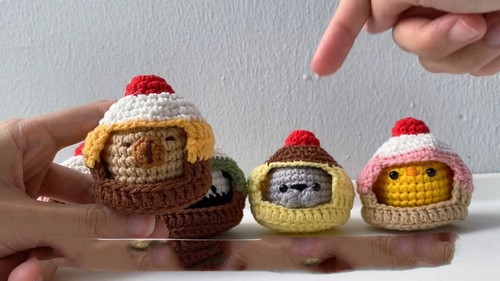
Adorable crochet cupcake holder to showcase your sweet treats in style. Elevate your dessert game with this charming accessory!
A Crochet Cupcake Holder adds a delightful touch to any dessert table. This charming accessory is perfect for presenting your cupcakes in a cute and unique way. With intricate designs and vibrant colors, it turns ordinary treats into eye-catching centerpieces. Whether for a special occasion or everyday enjoyment, these holders bring a handmade appeal to your sweet displays. They’re not just for cupcakes either – use them for muffins, small pastries, or even as decorative accents. Elevate your baking presentation effortlessly and impress guests with this endearing and functional piece, making your treats as visually pleasing as they are delicious.

Why Love This Pattern?
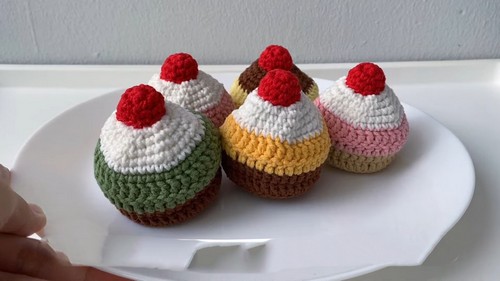
- Cute and Adorable Design: The cupcake and animal patterns are cute and resemble a plate of cupcakes, adding charm to any space.
- Versatility: The pattern can accommodate slightly larger plush toys due to its flexible size, making it more functional.
- Color Customization: The ability to use different colors for various parts of the cupcake, such as the base and the "frosting," allows for personalization for different flavors and styles.
- Completeness: The pattern includes detailed sections like sewing in the strawberry on top and making the cupcake holder, ensuring the final product looks polished and professional.
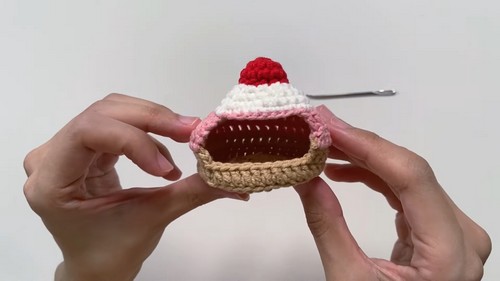
Crochet Cupcake Holder With Strawberry
Materials Needed:
- Brown yarn
- Pink yarn
- White yarn
- Red yarn
- Yellow yarn (optional for pudding)
- Stitch Marker
- Crochet Hook
- Scissors
- Stuffing
Cupcake Holder:
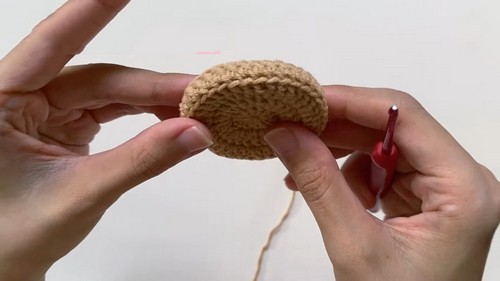
Bottom of the Cupcake:
- Magic Ring:
- Make a magic ring with brown yarn.
- Round 1:
- Chain 2.
- Do 12 double crochets (DC) in the magic ring.
- Pull the tail to close the ring.
- Skip the two chains at the beginning.
- End the round with a slip stitch (sl st) in the first stitch/first DC.
- Round 2:
- Chain 2.
- In the same stitch, do a double crochet (DC).
- Mark the first DC with a stitch marker.
- Do one more DC in the first stitch.
- Do 2 DC in each stitch until the end of the round.
- End with a sl st in the first stitch/first DC.
- Round 3:
- Chain 2.
- In the same stitch, do a DC.
- Mark the first DC with a stitch marker.
- Do 1 DC, then 2 DC in the next stitch. Repeat 12 times.
- End with a sl st in the first stitch/first DC.
- Round 4 (Back loops only):
- Chain 2.
- Do 1 DC in the back loop of each stitch (36 DC).
- Mark the first DC with a stitch marker.
- End with a sl st in the first stitch/first DC.
- Round 5:
- Chain 2.
- Do 1 DC in each stitch (27 DC).
- Mark the first DC with a stitch marker.
- End with a sl st in the first stitch/first DC.
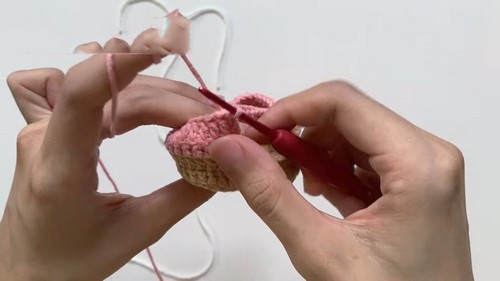
- Round 6 (Change to Pink Yarn):
- Take the pink yarn, attach it on the inside.
- Chain 2 with pink yarn.
- Turn the work.
- Do 1 DC in the first stitch and mark it.
- Continue with 27 DC.
- End with a sl st in the first stitch/first DC.
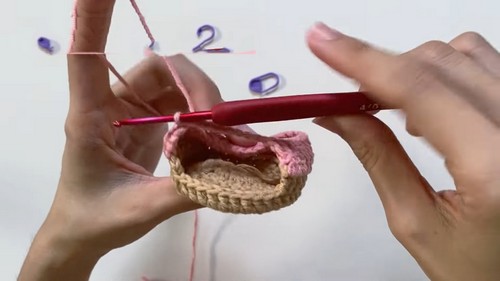
- Round 7 (Back loops only):
- Chain 2.
- Do 1 DC in each stitch in back loops (27 DC).
- Mark the first DC with a stitch marker.
- End with a sl st in the first stitch/first DC.
- Round 8 (Change to White Yarn):
- Chain 9.
- Join to the first stitch on the other side with a sl st.
- Attach the white yarn.
- Do 27 DC (skip the chain space).
- End with a sl st in the first stitch/first DC.
Cupcake Body:
- Round 9 (Change to White Yarn):
- Chain 2.
- Use white yarn for this round.
- 36 single crochet (SC).
- Round 10 (4 SC, Decrease):
- Chain 2.
- 4 SC, then decrease. Repeat 6 times.
- End with a sl st in the first stitch/first SC.
- Round 11 (3 SC, decrease):
- Chain 2.
- 3 SC, then decrease. Repeat 6 times.
- End with a sl st in the first stitch/first SC.
- Round 12 (2 SC, decrease):
- Chain 2.
- 2 SC, then decrease. Repeat 6 times.
- End with a sl st in the first stitch/first SC.
- Round 13 (1 SC, decrease):
- Chain 2.
- 1 SC, then decrease. Repeat 6 times.
- End with a sl st in the first stitch/first SC.
- Final Round (Decrease):
- Chain 2.
- Decrease 6 times.
- End with a sl st in the first stitch.
- Leave a tail, sew and close the hole.
Strawberry:
Bottom of the Strawberry:
- Magic Ring:
- Make a magic ring with red yarn.
- Round 1:
- Do 6 SC in the magic ring.
- Pull the tail to close the hole.
- End the round with a sl st in the first stitch.
- Round 2:
- Mark the first SC with a stitch marker.
- Do 1 SC in the first stitch.
- Do 1 more SC.
- Do 5 increases (2 SC in next) for a total of 6 increases.
- Round 3:
- Mark the first SC with a stitch marker.
- Do 12 SC.
Assemble the Strawberry on the Cupcake Holder:
- Stuff the Strawberry:
- Add a little bit of stuffing inside the strawberry.
- Attach and Sew:
- Place the strawberry on top of the cupcake holder.
- Sew the strawberry on row 1 and row 2 on top of the cupcake.
- Secure the sewing tail and weave it in to hide the ends.
Pudding Cupcake (optional):
- Use yellow yarn for the first and second colors, then switch to brown yarn for the third color.
Tips:
- You can customize the cupcake colors to your liking.
- Add a hanging loop if you wish to hang the cupcakes.
That's it! You have a cute cupcake and strawberry crochet pattern. Happy crocheting!