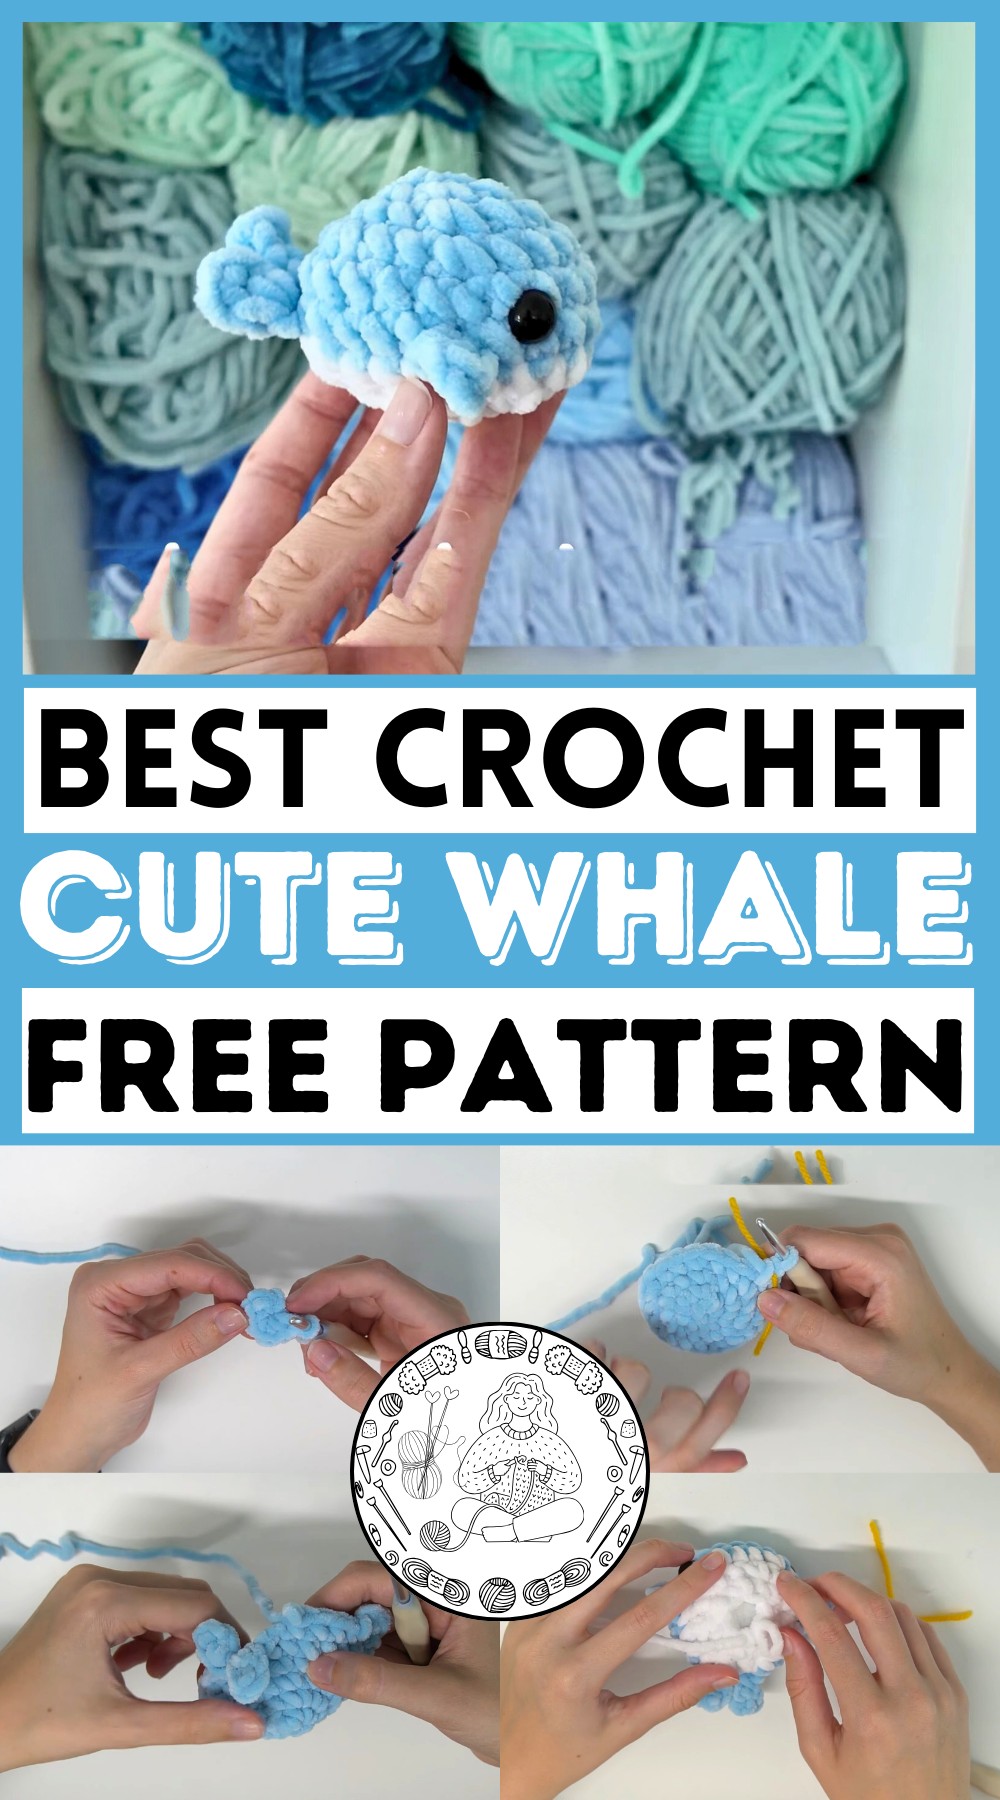
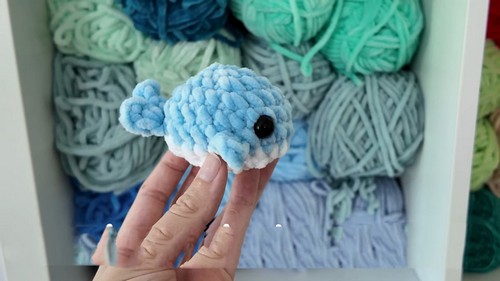
Unlock beginner-friendly crochet techniques in this Crochet Whale Tutorial! Transform yarn into a charming whale with ease.
This "Crochet Whale Pattern" offers a delightful introduction to the world of amigurumi. The tutorial breaks down each step, making it simple to follow along and produce your own adorable mini whale. With easy-to-understand instructions on everything from making a magic ring to finishing touches, it’s perfect for those new to crocheting. Grab your yarn and hook, and watch as a cute whale takes shape right before your eyes. Ideal for anyone looking to take on a fun and rewarding project, this tutorial is sure to provide a satisfying experience.
Why Love This Pattern?
- Detailed Instructions: The video provides detailed guidance on each part of the pattern, including how to make a magic ring, how to increase and decrease stitches, and how to add details like the safety eyes and the fins.
- Versatile Yarn and Tools: You can customize the whale with your preferred yarn and color choices. The tutorial uses a weight six yarn and a 5 mm crochet hook but also explains how you might adjust for different yarn sizes.
- Skill-Building: While the pattern is accessible to beginners, it also introduces new techniques (like working in front loops only and making slip stitches), helping you build your crochet skills.
- Cute and Fun Project: The end result is an adorable mini whale, making it a rewarding project. Plus, you can experiment with different colors for a personalized touch.
- Extra Tips and Tricks: The tutorial includes tips for avoiding common mistakes and making the process easier, such as how to switch colors seamlessly.
How To Crochet Amigurumi Whale
Materials Needed
- Crochet Hook: 5 mm (adjust depending on yarn size)
- Scissors
- Yarn Needle
- 12 mm Safety Eyes (or embroider the eyes)
- Yarn: Weight 6 yarn in blue (or any color for the top of the whale) and white
- Stuffing: More than you think you need
Step-By-Step Instructions
1. Starting the Whale:
- Begin with a Magic Ring: (Easier method for beginners)
- Create a Slip Knot:
- Drape yarn over your finger and form an X shape.
- Insert crochet hook under top of the X and pull the lower part through.
- Tighten the slip knot on the crochet hook.
- Chain Two:
- Yarn over, pull through slip knot.
- Yarn over, pull through first chain.

2. Round 1:
- Single Crochet (sc): Make 6 single crochets into the first chain (magic ring).
3. Round 2:
- Increase:
- Make 2 single crochets in each stitch around.
- Total: 12 stitches
4. Round 3:
- Single Crochet (sc) Increase:
- Pattern: 1 sc in first stitch, 2 sc in next stitch (Increase)
- Repeat this pattern around.
- Total: 18 stitches
5. Round 4:
- Two Single Crochets followed by an Increase:
- Pattern: 1 sc in first stitch, 1 sc in second stitch, 2 sc in third stitch (Increase)
- Repeat pattern around.
- Total: 24 stitches
6. Round 5:
- Single Crochet in Each Stitch:
- No increase, just sc in each stitch.
- Total: 24 stitches
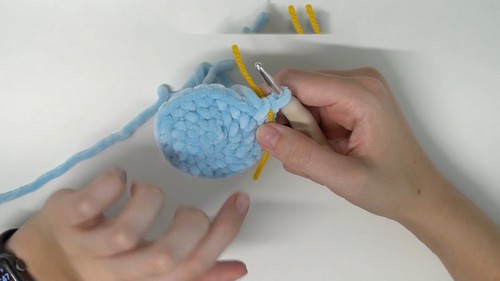
7. Round 6:
- Front Loops Only:
- Slip stitch into the front loop of next two stitches.
- Fin Creation:
- Chain 3, make half double crochet (hdc) in next two chains.
- Slip stitch back into original front loop.
- Repeat for second stitch.
8. Round 7:
- Five Single Crochets (sc):
- Create Fin (Same as round 6):
9. Round 8:
- Working Around:
- sc in next five stitches
- Slip stitch into front loop, chain 2, hdc in chain 1, slip stitch back.
10. Switching Yarn Color to White:
- Switch Colors:
- On the last stitch of blue, complete with white.
- Double knot the ends and cut the excess yarn.
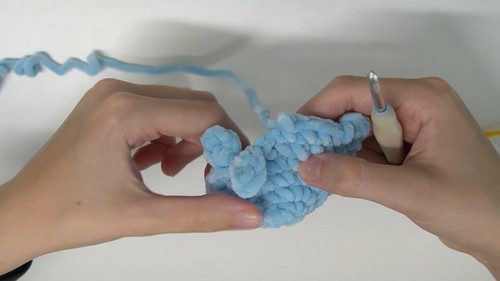
11. Decrease Rounds:
- Single Crochet Decrease (sc2tog):
- Sc in first stitch, sc decrease over next two stitches.
- Continue pattern around.
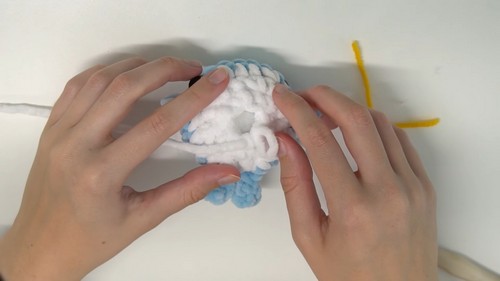
12. Adding Stuffing:
- Stuff the Whale:
- Fill enough to shape but leave soft.
13. Final Round:
- Decrease to Close:
- Make 6 decreases.
- Sew the Bottom Shut:
- Use yarn needle, go into front loops only, sew shut with tail.
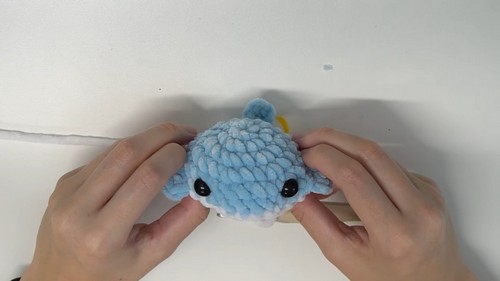
14. Final Touches:
- Secure and Weave:
- Pull yarn through side, cut and tuck inside.
Additional Steps:
- Safety Eyes:
- Place between rounds 5-6 and 6 stitches apart.
- Skillshare Sponsor:
- Discuss benefits and promotion (skip if just instructions needed).
Final Notes:
- Beginners: Highly advisable to rewatch sections for clarity.
- Advanced Tutorials: Channel includes other animal designs.
- Social Media: Check out Instagram for more creations and updates.
Enjoy your crocheting, and hope this step-by-step guide helps make your mini whale a success!