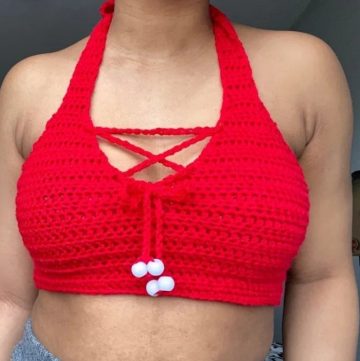
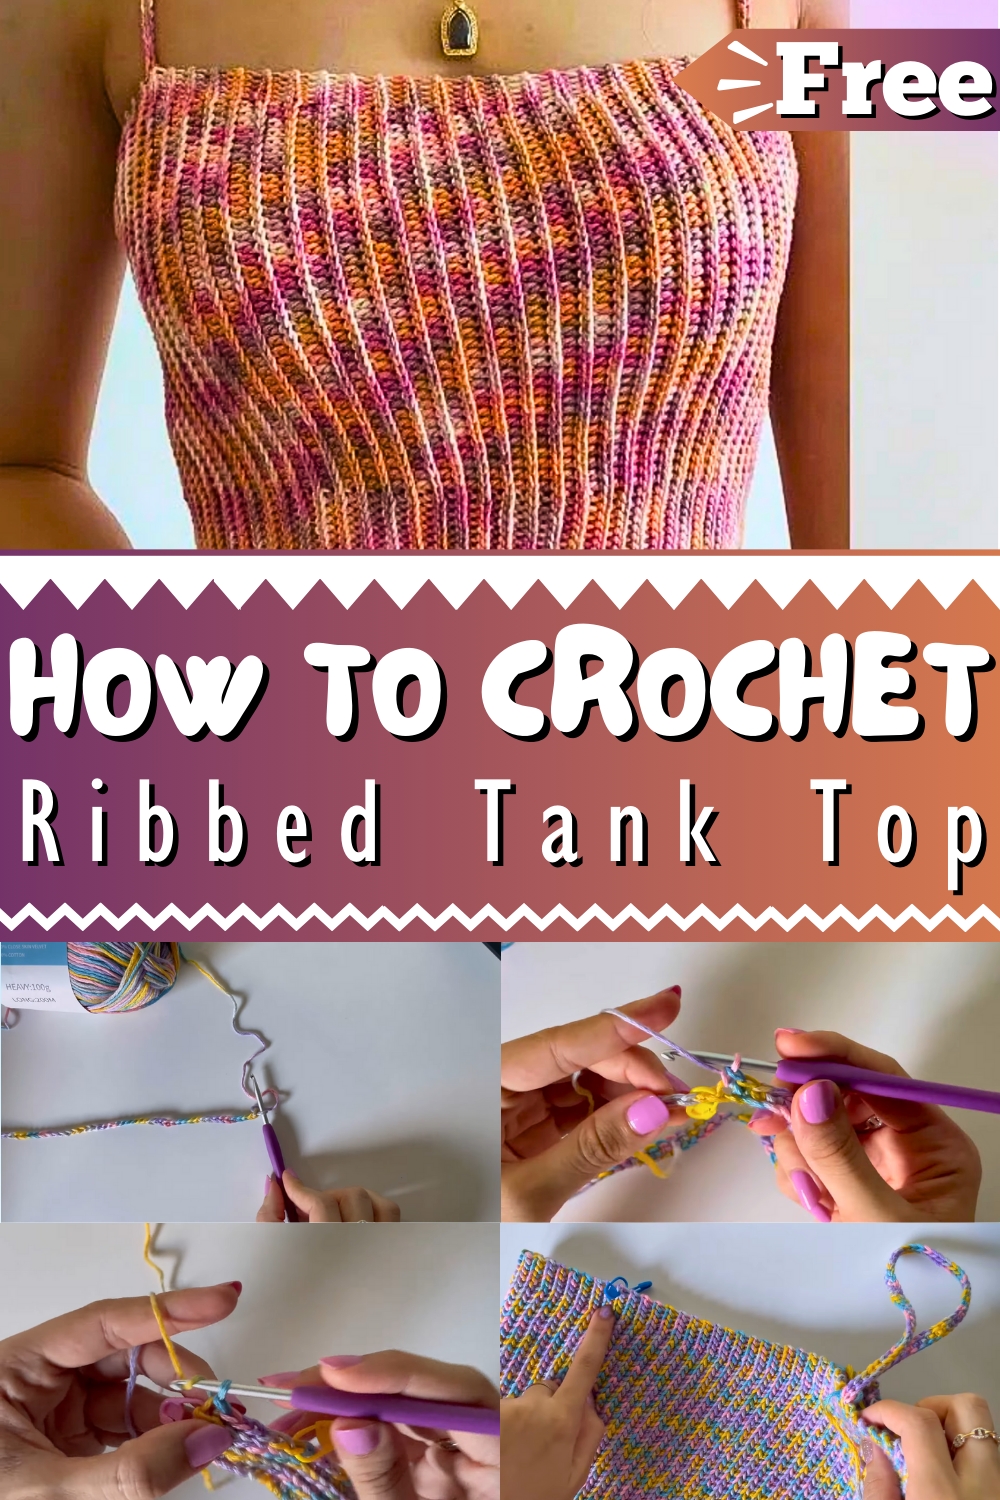
Crochet your own cozy, stylish Crochet Ribbed Tank Top. This beginner-friendly pattern offers a chic, fitted shape perfect for any wardrobe.
Crochet Ribbed Tank Top Pattern
Feel the comfort of your favorite tank top with a handmade touch with Crochet Ribbed Tank Top Pattern! With this pattern you can make a stylish tank top having a ribbed design that feels soft and stretchy. Easy to follow, it's great for beginners and offers a chic, fitted shape. Perfect for layering or wearing on its own, its classic look suits any wardrobe. Plus, you can pick any color to match your style. Make your own cozy tank top that's both practical and pretty with this fun, simple pattern!
Why Love This Pattern?
- Easy to Follow: The tutorial is detailed and beginner-friendly, with clear step-by-step instructions that ensure you understand each part of the process.
- Comfortable Fit: The ribbed design ensures the top retains its shape over time and is easy to put on and take off without worrying about overstretching.
- Versatile Sizing: With instructions specifically tailored for multiple sizes, including S and M, you can customize the pattern according to your body measurements.
- Practical Tips: GrannyGaia includes practical tips such as adding extra chains due to the slip stitch technique, which tends to shrink the length.
- Minimal Tools Required: The pattern only requires basic crochet tools—yarn, a 4mm hook, scissors, a tape measure, and stitch markers—making it accessible for most crafters.
Crochet Ribbed Tank Top Pattern
Materials Needed:
- Number 3 (DK weight) yarn
- 4mm crochet hook
- Scissors
- Tape measure
- Stitch markers
Steps:
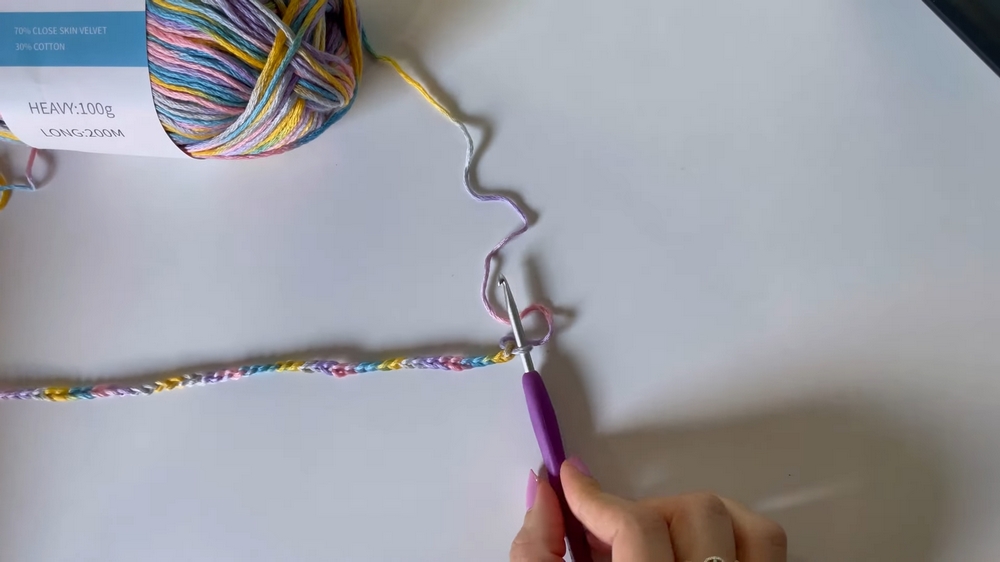
- Starting with Slip Knot and Chain:
- Make a slip knot, then chain the length that you want your top to be.
- Measure the chain against your body. For example, if making a custom length of 28 cm, chain until it measures 28 cm, then add an extra 2-3 cm of chain to account for shrinkage from slip stitches.
- Marking Ribbing Parts with Stitch Markers:
- Mark 4 cm (from the bottom of the top) with a stitch marker: this is for the ribbing.
- Mark 2.5 cm from the neckline (from the top of the top): this is for another ribbing section.
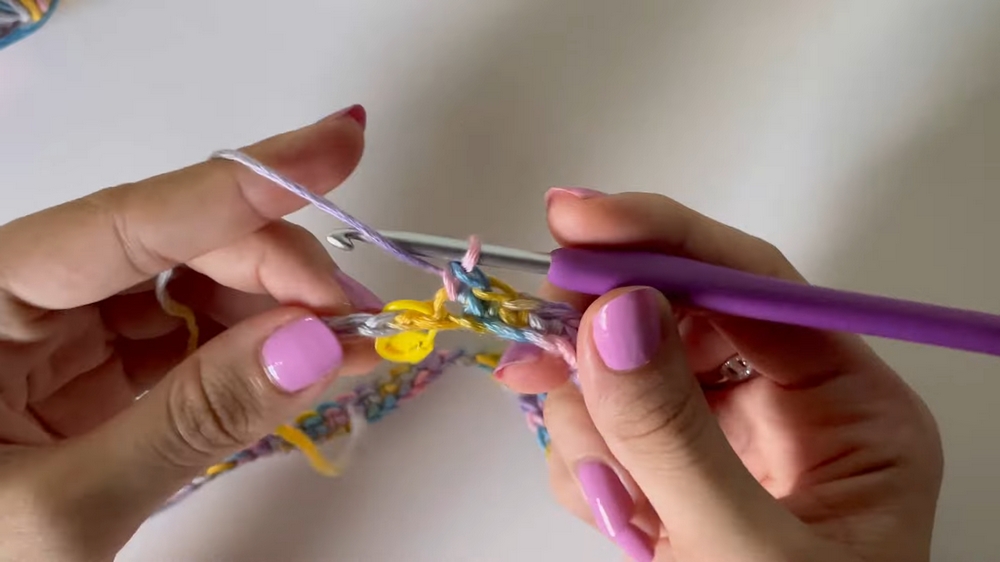
- Slip Stitches to Form Ribbing:
- Skip the first chain and place a slip stitch in the next chain; mark this first slip stitch with a stitch marker.
- Slip stitch all the way to the stitch marker.
- Remove the stitch marker, slip stitch into that marked stitch, then replace the stitch marker in the new slip stitch.
- Single Crochet:
- Continue with single crochet in each stitch until you reach the second stitch marker, at which point slip stitch to the end.
- Mark the first slip stitch; this indicates where to switch from single crochets to slip stitches.
- Alternate Slip Stitch and Single Crochet Rows:
- Chain 1, turn your work, make slip stitches in the back loop only until the first stitch marker.
- Switch to single crochets in the back loop only until the second stitch marker, finishing the row with slip stitches.
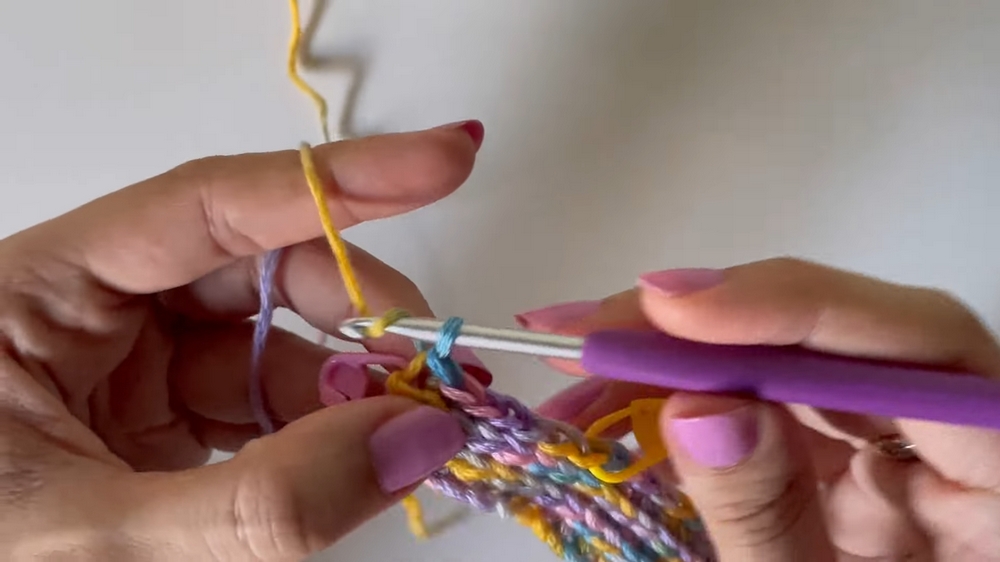
- Maintaining Loose Tension:
- Ensure your tension is loose when making slip stitches to prevent your project from shrinking and to make it easier to go into the stitches in the next row.
- Repeating the Pattern:
- Continue this pattern of alternating rows: one row with slip stitches and the next row with single crochets in the back loop in the ribbing sections.
- Remember to keep your stitch markers in place to maintain your pattern and ensure no stitches are added or skipped.
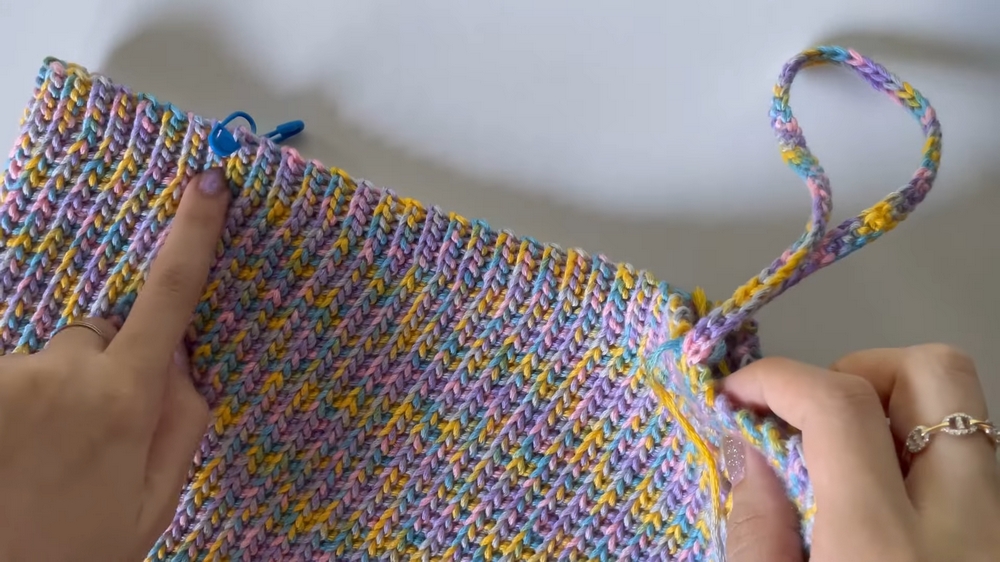
- Making Total Rows:
- Keep crocheting until the piece wraps around your body comfortably. Make sure to try on your top to ensure the correct fit. Stretch the fabric to check the snugness of the fit.
- Seaming the Panel:
- Fold your panel in half with the right sides facing each other.
- Seam up the sides using slip stitches, picking up the back loops only, to form tubes for the body. Chain 1 at the end and fasten off.
- Attaching Straps:
- Put on the top to mark where you want your straps to begin in the front and back with stitch markers. Ensure the strap positions are symmetric from the side seam.
- Count and note the number of chains for the front strap, and repeat for the back to have equal measurement.
- Creating Straps:
- Attach yarn at the front stitch marker, and chain the required strap length while confirming by trying on the top.
- Attach the strap at the corresponding point in the back, ensuring the strap isn't twisted, and slip stitch to secure.
- Repeat the same for the other strap.
- Final Touches:
- Once straps are done, try on the top to ensure fits and adjustments if needed.
- Weave in all ends securely to finish off the top.

Notes:
- Keep checking your work with a measuring tape to make sure all sections are correct.
- Utilize stitch markers to prevent mistakes with skipped or added stitches throughout the project.
- Be mindful of your tension, especially with slip stitches, as this can affect the overall fit and look.