Effortlessly crochet a cozy and stylish beanie with this easy step-by-step guide, perfect for adding warmth and flair to your winter wardrobe!
Learn how to crochet a beanie with ease, adding a stylish accessory to your collection in no time. This straightforward project suits both beginners and seasoned crocheters, offering a fun and rewarding experience. The beanie, customizable with your choice of yarn and colors, provides warmth and a personalized touch to any outfit. The intricate yet simple stitches make the process enjoyable and satisfying, resulting in a cozy masterpiece perfect for cold days. Ideal for gifts or personal use, crocheting a beanie is a delightful way to showcase your creativity while enhancing your winter wardrobe effortlessly.

Why Love This Pattern?
- Customizable Fit:
- The pattern allows you to adjust the number of chains and rows, making it adaptable to fit any head size comfortably.
- Simplicity:
- It uses basic crochet stitches like single crochet and half double crochet, making the pattern accessible even for beginners.
- Easy Construction:
- The instructions are straightforward, with clear steps on how to assemble and finish the hat, including joining the ends and closing the top.
- Quick Project:
- With only 47 rows required (adjustable as needed), it’s a relatively quick project to complete.
- Versatile Style:
- The finished hat includes a fold-up brim, adding a stylish touch that can be personalized in various ways.

How To Crochet Adorable Beanie
Materials Needed:
- Yarn based on your choice
- Crochet hook (appropriate size for your yarn)
- Stitch markers
- Yarn needle
- Scissors
Pattern Instructions:
Foundation Chain:
- Start with a slip knot.
- Chain 40. (You can adjust the number of chains to fit your head size.)
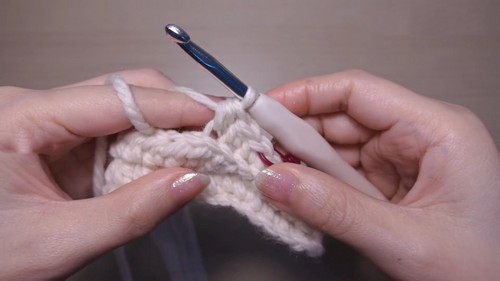
Row 1:
- Skip the first chain.
- Make one single crochet (sc) in the next 6 chains.
- Place a stitch marker in the 6th single crochet to mark this point.
- Yarn over and make one half double crochet (hdc) in the next 33 chains.
Row 2:
- Chain 2.
- Turn the work over.
- Make one half double crochet in the next 33 back loops only.
- Make one single crochet in the next 6 back loops only.
Row 3:
- Chain 1.
- Turn the work over.
- Make one single crochet in the next 6 back loops only.
- Make one half double crochet in the next 33 back loops only.
Row 4:
- Chain 2.
- Turn the work over.
- Make one half double crochet in the next 33 back loops only.
- Make one single crochet in the next 6 back loops only.
Row 5:
- Chain 1.
- Turn the work over.
- Make one single crochet in the next 6 back loops only.
- Make one half double crochet in the next 33 back loops only.
Row 6:
- Chain 2.
- Turn the work over.
- Make one half double crochet in the next 33 back loops only.
- Make one single crochet in the next 6 back loops only.
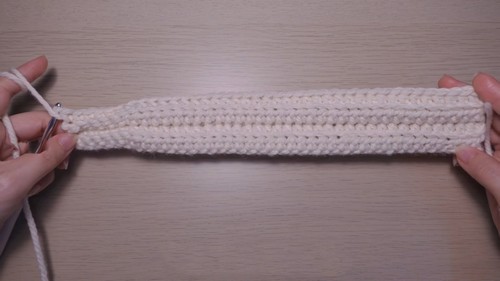
Repeat Rows 3 to 6:
- Continue the pattern, repeating the rows 3-6 until you have made a total of 47 rows or the desired number of rows to fit your needs.
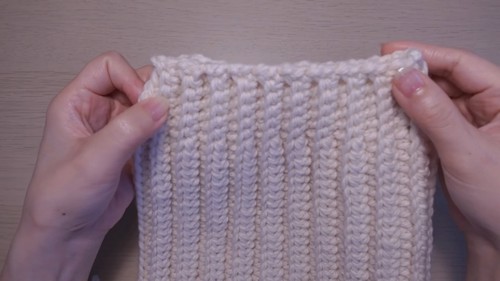
Assembling the Beanie:
- Identify the right side and the wrong side of your work.
- Fold the piece in half, ensuring the right side is facing inward and the wrong side is facing outward.
- Insert the hook into the first stitch and grab the loop.
- Attach the ends together using slip stitches.
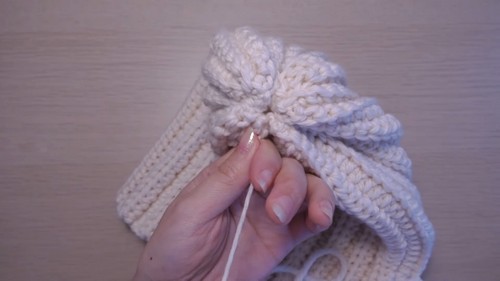
Closing the Top:
- Cut the yarn and secure it, leaving a longer tail for sewing.
- Use the needle to weave the yarn back and forth at the top of the hat.
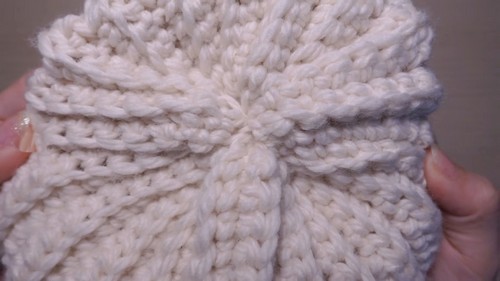
- Pull the yarn tight to close the hole.
- Continue weaving the yarn to close up any small gaps.
- Secure the yarn and weave in the ends.
Finishing Touch:
- Turn the hat inside out.
- Fold up the brim to your desired length.
Your hat is now complete! Here’s what it looks like once it's finished.