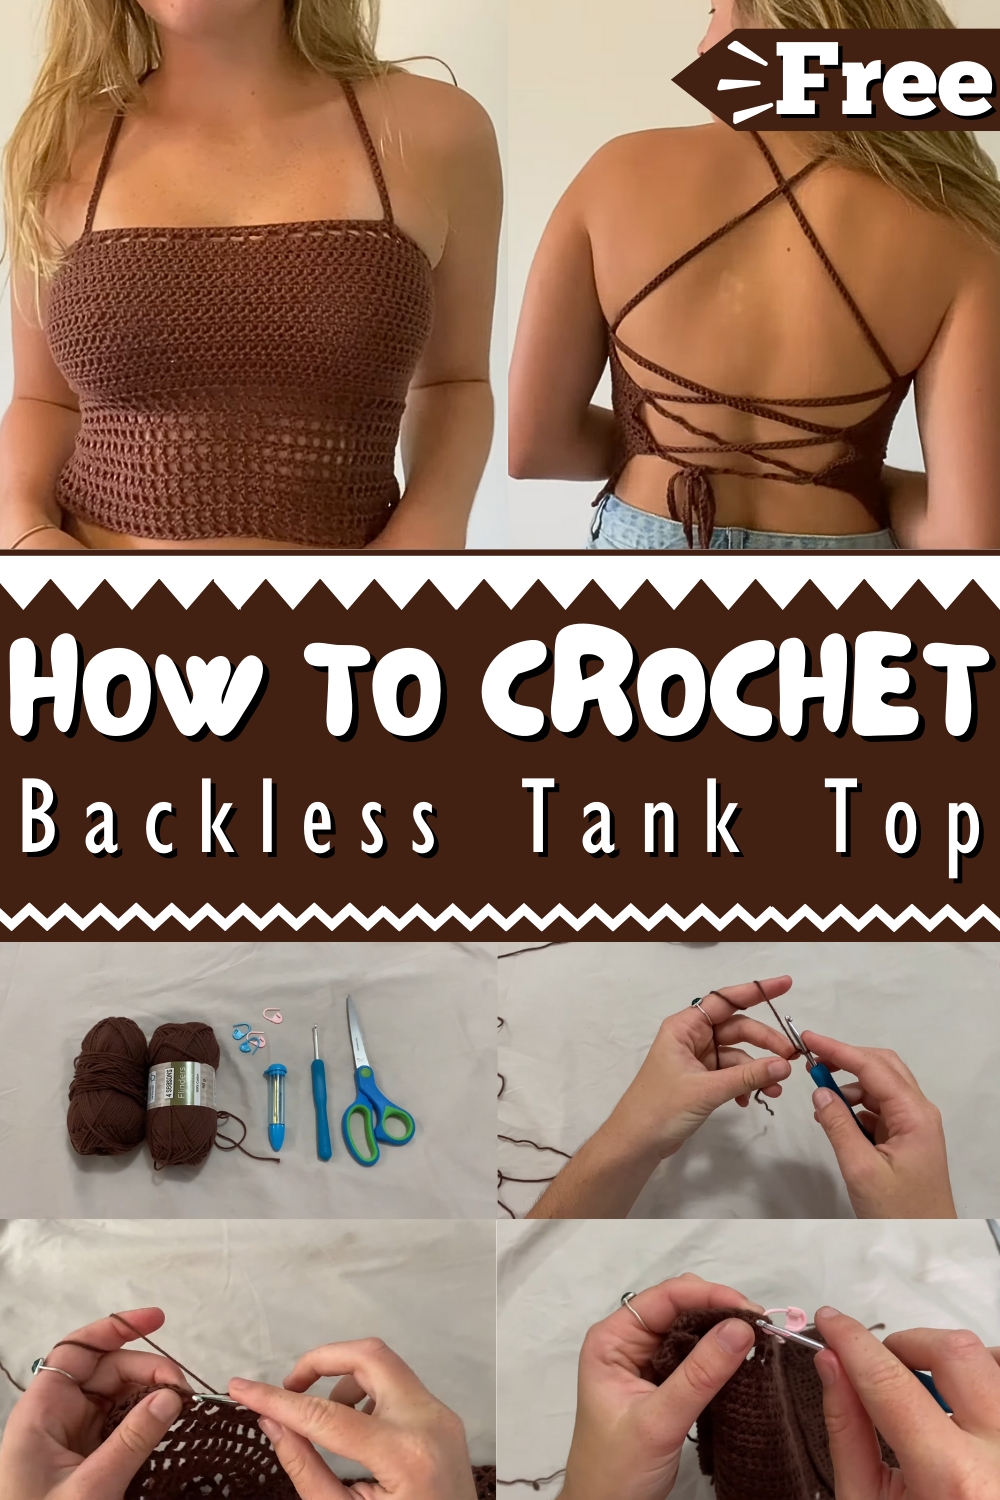
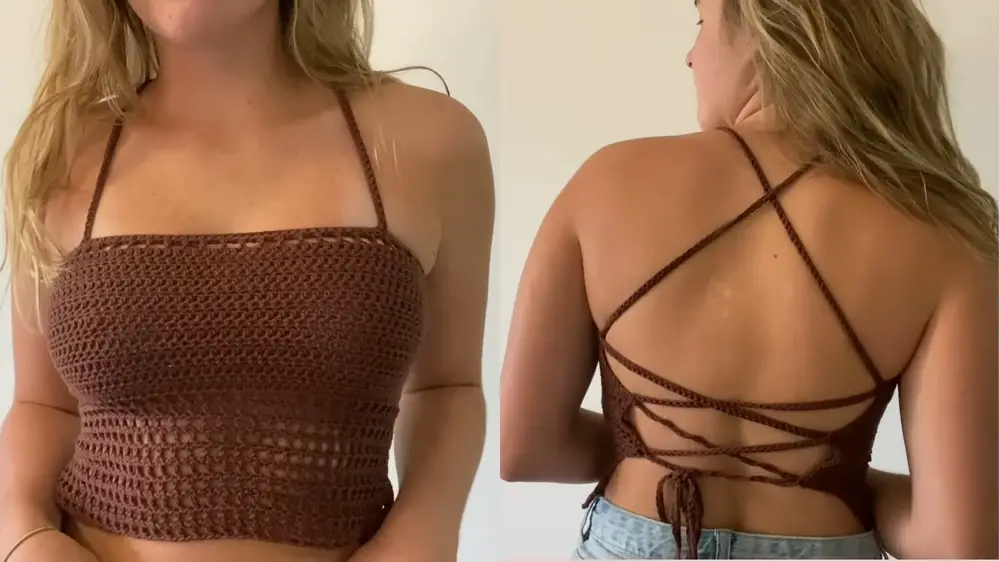
Stun this summer with a chic, airy Crochet Backless Tank Top pattern featuring an open back design, perfect for stylish and comfortable looks.
Summers Crochet Backless Tank Top
Turn heads this summer with a stunning Crochet Backless Tank Top! This crochet pattern gives a chic and airy top that is perfect for warm days. It shows an open back design with intricate patterns and delicate straps. The tank top hugs your body comfortably, offering both style and comfort. You can pair it with shorts, skirts, or jeans for a casual or dressed-up look. It is a must-have for your wardrobe, making you feel cool, confident, and fashionable wherever you go.
Why Love This Pattern?
- Beginner-Friendly:
- The pattern is designed to be easy and approachable, making it perfect for beginners who are just starting out with crochet.
- Customization:
- The pattern allows for customization in terms of size. You can adjust the number of chains to fit from one armpit to the other, ensuring a perfect fit for your body.
- Aesthetic Appeal:
- The finished top has a stylish and modern look with a mesh stitch pattern and a solid crochet pattern, making it a great addition to your wardrobe.
- Functional Design:
- The top includes thoughtful details such as making holes for crisscross straps at the back, which adds to both the style and functionality of the top.
How To Crochet Crochet Backless Tank Top
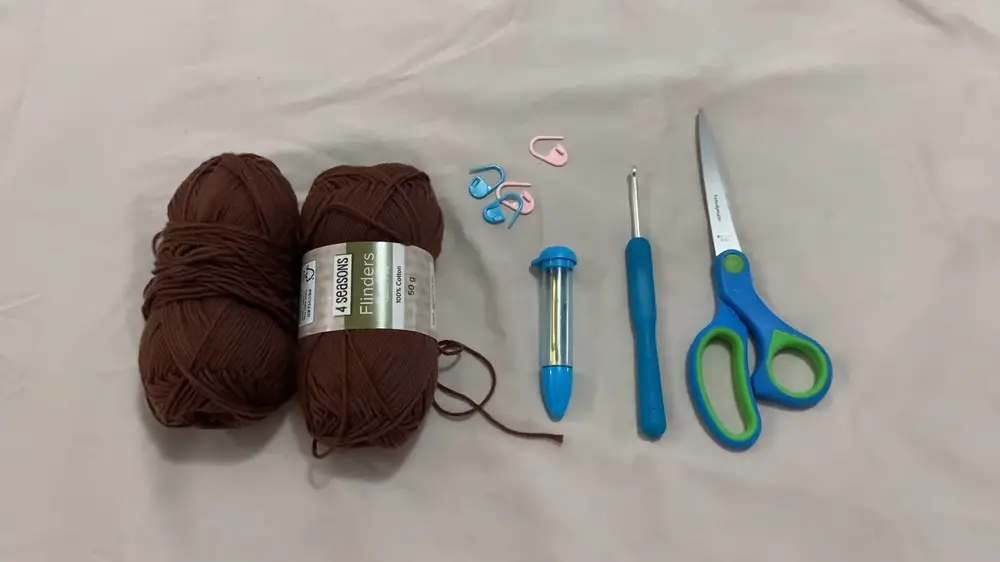
Materials Needed:
- 100g of cotton yarn (Four Seasons blenders, 8 ply)
- 4mm hook
- Four stitch markers
- Yarn needles
- Scissors
Abbreviations:
- Ch: Chain
- HDC: Half Double Crochet
- DC: Double Crochet
- SC: Single Crochet
- St(s): Stitch(es)
- YO: Yarn Over
Pattern:
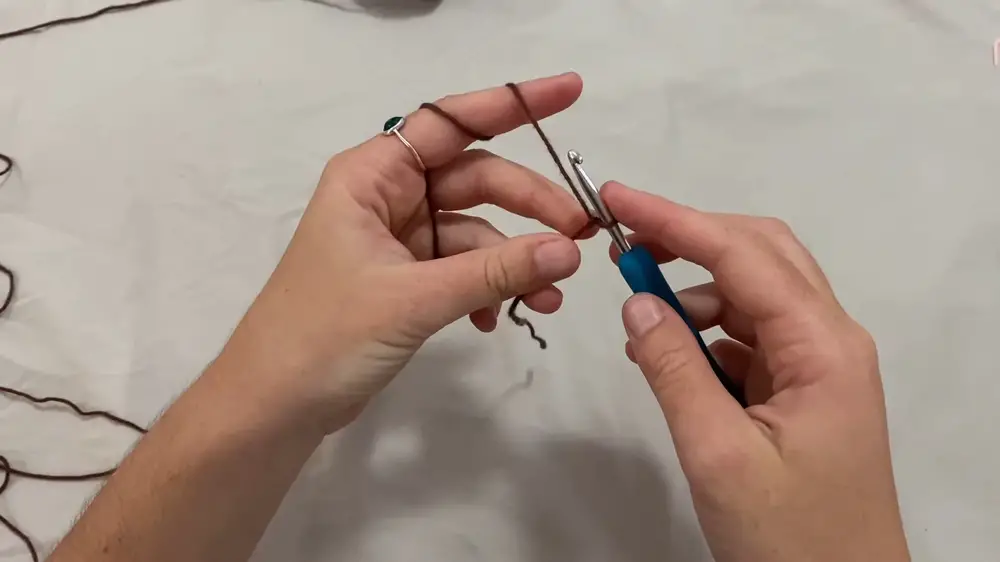
- Starting the Chain:
- Make a slip knot.
- Chain an even number that fits from one armpit to the other (the video example uses 70 chains).
- First Row (Half Double Crochet - HDC):
- Chain two (counts as first HDC).
- Skip the first two chains.
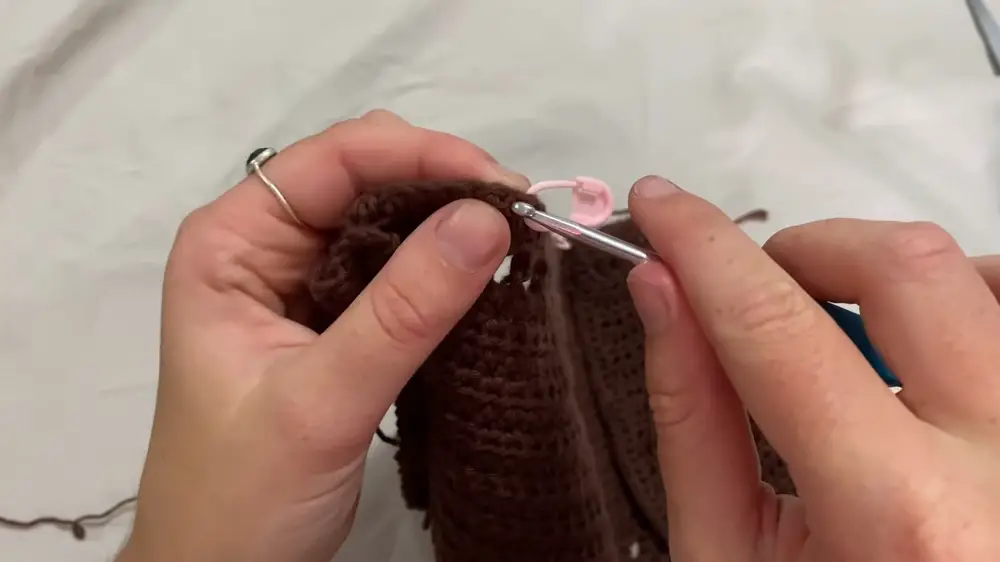
- In the third chain, make a HDC: yarn over, insert hook, yarn over, pull through, yarn over, pull through all three loops.
- Repeat HDC in each chain across the row.
- Second Row (Mesh Stitch - Double Crochet - DC):
- Chain three (counts as first DC and chain space).
- Skip the first gap.
- Yarn over, insert into the next gap, yarn over, pull through, yarn over, pull through two loops, yarn over, pull through two loops (DC).
- Chain one, skip the next stitch, DC into the next stitch - repeat across the row.
- Third Row (HDC into gaps):
- Chain two, turn work.
- HDC into first space.
- HDC into each subsequent gap and DC from the previous row.
- Repeat until end of row.

- Increasing:
- Fourth Row: Chain two, HDC in first stitch, 2 HDC in second stitch, HDC across, 2 HDC in the second-to-last stitch, HDC in the last stitch.
- Fifth Row: Chain two, HDC in each stitch (no increases).
- Sixth Row: Repeat increase pattern.
- Continue alternating rows with and without increases until piece covers your chest. In the video example, a total of 12 rows are done (6 with increases, 6 regular HDC).
- Continuing without increases:
- Work additional rows in HDC without increases until desired length is reached. The example adds 5 more rows, making a total of 19 rows.
- Mesh Stitch at the Bottom:
- Chain three, turn work.
- DC in the second stitch, chain one, skip a stitch, DC in the next stitch.
- Repeat along the row.
- Turn work, chain three, DC in each DC from previous row, chaining one and skipping spaces accordingly.
- Repeat mesh rows until the desired length of the mesh section is achieved (the example makes 10 rows).
- Straps:
- Place stitch markers where you want the straps to attach.
- Make a slip knot, insert hook into the marked stitch.
- Chain a desired length for the strap (the example uses 280 chains).
- Single crochet (SC) back along the chain.
- Attach the strap securely by slip stitching to the top.
- Repeat for the other strap.
- Side Holes for Straps:
- Connect yarn to the bottom side edge, SC evenly up the side.
- Chain one, turn, and SC but create holes by chaining two and skipping two stitches at regular intervals (the example spaces holes by 12 SC).
- Finish and repeat for the other side.
- Finishing:
- Weave in all ends using a yarn needle.
- Thread the straps through the side holes for criss-cross effect in the back.
- Trying On and Adjustments:
- Try on the top and adjust the straps as needed, ensuring the criss-cross straps are snug but comfortable.
Notes:
- Adjust stitch counts based on personal sizing requirements.
- The straps should be long enough to comfortably tie at the back (or bring over the shoulders).
- Be mindful of your tension to ensure a consistent stitch pattern and fit.