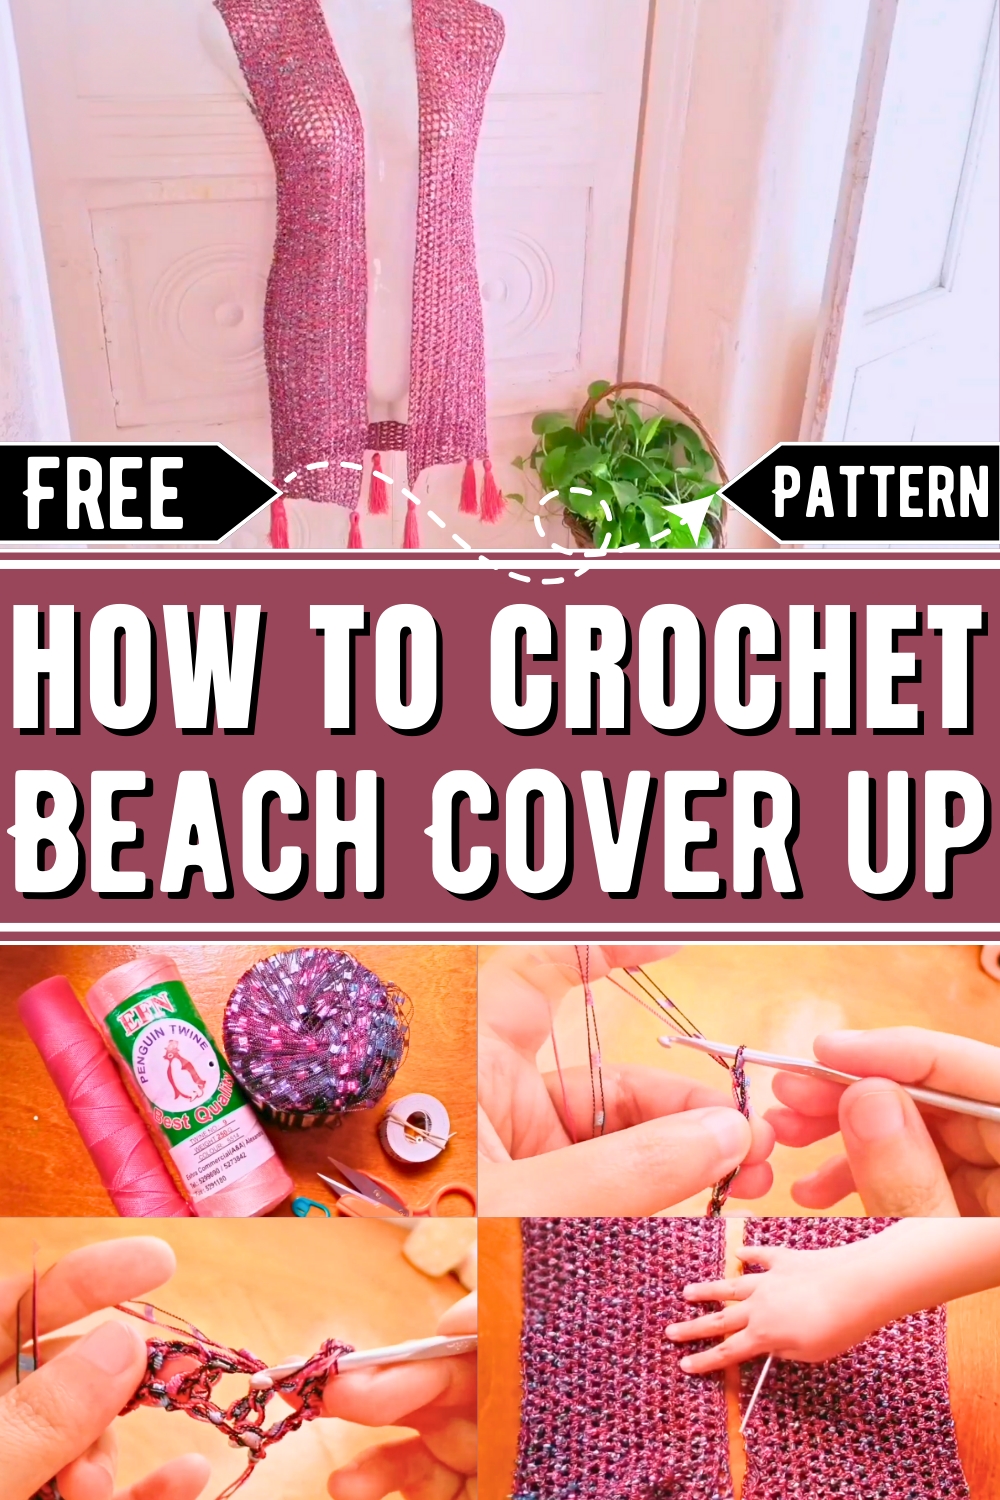
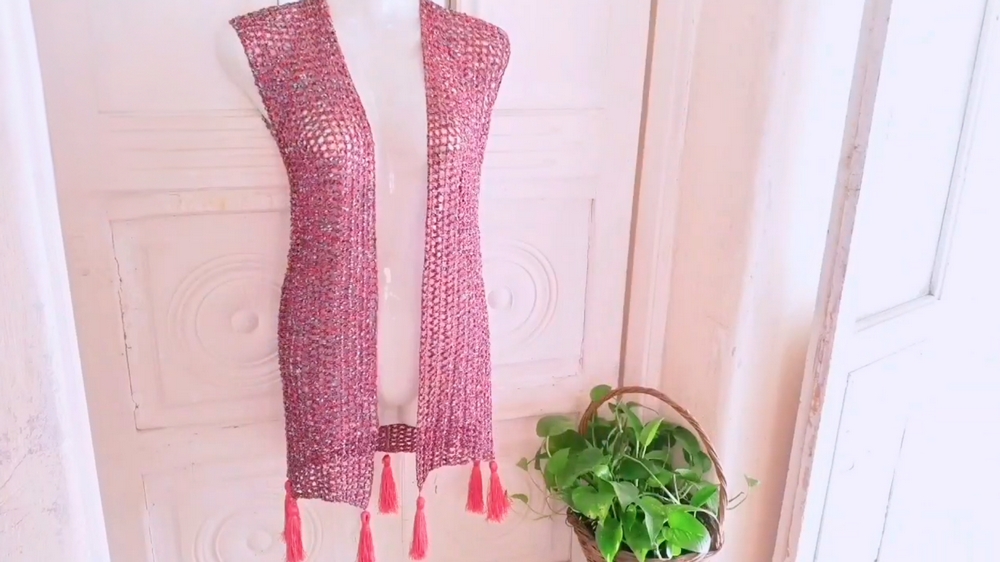
Turn heads at the beach with this free Crochet Beach Cover-Up pattern, the perfect blend of style and comfort for effortless seaside elegance.
Stylish Crochet Beach Cover-Up Pattern
Sunny days by the sea call for a breezy, stylish addition to your beach wardrobe, and a crochet beach cover-up is the perfect choice. Lightweight and breathable, this pattern lets you make a versatile piece that’s great for layering over your swimsuit while offering just the right amount of coverage. Whether strolling along the shore, lounging by the pool, or enjoying a summer picnic, this cover-up adds elegance to casual beachwear.
Designed with comfort in mind, it features an airy texture to keep you cool without sacrificing style. The flexible design makes it easy to adjust, allowing you to personalize the length, fit, and even the color to match your unique taste. Its versatility means you can wear it as a tunic, dress, or even a stylish wrap depending on the occasion.
The pattern’s straightforward instructions make it suitable for crocheters of all skill levels, from beginners to experts. Not only does it serve as a stunning wearable piece, but it also makes a thoughtful handmade gift for beach-loving friends and family. Pair it with sandals and a wide-brimmed hat to complete the summer-ready look effortlessly.
How To Crochet Beach Cover-Up
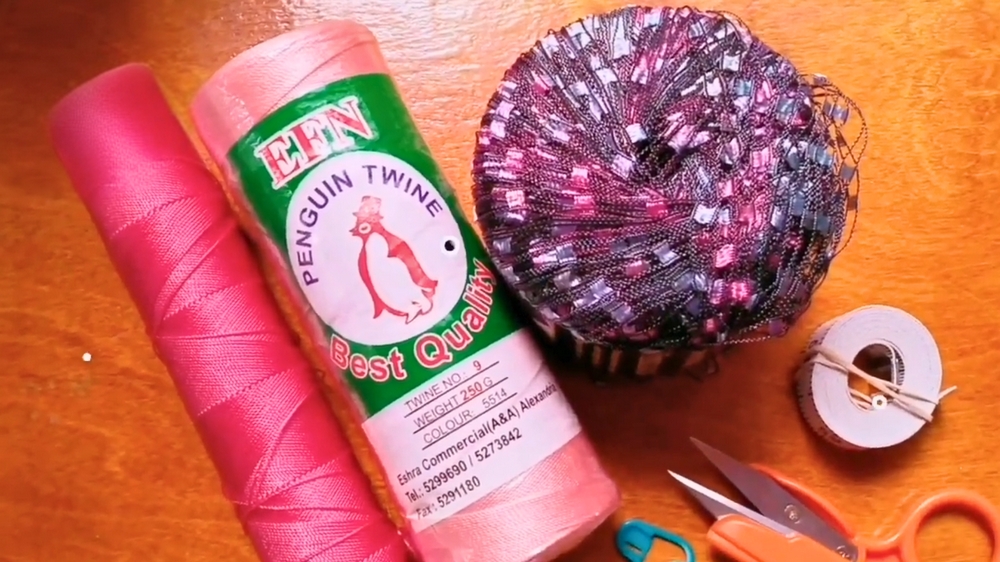
Materials Needed
- Yarn: Nylon fishing twine (1–2 skeins depending on size) or 4–5 strands of fabulous ribbon yarn.
- You can double your yarn for the selected size.
- Feel free to play with colors.
- 3.5 mm crochet hook.
- Measuring tape.
- Scissors.
- Markers.
- Yarn needle.
Step-by-Step Pattern
Step 1: Foundation Chain
- Make a slip knot using your preferred method.
- Chain a number of stitches as multiples of 2, then add 4 extra chains.
- Example: For this tutorial, 145 chain stitches were used based on the desired length.
- Double the chains (for width), which resulted in 292 chain stitches plus the extra 4 chains.
Step 2: Measuring and Preparing the Chains
- Measure the chain stitches to ensure they match your desired size and number.
- After confirming, proceed by adding 4 chain stitches at the end.

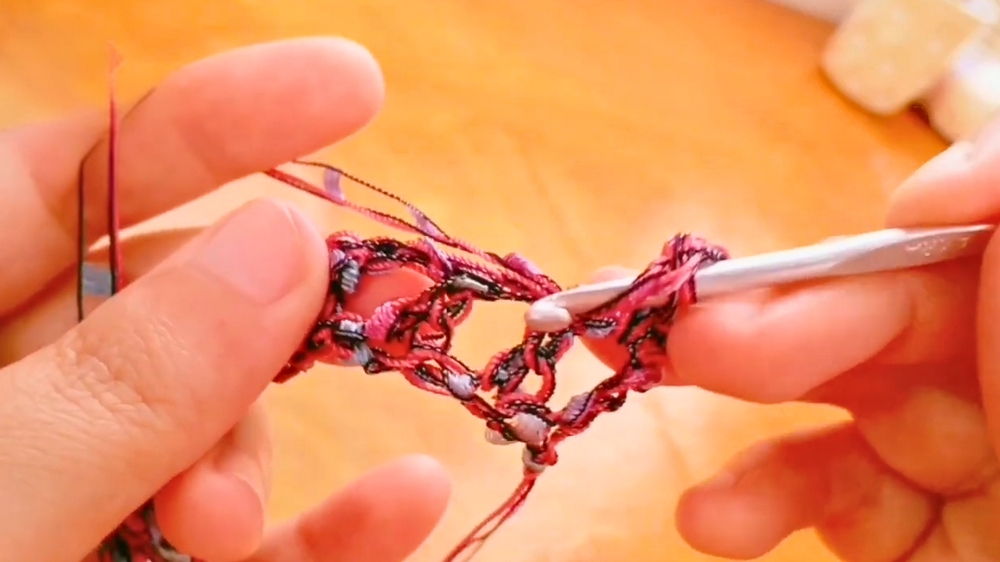
Step 3: First Row
- Skip 3 chain stitches from the hook.
- In the next stitch, work 3 double crochet stitches using this "three-times" method:
- Yarn over, pull through one loop.
- Yarn over, pull through two loops.
- Yarn over, pull through the last two loops.
- Chain 1.
- Skip 1 chain stitch and work another double crochet (using the "three-times" method) into the next chain stitch.
- Repeat this sequence:
- Chain 1.
- Skip 1 chain stitch.
- Create a double crochet into the subsequent stitch using the three-times method.
- Continue until you reach the end of the row.
- At the end of the first row:
- Skip 1 chain stitch.
- Work a double crochet stitch using the three-times method into the last chain stitch.
Step 4: Second Row
- Chain 3 and turn your work.
- In the first chain-1 space, make a double crochet (using the "three-times" method).
- Chain 1.
- Skip the double crochet from the previous row and work into the next chain-1 space, making another double crochet.
- Repeat:
- Chain 1.
- Work into the next chain-1 space with a double crochet.
- At the end of the row:
- Insert the hook into the chain-3 space and create a double crochet using the three-times method.
Step 5: Repeat Rows
- After completing Row 2, repeat Row 2 for the rest of the piece.
- Chain 3 at the start of each row.
- Work into chain-1 spaces with double crochet stitches.
- Continue crocheting until you reach your desired size.
- Measure your rows using the provided chart (or aim for 8 rows per size adjustment).
Step 6: Fasten Off
- Finish the last row, ensuring the stitch counts match your initial chain measurements.
- Cut the yarn and fasten off securely.
- Weave in loose ends using the yarn needle.
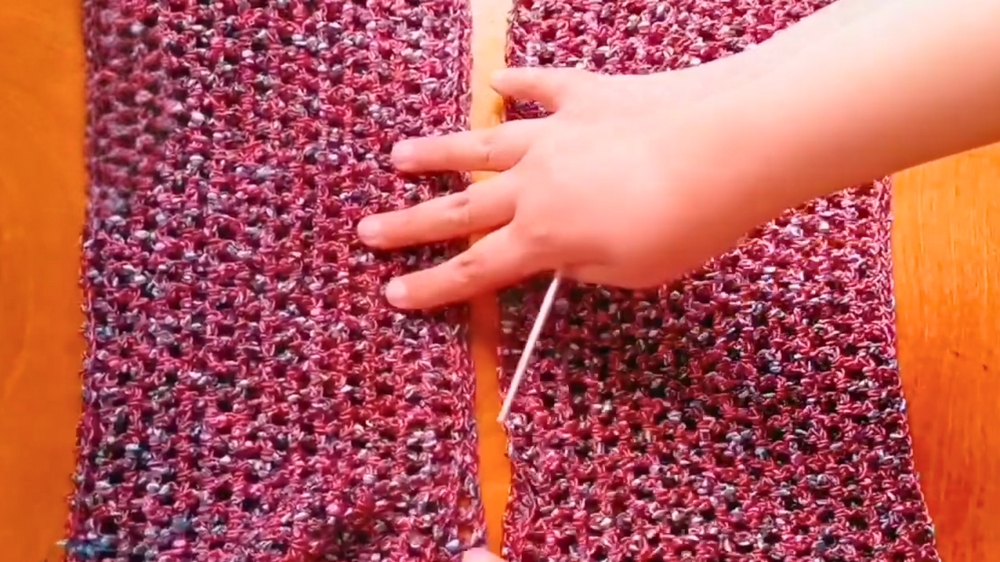
Making Two Pieces
- Repeat the pattern above to create two identical rectangular pieces.
- Once both pieces are completed:
- Lay them flat side by side.
Assembling the Pieces
Step 7: Joining the Back Line
- Fold one piece in half and secure with markers.
- Match up the opposite stitches of the two pieces.
- Start joining by inserting your hook through the corresponding stitches of both pieces.
- Work through the loops of both stitches.
- Continue joining stitches for the back line.
- Stop joining when you reach the marker at the back midpoint.
- Fasten off and weave in loose ends.
Step 8: Armholes
- Fold the assembled piece in half to determine the depth of the armholes.
- Use markers to outline the armholes at your selected size.
- Example: Skip 20 chain-1 spaces for each side.
- Repeat the process on both sides.
Step 9: Joining the Sides
- Begin joining the side seams from the armhole markers downward.
- Leave the armholes open.
- Repeat this on the other side.
- Ensure you fasten off and weave in ends after finishing the seams.
Optional: Tassels
- Create tassels using 100 rounds of yarn for each.
- Attach tassels to the bottom edges of the cover-up using a needle.
- Example: Add 7 tassels evenly spaced across the piece.
- Example: Add 7 tassels evenly spaced across the piece.
Finishing
- Flatten the cover-up, check for loose ends, and weave them in.
- Add additional decorative elements if desired.
Your summer cover-up top is now complete!