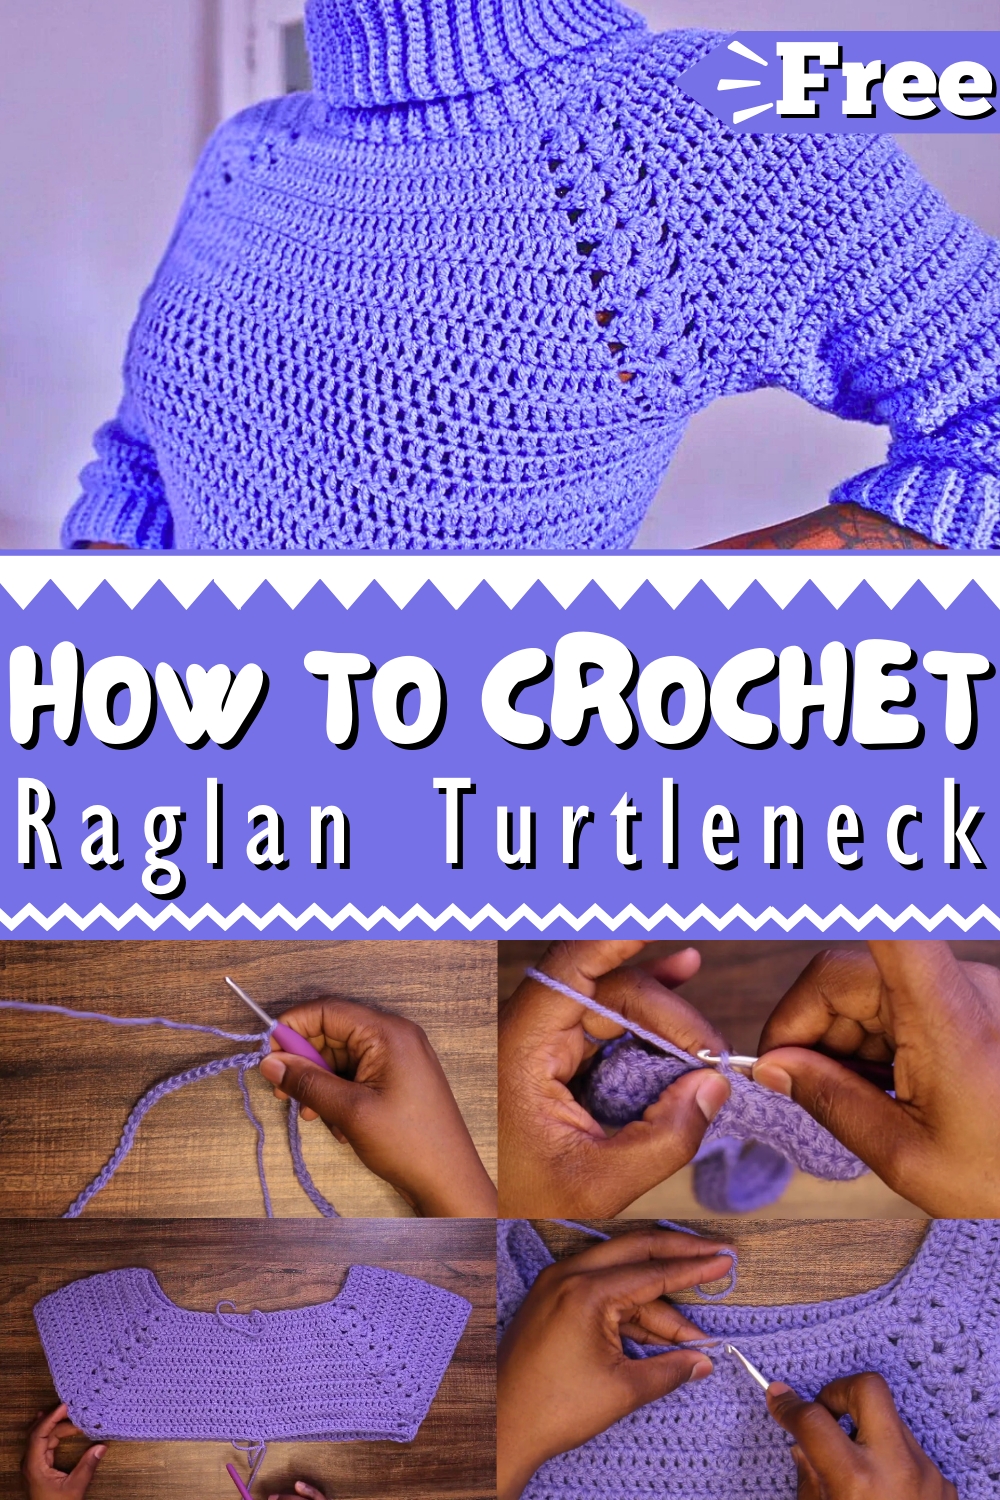
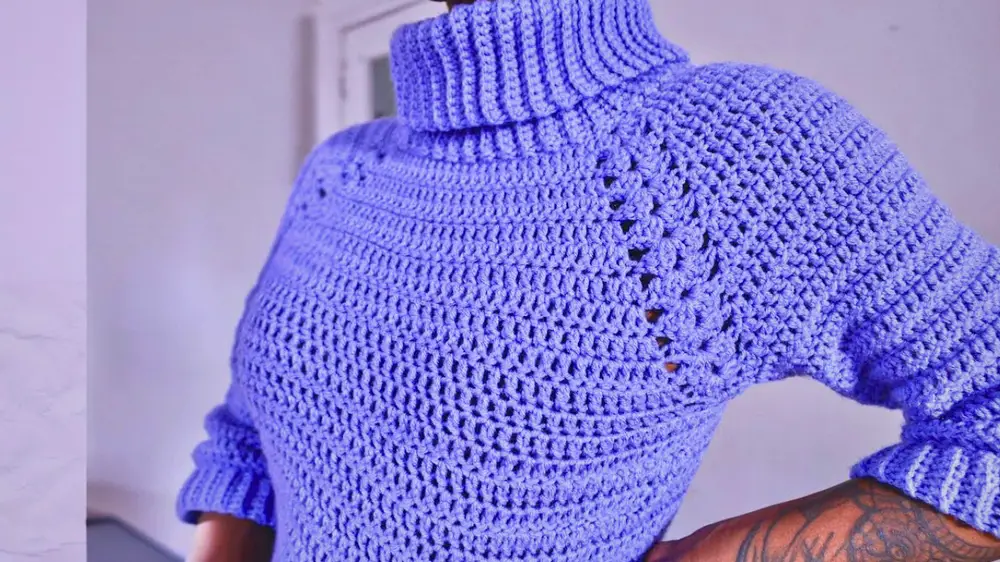
Cozy and chic, this free pattern for a crochet turtleneck raglan offers effortless style and warmth perfect for cooler weather.
Crochet Raglan Turtleneck XS-3XL
Get ready to fall in love with these cozy raglans! They are a must-have for any crochet enthusiast, combining both warmth and style in one chic garment. Perfect for the fall and winter seasons, these turtleneck raglans provide a snug fit that keeps you cozy on even the chilliest days. Whether you're dressing up for a casual outing or simply lounging at home, these versatile pieces add a touch of elegance to any outfit.
With endless color options and yarn choices, you can personalize each pattern to suit your taste. Additionally, the raglan design ensures a seamless, comfortable fit that's flattering on all body types.
Tip:
Always check your gauge before starting to ensure your turtleneck fits just right. Dive into the world of crochet turtleneck raglans and elevate your wardrobe with handmade charm!
How To Crochet Raglan Turtleneck
Materials Needed
- Weight 4 yarn (check the video description for the specific yarn used)
- 4mm crochet hook
- 5mm crochet hook
- Scissors
- Tapestry needle
Steps to Create the Crochet Turtleneck
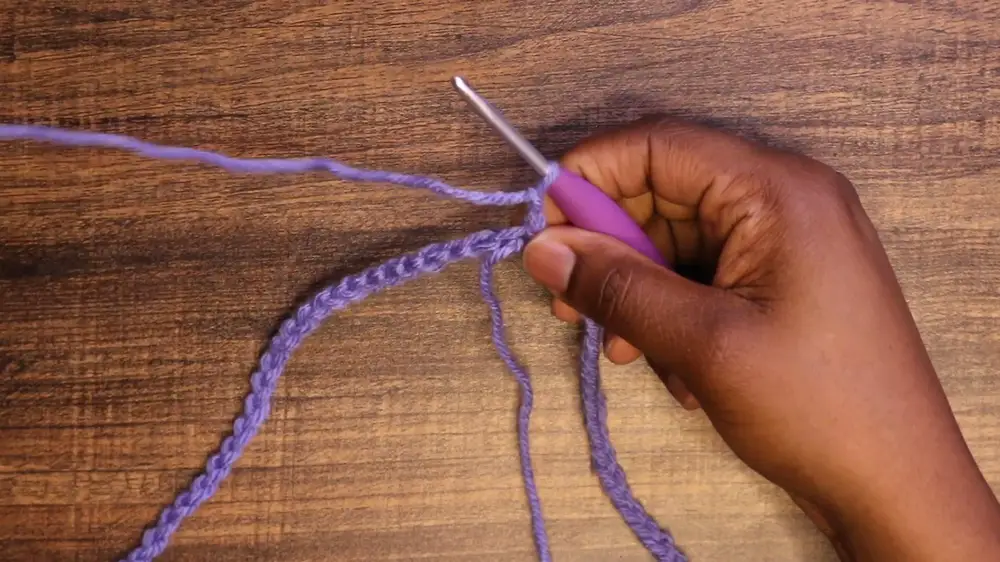
Step 1: Chain Foundation
- Size Selection: Start by choosing the size you want to make. For an extra small, chain 92 stitches.
- Circle Formation: Slip stitch into the first chain to form a circle, ensuring it's not twisted. Chain up two.
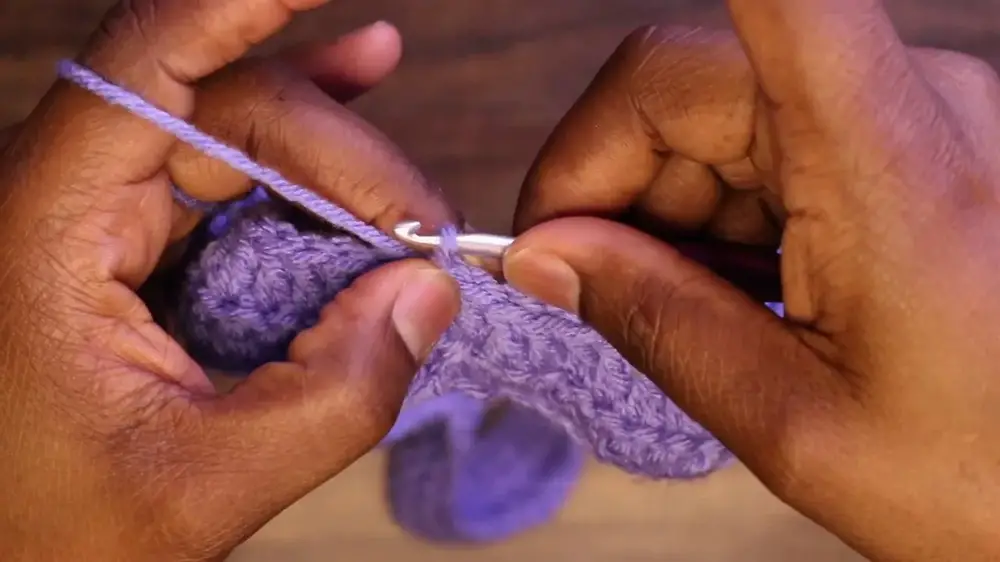
Step 2: Initial Double Crochet and Shell Stitch
- Double Crochet: Begin with a double crochet in the first chain for 12 stitches if you're working on an extra small.
- Shell Stitch: Skip one then work a shell stitch: three double crochets, chain two, three double crochets in the next stitch.
- Continue Double Crocheting: For extra small, proceed with 16 double crochets, then another shell stitch. Follow the pattern for your selected size.
Step 3: Complete the Initial Round
- Repeat the Pattern: Continue alternating double crochets and shell stitches as detailed above until you complete the round.
- Slip Stitch: Finish with slip stitching into the first double crochet, not into the chain two space to keep seams straight.
Step 4: Continue Building the Yoke
- Chain and Turn: Chain two and turn your work, double crocheting into each stitch, increasing before and after each shell stitch.
- Repeat Rounds: Continue building up to a total of 11 rounds for extra small. Adjust according to your size requirements.
Step 5: Create the Body
- Double Crochet Only: After creating the yoke, double crochet in each stitch with no increases around the body.
- Divide for Armholes: Place three double crochets in each chain two space. Skip the shoulder section and connect to the other side of the yoke.
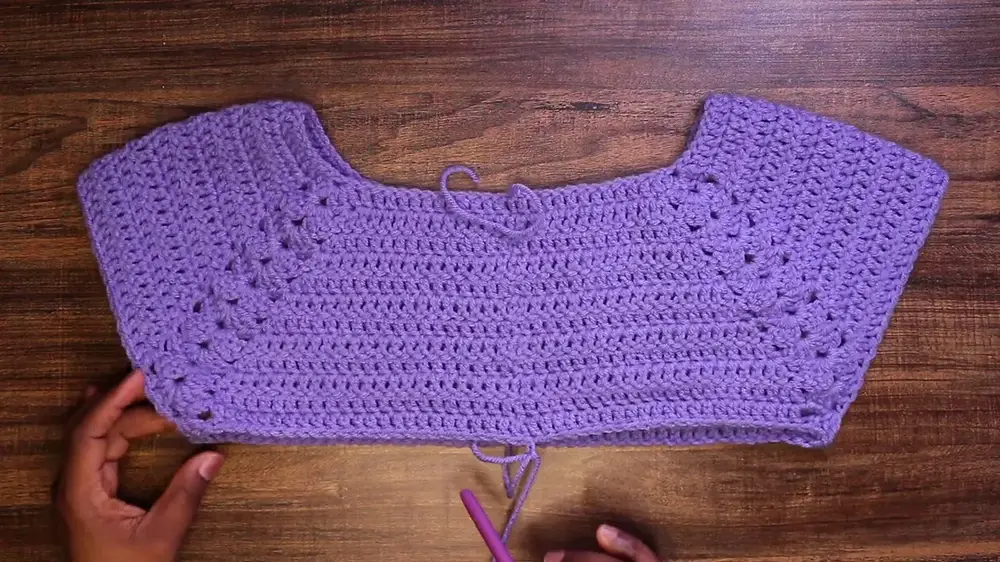
Step 6: Add Ribbing to the Body
- Switch Hook Size: Switch to a 5mm hook for the ribbing; chain up 13 for the ribbing length.
- Single Crochet: Work single crochets in the back loop only, back down to the body.
- Attach: Slip stitch into the next two double crochets, turn work, and repeat ribbing till complete.
Step 7: Create the Sleeves
- Attach Yarn: Between three double crochet groups from the dividing round, attach yarn with a 4mm hook.
- Round Sleeves: Double crochet around, maintaining length desired (ex. 21 rounds for ¾ sleeves).
- Finish Sleeve with Ribbing: Use the same ribbing technique as the body but chain eight.
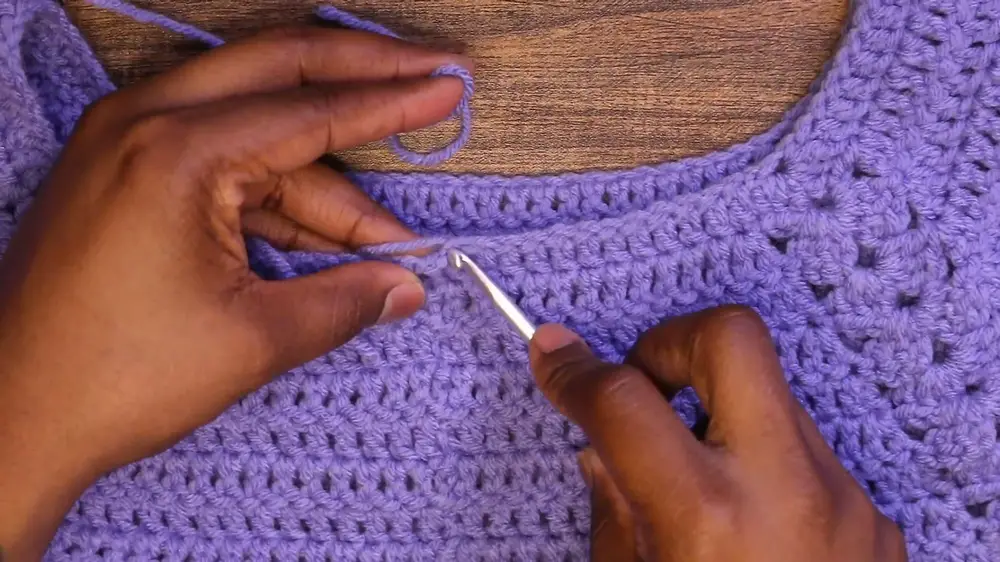
Step 8: Turtleneck
- Attach Yarn: At the back seam, near the chain two, switch to the 5mm hook.
- Chain Formation: Chain 31 for a turtleneck, working single crochets back down.
- Ribbing Style: Repeat ribbing technique for a snug fit.
Conclusion
Congratulations on completing your crochet turtleneck! This project results in a cozy and stylish addition to your wardrobe. Make sure to weave in any loose ends and wear your creation with pride.