
Vintage-inspired and stylish Free Crochet Granny Square Cardigan Pattern: Create your cozy wardrobe essential with this easy-to-follow guide!
Perfect Granny Square Cardigan
Remarkably trendy and timeless, this cardigan is a symbol of beauty and elegance. Flaunting a mesmerizing combination of classic motifs and modern wearability, this cardigan is a versatile staple perfect for any wardrobe. Each square boasts intricate designs, meticulously arranged to create a stunning patchwork of colors and patterns, exuding both warmth and sophistication.
Ideal for layering over your favorite outfits, this cardigan not only keeps you cozy but elevates your style effortlessly. The interplay of vibrant hues and delicate stitching provides a charming aesthetic that catches the eye and draws compliments. Whether paired with jeans for a casual look or worn over a dress for an elegant touch, this cardigan promises to be a conversation starter.
Tip:
Choose high-quality yarn to enhance the durability and comfort of your cardigan.

How to Crochet a Granny Square
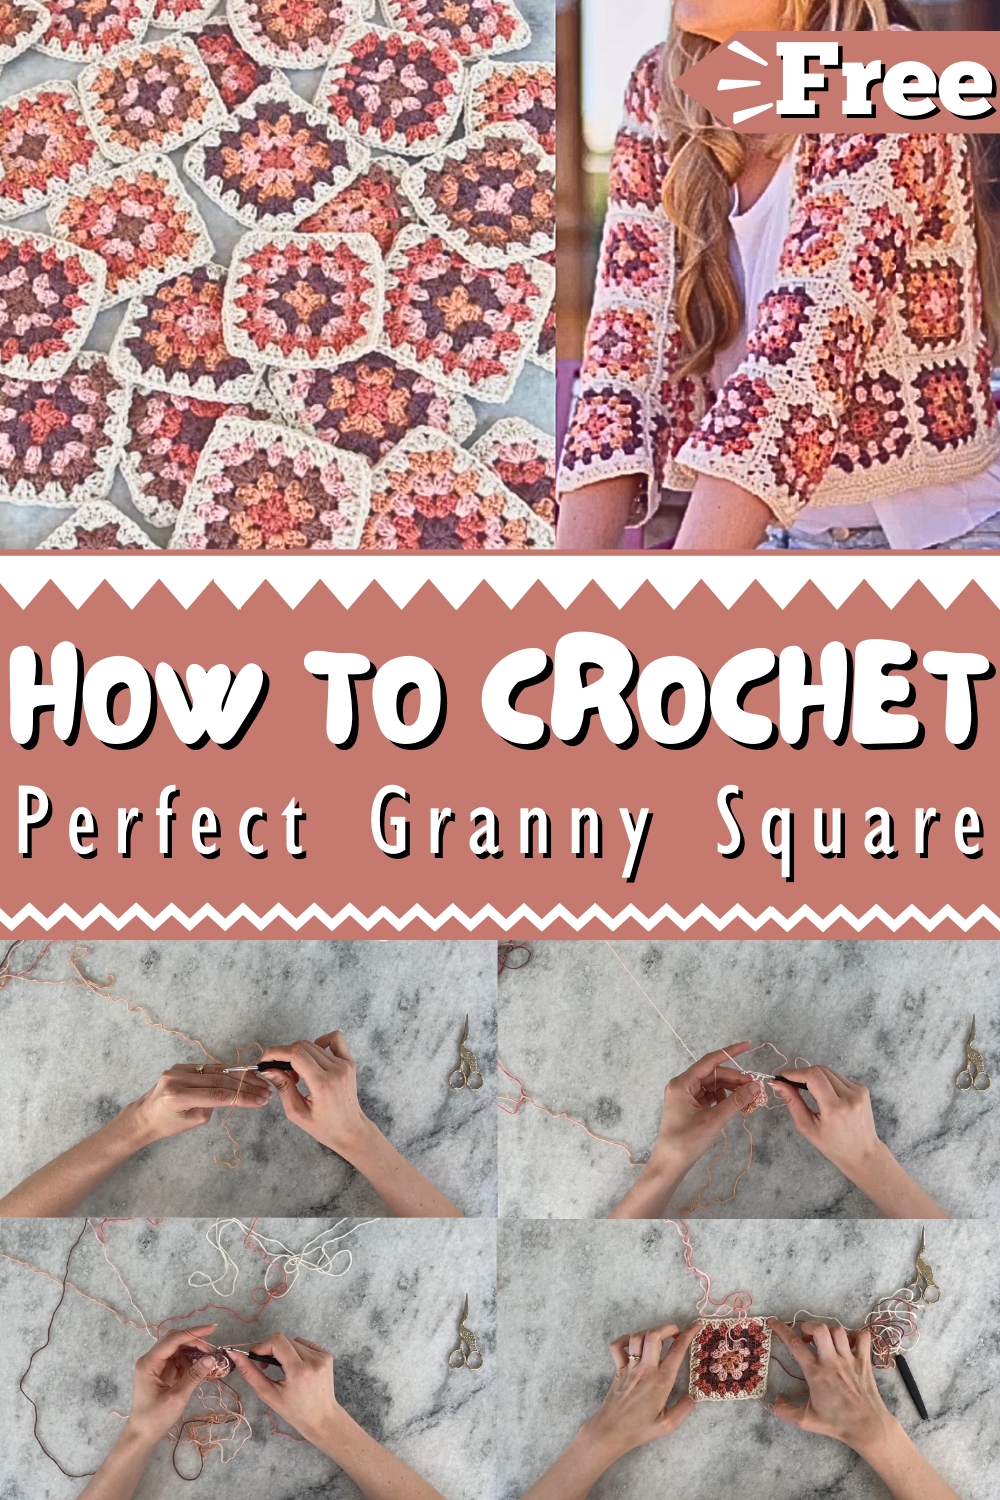
Introduction
In this pattern, you'll learn how to crochet a classic granny square using the granny stitch. These squares can be combined to make various items like cardigans or blankets. The specific squares demonstrated here are used to create a granny square cardigan.
Materials Required
- Yarn: Lion Brand New Boo in five colors, with one color used per round.
- Crochet Hook: Size 4.5 mm (smaller than the recommended size for a tighter stitch).
Step-by-Step Instructions
Step 1: Create a Magic Ring
- Lay the yarn across your fingers, wrap it under, and hold it with the pinky.
- Wrap it over the front and cross it.
- Insert your hook under the first strand, pull up a loop with the second, and pull it through the loop of the first strand.

Step 2: Begin the Square
- Chain two—this counts as the first stitch.
- Work two double crochets into the magic ring.
- Chain one to start creating a corner.
Step 3: Complete the First Round
- Work three double crochets into the ring—this forms the second side of the square.
- Chain one and work three more double crochets for the third side.
- Chain one and work three double crochets for the fourth side.
- Tighten the magic ring slightly.
- Chain one, then join using a new color for seamless transitions.

Step 4: Start the Second Round
- Chain two and work two double crochets into the first corner gap.
- Work three double crochets in the next gap space (a corner).
- Chain one, work three more double crochets to complete the corner.
- Continue this pattern in each corner.
Step 5: Subsequent Rounds
- With each new round, start with a chain two and two double crochets in the corner gap.
- Work three double crochets into each gap along the sides and corners, with each corner getting a chain one or two, and three more double crochets.
- Change yarn color at the end of each round by slip stitching with a new color, maintaining a seamless appearance.

Step 6: Final Round
- For the last round, work with the white yarn.
- Chain two at corners instead of one for easier seaming with other squares.
- Slip stitch using both loops to join, making it look uniform.

Tips
- The final round’s chained corners allow for easier alignment when assembling multiple squares.
- Turn your work at the end of each round to avoid spiraling and maintain even shaping.
- Weave in ends as you go to simplify finishing.
Conclusion
By following these steps, you can create beautifully crocheted granny squares that can be pieced together for various crochet projects. With practice, each square can be completed in about ten minutes, making it a rewarding and efficient task.


