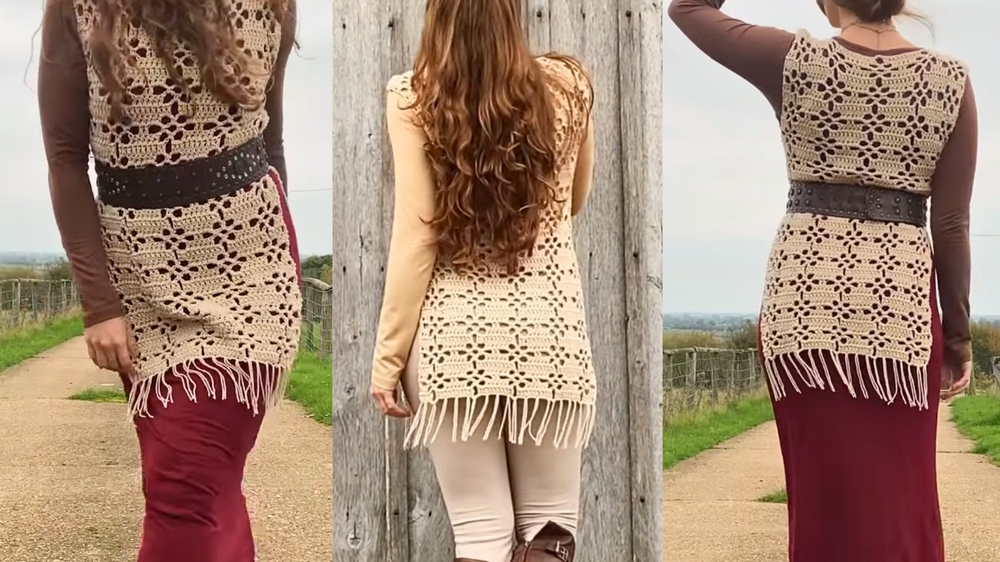
Uncover your bohemian spirit with this free Crochet Easy Boho Tunic pattern, perfect for creating a relaxed yet stylish handmade wardrobe staple.
Stylish Crochet Boho Tunic
Boho tunics are a timeless wardrobe staple that combine effortless style and comfort. The Easy Boho Tunic Pattern is designed for those who love the charm of relaxed fits and a hint of individuality in their outfits. Perfect for layering over jeans, leggings, or skirts, this pattern helps you make a versatile piece that works for casual outings, beach days, or even lounging at home.
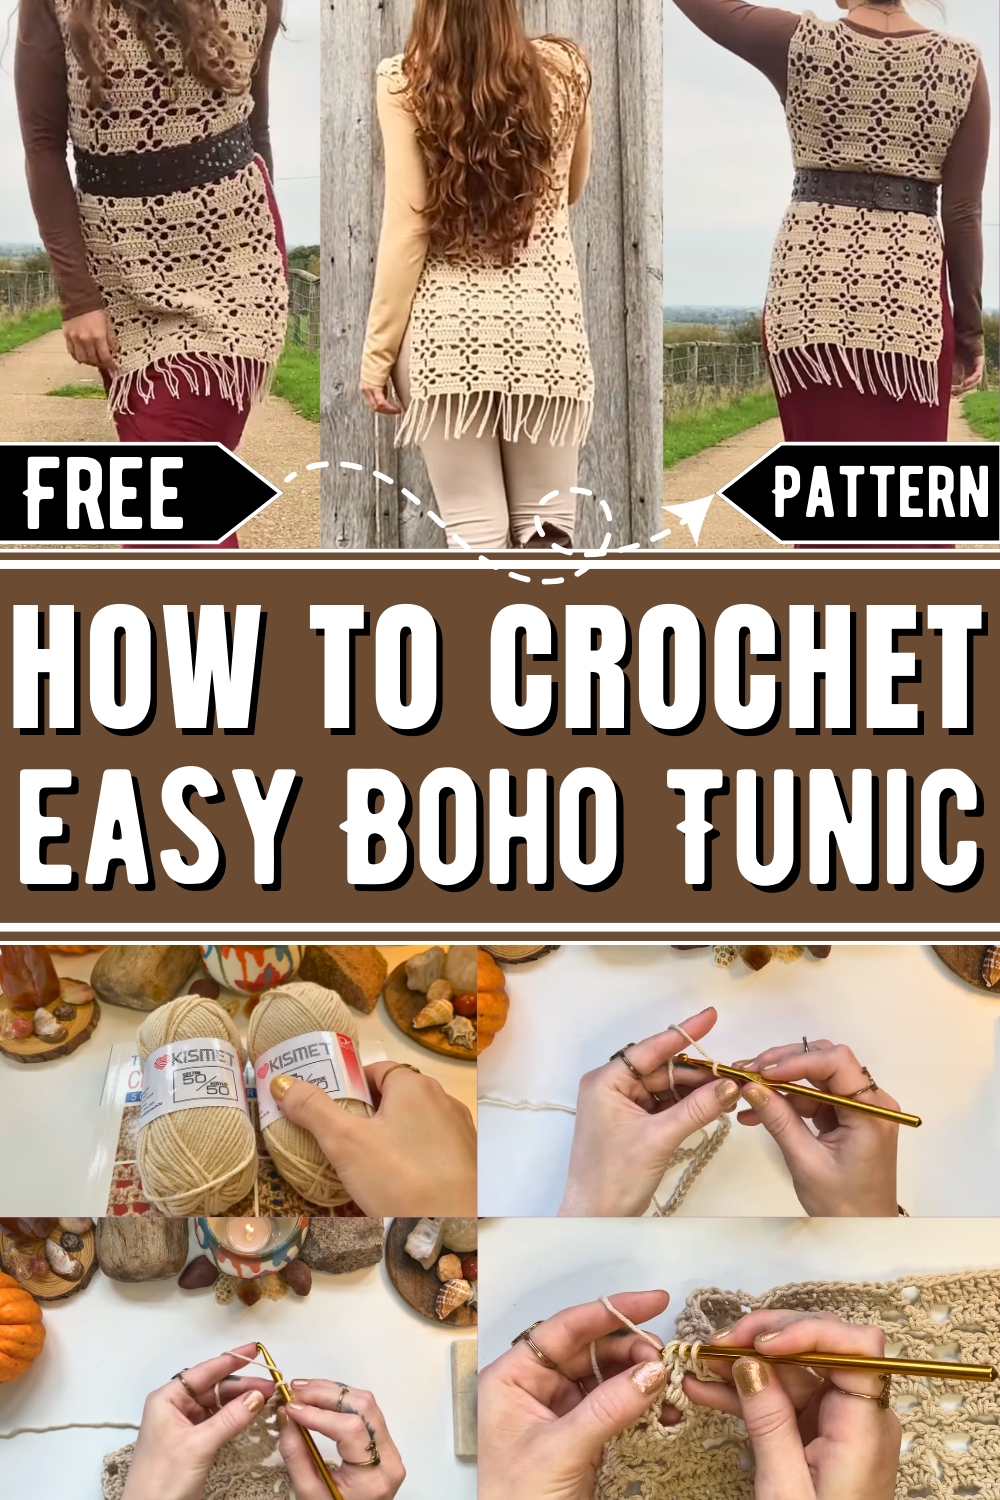
Designed to be beginner-friendly, this tunic pattern balances simplicity with elegant detail, making it accessible to both experienced crocheters and those new to stitchwork. The lightweight and breathable texture adds comfort, while the boho-inspired design makes it ideal for warmer seasons or layered looks during colder months.
How To Crochet Crochet Boho Tunic
Its flowy silhouette flatters different body types, giving you an effortlessly chic vibe while ensuring free movement throughout the day. With this easy-to-follow guide, you can fashion a piece that stands out while being practical enough for everyday use. Plus, the pattern allows room for customization, letting you experiment with colors or embellishments that reflect your personal style. Dress it up, or keep it casual—this tunic pattern is a handy addition to any wardrobe.
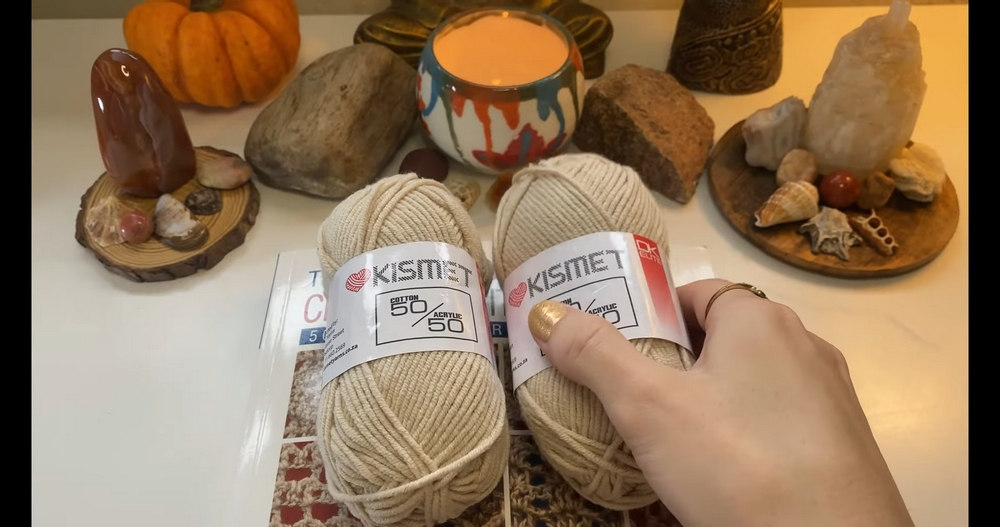
Materials Needed:
- Yarn: Medium weight yarn (light beige cotton-acrylic blend was used in the video; adjust based on your preference).
- Hook: Suggested is a 6mm crochet hook for a relaxed stitch (feel free to adjust depending on your yarn).
- Additional Tools: Scissors, measuring tape, yarn needle, stitch markers, and a book (for tassels).
Step-by-Step Instructions:
Step 1: Take Measurements
- Measure from shoulder to shoulder (e.g., 17 inches). Add 2–4 inches if you need a looser fit due to a larger bust size.
- Measure the desired length of the tunic (e.g., 26 inches to fall over upper thighs). Modify for a shorter tunic or a full-length tunic as preferred.
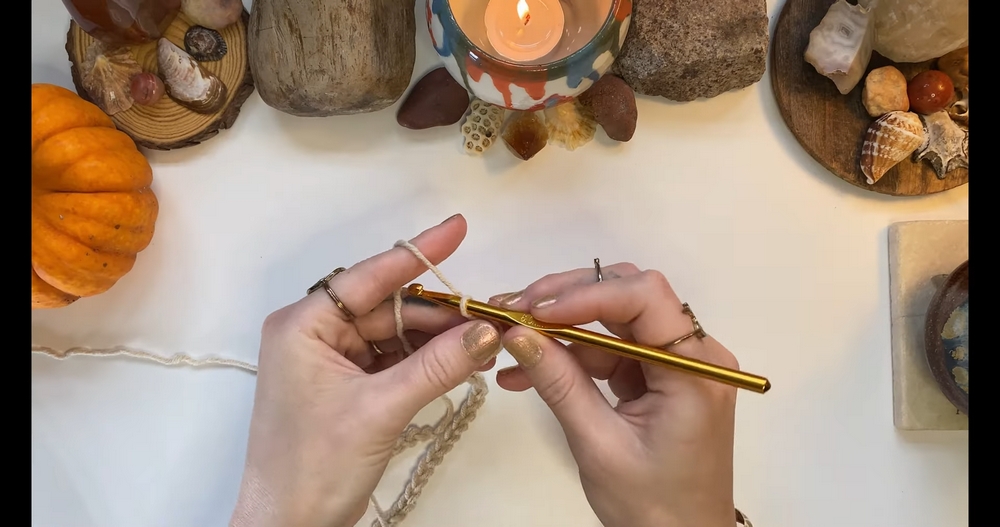
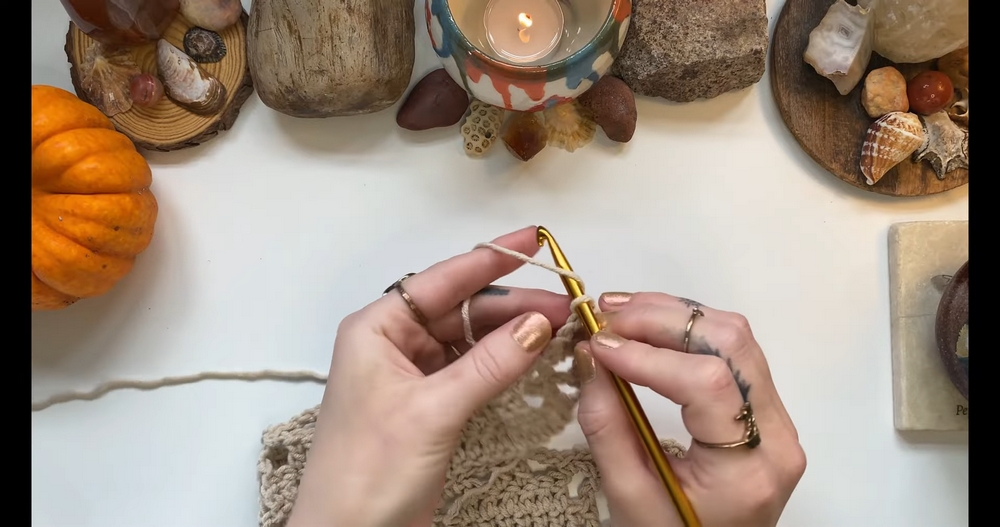
Step 2: Prepare Your Yarn and Chain
- Make a slip knot:
- Wrap the yarn around your middle and index fingers twice to create an "X."
- Push the yarn under the "X," pull the loop out, insert your hook, and tighten.
- Chain in multiples of 12 + 2:
- Your total chain length should match your shoulder measurement.
- For example, for a 17-inch width, chain 62 (based on the pattern, this gives room for 5 diamond shapes).
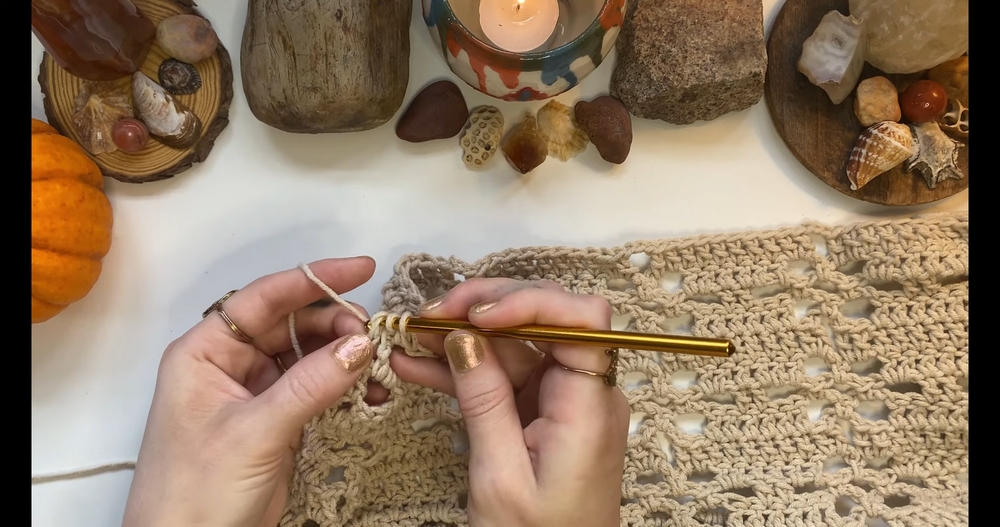
Step 3: Create the Rectangular Panels
You will crochet two identical panels for the tunic using the following pattern:
Row 1
- Yarn over, insert a double crochet in the 4th chain from the hook (Chain 4 counts as a double crochet here).
- Make double crochet in the next 3 chain stitches (total: 5 double crochets).
- Chain 3, skip 2 chain stitches, and insert a double crochet in the third stitch.
- Make 10 double crochets in the next 10 chain stitches.
- Continue the pattern: chain 3, skip 2 chain stitches, make 10 DCs across, until you have 5 chain stitches remaining.
- Finish the row with double crochets in the remaining 5 stitches.
Row 2
- Turn your work, chain 3 (counts as a double crochet).
- Yarn over, make 2 double crochets for a total of 3 at the start.
- Chain 3, make a single crochet in the chain space.
- Chain 3, skip 2 stitches, and insert 6 double crochets.
- Repeat: Chain 3, skip 2 DCs, single crochet in the chain space, chain 3, and make 6 DCs in the next segment.
- Work across the row until the end: finish with 3 DCs (2 into the regular stitches and 1 into the turning chain).
Row 3
- Turn your work; chain 6 (counts as 1 DC and chain 3).
- Make single crochet in the chain spaces throughout the row, alternating chain spacing.
- Skip DCs as necessary (pairs of 2) while maintaining the diamond shape pattern.
- End the row with double crochet into the turning chain.
Row 4
- Turn your work, chain 3, and make 2 DCs into the next chain space.
- Chain 3, single crochet into the chain space, chain 3, and make 2 DCs in the chain space.
- Continue the pattern: Work DCs and chain combinations (maintaining the correct count for the diamond shapes).
- End with DCs into the turning chain.
Row 5
- Turn your work, chain 3, make double crochets along the pattern edges.
- Begin to close the diamond shape by reducing chain space sections.
- End with DCs into the chain spaces.
Repeat Rows 2–5 until the panel matches your desired tunic length measurement.
- Example from the video: Panel contains 5 diamonds across and 12 diamonds down (measures 26 inches in length).
Step 4: Join the Panels
- Place the panels right-side facing.
- Use stitch markers to determine and align the width of the neck hole.
- Place markers where you'd like your neck opening.
- Sew or join panels together along the marked stitches using:
- Yarn needle (by weaving through).
- Or alternative crochet hook methods (linked in the video description).
Step 5: Size and Join Armholes
- Use stitch markers to determine armhole placement and width.
- Position markers below the fourth diamond pattern on the garment for loose armholes.
- Sew the panels together below the armholes until your desired slit or join location (e.g., start of hips for longer side slits).
Step 6: Add Tassels
-
- Prepare tassels:
- Wrap yarn around a book several times.
- Cut along the inside of the book.
- Attach tassels to open spaces in the diamond pattern:
- Fold a yarn strand in half, push through a stitch, loop over the hook, and pull through to form a knot.
- Fold a yarn strand in half, push through a stitch, loop over the hook, and pull through to form a knot.
- Prepare tassels:
- Add tassels to each chain space evenly or create a fuller look by doubling.
Optional:
- Steam tassels to straighten.
- Trim tassels to the desired length using the book for guidance.
Step 7: Weaving in Ends & Blocking
- Weave in all loose yarn ends.
- Optional: Block the garment to define shape and stitches.
Step 8: Admire Your Finished Tunic
- Wear your tunic and style it:
- Cozy: Over a long sleeve top and leggings.
- Chic: With a dress and a belt.
Enjoy your bohemian-style tunic!