
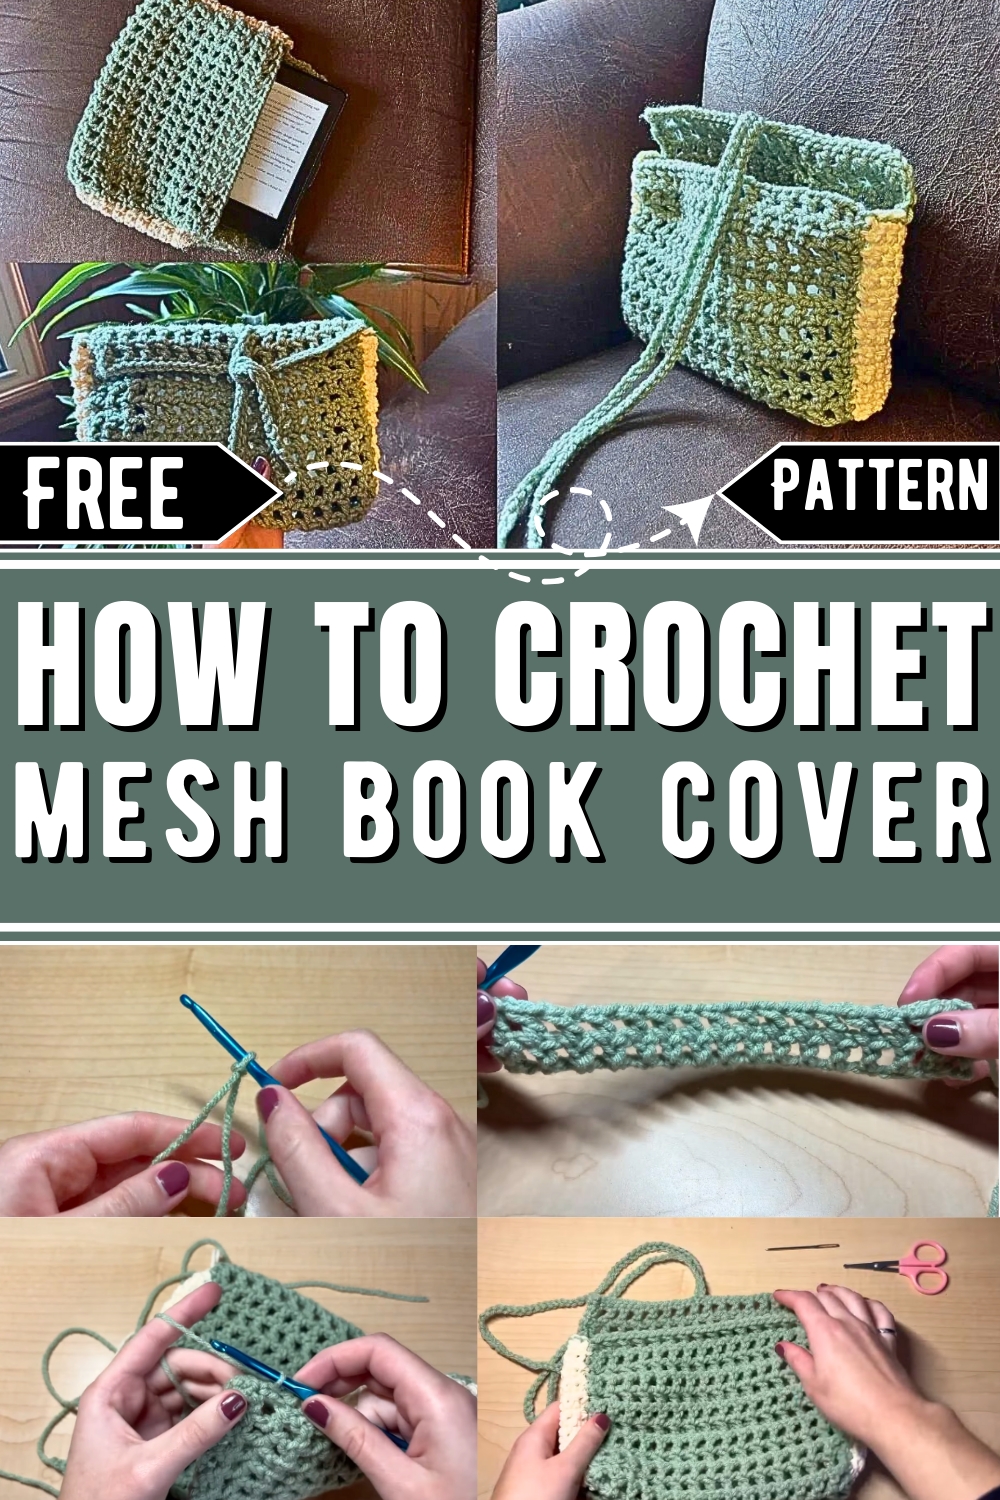
Add charm and protection to books or devices with a lightweight, customizable crochet mesh cover that's practical, eco-friendly, and uniquely yours!
Crochet Simple And Easy Mesh Book Cover Pattern
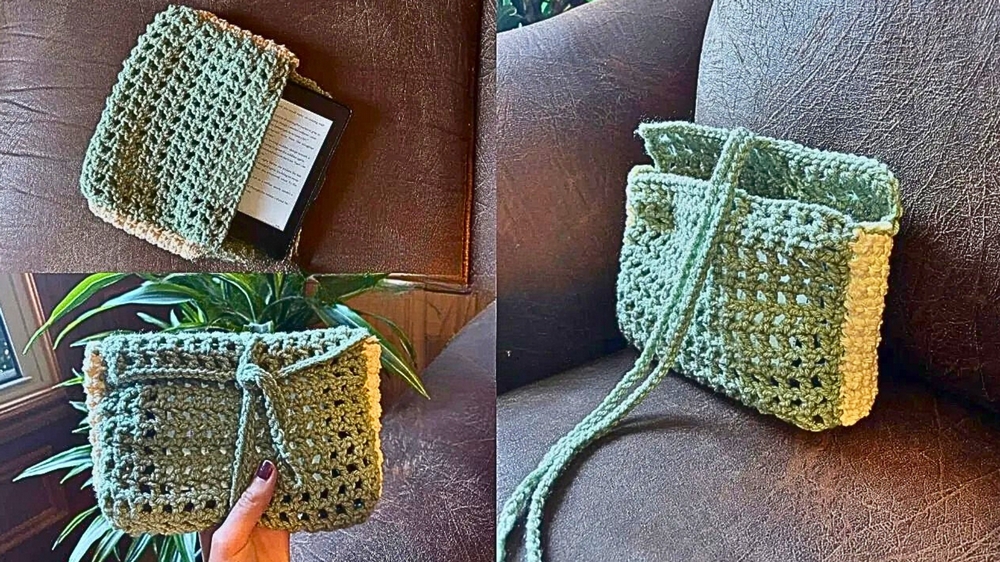
Crochet isn’t just about blankets and scarves, it’s a way to add functionality and charm to everyday items. Think about protecting your favorite book or e-reader while giving it a personalized touch. A free crochet mesh book cover pattern lets you do just that, offering a lightweight yet durable cover that doubles as a style statement. The mesh stitch design provides flexibility, making it perfect for books and devices of various sizes. This book cover isn’t just for protection; it’s a versatile companion for travel, work, or even lounging at home.
The airy mesh design makes it easy to slip your book in and out while ensuring the cover stays clean and scratch-free. Beyond its practicality, the pattern allows for customization with different yarn colors, textures, and even embellishments, making it uniquely yours. Plus, it’s a thoughtful handmade gift for anyone who loves reading or values personal touches in their belongings.
Lightweight, reusable, and eco-friendly, this crochet mesh book cover isn’t just a safeguard for your items it’s a reflection of your personality while reducing waste from disposable covers. Make an impact with this perfect fusion of utility and beauty for your books or devices.
How To Crochet Mesh Book Cover
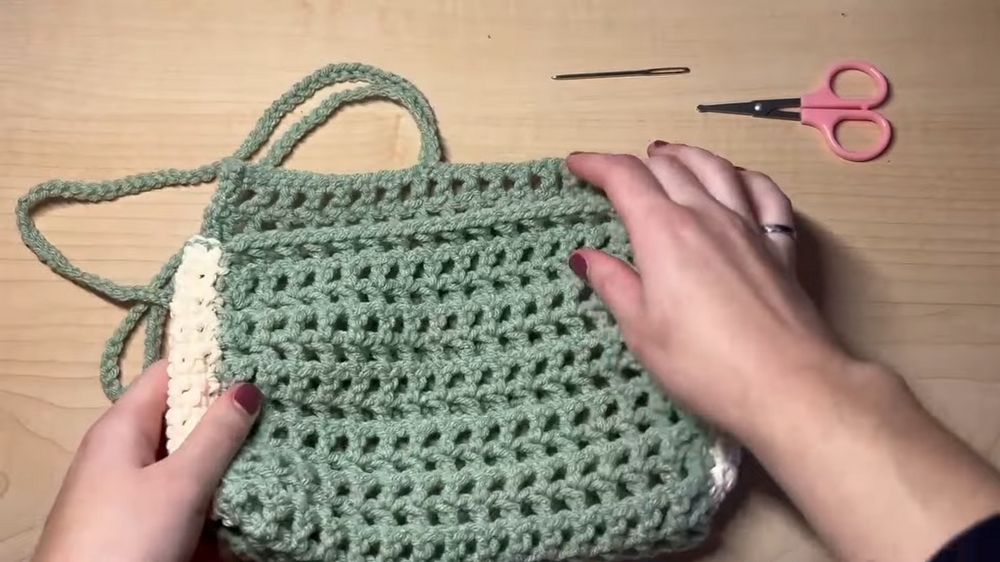
This crochet pouch pattern is perfect for creating a small bag suitable for holding a book, Kindle, or any small items you need to carry. The pouch consists of a main panel that wraps around the whole bag and two side panels, all worked with basic crochet stitches.
1. Gathering Supplies and Tools
- Yarn: 50 grams total (10 grams white, 40 grams green)
- Hooks: 5.5 mm and 5 mm
- Other Tools: Yarn needle and scissors
Step-by-Step Guide
2. Crocheting the Main Panel
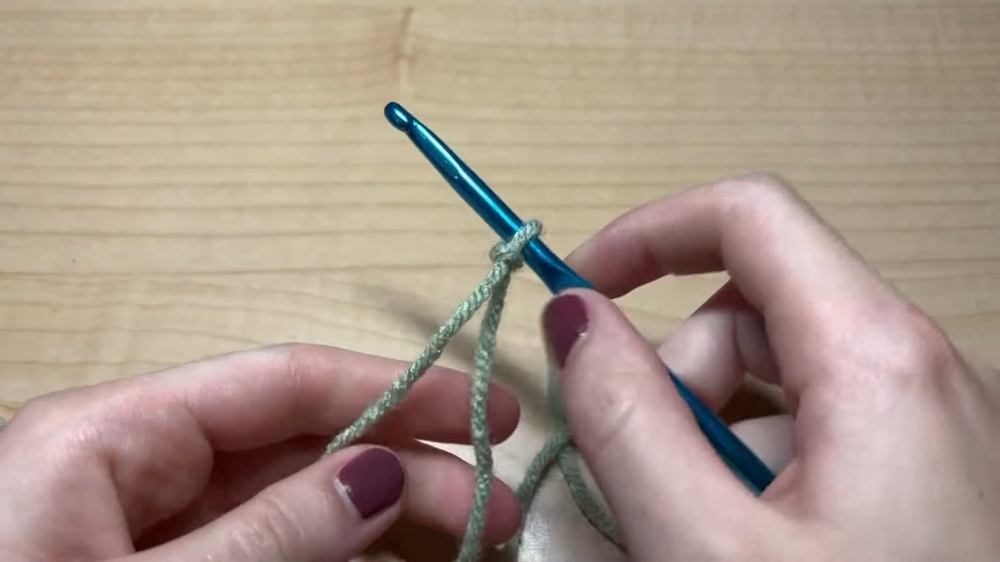
- Starting the Foundation: Slip Knot and Chains
- Create a slip knot and place it on the 5.5 mm hook.
- Chain 33 stitches.
- First Row: Initiate Mesh Stitch
- Double crochet into the third stitch from the hook.
- Chain one, skip one stitch, and double crochet into the next stitch. Continue this pattern until the end of the row. The last stitch is a double crochet next to the slip knot.
- Subsequent Rows: Repeating the Mesh Stitch
- Chain two and turn at the end of each row.
- Double crochet into the first stitch (not counting the chain). Then chain one, skip one stitch, and double crochet into the next stitch. Continue until the end of the row.
- Repeat this pattern for a total of 27 rows.
- Completing the Main Panel
- Finish off and set the piece aside.
3. Crocheting the Side Panels
- Foundation and First Row: Single Crochets
- Create a slip knot and use the 5mm hook.
- Chain five.
- Single crochet into the second chain from the hook and continue single crocheting down the row.
- Subsequent Rows: Repeating Single Crochets
- Chain one, turn, and single crochet across each stitch.
- Repeat this for a total of 21 rows.
- Create a second identical side panel.

4. Assembling the Pouch
- Sewing the Panels Together
- Align one side panel with the end of the main panel.
- Use a long tail of yarn threaded through a yarn needle to sew the side panel to the main panel by weaving back and forth through the edges.
- Wrap the main panel around and sew the other edge to the side panel.
- Repeat the alignment and sewing process with the other side panel. Use safety pins to help keep edges aligned.
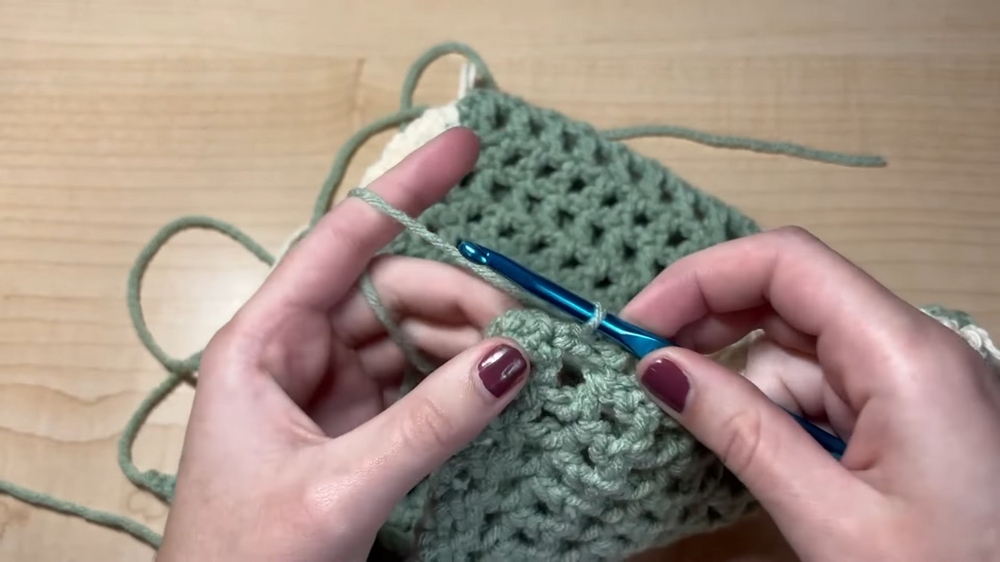
- Adding the Edging and String
- Creating Trim Along the Top Edge
- Start in a corner with the green yarn. Pull up a loop and begin slip stitching along the edge.
- Work two slip stitches per row and one slip stitch into each foundation chain stitch along the top.
- When you reach the center, chain 106 stitches or an amount sufficient to wrap around the pouch.
- Continue the trim to the end, tying off in the corner where you started.
- Reattaching the Chain String
- Reattach the chain string at the center using the last stitch worked, ensuring it is securely affixed.
- Reattach the chain string at the center using the last stitch worked, ensuring it is securely affixed.
5. Finishing Touches
- Weaving in the Ends
- Use a yarn needle to weave the ends through the same color stitches to hide them.
- Tie a small knot and cut off any excess yarn.
- Turning the Pouch Inside Out
- Turn the bag inside out to hide the seams and give it a finished look.
- Turn the bag inside out to hide the seams and give it a finished look.
Conclusion
This handy crochet pouch pattern is both functional and enjoyable to make, providing a great way to practice basic crochet stitches like double and single crochets. The result is a custom-sized pouch perfect for your books, e-readers, or other small items. With just a few simple steps, you can create a useful and attractive accessory.


