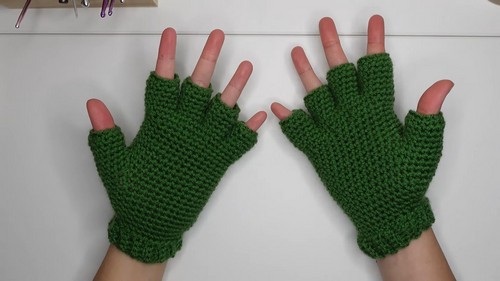
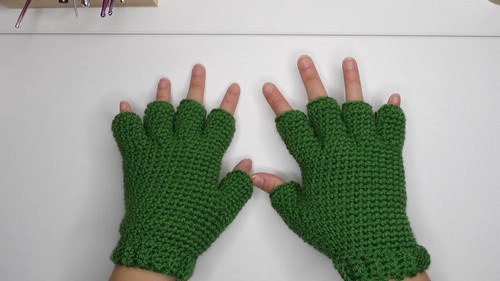
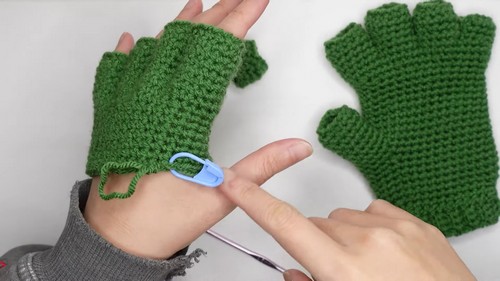
Unlock the art of crocheting half finger gloves with easy steps. Ideal for beginners and pros, make your own stylish and functional gloves today!
Crocheting half finger gloves offers a practical and stylish opportunity to expand your skills. With straightforward instructions, you can easily stitch these versatile accessories that provide warmth while allowing for dexterity. Whether you're looking to add a handmade touch to your wardrobe or seeking a personalized gift, these gloves perfectly balance function and fashion. They adapt to any outfit and are great for cooler weather. The process involves working in rounds, mastering stitches, and sizing to ensure a snug fit. You’ll enjoy the satisfaction of making something both beautiful and useful, all while showcasing your unique style.

Why Love This Pattern?
- Ease of Material Use: The creator uses versatile materials such as pulley acrylic yarn and mentions that any kind of yarn can be used, making it accessible and adaptable to what you have on hand.
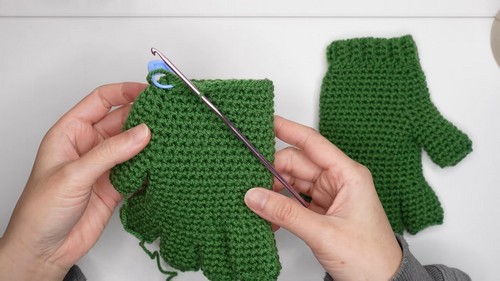
- Clear Stitch Marking: The tutorial emphasizes marking the first stitch and providing continuous rounds, which ensures accuracy and helps prevent mistakes.
- Customization: For example, the middle finger includes an extra round compared to the other fingers to accommodate for its length, showing the pattern’s consideration for anatomical differences.
- Finishing Touches: The video covers not only the main construction but also the finishing details, like attaching the thumb, making decreases for a snug fit, and adding the wrist section for a complete and polished look.
How to Crochet Half Finger Gloves
Materials Needed
- Acrylic yarn (or any preferred type of yarn)
- 3.5mm crochet hook
Step 1: Starting the Chain
- Create a slip knot.
- Chain 12.
Step 2: Forming the Base
- Connect the 12th chain to the first chain with a single crochet.
- Mark the first single crochet.
- Continue single crocheting in each chain around, back to the stitch marker.
Step 3: Building the Rounds
- Create a continuous spiral of single crochet for three more rounds (total of four rounds of 12 single crochets).
Step 4: Securing and Cutting Yarn
- Cut the yarn and secure it.
- Hide the yarn tails inside the stitches.
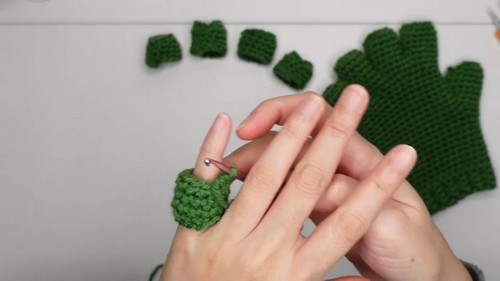
Step 5: Repeating the Pattern for Other Fingers
- Follow the same pattern for each finger.
- The middle finger requires one extra round for a total of five rounds of 12 single crochets.
Step 6: Connecting the Fingers
- Start with the pinky (little finger).
- Connect the pinky to the ring finger with six single crochets per finger.
- Continue single crocheting around and make two rounds.
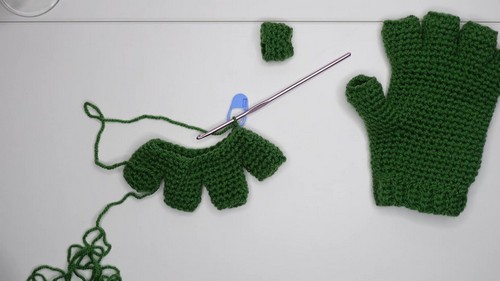
Step 7: Decreasing for Each Finger
- In the third round, begin decreasing every finger.
- Single crochet until you reach the next finger and decrease.
- Repeat the decrease for the next four rounds.
Step 8: Continuing to Single Crochet
- Crochet single rounds for five rounds after the decrease.
Step 9: Attaching the Thumb
- Connect the thumb to the base using single crochet.
- Complete two rounds of single crochet.
Step 10: Decreasing the Thumb
- Make decreases in the front and back of the thumb for six rounds.
- Add one more round of decrease if necessary to match your size.
Step 11: Completing the Thumb
- Cut the yarn and secure with extra length for sewing.
Step 12: Starting the Wrist Band
- Create a slip knot and chain five.
- Single crochet back along the bump of the chain.
Step 13: Building the Wrist Band
- Chain one at the end of each row.
- Continue with back loop single crochet for 27 rows.
Step 14: Finishing the Wrist Band
- Chain one and slip stitch the rows together.
- Turn the work, chain one, and cut the yarn.
- Hide the extra tail inside the stitches.
Step 15: Attaching the Wrist Band to the Glove
- Use a darning needle to sew the wrist band to the glove.
Final Steps
- Finish by adjusting and hiding any remaining yarn tails.
- Enjoy your finished glove!