
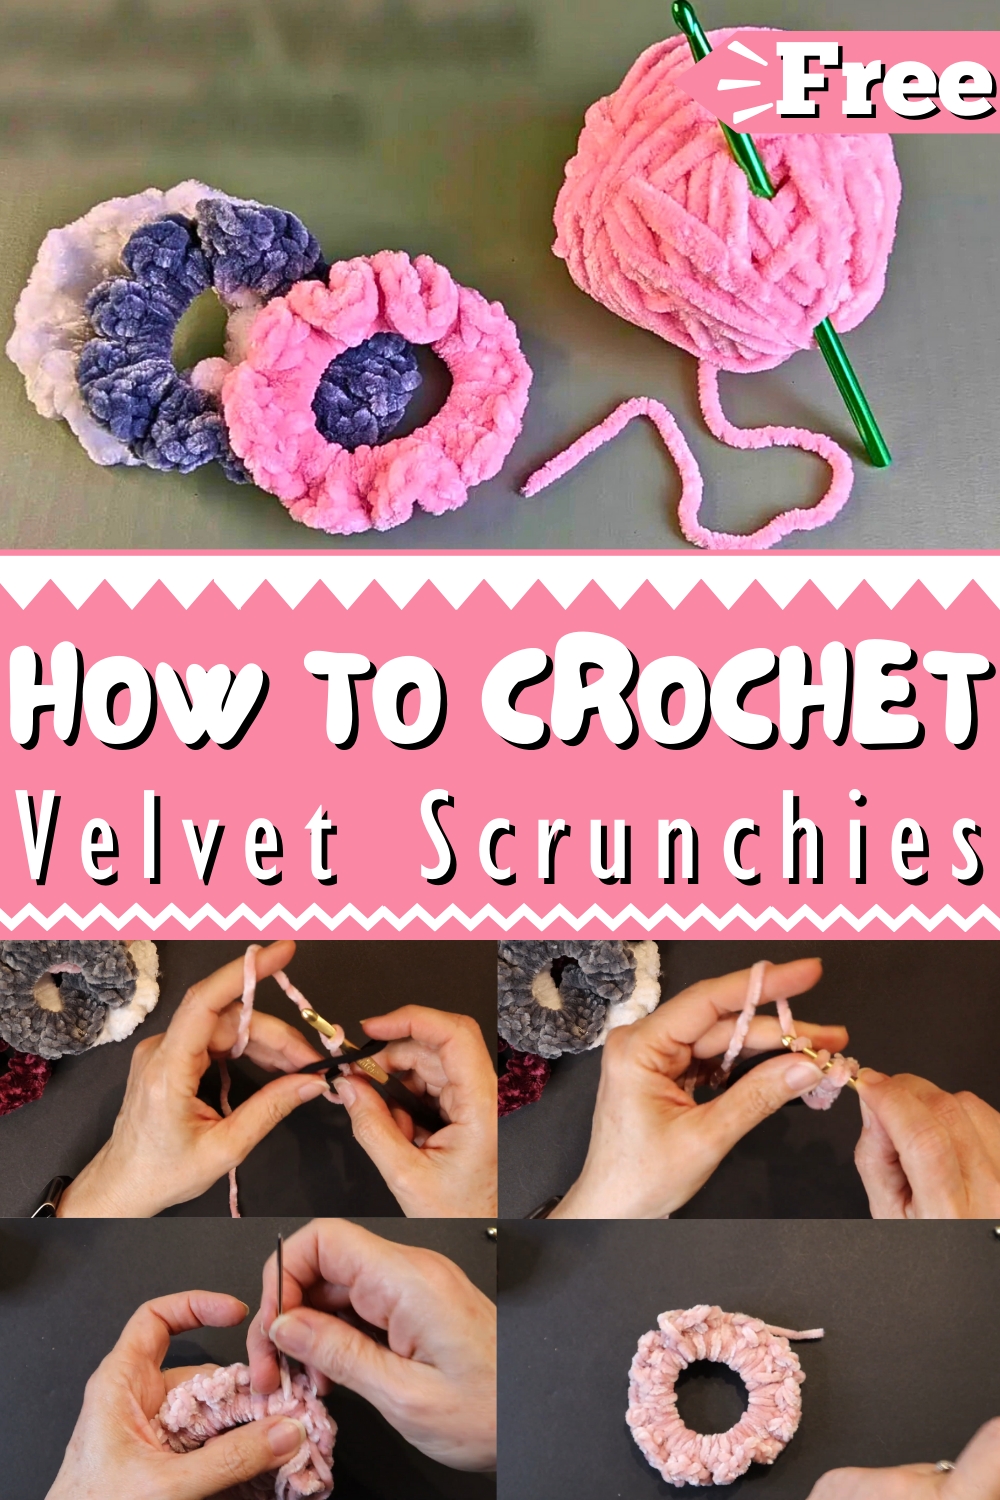
Luxurious Free Crochet Velvet Scrunchies Pattern: Create plush hair accessories that elevate your style with this easy-to-follow, stylish design!
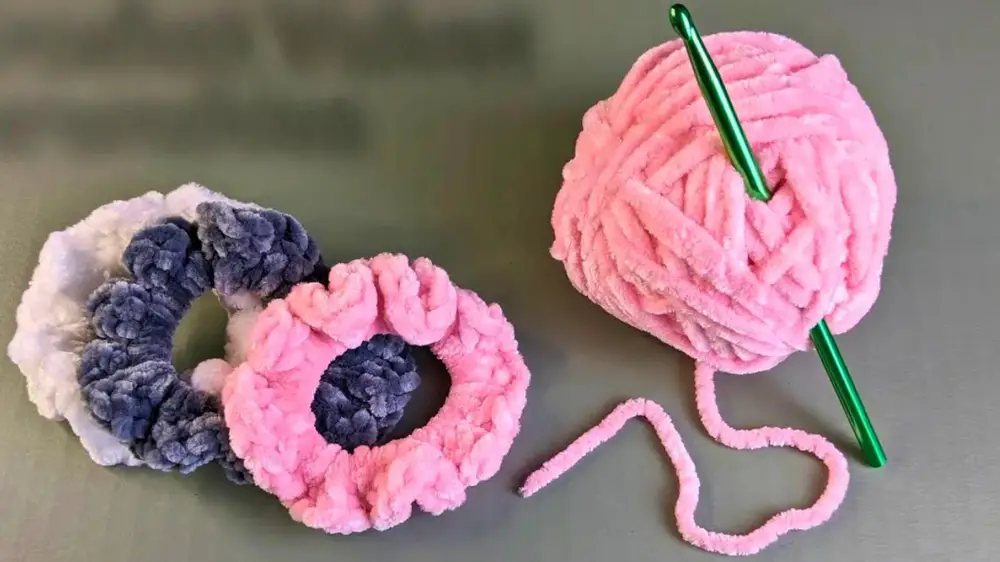
Crochet Velvet Scrunchies
Walk into the world of classy crocheted accessories and add an element of elegance to your hair with velvet scrunchies! These patterns are designed to help you create plush, stylish hair ties that not only look fabulous but are also gentle on your locks. Perfect for all hair types, velvet scrunchies minimize breakage and reduce frizz, providing a chic and functional alternative to standard hair ties.
Whether you're dressing up for a special occasion or adding a touch of sophistication to your everyday look, these versatile scrunchies are your new go-to hair accessory. Plus, crocheting them yourself allows for endless creativity, making each piece uniquely yours.
Tip:
To achieve the softest and most durable scrunchies, opt for high-quality velvet yarn and maintain a consistent tension throughout your crochet. With this simple tip, you're set to create the most exquisite velvet scrunchies that will surely turn heads!
How to Create a Crochet Velvet Scrunchie
Materials Needed
- Hair Ties: You can find these at Dollar Tree for a great price.
- 6mm Crochet Hook: Essential for creating uniform stitches.
- Darning Needle: Used for weaving in the ends.
- Yarn: You can use any yarn you like. Maggie used Bernat's Velvet Yarn and also found Just Chenille at Dollar Tree, which comes in various cute colors.
Understanding Hair Tie Thickness
The thickness of your hair tie can affect the final look of your scrunchie. Maggie demonstrated that thicker hair ties make the center ring wider and the ruffles less pronounced, while thinner hair ties create a more defined ruffle.
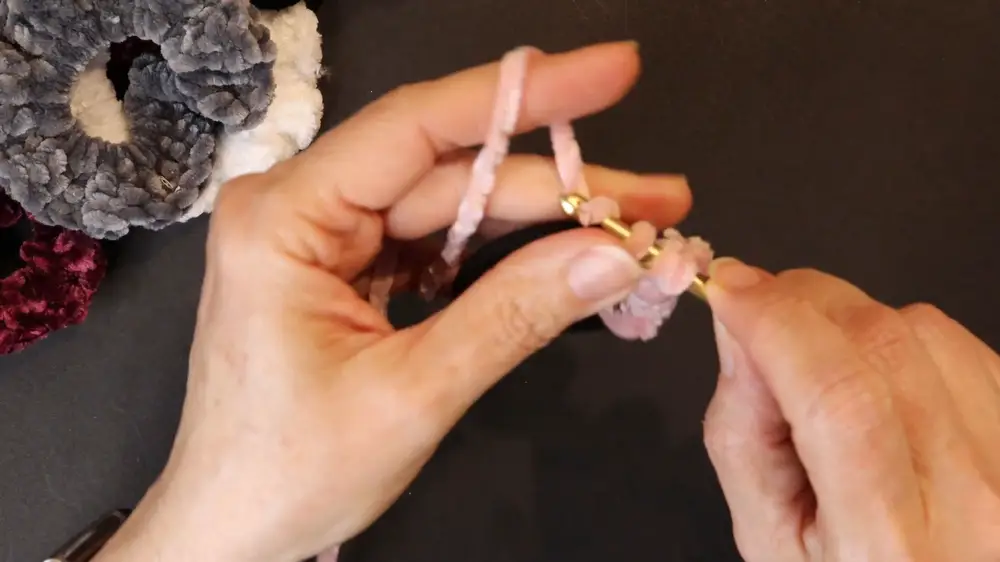
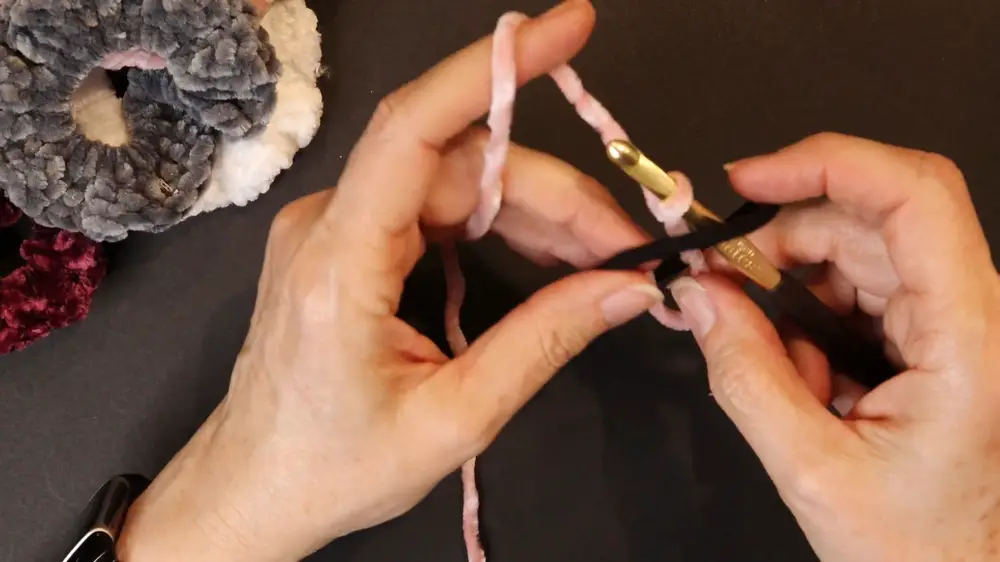
Creating the Slip Knot and Initial Stitches
- Create a Slip Knot: Place your hook through the hair tie and attach the slip knot to the hook.
- Make Two Chains: Start your foundation by chaining two.
- Double Crochet Stitches:
- Wrap the yarn around your hook.
- Go under the hair tie.
- Bring the yarn around the hook and pull through two loops.
- Yarn over and pull through the last two loops.
Completing the Double Crochets
- Continue making double crochet stitches around the hair tie.
- Note: The number of double crochets needed varies depending on the size and thickness of your hair tie and yarn.
- Ensure they bunch up closely to form the desired ruffle.
Tips for Double Crocheting
- Avoid Stretching: Be gentle and avoid stretching the hair tie as you work to prevent weakening it.
- Adjust as Needed: Periodically scrunch your stitches to ensure even distribution and to check how much more is needed.
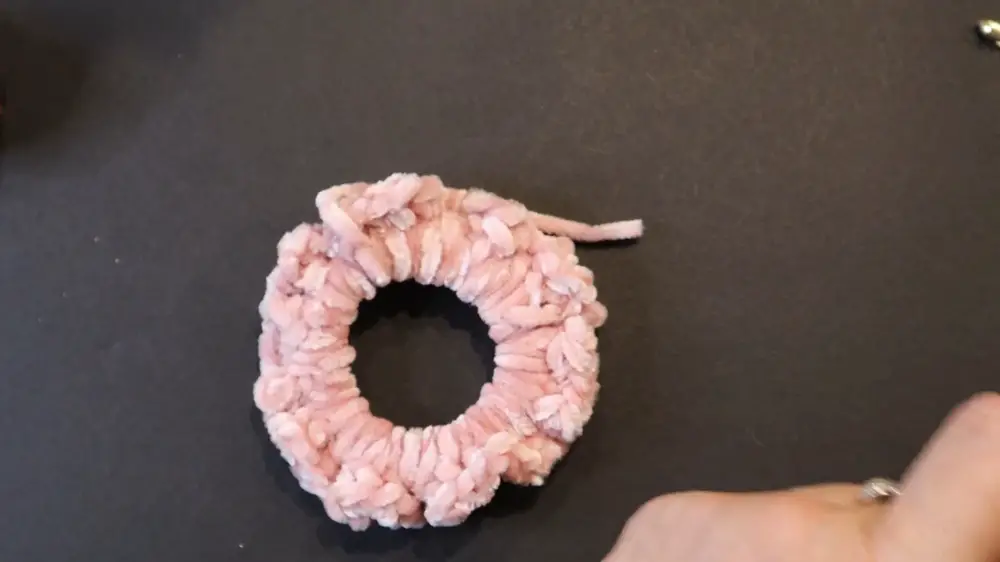
Finishing Off the Scrunchie
- Slip Stitch: Once you’ve double crocheted around the hair tie, finish by going into the second stitch from the start and making a slip stitch.
- Leave a Tail: Cut the yarn, leaving a tail to weave in, and pull it through the final loop.
- Tighten the Knot: Pull the knot tight and adjust your stitches to ensure they are even.
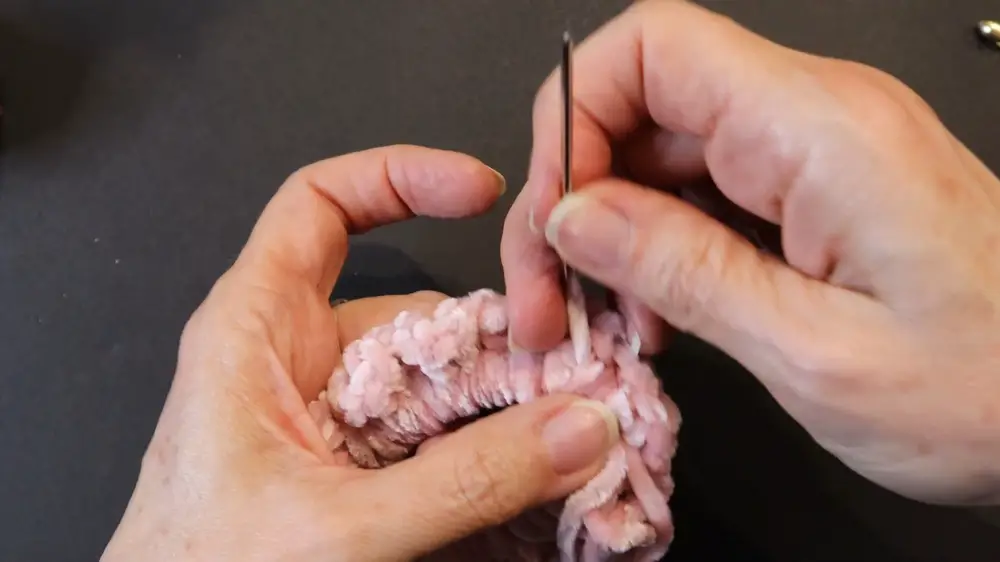
Weaving in the Ends
- Use the darning needle to weave in the loose ends securely through the stitches.
- The yarn used in this project is forgiving and doesn’t show the weaving, which helps maintain a neat look.
Conclusion
This crochet scrunchie project is super easy and beginner-friendly! I hope this breakdown helps! This should provide a comprehensive understanding of what the video covers step by step.


