Add charm to your wardrobe with a free crochet flower corset top, featuring stunning floral designs that blend comfort and style effortlessly!
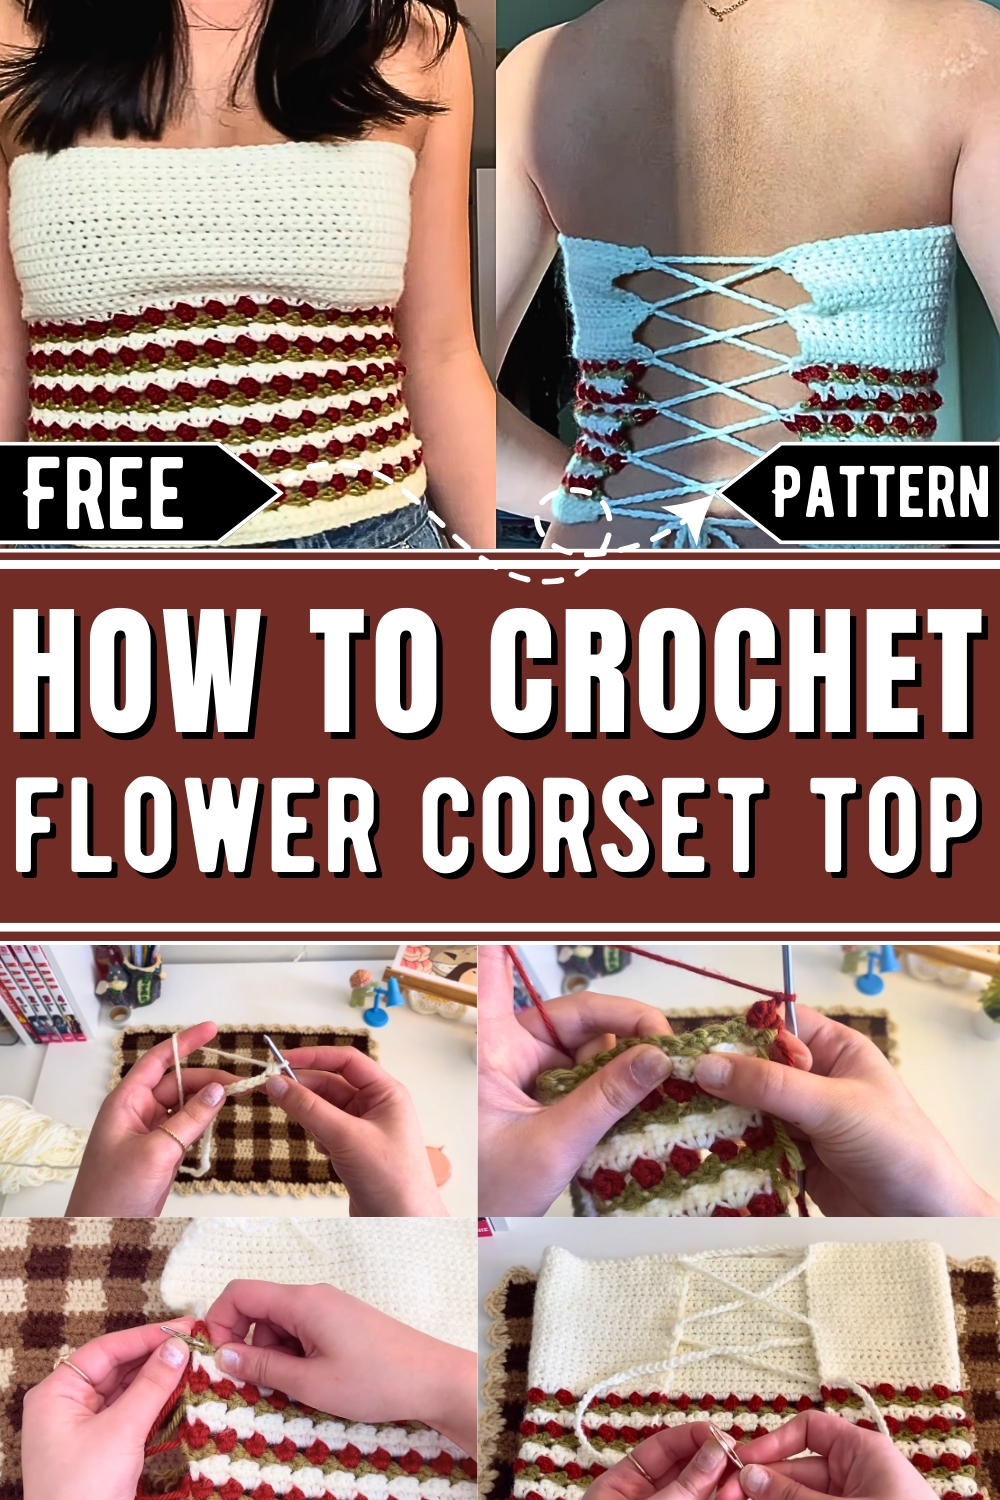
Lovely Crochet Flower Corset Top
Featuring vibrant floral patterns, this stunning top combines style with practicality, making it a perfect choice for casual outings, festivals, or even stylish layering. The intricate flower designs add a touch of artistry and personality, ensuring it stands out in any wardrobe.Turn heads with the timeless beauty of a crochet flower corset top—where elegance meets comfort. This corset top is lightweight and breathable, making it ideal for warm weather or an evening event. Adjustable lacing provides a customizable fit, offering support and ensuring comfort all day long. Its versatility means it can be paired with jeans, skirts, or flowy trousers for countless outfit combinations.
Handmade with care and attention to detail, the flower corset top captures a unique aesthetic while celebrating the charm of crochet techniques. It appeals to those looking for fashion that reflects individuality and creativity. The floral details add a natural and feminine vibe, making it as eye-catching as it is practical.
A crochet flower corset top isn’t just clothing; it’s a wearable work of art, turning a simple outfit into a bold statement. Both stylish and functional, it’s a great way to express your love for handmade, thoughtful fashion pieces.
Crochet Flower Corset Top
Materials Needed
- Yarn:
- Main color (base): Enough to cover the main portion of the top.
- Flower color: Yarn for flowers.
- Stem color: Yarn for stems.
- Recommended: Cotton yarn if wearing in warm weather. Weight of yarn should be Medium 4.
- Hook size: 3.57 mm crochet hook (adjust depending on yarn weight).
- Tape measure: To measure around your waist.
- Scissors: For cutting yarn.
- Darning needle: To weave in ends.
Step 1: Preparing for Your Top
- Measure your waist: Use a tape measure to take your waist measurement while wearing a tight-fitting shirt.
- Round your measurement down to the nearest inch if it’s a half-inch (e.g., 30.5 → 30 inches).
- Calculate chain length: Subtract 6 inches from your waist measurement. For example:
- If your waist = 26 inches, subtract 6 → 20 inches.
- Chain stitches: Chain your adjusted waist measurement (in inches). Ensure the total chain count is divisible by 3.
Step 2: Base Rows
- Create a slip knot, attach yarn to your hook, and chain the required length.
- Ensure the chain measures your desired length by holding it against your waist.
- Adjust chains as needed (keep divisible by 3).
- Row 1 (Single Crochet):
- Start in the second chain from the hook.
- Single crochet into each chain until the end of the row.
- Chain 1 at the end, turn your work.
- Rows 2 & 3 (Single Crochet):
- Single crochet into each stitch until the end of the row.
- At the end, chain 1 and turn your work.
Step 3: Stems
- Attach your stem color yarn:
- Insert your hook into the first stitch of the new row.
- Pull the stem yarn through and secure the white yarn tightly.
- Cut off the excess white yarn, leaving a small tail to weave in.
- Begin the Stem Row:
- Chain 2.
- Skip the first stitch, and in the second stitch, make:
- 1 single crochet.
- Chain 1.
- 1 single crochet into the same stitch.
- Skip 2 stitches, and in the third stitch, repeat:
- 1 single crochet,
- Chain 1,
- 1 single crochet into the same stitch.
- Continue this pattern across the row.
- End the row:
- Skip the second-to-last stitch.
- Make a single crochet into the last stitch.
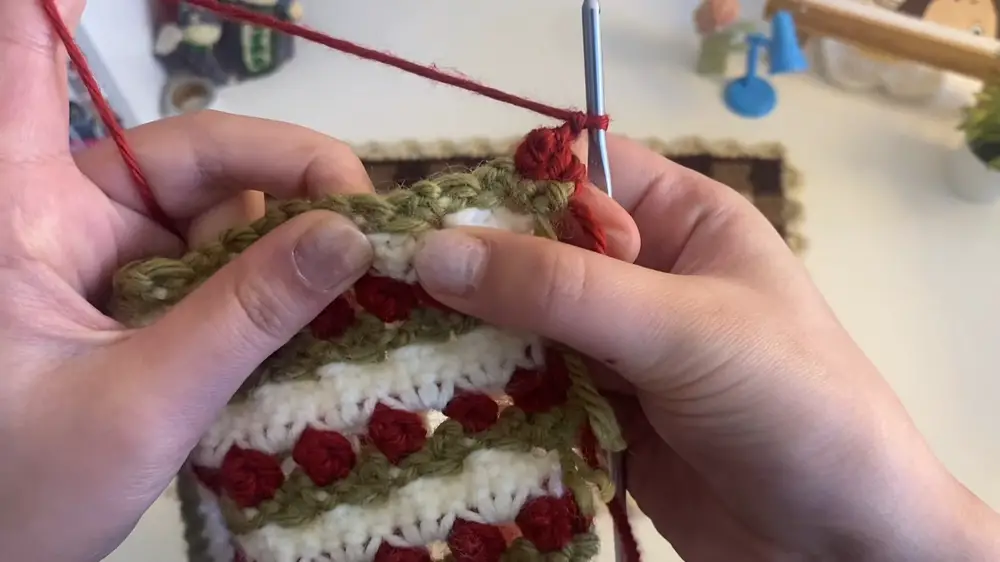
Step 4: Flowers
- Attach flower color yarn:
- Pull flower yarn through and secure.
- Chain 3, turn your work.
- Flower Stitch:
- Skip the first stitch.
- In the second stitch (the middle of the stem stitch), make:
- 3 half double crochets.
- Pull your hook up and remove the loop.
- Insert your hook into the first half double crochet, then reinsert the loop.
- Yarn over and pull through to "close the flower."
- Chain 2.
- Repeat:
- Make 3 half double crochets in the next stem gap.
- Pull up loop, insert hook into the first half double crochet, reattach loop, and close the flower.
- End Row:
- After the last flower, chain 1.
- Half double crochet into the last stitch.
- Note:
- The flower stitch is worked in the "dip-stem-dip" pattern. Each stem is identified by two lines on the left and one on the right. Crochet flowers between these stems.
- The flower stitch is worked in the "dip-stem-dip" pattern. Each stem is identified by two lines on the left and one on the right. Crochet flowers between these stems.
Step 5: White Rows
- Attach base color (white) yarn:
- Pull through and secure the flower yarn.
- Row 1:
- Single crochet into:
- The gap between the last flower and the end of the row.
- Each space between the flowers (3 single crochets per gap).
- Chain 1, turn your work.
- Single crochet into:
- Row 2:
- Single crochet into each stitch across the entire row.
Step 6: Repeat Stem & Flower Rows
- Repeat Steps 3, 4, and 5 until the bottom portion of your top reaches the desired length (up to where your bust begins).
- Example: Make 6 rows of flowers, or approximately 6.5 inches.
- Measure it against your body to check the length.
Step 7: Solid Top Portion
- Continue using base color yarn (white):
- Single crochet across each stitch for solid rows.
- Chain 1 at the end of each row, turn your work.
- Repeat until the top portion wraps comfortably around your bust.
- Example: Complete 23 single crochet rows.
- Measure to ensure the fit.
Step 8: Weave in Ends
- Flip to the back side of your work (where everything looks flat).
- Use the darning needle to weave loose yarn ends into their respective rows:
- Green ends → woven into the stem row.
- Flower ends → woven into the flower row.
- Ensure no strands show on the front side.
- Trim excess yarn.
Step 9: Blocking/Steaming
- This step is optional but recommended to straighten and soften the stitches:
- Steam: Use an iron with steam to lightly stretch and relax your work (dries quickly).
- Block: Stretch your top into desired dimensions and let it dry (takes hours).
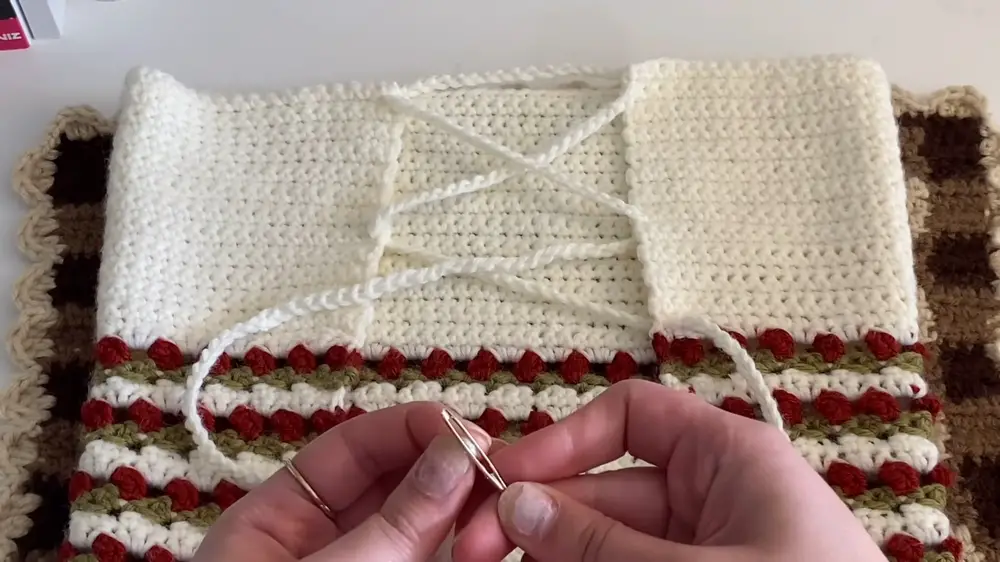
Step 10: Corset Back
- Create Corset Chains:
- Use base (white) yarn or any yarn of your choice.
- Start with a slip knot and chain.
- Mimic the zigzag corset pattern by draping around the edges of the top:
- Create 6–7 passes or zigzags to ensure a secure fit.
- Adjust chain length as needed (leave enough for tying a bow at the end).
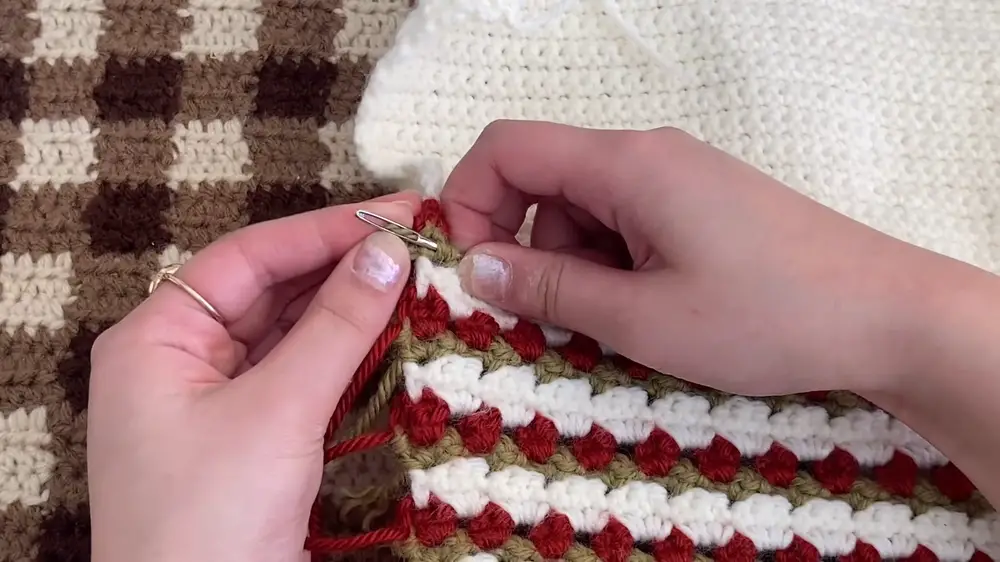
- Weave Corset Chains:
- Use a darning needle or crochet hook to weave the chain along the edges:
- Start at the top back corner and alternate weaving into the left and right side every few stitches.
- Ensure patterns are symmetrical.
- Use a darning needle or crochet hook to weave the chain along the edges:
- Secure Ends:
- Tie a knot at the end of each chain (make multiple knots to prevent unraveling).
- Trim excess ends.
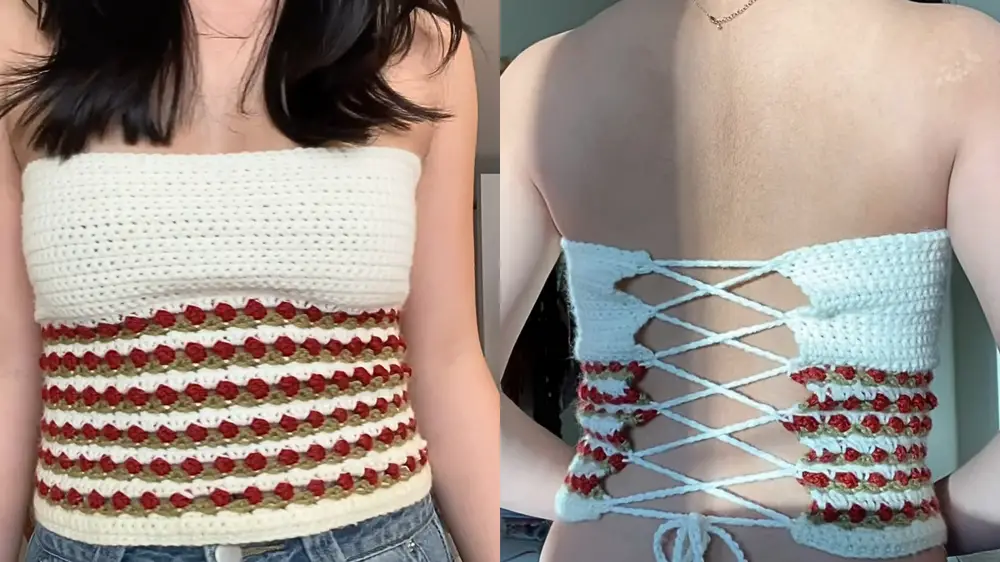
Finished Product
Your flower corset top is now complete! Loosen the corset back before wearing, adjust to fit, and tie a bow to secure the top snugly.