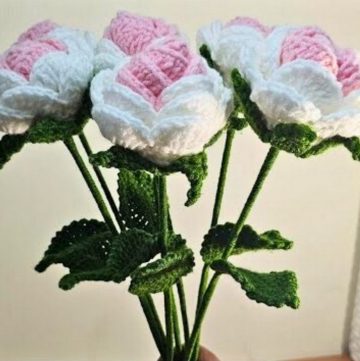
Craft a stunning, lifelike poinsettia with the Crochet Bendable Poinsettia Flower Pattern. Perfect for holiday decor and gifts!
Crochet Bendable Poinsettia Flower Pattern

Tips:
- Tension Control: Keep your stitches even by applying consistent tension throughout your work. This will ensure uniformity in the finished piece.
- Wire Insertion: When incorporating wire, make sure to place it parallel to your working yarn right before starting the second round, as it adds structure to your petals and leaves.
- Customizations: Feel free to adjust the number of chains and stitches to scale your flower up or down to your liking.
- Markers: Use stitch markers to keep track of the beginnings of rounds or significant stitches, especially when working with intricate patterns or when using wire.
- Blocking: To set the shape of your flowers and leaves, you can gently block the finished pieces. Avoid direct heat if the yarn can melt or distort.
- Ending Work: Securely weave in all loose ends to prevent unraveling, especially important when working with the extra elements like wires.

How To Crochet A Poinsettia Flower
Materials:
- Yarn
- Crochet hook
- Wire
- Markers
- Optional: Pearls or flower center material, hot glue
Leaves:
- Slip Knot: Start with a slip knot on the hook.
- Chains: Make 18 chains.
- Round 1:
- Single Crochet (SC): 1 SC in the second chain from the hook.
- Half Double Crochet (HDC): 1 HDC in the next chain.
- Double Crochet (DC): 1 DC in the next chain.
- Extended Double Crochet: In the next chain, yarn over, insert the hook, pull up a loop, yarn over, go through one loop, yarn over, go through two loops, yarn over, go through last two loops.
- Triple Crochets (TC): 2 TCs in the next two chains.
- Increase with Triple Crochets: Make an increase with TC, which means 2 TCs in one chain.
- Repeat Steps: After this, the pattern follows a similar but mirrored pattern on the opposite side.
- Round 2:
- Adding Wire: Place the wire between the hook and the yarn.
- Single Crochets: 1 SC in each stitch to the marker, then 1 SC, 2 chains, and 1 slip stitch (sl st) into the marked stitch, then continue with SCs to the end.
Small Petals:
- Slip Knot: Start with a slip knot on the hook.
- Chains: Make 12 chains.
- Round 1:
- Single Crochet (SC): 1 SC in the second chain from the hook.
- Half Double Crochet (HDC): 1 HDC in the next chain.
- Double Crochet (DC): 1 DC in the next 2 chains.
- Increase with Double Crochets: 2 DCs in the next chain.
- Repeat Steps: Follow the same steps as before for the mirrored side.
- Round 2:
- Wire: As with leaves, add wire and repeat similar steps as above.

Big Petals:
- Slip Knot: Start with a slip knot on the hook.
- Chains: Make 15 chains.
- Round 1:
- Single Crochet (SC): 1 SC in the second chain from the hook.
- Half Double Crochet (HDC): 1 HDC in the next chain.
- Double Crochet (DC): 1 D in the next chain.
- Extended Double Crochet: 1 EDC in the next chain.
- Triple Crochets (TC): 2 TCs in the next two chains.
- Increase with Triple Crochets: 2 TCs in one chain.
- Repeat Steps: Continue with mirrored steps on the other side.
- Round 2:
- Wire: Similarly, add the wire and repeat the SCs with the wire included.

Flower Center:
- Option 1: Fold a piece of flower center material and hot glue it to the stem.
- Option 2: Use pearls on a piece of wire. Thread the pearls, twist the wire, and hot glue as necessary.

Assembling the Flower:
- Attach the small petals around the center.
- Add the big petals around the small petals.
- Use wire and floral tape as needed to keep everything secure and in place.

Finishing:
- Make sure to follow the video for specific visual details and adjustments as you go through each step.
- Wrap flower centers and adjust the arrangement as necessary.
- Continue wrapping stems and securing the petals in layers.
Conclusion:
- Finish by securing everything tightly.
- You can adjust the number of leaves and petals according to your preference.