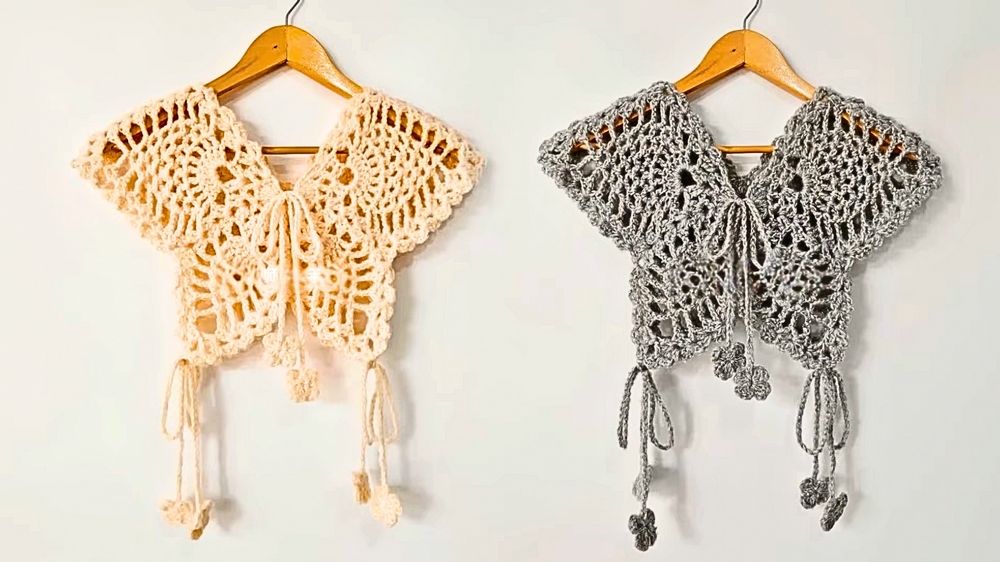
Transform your style effortlessly with this free Crochet Butterfly Shawl Into Top pattern – a versatile and chic project perfect for any season!
Butterfly Crochet Top
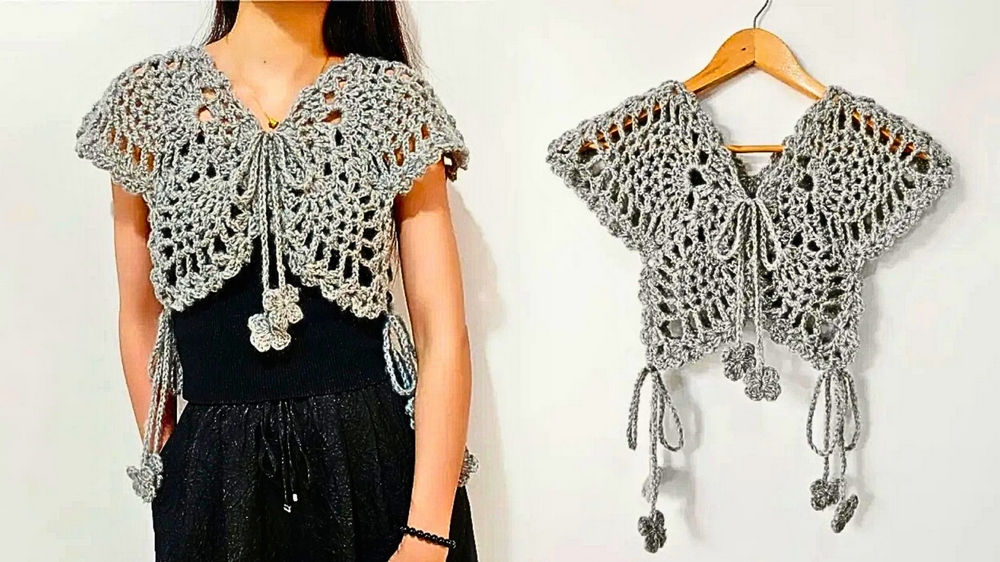
A versatile piece in any wardrobe can often become a favorite, especially when it combines style with function. The Crochet Butterfly Shawl Into Top takes this idea to new heights. Originally intended as a shawl, its clever design allows it to double as a trendy top, making it a dynamic addition to your clothing collection. Whether you're heading to a casual event or looking for something unique to layer over your outfit, this wearable piece offers endless possibilities.

Its butterfly-inspired pattern provides an elegant and lightweight texture, perfect for year-round wear. During warmer months, it acts as a breathable and stylish wrap, while in cooler seasons, it provides a touch of cozy flair without bulkiness. The shawl-turned-top concept is not just about fashion—it’s also incredibly practical, saving space and offering more ways to wear a single piece.
For those who enjoy personal projects, this shawl is also a fulfilling crochet design, bringing an extra layer of charm to handmade wardrobes. Its ability to shift from accessory to top makes it ideal for gifts or those who appreciate multi-purpose clothing. Add this design to your collection for an easy way to elevate your outfits while enjoying the flexibility it brings.
How To Crochet Butterfly Shawl
This shawl is worked in three parts:
- Left wing,
- Right wing, and
- Back panel.
After crocheting these pieces separately, they are joined together to complete the project.
Materials
- Yarn: South African mohair (yarn held 3 strands together for standard size). For larger size, use 4 strands.
- Hook size: 7.0 mm for standard size; 8.0 mm for larger size.
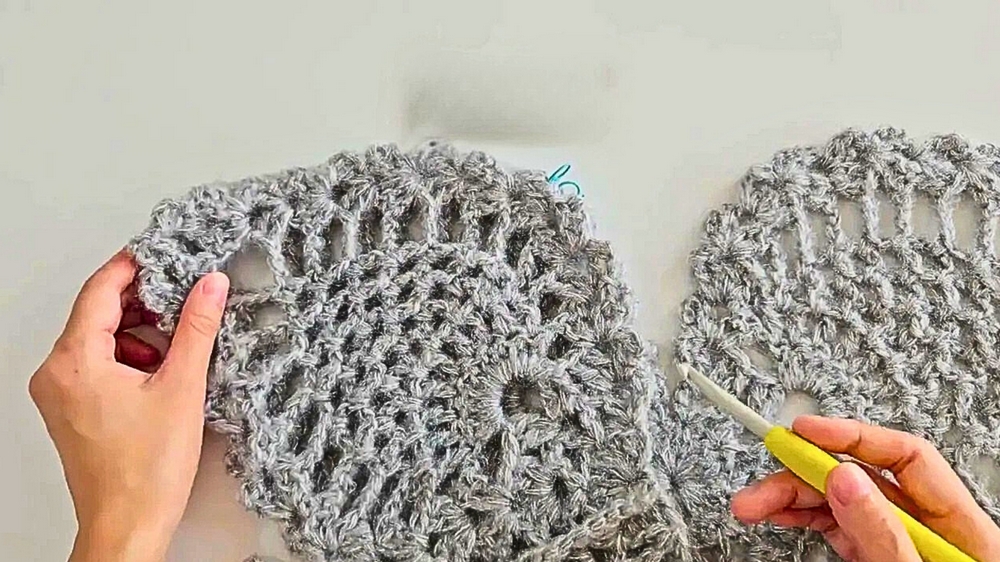
Part 1: Front Wings
The left and right wings (front) are crocheted using the same technique. Begin with the following:
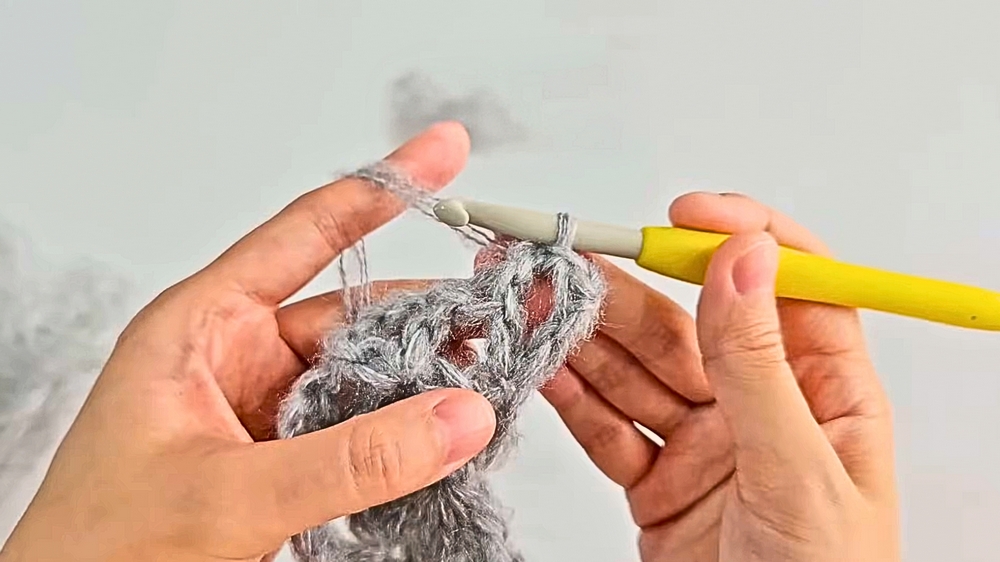
Row-by-Row Instructions
- Row 1 (Setup):
- Start with a foundation of 4 lock stitches (chains).
- Pull the yarn through to connect the circle and form the first row.
- Lock 3 stitches (as one "long stitch"). Wrap around the loop to create the first long stitch.
Pattern:
- On the first stitch: Crochet a long stitch, skip 2 stitches, and make a long stitch on the next stitch.
- Chain 2 from the same position and crochet a long stitch again. Repeat this sequence across with skipped stitches and loops.
- Row 2:
- Lock 1 stitch. Turn your fabric.
- Insert the hook into the gap between long stitches and pull to secure.
- Lock 3 stitches (as one long stitch), crochet another long stitch in the same place, and chain 2 stitches.
Pattern:
- In each gap: Crochet 2 long stitches, chain 5, then crochet 2 more long stitches in the same gap.
- Continue repeating this sequence across each gap.
- Row 3:
- Lock 1 stitch. Turn the fabric. Crochet a slip stitch into the gap between the long stitches from the previous row.
- Lock 3 stitches to form the first long stitch in the group. Make another long stitch in the same position.
Pattern:
- In each gap: Crochet 2 long stitches, chain 2, then 2 more long stitches.
- Between long stitches from the previous row, insert short stitches connected by chains for decorative loops.
- Row 4 and beyond:
- Continue repeating the sequence of long stitches and decorative loops based on the pattern above. Gradually, decrease stitches as needed to maintain symmetry.
Small Wing Sections:
Follow similar steps, but reduce the stitch count in rows to create smaller wing areas toward the edges.
Part 2: Back Panel
- Start by crocheting 26 long stitches in the first row.
- Work the front half of the back panel on the first 13 stitches, then the second half on the remaining 13 stitches.
- Use the same pattern as the front wings for consistency.
Joining Pieces (Assembly)
- Align the edges of the front wings and back panel.
- Starting at one shoulder:
- Rejoin the yarn at the 7th row of one wing.
- Insert the hook between stitches on row 8 of the back panel, crocheting slip stitches and chaining 4 stitches alternately.
- Repeat this for 8 total repeats to complete one shoulder.
- Use the same method to join the other wing to the back panel.
Finishing Touches
- Tie Ropes:
- Chain 60 stitches to form a rope for tying the shawl.
- At the end of the rope, crochet small decorative flowers:
- Form a magic ring, make 2 standing stitches, and crochet petals using a mix of long stitches and slip stitches.
- Final Assembly:
- Attach ropes to either side of the shawl.
- Tie them into bows when wearing the butterfly shawl.
Additional Notes
- Adjust the stitch count and number of rows for a larger or smaller shawl.
- The "decorative loops" with chains provide the wing-like effect that mimics a butterfly.