Bring out your creativity with this free Crochet Flower Top tutorial—perfect for adding a handmade, boho-chic flair to your wardrobe effortlessly!
Crochet Flower Top Pattern
Once, a simple thread found new life as a stylish flower top, thanks to the art of crochet. The free Crochet Flower Top guide offers crafters an invaluable opportunity to turn yarn into wearable elegance. Perfect for warmer months, this tutorial guides you through each step, ensuring that even beginners can produce a stunning piece that looks both professional and fresh. All you need is some yarn, a crochet hook, and a willingness to try something new.
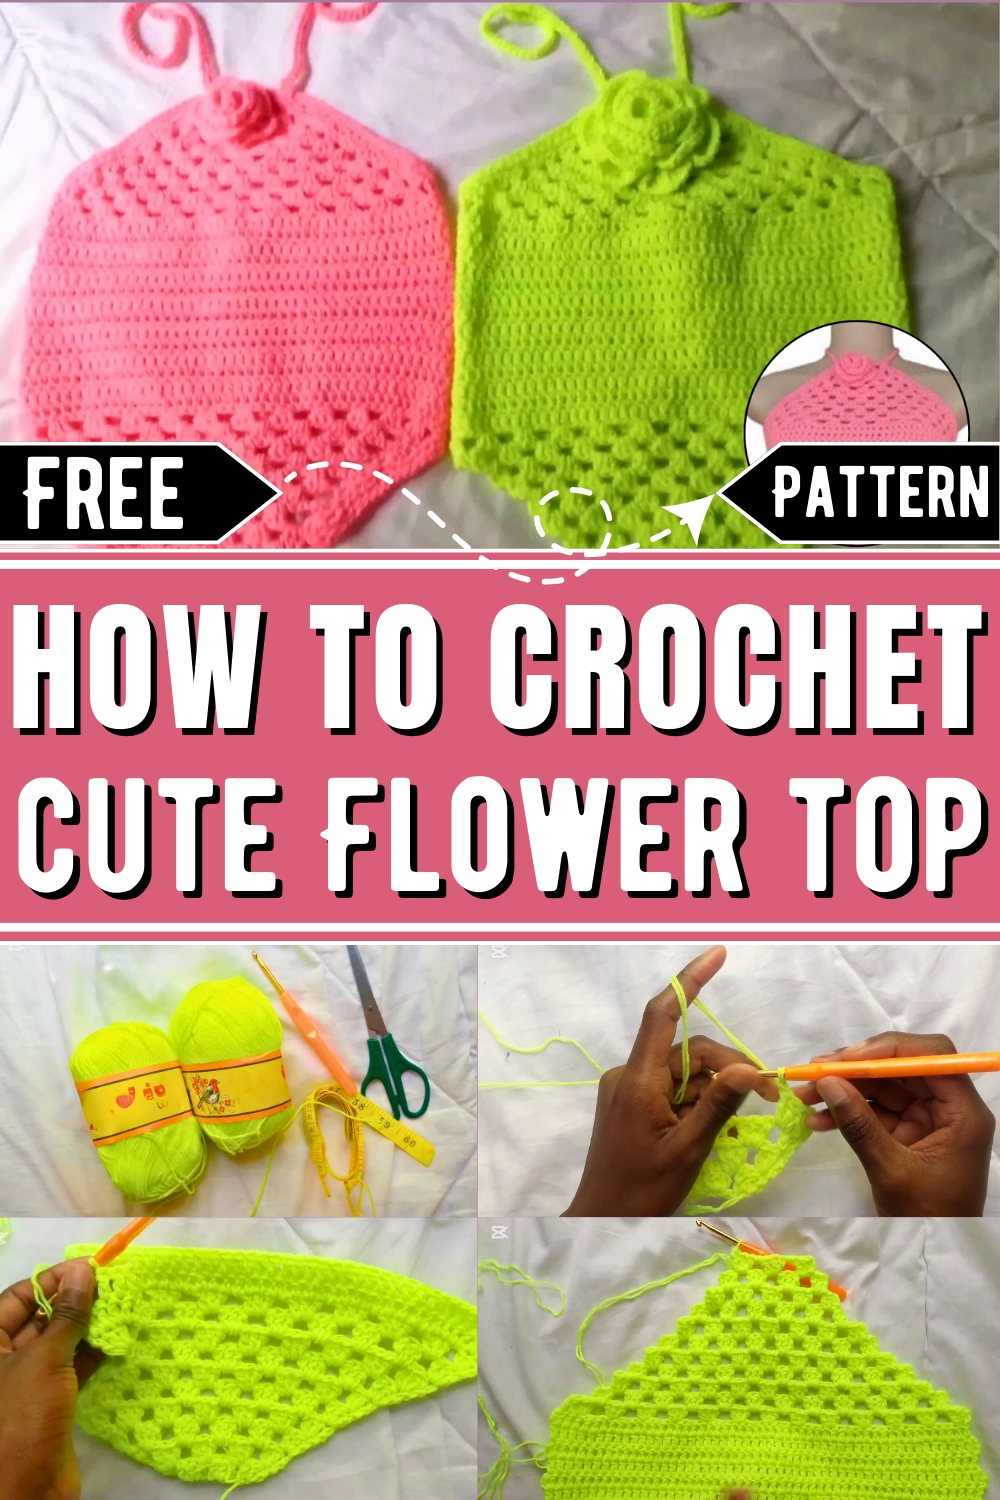
The Crochet Flower Top is more than just a garment; it’s a versatile addition to any wardrobe. It can be paired with jeans for a casual day out or layered over a dress for a touch of bohemian flair. Making your own top fosters creativity and mindfulness, allowing for a therapeutic crafting experience. Once completed, you’ll have a unique piece that reflects your style and hard work. This endeavor not only hones crafting skills like reading patterns and stitching but also results in a functional piece that is as beautiful as it is practical. Every stitch becomes an investment in self-expression, making it a rewarding project for anyone seeking to add a personal touch to their fashion choices.
How To Crochet Flower Top
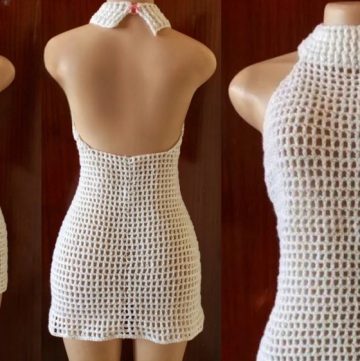
The video introduces viewers to the process of making a crochet flower top. The tutor highlights that the top design has slight variations that can be adjusted depending on personal preferences and sizes. The tutorial focuses on a beginner-friendly process, starting from the top and working downwards.
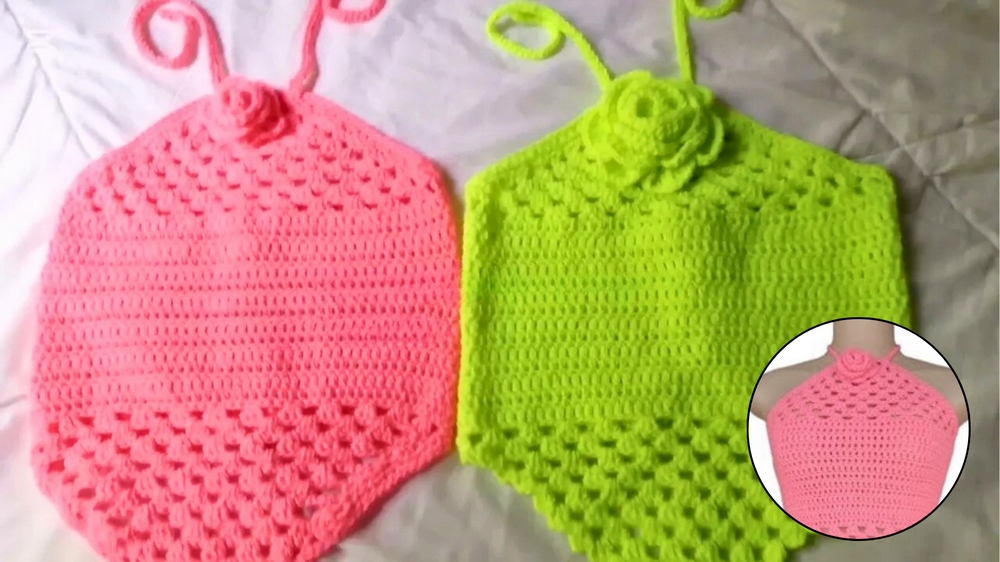
Materials Needed:
- Yarn (your preferred type)
- Crochet hook matching the yarn size
- Scissors
- Measuring tape
Step by step Guide
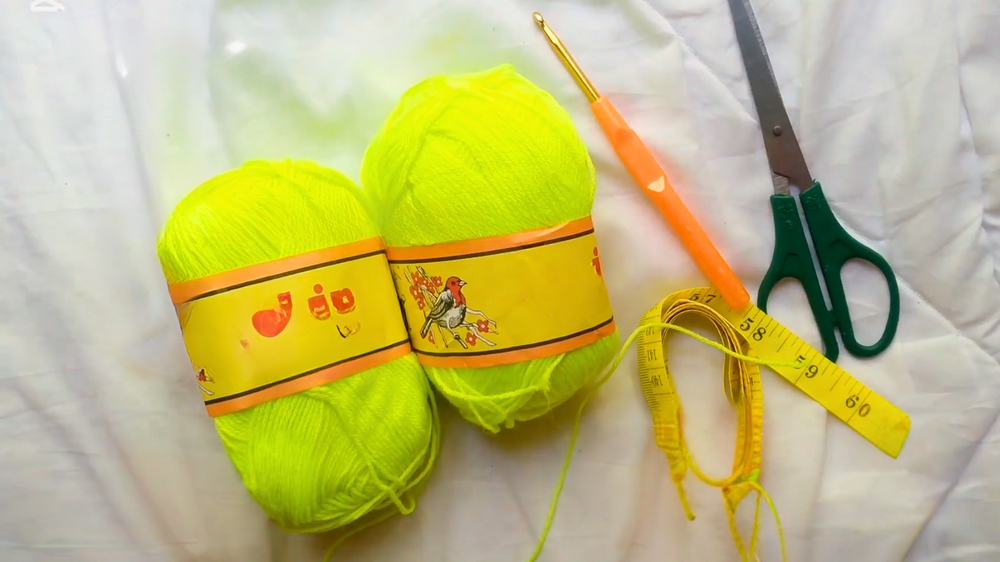
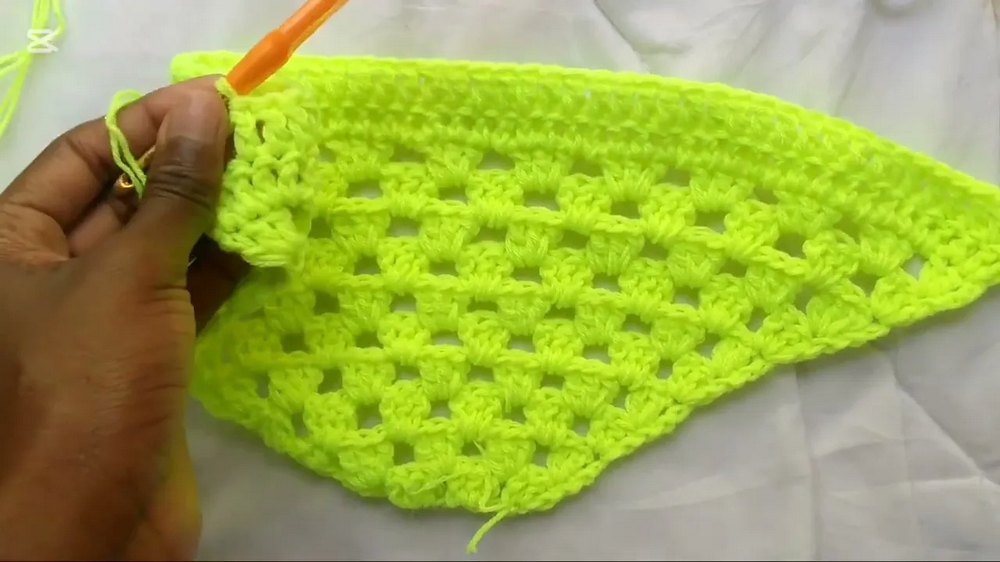
Step 1: Foundation Chain
- Slip Knot: Start by making a slip knot.
- Chain Base: Chain 10.
- Count 4 chains from the hook, and in the fourth chain, make a double crochet (DC).
- Create 3 DC into the same stitch.
- Chain 1, skip a stitch, and continue making 3 DC into each skipped stitch.
- At the end, work 3 DC into the last stitch.
- This completes the first row.
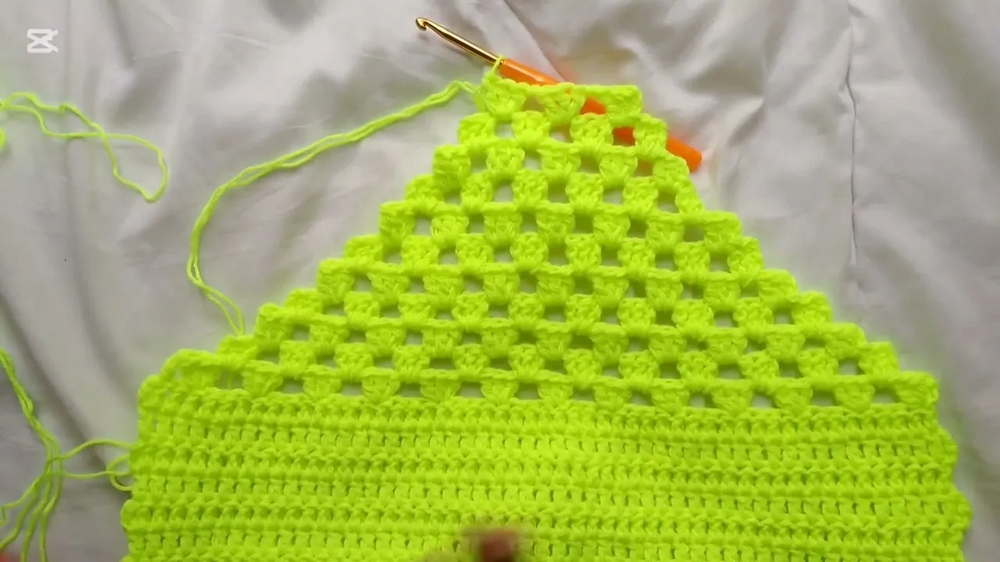
Step 2: Build the Granny Stitch Rows
- Chain 3 to start the next row (this counts as a DC).
- Into the first stitch, make 2 DC (this creates an increase).
- Chain 1 and make 3 DC into each chain space from the previous row.
- At the end of the row, find the chain 3 from the previous row, and into its third chain make 3 DC (this creates another increase).
- Repeat this pattern for 10 rows, increasing at the beginning and end of each row.
Step 3: Transition Section
- Chain 3 to turn your work for the next row.
- Make DC stitches into every stitch across the row (including previous chain spaces).
- Continue this process for 14 rows of DC (double crochet).
Step 4: Begin the Lower Section (Decreasing to Shape the Waistline)
- Start a row with granny stitches again (3 DC with chain spaces).
- Chain 3, make 3 DC into the next stitch, chain 1, and skip 3 stitches before working the next 3 DC.
- At the end of the row, only 1 or 2 stitches might remain—work a single DC in one of these stitches to balance the row.
- On every following row:
- Slip stitch into the first few stitches to shift your starting point into the next chain space.
- Decrease the number of granny stitch clusters in each row by following the same skipping and chaining pattern.
- Decrease rows until you have 11 rows and only 3 granny stitch clusters remaining at the bottom.
Step 5: Finish the Bottom Section
- Create a straight finish by working single crochet (SC) stitches along the edge.
- Add decorative SC stitches (or leave plain) on the rows where the granny stitch ends at the bottom.
Step 6: Side Panels
- From the side of the top (aligned with the armhole section), attach yarn with a slip knot.
- Work 10 rows of DC into the sides to create the side panels.
- For each row, identify spaces between stitches and rows to ensure the panel is secure and even.
- Repeat for both sides.
- After completing the panels, finish the edges with single crochet stitches.
Step 7: Strings
- Make the Back Panel Strings:
- Create a chain of 120.
- Slip stitch into each chain to create a sturdy string.
- Attach to the sides of the back panels and weave through the spaces for tying.
- Make the Neckline Strings:
- Chain 50.
- Slip stitch back through the chain and attach to the neckline.
- Repeat for the opposite side of the neckline.
Step 8: Add Finishing Touches
- Complete all edges using single crochets for a polished look.
- Weave in all loose ends to ensure the top is neat and secure.
Tips for Resizing:
- For larger or smaller sizes:
- Adjust the foundation chain with an even number.
- Add or reduce rows for the granny stitch section, DC section, and side panels.
- Measure the bust size to ensure proper fitting and alignment for the individual wearing the top.
Final Look:
- The completed top features granny stitch rows transitioning into rows of DC.
- The waist is shaped by decreases, and side panels provide extra coverage.
- Strings are added for tying at the back and neck, completing the design.