
Free Crochet Bucket Hat pattern featuring the trendy Waistcoat stitch for a chic, stylish accessory. Perfect for fashion-forward crocheters!
Crochet Bucket Hat Trend With Waistcoat stitch
Avoid blending into the crowd! This season, try out this pattern and experience a fun, creative way to elevate your style. This innovative crochet technique, often known as the knit stitch, creates a dense and sturdy fabric that's perfect for hats. The resurgence of the bucket hat trend combines practicality with flair, offering sun protection while making a bold fashion statement.

The Waistcoat stitch's unique, knit-like texture adds a sophisticated touch to your hat, setting it apart from traditional crochet designs. To master this stitch, insert your hook into the "V" of the stitch below, rather than the usual top loops, resulting in a beautifully tight and structured finish. This crochet hat pattern is beginner-friendly, featuring clear, step-by-step instructions and accompanying visuals to guide you through every stage.
Tip:
Choose a slightly larger hook than usual to avoid overly tight stitches, making your project more enjoyable and ensuring a comfortable fit.

How To Crochet Bucket Hat With Waistcoat stitch
Materials Needed
- Yarn (100g, 300m, acrylic; budget yarn from ALDI)
- Hook size: 8 (5mm)
- Stitch marker
Step by step Guide
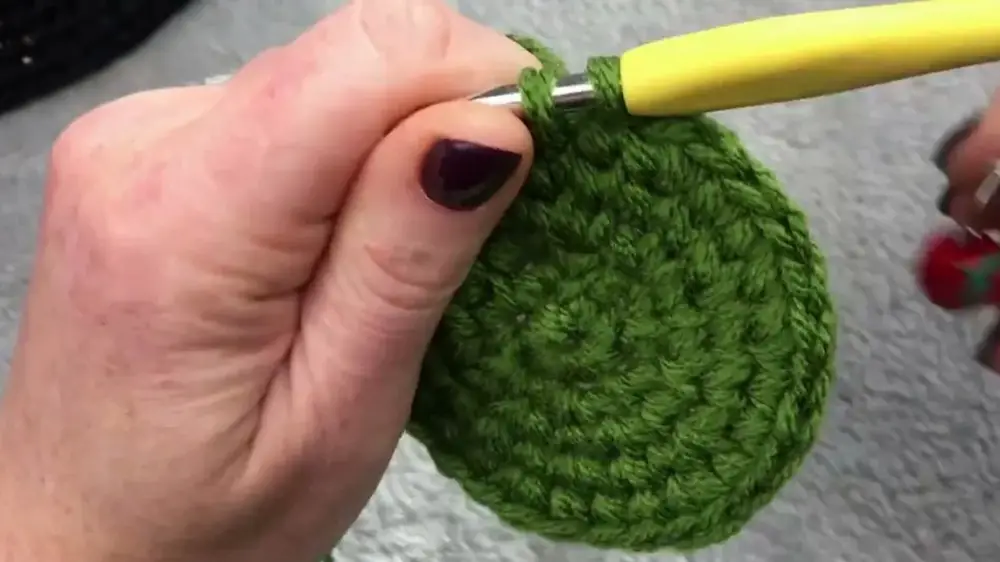
Step 1: Create the Magic Loop
- Make a magic loop or magic circle.
- Insert your hook, pick up the yarn, pull it out, and create a loop with the working yarn. This will not count as your single crochet (sc), it's just the starting loop.
- Crochet 6 sc into the magic circle.
Step 2: Begin Increasing
- Row 2: Increase in every stitch (2 sc in each stitch). Total of 12 stitches.
- Row 3: 1 sc and increase (2 sc in one stitch). Total of 18 stitches.
- Work into the middle of the sc for a firmer shape instead of the usual top loops.
- Row 4: Increase and 2 sc. Total of 24 stitches.
- Row 5: 3 sc and increase. Total of 30 stitches.

- Row 6: Adjust the starting stitch by moving one sc to the side. Increase and 4 sc. Total of 36 stitches.
- Row 7: Begin in the middle between two increases. 5 sc and increase. Total of 42 stitches.
- Row 8: 6 sc and increase. Total of 48 stitches.
- Row 9: Continue the pattern, increasing the number of sc between each increase by 1 stitch per row.
- Row 12: Final row for the top of the hat (12 rows total). Total of 70 stitches, measuring 17.5 cm (7 inches).

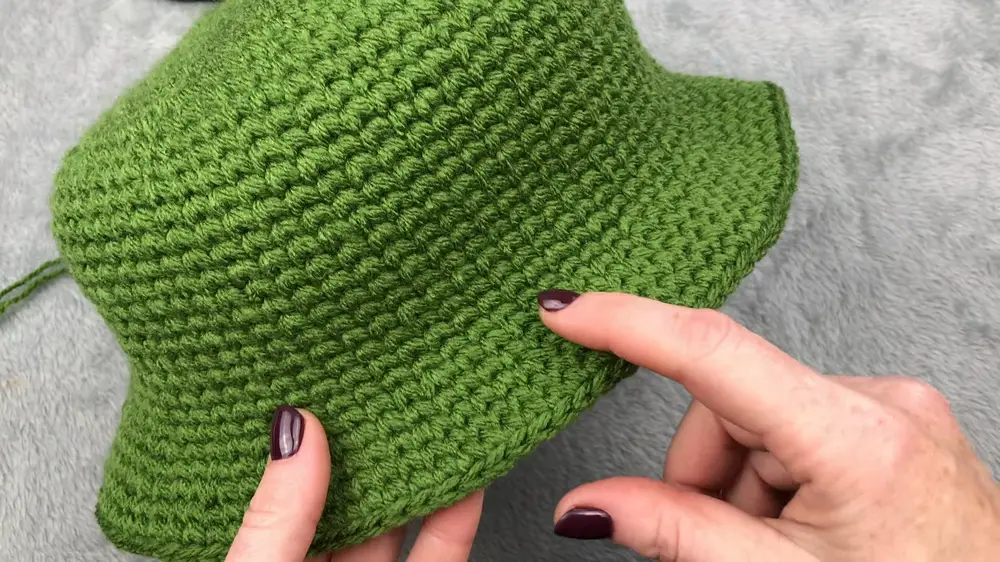
Step 3: Form the Sides
- Row 13-26: No increases or decreases; make 1 sc into each stitch to form the sides.
- Mark the first stitch of each row.
- After 14 rows for the sides, the hat should reach 16 cm.
Step 4: Create the Brim
- Row 27: Increase with a pattern of 4 sc and 1 increase.
- Row 28: 1 sc in each stitch without increasing.
- Row 29: Increase with a pattern of 3 sc and 1 increase.
- Row 30-31: 1 sc in each stitch without increasing.
- Row 32: Make a small increase with a pattern of 10 sc and 1 increase.
Conclusion
Congratulations! Your trendy bucket hat is ready. This hat is not only stylish but also functional, with the ability to adjust it to fit perfectly. If you want a larger brim, feel free to add a few more rows.


