
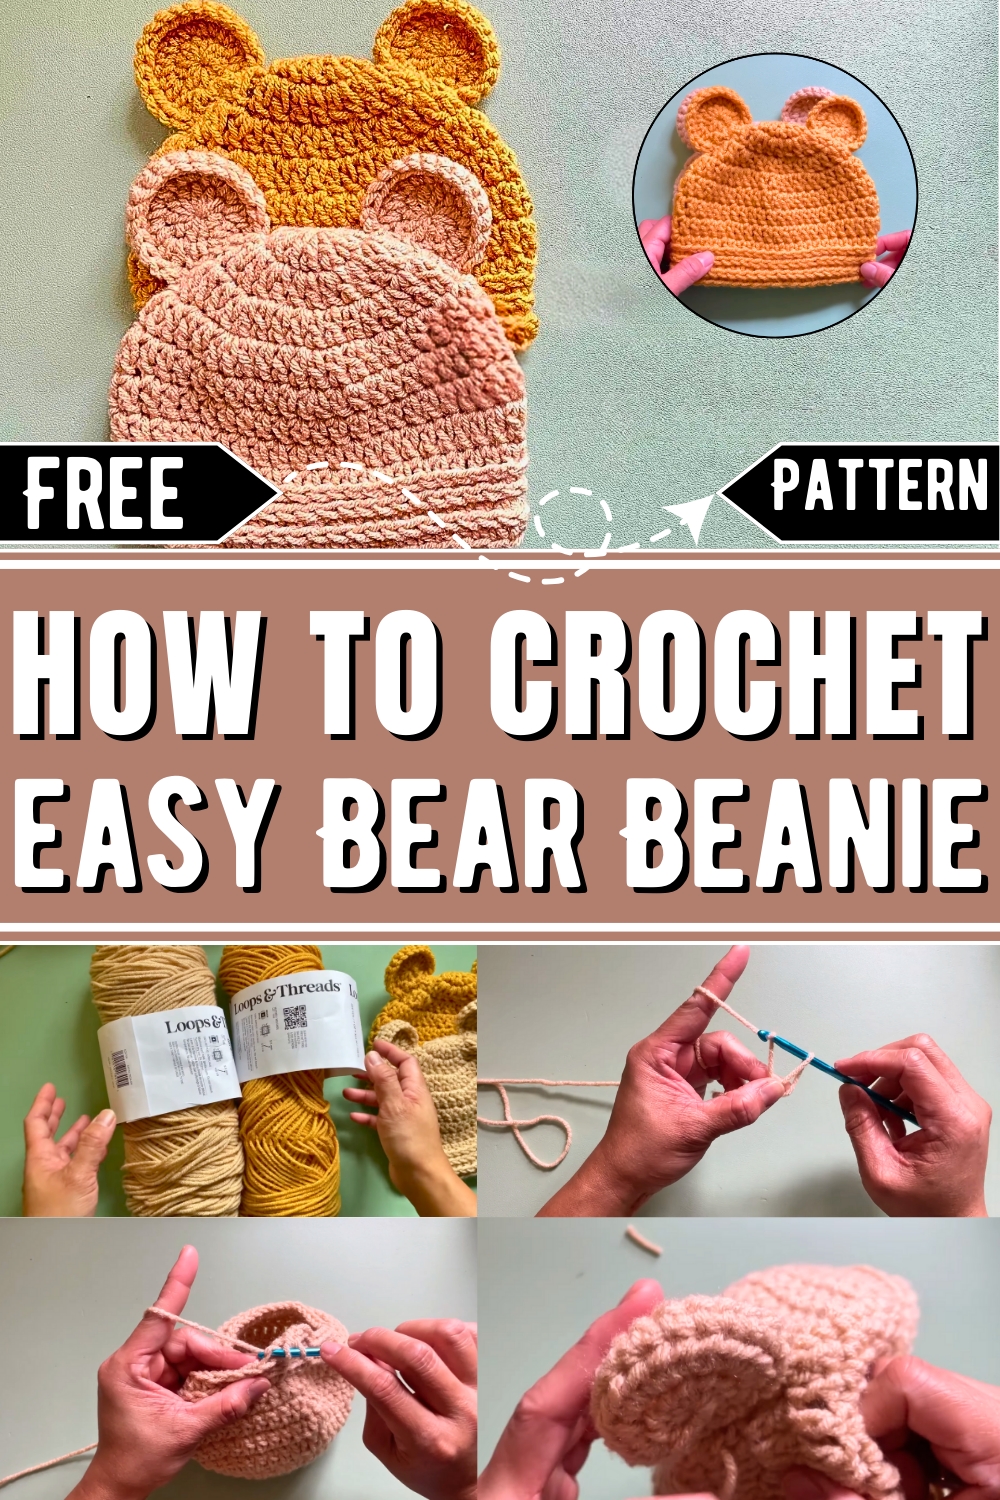
Crochet an adorable and cozy accessory for little ones with this easy-to-follow bear beanie pattern, perfect for adding charm and warmth to any outfit.
Cute Crochet Bear Beanie Pattern
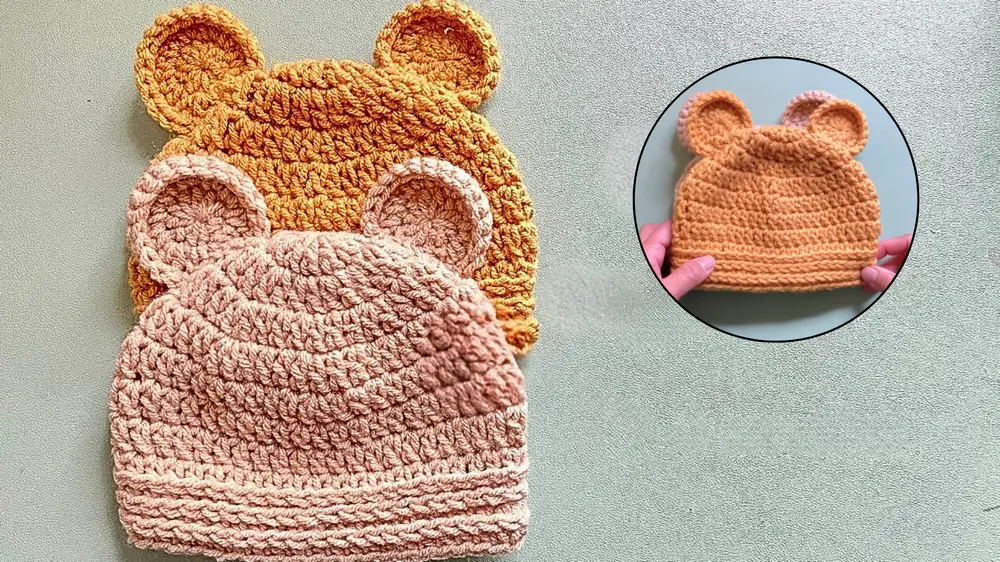
Tiny, cozy beanies hold a special charm, especially for the youngest members of the family. The free crochet bear beanie pattern for 3 to 6 months brings warmth, comfort, and cuteness together in one snug design. Perfectly sized for infants, this adorable bear-themed accessory adds playful character to their wardrobe while keeping them cozy during chilly moments. Made with soft yarns, the texture is gentle against their sensitive skin, ensuring they stay comfortable throughout the day.
This pattern isn’t just a wonderful gift option for baby showers or birthdays; it’s also a joyful way to build handmade keepsakes that can be cherished for years or even passed down as a sentimental memory. Beyond its charm, the beanie is practical for cool mornings, outdoor walks, or simply as an extra layer in breezy weather. With its recognizable bear ears, it’s ideal for casual photoshoots and capturing milestone moments.
The pattern is straightforward enough for both beginners and experienced crocheters, offering the joy of completing a satisfying project while creating something useful. Whether making one for a loved one or donating to community causes, this bear beanie design combines style with function in the sweetest way possible.
How To Crochet Bear Beanie For Kids
Materials Required
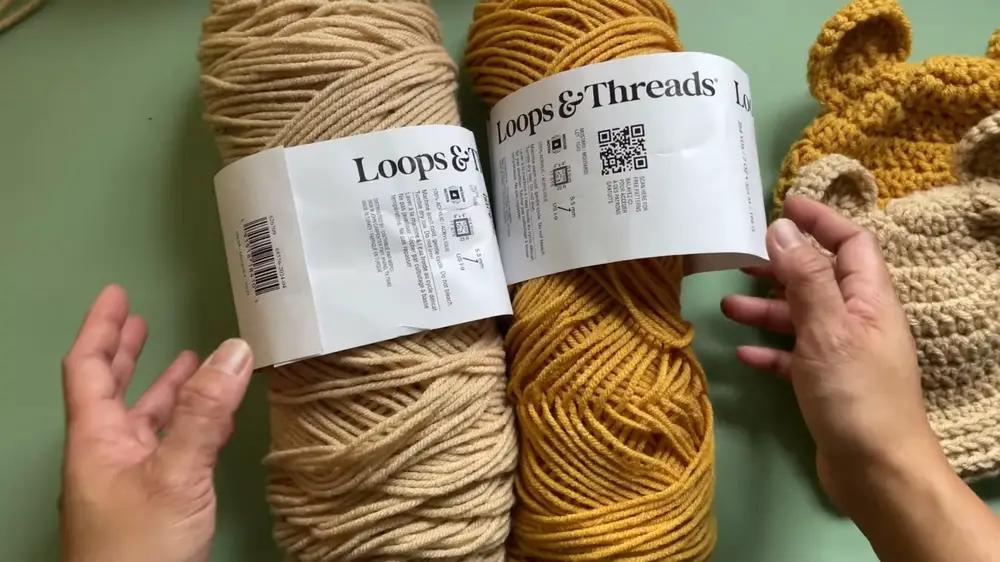
Yarn
- Type: Medium weight yarn (#4), also known as worsted-weight yarn.
- Recommended: Loops and Threads Soft Classic Acrylic Yarn (100% acrylic).
- Alternative: Cotton yarn (less stretchable).
Tools
- Crochet Hook: 5mm crochet hook.
- Yarn Needle: For sewing parts (e.g., the ears).
- Scissors: For cutting the tail ends.
Measurements
- Hat circumference: Typically 16 inches (stretchable).
- Hat height: 5.75 inches from top to bottom.
Crochet Baby Bear Beanie Tutorial
In this pattern, I'll provide step-by-step details on how to crochet a baby bear beanie for babies aged 3 to 6 months. The pattern is simple, beginner-friendly, and results in an adorable beanie featuring ears! The baby bear beanie uses double crochet, half-double crochet, single crochet stitches, and a knit-like stitch achieved by crocheting into the back loop.
Step-by-Step Instructions
1. Start with the Magic Loop (Round 1)
- Create a magic loop to begin.
- Wrap yarn around your fingers, twist it, and hold the loop.
- Insert the hook through the loop, yarn over, and pull through to make the starting loop.
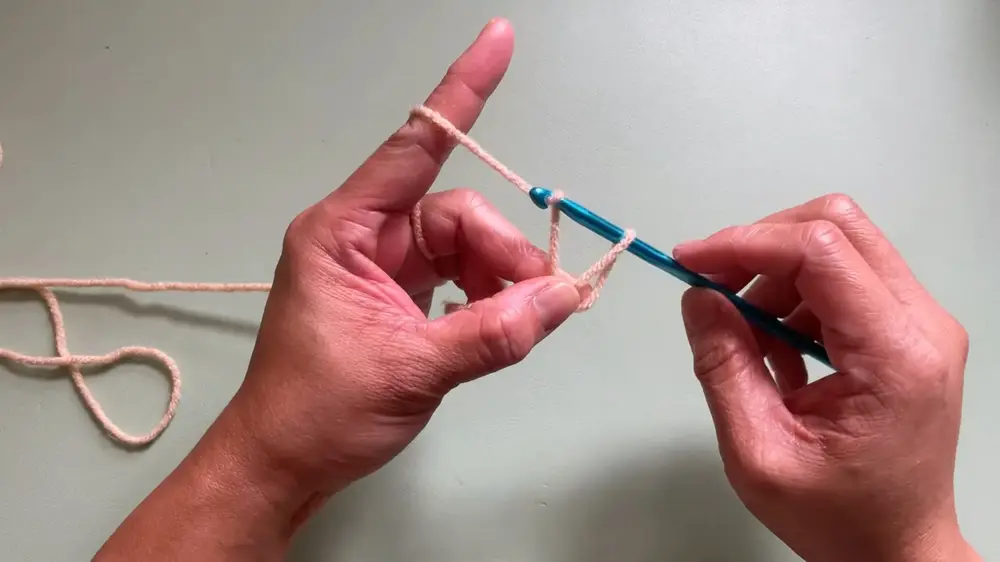
- Chain 2 (does not count as a stitch).
- Crochet 12 double crochet stitches within the magic loop.
- Yarn over, insert hook into the loop, yarn over again, pull up (3 loops on hook).
- Yarn over, pull through 2 loops; yarn over again, pull through final 2 loops.
- Pull the tail to tighten the magic loop.
- Slip stitch into the first double crochet to close the round.
2. Round 2 (Increase Round)
- Start with chain 2 (does not count as a stitch).
- Make 2 double crochet stitches in each stitch from Round 1 (total 24 stitches).
- Crochet over the tail while working to hide it.
- Slip stitch to the first double crochet to close the round.
3. Round 3 (Alternate Increase Sequence)
- Start with chain 2.
- Follow this sequence: 1 double crochet in next stitch, 2 double crochet in the following stitch (increase).
- Repeat this sequence 8 times around.
- Total stitches: 32.
- Slip stitch to the first double crochet to close the round.
4. Round 4 (Adding More Stitches)
- Start with chain 2.
- Follow this sequence: 3 double crochet stitches in consecutive stitches, then make 2 double crochet stitches in the next stitch (increase).
- Repeat this sequence 8 times.
- Total stitches: 40.
- Slip stitch to the first double crochet to close the round.
5. Round 5 (Fewer Increases)
- Start with chain 2.
- Follow this sequence: 9 double crochet stitches in consecutive stitches, then 2 double crochet stitches in the next stitch (increase).
- Repeat this sequence 4 times.
- Total stitches: 44.
- Slip stitch to the first double crochet to close the round.
6. Round 6 and 7 (No Increases)
- Start each round with chain 2.
- Make 44 double crochet stitches around (1 per stitch).
- Slip stitch to the first double crochet to close each round.
7. Round 8 (Half Double Crochet)
- Start with chain 1.
- Make 44 half double crochet stitches around:
- Yarn over, insert hook into stitch, pull up a loop (3 loops on hook).
- Yarn over, pull through all 3 loops.
- Slip stitch to the first half double crochet to close the round.
8. Round 9 and 10 (Back Loop for Knit-Like Stitch)
- Start each round with chain 1.
- Make 44 half double crochet stitches, but crochet into the back bump (third loop) of each stitch to create a knit-like effect:
- Locate the back bump beneath the back loop.
- Yarn over and complete the half double crochet as normal.
- Slip stitch to close each round.
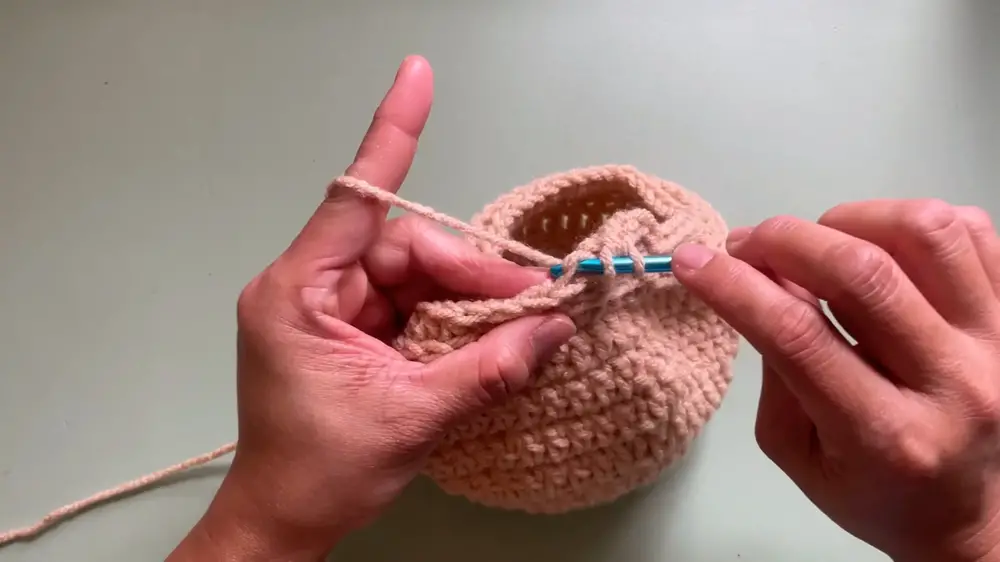
9. Round 11 (Single Crochet Finish)
- Start with chain 1.
- Make 44 single crochet stitches, all in the back bump:
- Insert hook into back bump, pull up a loop (2 loops on hook).
- Yarn over, pull through both loops.
- Slip stitch to close the round.
- Chain 1 to secure the stitches, cut the yarn, and weave in ends.
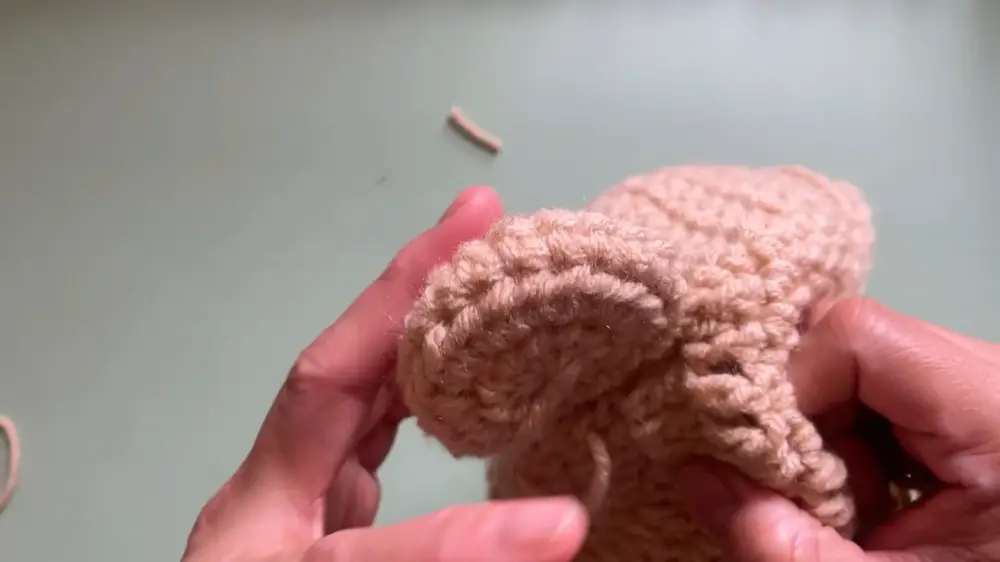
Crocheting the Ears
Step 1: Round 1
- Create a magic loop and start with chain 1 (does not count as a stitch).
- Crochet 10 half double crochet stitches inside the loop.
- Pull the tail to close the loop, then slip stitch to the first half double crochet.
Step 2: Round 2
- Start with chain 1.
- Make 2 half double crochet stitches in each stitch (total: 20 stitches).
- Slip stitch to the first half double crochet.
Step 3: Round 3
- Start with chain 1.
- Make 1 single crochet stitch per stitch (total: 20 stitches).
- Slip stitch to close, then chain 1 and cut the yarn (leave a long tail for sewing).
Attaching the Ears
- Use a yarn needle and align the ears at Rounds 2 and 3 of the hat.
- Sew carefully, ensuring the ears face the right direction and lie straight on the hat.
- Pull stitches tight and secure with a knot at the back.
- Trim excess yarn.
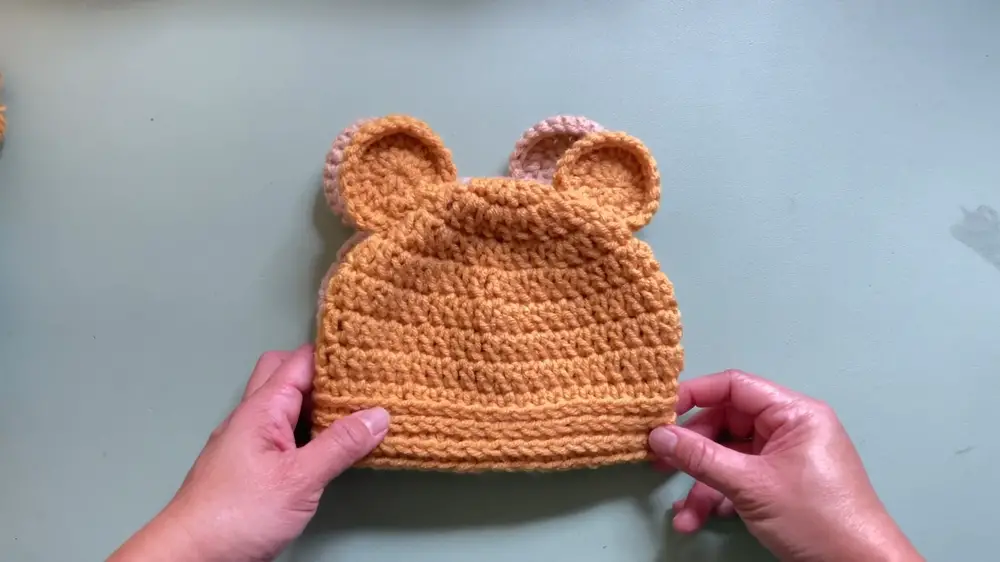
Conclusion
You’ve now created a beautiful baby bear beanie! This adorable hat is perfect for gifts, photography props, or everyday wear for babies aged 3 to 6 months. The textured knit-like detail and bear ears give the hat a unique and cozy finish.


