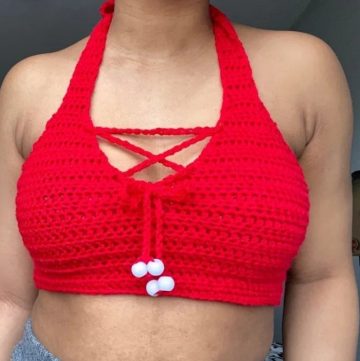
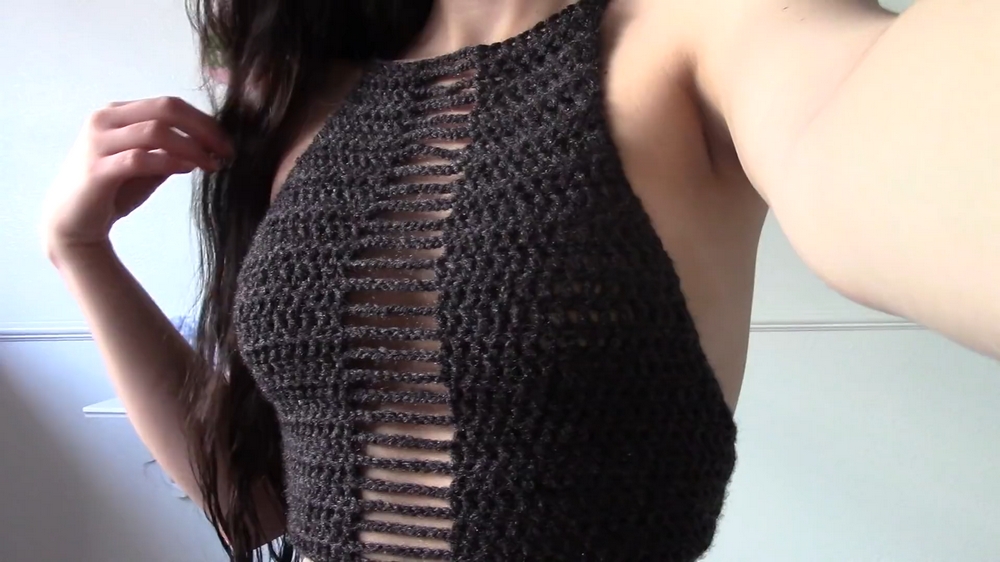
Let the charm of Crochet Top Alexia Halter Pattern inspire your wardrobe with its delicate detail and flattering halter style for day or night.
With its origins tracing back to bohemian inspiration, the Crochet Top Alexia Halter is a delightful and versatile addition to any fashion enthusiast’s wardrobe. This pattern turns a simple outfit into a striking ensemble. Its airy design naturally fits around the shoulders, making it ideal for sun-soaked days or warm evenings. The halter style offers a flattering silhouette that accentuates the neckline and provides a comfortable fit, allowing for easy movement whether lounging at the beach or dancing the night away.
Crochet Top Alexia Halter

The Top Alexia Halter is more than just a stylish piece of clothing; it's a relaxing and enjoyable project. Making this halter top helps to calm the mind and improve hand coordination. Each stitch provides a break from daily stress and can turn into a fun hobby. It flatters any figure and can be worn in various ways—over jeans for a casual look or as chic beachwear. The handmade quality adds a personal touch that showcases your unique style. The Crochet Top Alexia Halter Pattern transforms simple yarn into a beautiful, functional garment you can be proud of.
How To Crochet Halter Top
This tutorial provides step-by-step guidance on creating a detailed crochet halter top, perfect for festivals or summer wear. The tutorial includes simple stitches and techniques, making it a great project for crocheters of all skill levels. The halter top is customizable to fit different body shapes and sizes.
Materials
- Yarn: Size 4 yarn (e.g., Vanna’s Choice).
- Crochet Hook: Size 5mm hook.
- Additional Tools: Scissors (for cutting yarn) and a yarn needle (optional for weaving in ends).
Abbreviations of Stitches
- CH: Chain
- DC: Double Crochet
- SLST: Slip Stitch
Step-by-Step Pattern Details
1. Starting the Base
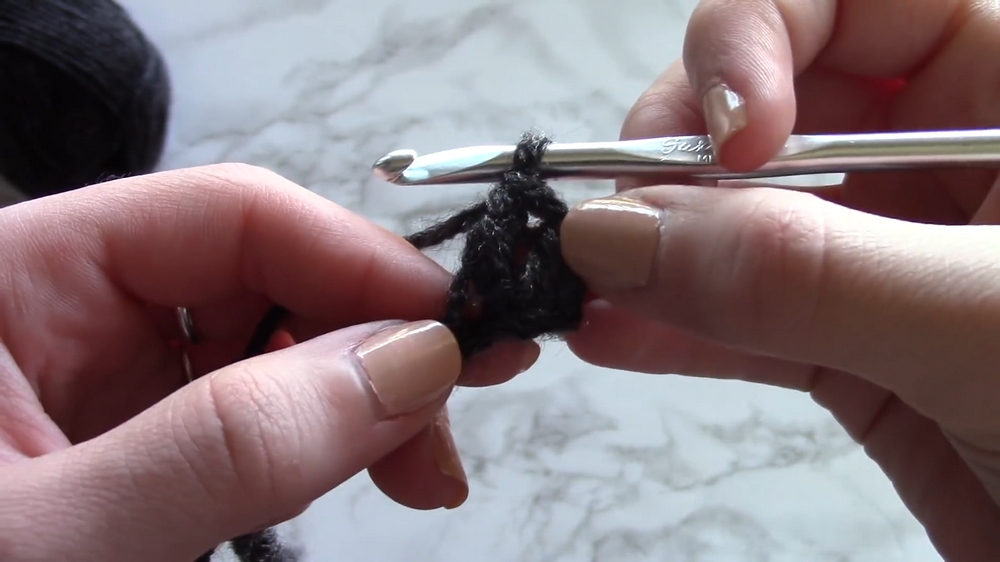
- Begin by creating a slip knot.
- Insert your crochet hook into the slip knot and chain enough length to cover the front of your torso (this varies depending on your body type). Hold the chain against your body to determine the ideal length.
2. Working the Foundation Row
- Use Double Crochet (DC) stitches across the entire chain.
- Start by wrapping the yarn over your hook (yarn over).
- Insert the hook into the chain stitch.
- Yarn over and pull through.
- Move through loops (step by step as outlined in the video).
- Continue placing DC stitches until you reach the end of the row.
3. Adding the Middle Detail
- Crochet DC stitches until you reach the desired middle section of the halter top (this section will remain solid to cover the chest).
- For the middle detail:
- CH 10.
- Skip 10 stitches and DC into the 11th chain.
- Continue DCs across the rest of the row.
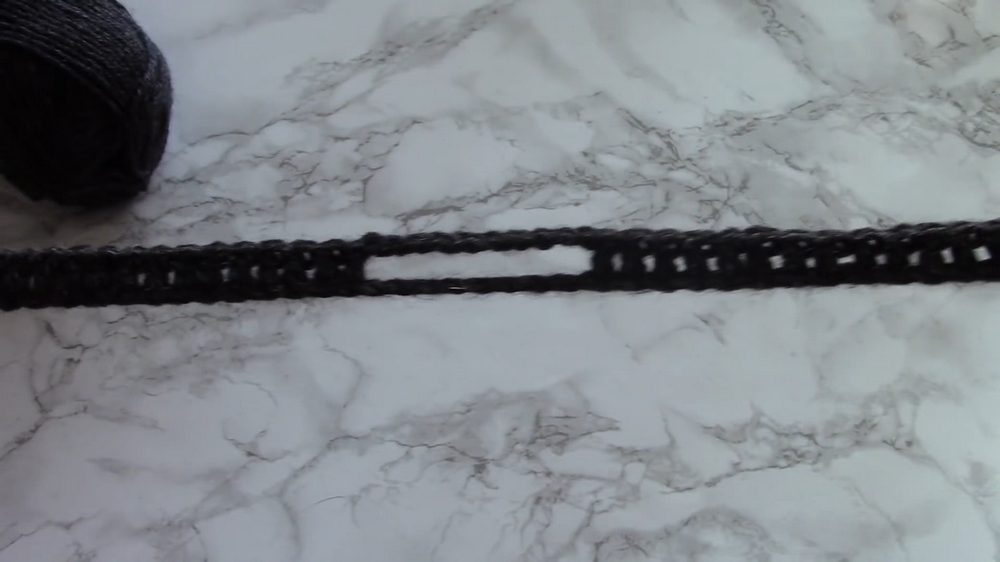
Tip: Ensure both sides of the design are symmetrical. This initial section may be a bit tricky, but the pattern will become repetitive after this.
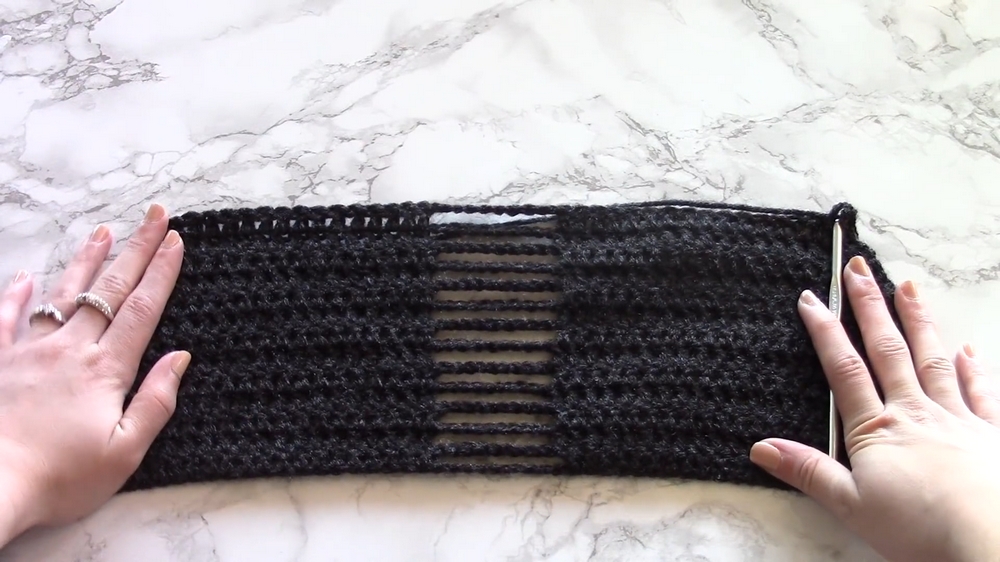
4. Creating Rows
- Chain 2 at the end of each row and flip the work.
- Continue performing DC stitches across each row:
- When reaching the middle detail area, stack your DC stitches one above the other for the crisscross design.
- Repeat the pattern until satisfied with the length.
5. Shaping the Halter
- To create the triangular "halter" shape:
- At the end of each row, chain 1 instead of chaining 2. Skip the second stitch and DC in the third stitch.
- Continue DC stitches while skipping one stitch at the beginning of each row.
- Begin to see the sides taper inward to form a triangle shape.
6. Adding the Straps
- On the second-to-last row:
- Make a chain of 150 stitches (or adjust as needed for personal fit).
- Turn and complete a Slip Stitch (SLST) down the entire chain for stability.
- Complete the last row of the project, then repeat the strap creation on the opposite side for the second strap.

7. Finishing Touches
- Once the halter is complete, cut the yarn, leaving enough tail to secure the piece.
- Attach the straps to the back of the halter top:
- Crisscross the straps to create a small corset-inspired design.
- Secure the straps on the opposite side of the top at slightly different heights to achieve the desired effect.
Conclusion
Creating this crochet halter top is a fantastic project for both beginners and more experienced crocheters. The design allows for customization to fit all body types. Once complete, the halter top offers a stylish and functional summer piece that can be dressed up or down!