
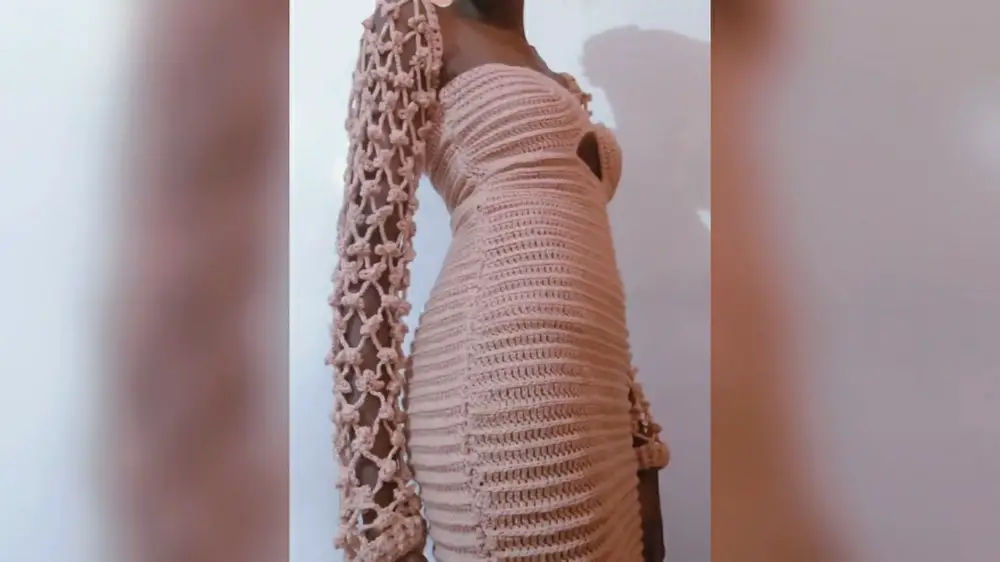
Elevate your style with Crochet Sleeves for Ava Dress! Delicate and airy, these handmade sleeves add a graceful touch to any outfit.
Crochet Sleeves For Ava Dress
Elegance meets handmade beauty with the Crochet Sleeves for Ava Dress! This pattern make delicate, flowing sleeves that add a stylish and graceful touch to any outfit. Designed with soft yarn, the sleeves have a light and airy texture, making them comfortable to wear. Their beautifully detailed stitchwork gives them a classic yet modern look. Perfect for enhancing dresses, they provide warmth without feeling heavy. A simple yet stunning project, they make any outfit feel extra special!

Uses Of Crochet Ava Sleeves:
- Fashion Accessory:
- Layer over tops or dresses for added style.
- Make a fashion statement.
- Functional Wear:
- Provide sun protection with lightweight yarns.
- Offer warmth with heavier yarns.
- Costume Design:
- Ideal for historical reenactments, cosplay, or fantasy costumes.
- Gifts:
- Unique, handmade presents.
- Athletic Use:
- Serve as arm warmers for athletes or dancers during warm-ups.
- Medical Use:
- Cover and protect medical dressings or support braces.
- Craft Sales:
- New product offering for craft shows or online stores.
Crochet Ava Sleeves are versatile and can be used in various practical and decorative ways.
How To Crochet Sleeves For Ava Dress
Materials
- 2.5 mm crochet hook
- Yarn of your choice
Abbreviations
- ch: chain
- sc: single crochet
- sl st: slip stitch
Instructions
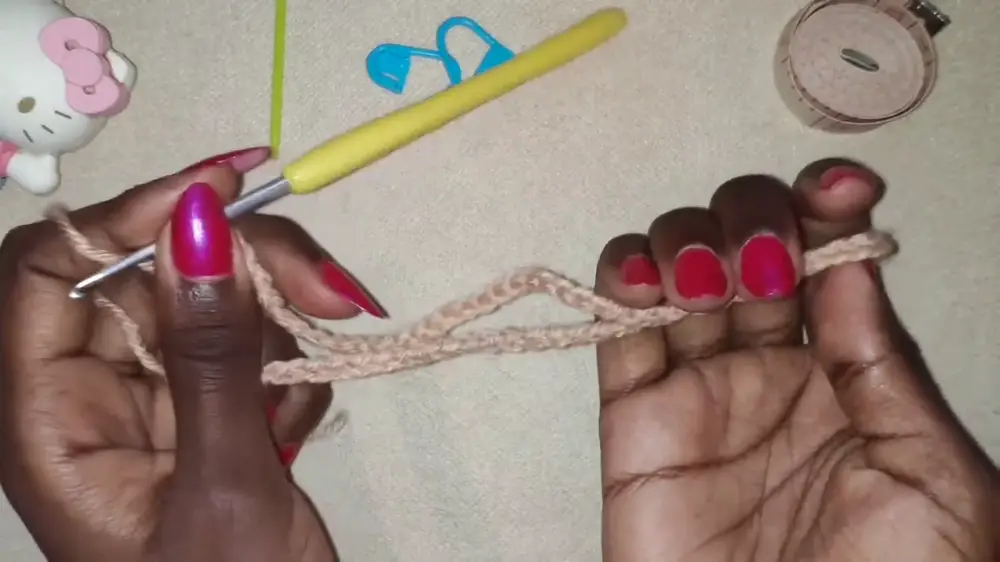
- Starting the Base Chain:
- Make a slip knot.
- Chain (ch) a multiple of 10 to your desired width for the sleeve. Example: ch 70.
- Chain 1 (this will be your turning chain).
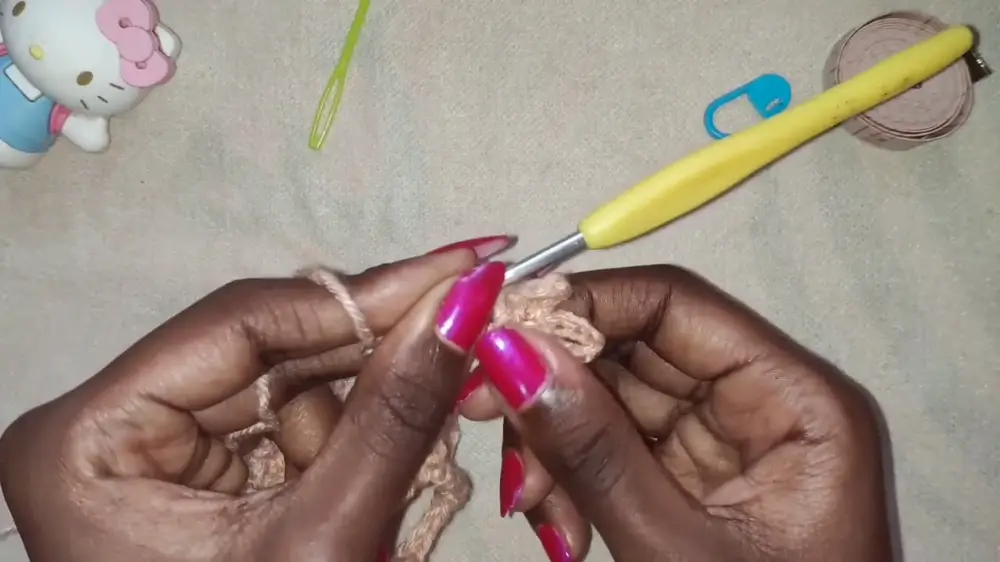
- Row 1:
- Work 1 single crochet (sc) into the second chain from the hook.
- Chain 7.
- To create the picot: chain 1, hold it down, and then chain another 6. Work a slip stitch (sl st) into the chain you were holding down.
- Repeat the picot pattern two more times, to form a total of three leaves.
- Work a slip stitch back into the first chain of the picot.

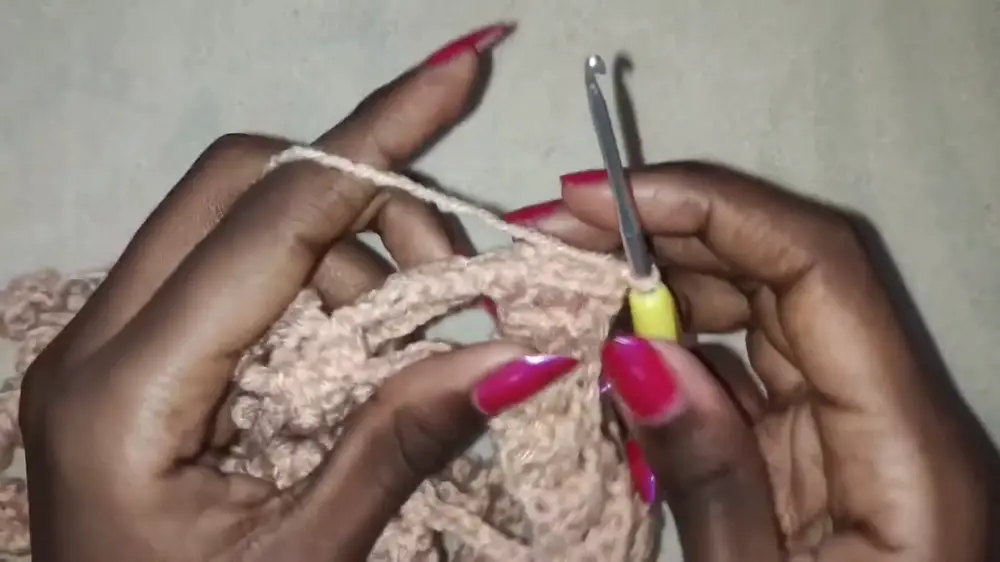
- Chain 7.
- Count 9 stitches from your previous single crochet, and work a single crochet into the 9th stitch.
- Repeat these steps until the end of the row.
- For example, if you started with a chain of 70, you should end with 7 picots.
- Row 2:
- Chain 7 and turn your work.
- Chain 6.
- Create the picot: chain 1, hold it down, and then chain another 6. Work a slip stitch (sl st) into the chain you were holding down.
- Repeat the picot pattern twice more, forming a total of three leaves.
- Work a slip stitch back into the first chain of the picot.
- Chain 6.
- Work a single crochet between the first and second picot leaf from the previous row. Chain 1. Work another single crochet between the second and third picot leaf.
- Chain 6.
- Repeat creating the picot, joining to the previous row, and chaining 6.
- Continue until the end of the row.
- Row 3:
- Chain 7 and turn your work.
- Chain 6.
- Create the picot: chain 1, hold it down, and then chain another 6. Work a slip stitch (sl st) into the chain you were holding down.
- Repeat the picot pattern twice more, forming a total of three leaves.
- Work a slip stitch back into the first chain of the picot.
- Chain 6.
- Attach to the previous row by working behind the picot stitch for row 2. Work a single crochet between the first and second picot leaf while pushing your work towards the back. Chain 1, work another single crochet between the second and third picot leaf while pushing your work towards the back.
- Chain 6.
- Repeat creating the picot, joining to the previous row, and chaining 6.
- Continue until the end of the row.
- Continue Repeating Rows:
- Repeat the process for subsequent rows, with the same structure of chaining, picot creation, and joining to the previous row until you reach your desired length from your shoulder to your wrist.
- Example: 19 rows.
- Final Row:
- Chain 7 and turn your work.
- Chain 6, but skip creating the picots.
- Attach to the previous row, chain 6, and attach again at an interval, until you reach the end.
- Ensure the total stitches match the original chain count. Example: If you started with 70 chains, you should have 70 stitches.
- Finishing and Adjustment:
- Chain 3 and work 1 half double crochet (hdc) into each stitch until the end of the row.
- To make the top part to fit better on the shoulder: Alternate between front post double crochet (fpdc) and back post double crochet (bpdc) decreasing stitches as needed.
- Continue adjusting until the shoulder fits properly.
- Alternatively, sew on an elastic band for a more secure fit.
- Joining the Sleeves:
- Fold the work in half and join using single crochet or follow the video to join using the picot leaves, working in a zigzag pattern.
- Creating the Wristband:
- Work 1 double crochet into each stitch.
- Use front post and back post double crochet to create a stretchy wristband.
- Complete 2 rows or more if needed.
Notes
- Customization will vary based on shoulder size and preference.
- The joins between rows and stitches should be neat to ensure a clean final look.


