
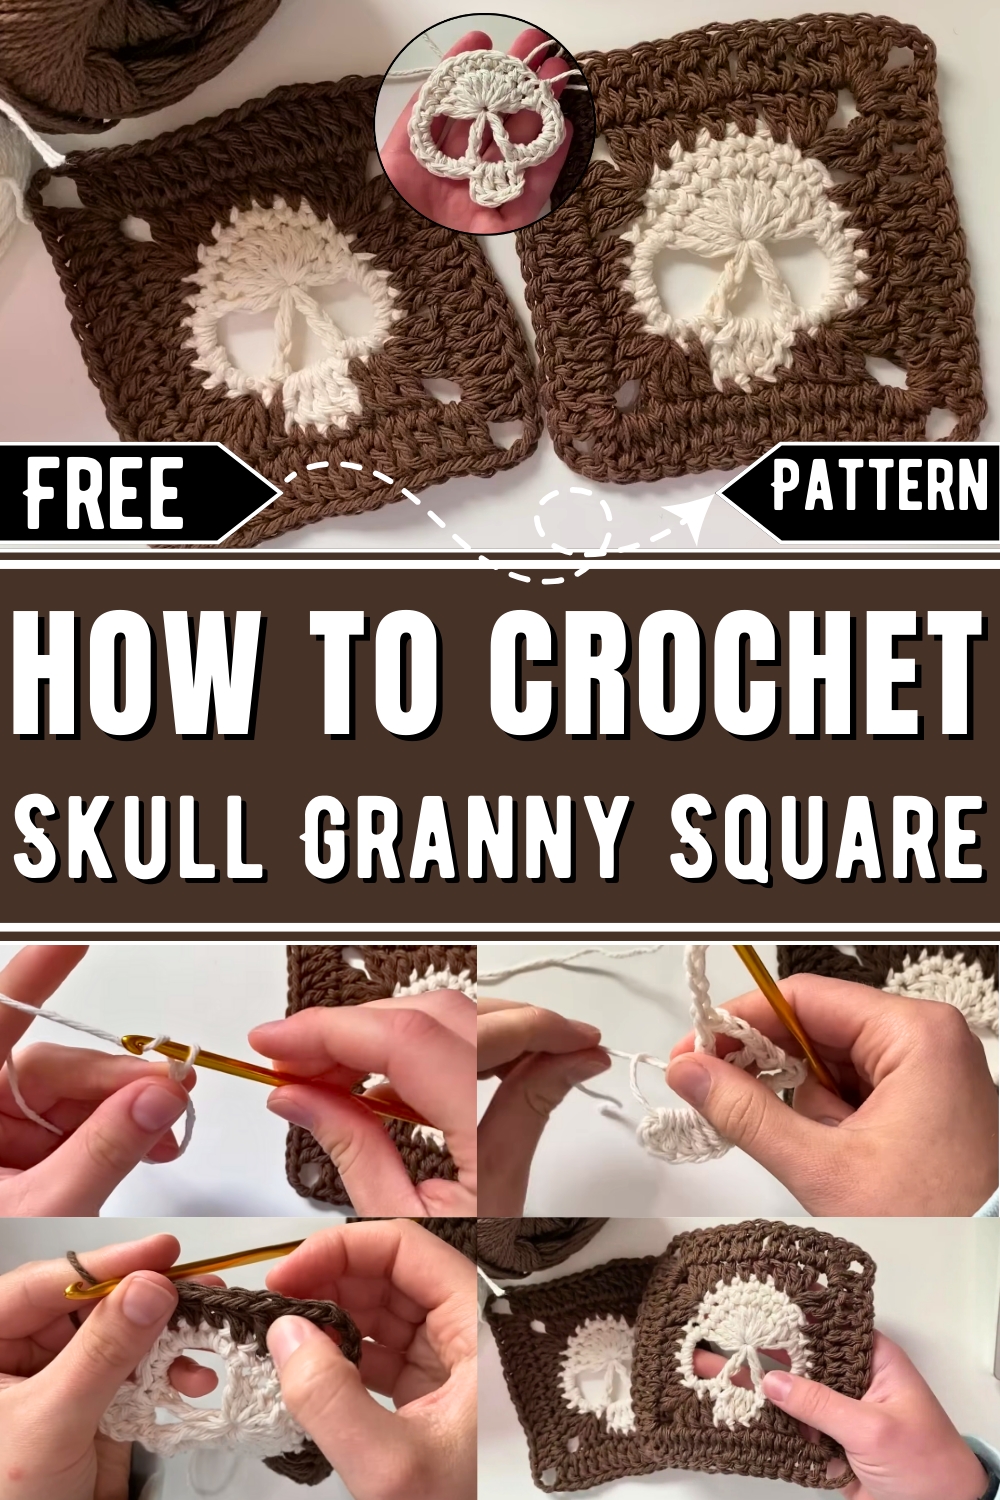
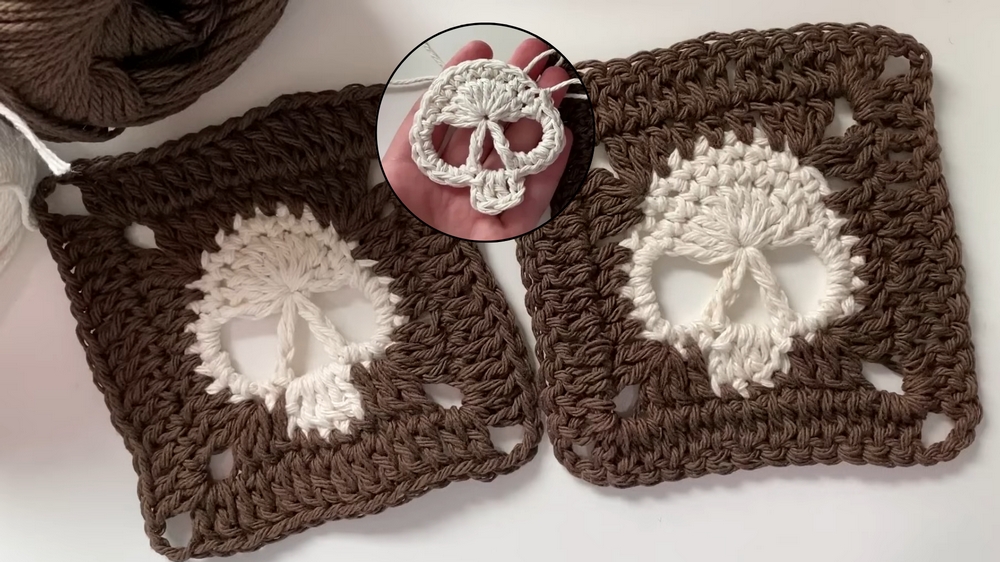
Bring a quirky edge to your crochet designs with this skull granny square pattern, ideal for personalizing blankets, bags, or eye-catching home decor.
Crochet Skull Granny Square
Skulls aren't just for Halloween; they can add a quirky and stylish touch to your designs all year round! The Free Crochet Skull Granny Square pattern is a clever way to combine the charm of traditional granny squares with an edgy twist. Made using basic crochet techniques, this design works wonderfully for beginners and experts alike. These skull squares are not only fun to make but can be used in countless creative projects.
Stitch them together to form a unique blanket or use them individually for decorative pillow covers. They can even be turned into funky tote bags or wall hangings that showcase your personality. Lightweight and versatile, these squares offer a unique way to breathe life into your older yarn stashes, making them great for sustainable crocheting.
Plus, experimenting with different yarn colors allows you to tailor the look to suit your taste or occasion. Whether you're personalizing gifts or simply refreshing your home decor, this granny square pattern is a fantastic way to combine practicality and flair.
How To Crochet Skull Granny Square
Materials Needed
To get started, you’ll need:
- Crochet hook: 4.5mm
- Darning or tapestry needle
- Scissors or clippers
- Two colors of yarn (Lily Sugar and Cream, weight 4, 100% cotton.)
Note: The yarn size will influence the size of the square, but any yarn type is fine.
In this project, you’ll learn how to create a unique skull design within a granny square. Perfect for Halloween, themed projects, or just as an eye-catching addition to your crochet collection, this pattern combines beginner-friendly techniques with a stylish finish.
Step 1: Making the Magic Ring
- Prepare the yarn:
- Pinch the yarn with your pointer finger and thumb, wrap it around two fingers, and form an X shape on your hand.
- Insert the hook underneath both loops of yarn on your hand.
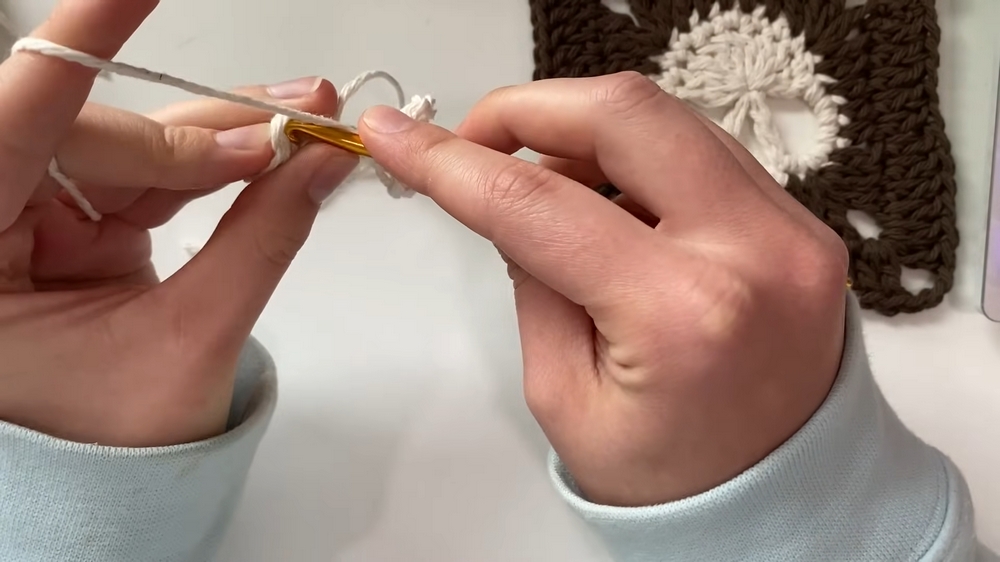
- Create the ring:
- Pull the back yarn forward, turn the hook, and loop it through the ring.
- Once secured, chain 1 to create the magic ring's foundation.
Step 2: Crocheting the Skull Base (First Round)
- Double crochet stitches:
- Yarn over, insert the hook into the ring, pull up a loop, and complete 9 double crochet stitches.
- Hold tension using your fingers for smooth stitches.
- Forming eye sockets:
- Chain 5 for the first eye socket, followed by 1 double crochet into the ring.
- Chain 3, make another double crochet, then chain 5 again for the second socket.
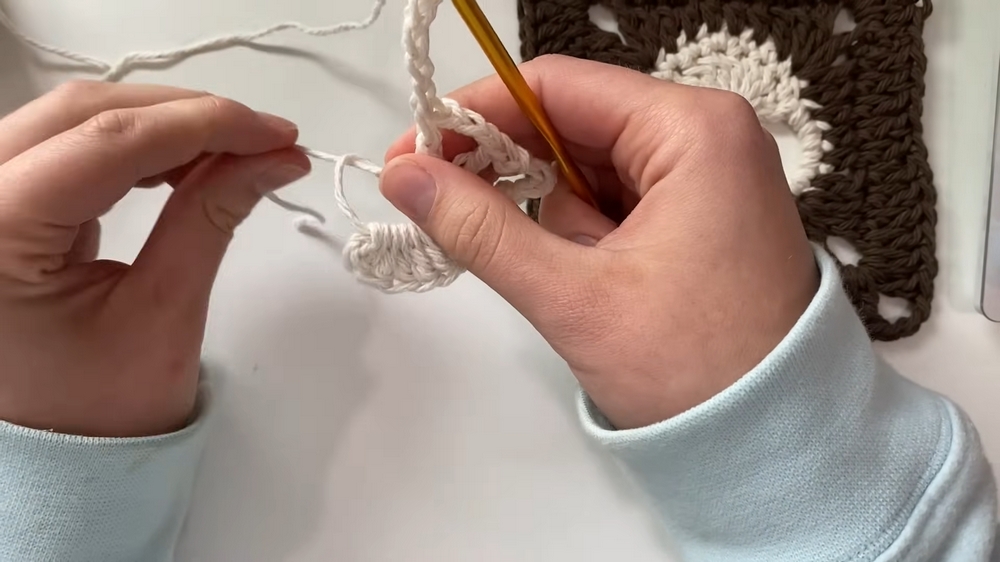
- Join stitches:
- Pull the tail to tighten the ring and form the skull base.
- Slip stitch into the first stitch to secure the round.
Step 3: Completing the Skull Shape (Second Round)
- Single crochet outline:
- Chain 1, and single crochet into all stitches around the first round.
- Eye sockets:
- Place 6 single crochets over the first chain-5 space.
- Slip stitch into the gap to create the mouth section, then chain 2.
- Place 6 single crochets over the first chain-5 space.
- Shaping the mouth:
- Make 2 double crochets, chain 2, then slip stitch again in the same gap.
- Second eye socket:
- Add 6 single crochets over the second chain-5 space.
- Finishing the skull:
- Slip stitch to join, chain 1, and cut the yarn. Pull the yarn through and weave in the ends to secure.
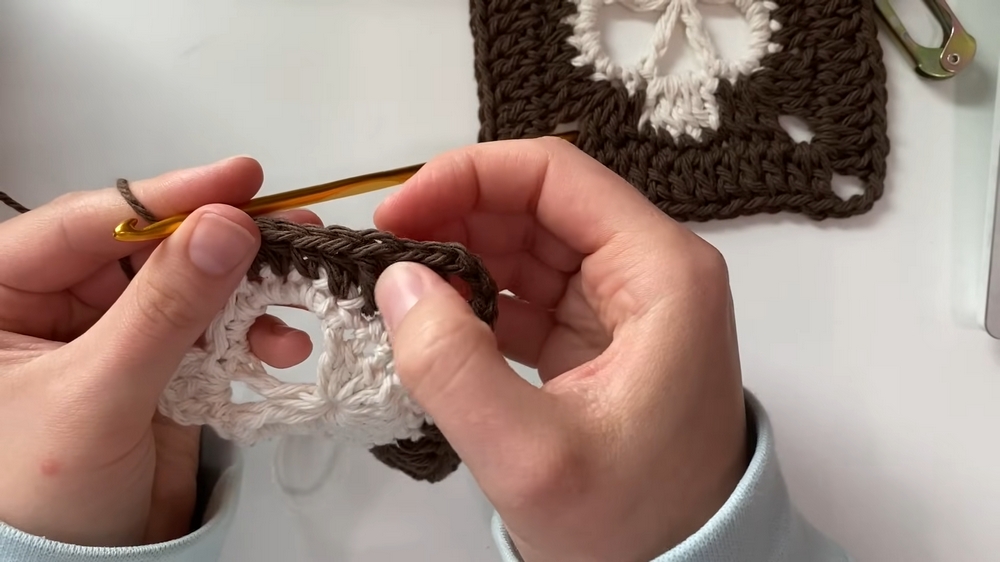
Step 4: Adding the Granny Square Border
- Standing double crochet:
- With a slip knot on your hook, yarn over, and start a standing double crochet in the stitch after the slip stitch.
- Corners:
- Chain 3 for the first corner, and place 2 double crochets into the same stitch.
- Sides:
- Add alternating double and half-double crochets along the skull’s sides using this pattern:
- 1 double crochet.
- 3 to 4 half double crochets.
- Add alternating double and half-double crochets along the skull’s sides using this pattern:
- Repeat the corners:
- At each corner, place 2 double crochets, chain 3, and 2 double crochets.
- Join and complete:
- Slip stitch back to the starting point, cut the yarn, and weave in the ends.
- Slip stitch back to the starting point, cut the yarn, and weave in the ends.
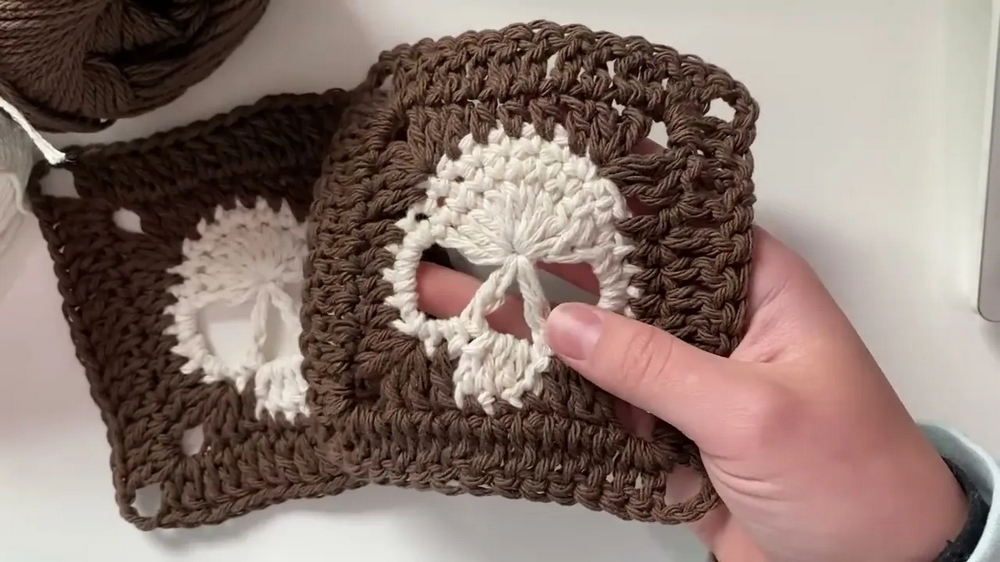
Step 5: Final Round
- Expand the square:
- Add one more round by crocheting double crochets into every stitch along the sides.
- For the corners, continue the 2 double crochet, chain 3, 2 double crochet pattern.
- Increase the square size:
- Each round adds 4 stitches to the sides, so calculate accordingly for larger projects.
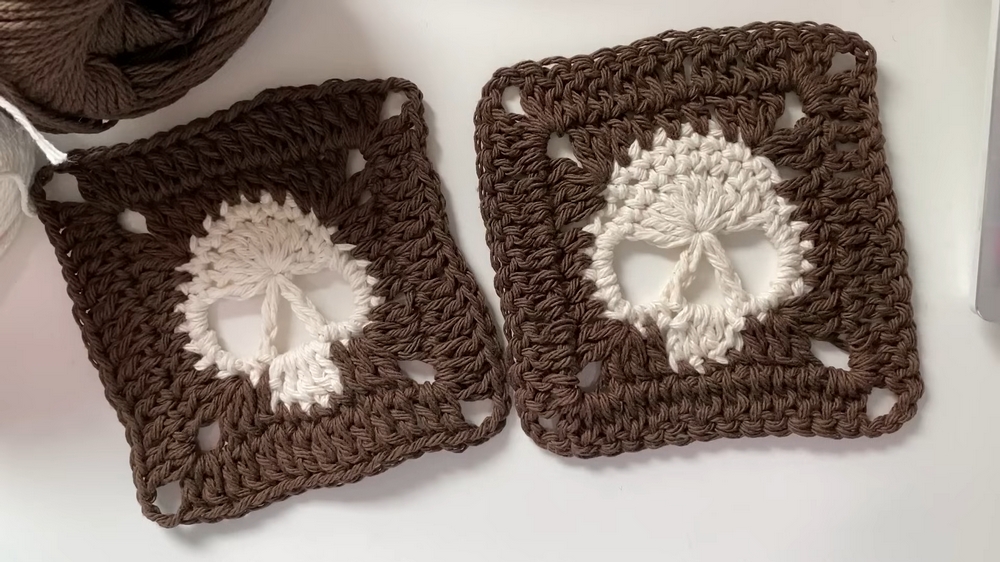
- Each round adds 4 stitches to the sides, so calculate accordingly for larger projects.
Conclusion
The finished granny square measures approximately 5 inches by 5 inches. If you’re planning a big project like a blanket, sweater, or pants, consider adding additional rounds for larger squares to reduce your stitching effort. With this skull granny square, you have a perfect mix of fun and functionality! Feel free to experiment with colors or yarn sizes to make the pattern uniquely yours.


