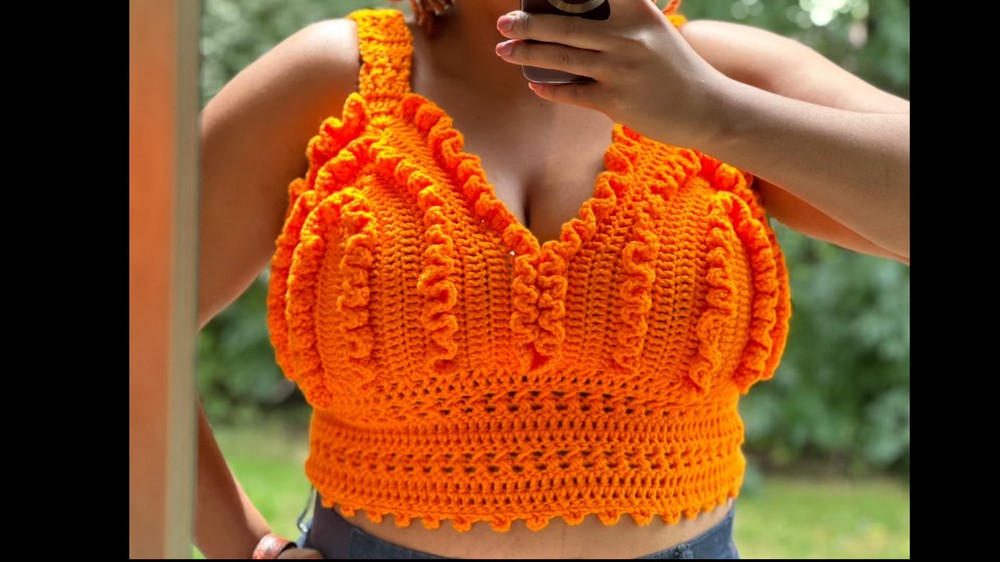
Flaunt your fashion-forward side with the Crochet Ruffle Bralette Pattern, offering a flattering fit, delicate ruffles, and endless outfit possibilities for any occasion.
Designed with elegance and versatility in mind, this pattern blends functionality with beauty, offering a chic and comfortable option for all-day wear. Its delicate ruffles highlight femininity while adding just the right amount of flair, making it perfect for casual outings, beach days, or layered under lightweight jackets. The combination of tailored cups, seamless detailing, and a sturdy yet breathable band ensures a flattering fit without compromising on comfort. It’s more than a fashion choice – it’s about incorporating versatility and grace into your wardrobe.
Crochet Ruffle Bralette Pattern
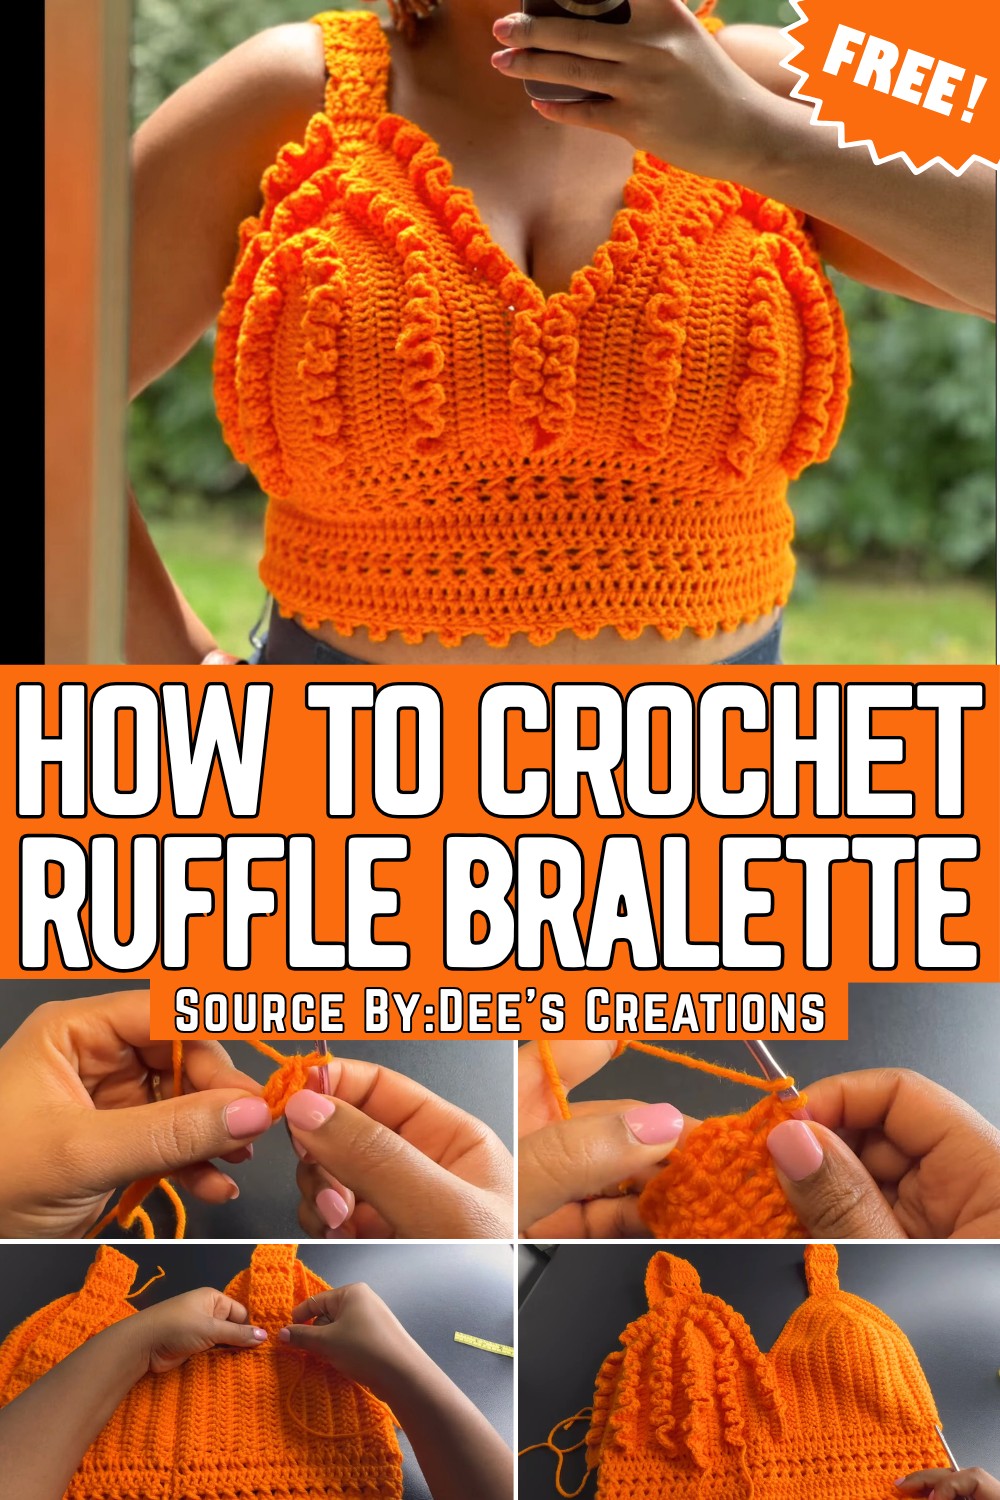
How To Crochet Ruer Bralette
This detailed pattern walks you through creating a stunning handmade bralette called the Ruer Bralette. The bralette is highly customizable for different sizes and includes optional ruffles to add a decorative flair. Whether you're an experienced crocheter or just starting out, this pattern provides clear instructions, including tips and tricks to ensure a perfect fit.
Materials Required
To create this bralette, you'll need the following:
- Yarn: Size 4 (medium weight) yarn (choose your preferred yarn type and color).
- Hook: 4.5 mm crochet hook (recommended, rather than the 5.5 mm indicated on the yarn label).
- Scissors
- Tape Measure
- Darning Needle (for weaving in ends)
Abbreviations of Stitches
The pattern employs standard U.S. crochet terms as follows:
- ch: Chain
- dc: Double Crochet
- sl st: Slip Stitch
- sc: Single Crochet
- yo: Yarn Over
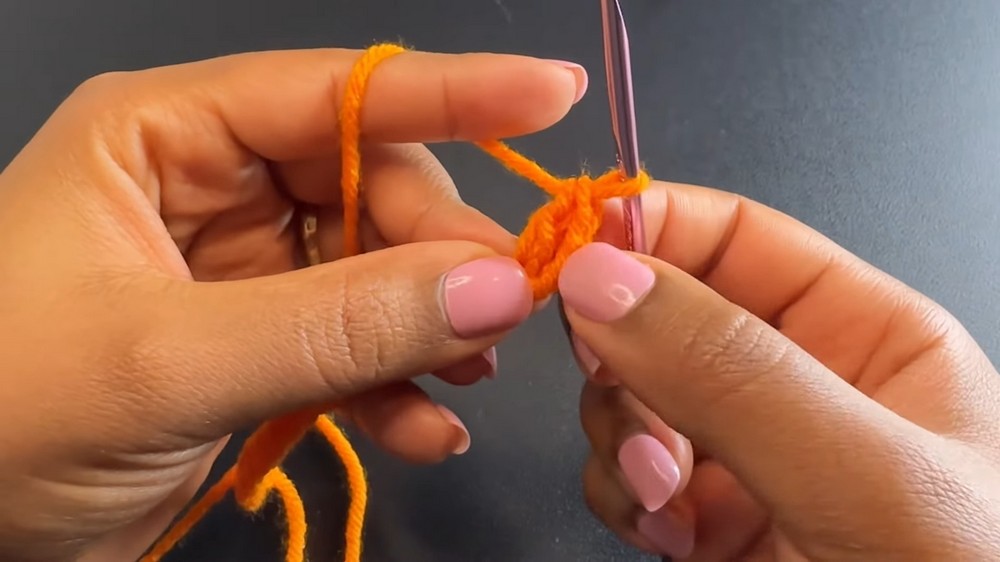
Step 1: Creating the Bra Cups
- Slip Knot and Start Chains:
- Make a slip knot.
- Chain 20 for your foundation (adjust according to your size based on instructions provided in the video).
- Setting Up Row 1:
- Add three chains at the end, making 23 total (these count as the first dc).
- Work your first double crochet (dc) into the fourth chain from the hook.
- Continue placing 1 dc into each chain across, leaving one chain at the end.
- Row 1 Tip for the Cup:
- When you reach the last chain at the end of Row 1, place the following into the same space: 2 dc, chain 1, 2 dc.
- You’ve now created the rounded tip of the cup.
- Work on the Opposite Side of the Foundation Row:
- Turn your work to the other side of the foundation chain.
- Place 1 dc in each stitch to match the stitches on the other half.
- Row Count and Sides Check:
- Ensure both sides before and after the chain-1 corner have the same number of stitches (example: 22 stitches on either side).
- Rows 2–10:
- For each new row: chain 3, turn your work, and dc in every stitch leading to the chain-1 corner.
- In the chain-1 corner: place 2 dc, chain 1, 2 dc.
- Continue the row by dc in each stitch across to the end.

Tip: Adjust the number of rows based on your desired cup size (the video suggests 10 rows for the example size).
Step 2: Adding the Side Extensions
- Re-Attach Yarn for Side Extension:
- If additional width is required for side coverage, attach yarn at the side of the cup on Row 10.
- Count the number of stitches to be worked (e.g., 18 stitches).
- Work Rows for Side Extension:
- Work 1 dc into each stitch across, ensuring you keep your sides straight (do not increase or decrease).
- Repeat this pattern for a total of 15 rows (adjust as needed for size).
- Make a Second Cup:
- Repeat all of the above steps to create an identical second cup, but ensure the side extension is placed on the opposite side.
Step 3: Joining the Cups Together
- Align the Cups:
- Place the two cups together with the right sides facing inward (wrong sides should face out).
- Align corresponding stitches from the inner edges of the cups.
- Join with Single Crochet:
- Start at the base of the cups. Insert your hook into the first stitch of both pieces, pull up a loop, chain 1, and make a single crochet (sc).
- Continue making sc stitches across approximately 15 stitches, ensuring the cups are evenly connected.
Step 4: The Bottom Band
- Attach Yarn at the Bottom Edge:
- Attach yarn at one corner of the cups and chain 3 to begin the bottom band.
- Row 1 – Alternating Increases:
- Work alternating 2 dc and 1 dc along the edge of the cups (e.g., 2 dc in one row of stitches, 1 dc in the next).
- This creates a slightly flared band at the bottom.
- Row 2 – Double Crochets:
- Work 1 dc in each stitch across to create a neat row.
- Row 3 – Cross-Stitch Pattern:
- Chain 3, skip the next stitch, and place a dc in the following stitch.
- Go back to the skipped stitch and place 1 dc. You’ve created a cross-stitch.
- Repeat this pattern to the end of the row.
- Row 4–Repeat Rows:
- Alternate rows of dc (1 dc per stitch) and the cross-stitch pattern until the bottom band reaches your desired length. The video suggests 10 rows total.
- Final Edging (Optional):
- Add a picot edge by alternating sc and small chain loops along the final row to give a decorative look.
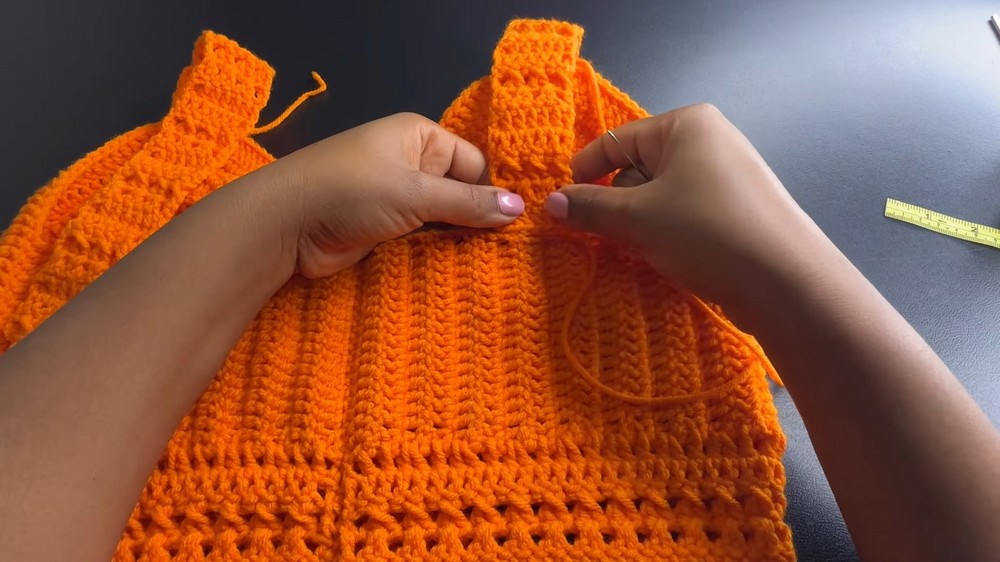
Step 5: Straps
- Start the Straps from the Cups:
- Attach yarn at the top edges of the cups, making sure they match the middle section.
- Create Strap Pattern:
- Use the same row alternation of double crochet and cross-stitch as used in the bottom band.
- Make 25 rows (or adjust length as needed based on your size).
- Attach Straps:
- Use a darning needle to secure the straps to the back edge of the bralette (ensuring symmetry).
- Use a darning needle to secure the straps to the back edge of the bralette (ensuring symmetry).
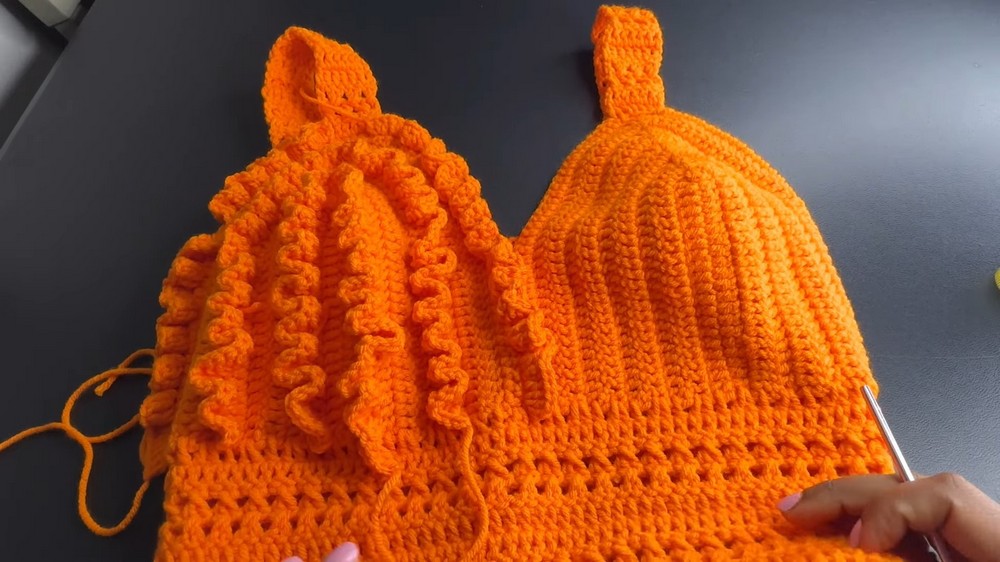
Step 6: Optional Ruffles
- Add Ruffles Along the Cup Edges:
- For additional decoration, add ruffle layers to the cup edges. Work three rows of double crochets into the loops at designated edges.
- Increase and Flare Ruffles:
- Use 2–3 dc in each stitch to create full and flared ruffles.
- Use 2–3 dc in each stitch to create full and flared ruffles.
Conclusion
Congratulations! You’ve completed the Ruer Bralette! This design is versatile, comfortable, and perfect for summer wear. You can customize the size, colors, strap lengths, and embellishments like ruffles to make your project unique. Don’t forget to weave in all ends for a polished finish.