
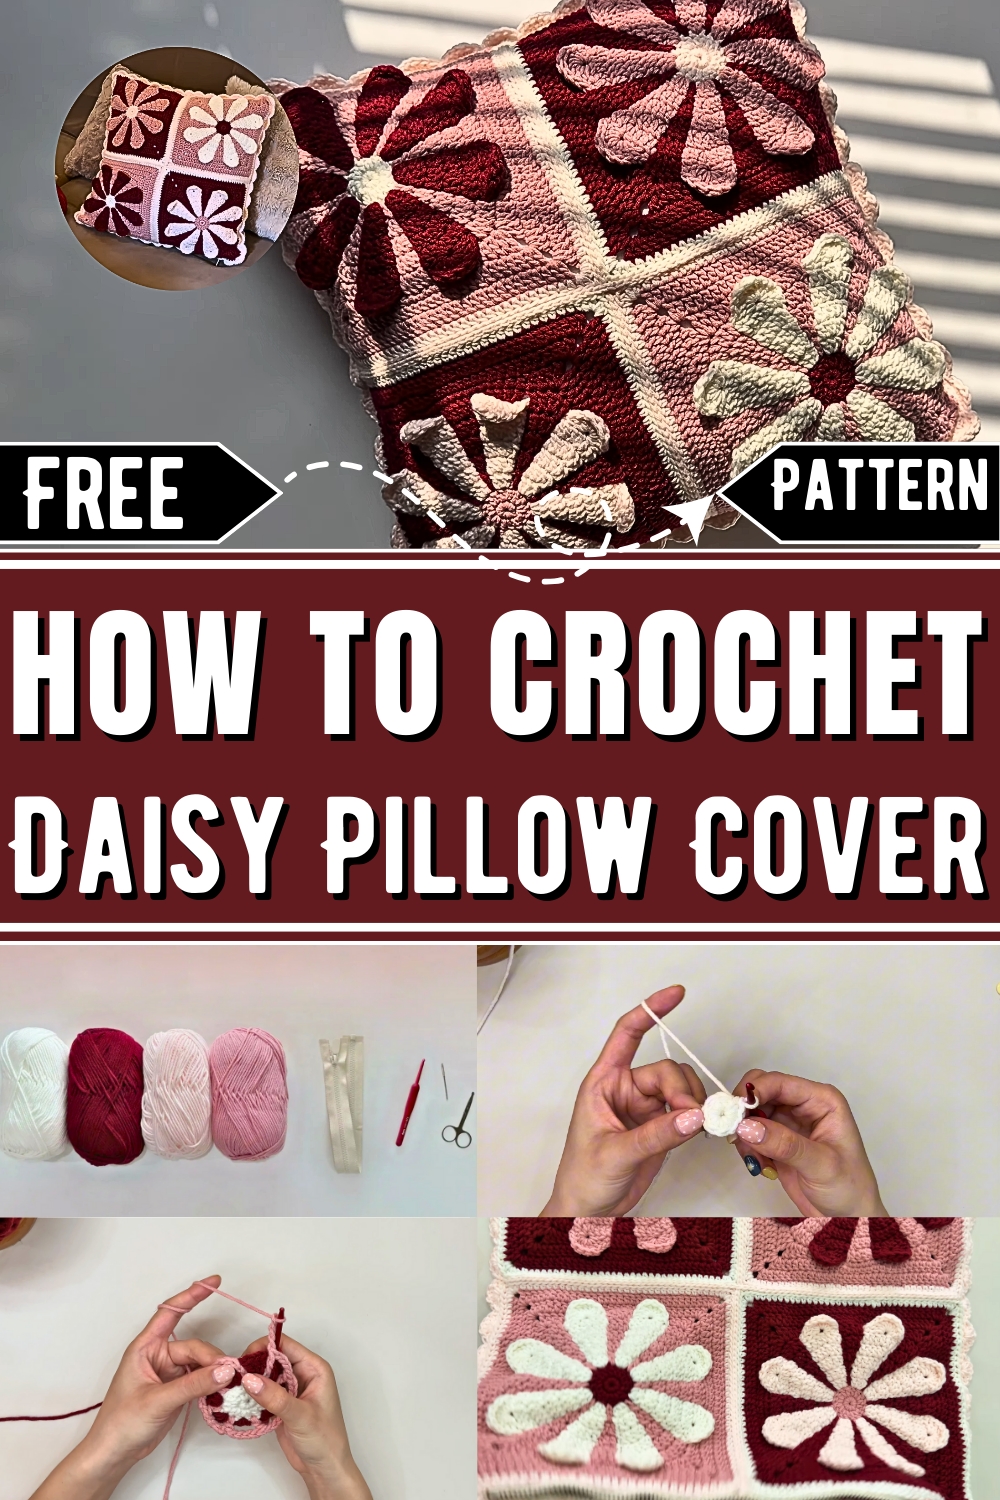
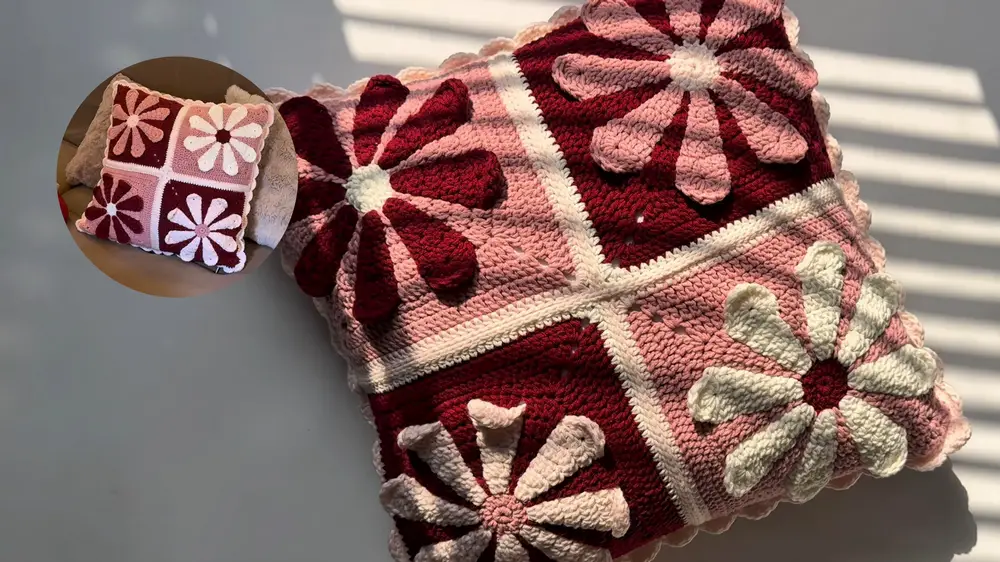
Brighten up your space with crochet a retro daisy pillow cover pattern that combines iconic granny squares with cozy floral accents.
Crochet Retro Daisy Pillow Cover With Granny Squares
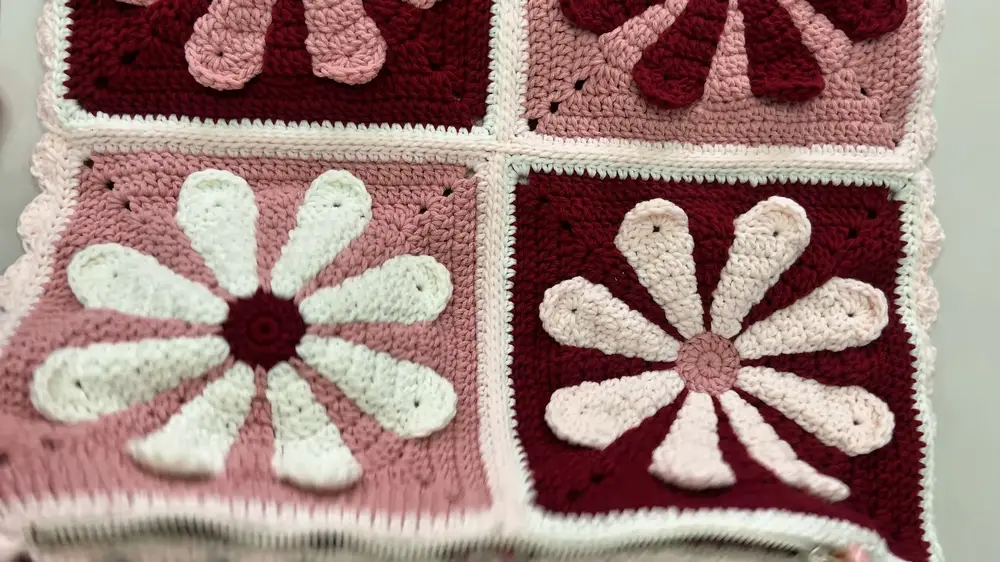
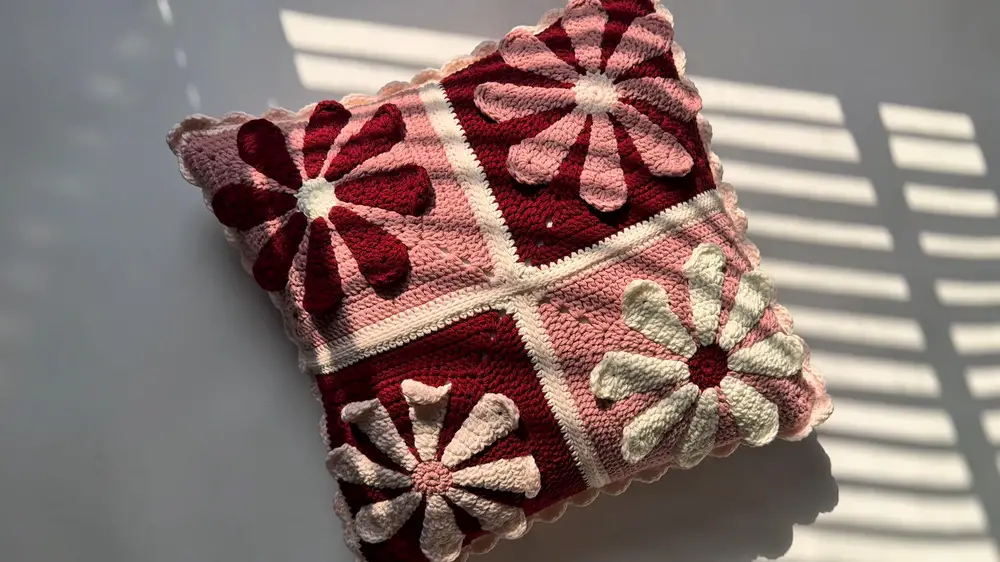
Granny squares have been a staple of crochet for generations, but the retro daisy pillow cover gives this classic design a fresh twist. Featuring cheerful daisies nestled within the iconic square pattern, this project is perfect for adding a nostalgic yet stylish touch to your home. These pillow covers not only brighten up sofas, reading nooks, or bedrooms but also bring a layer of warmth and personality to your décor. Versatile and lightweight, they can easily be swapped out for seasonal updates or used year-round to add charm and color.
The softness of the crochet texture makes them ideal for lounging, elevating comfort during relaxation moments. Beyond their aesthetic appeal, this pillow cover can become a heartfelt handmade gift for friends or family, showcasing the effort and love that goes into every stitch. As functional as they are beautiful, they are simple to maintain and durable enough for everyday use. Whether serving as a statement decorative piece or complementing other elements, the retro daisy design effortlessly uplifts any space. Combining practicality with timeless artistry, it’s a wonderful option for transforming ordinary cushions into works of home décor beauty.
How To Crochet Retro Daisy Pillow
This pattern demonstrates how to crochet a charming retro daisy pillow cover made up of co lorful granny squares. With clear instructions for creating a daisy granny square and seamlessly assembling the pillow cover, this guide ensures an enjoyable crochet experience.
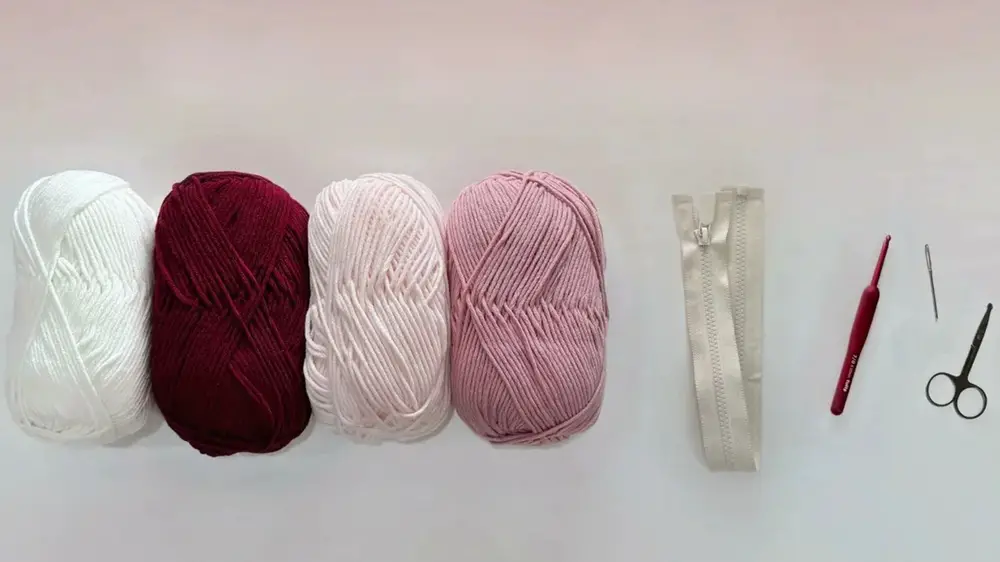
Materials Required
- Yarn: 100% acrylic yarn (3mm thickness) in four different colors.
- Crochet Hook: 4.0mm.
- Additional Tools: Scissors, sewing needle, and a zipper (40cm).
Step-by-Step Instructions
Creating the Daisy Granny Square
1. Center Circle:
- Make a slip knot, then chain 4.
- Slip stitch into the first chain to form a ring. Alternatively, use a magic ring technique if preferred.
- Crochet 8 single crochets into the ring.

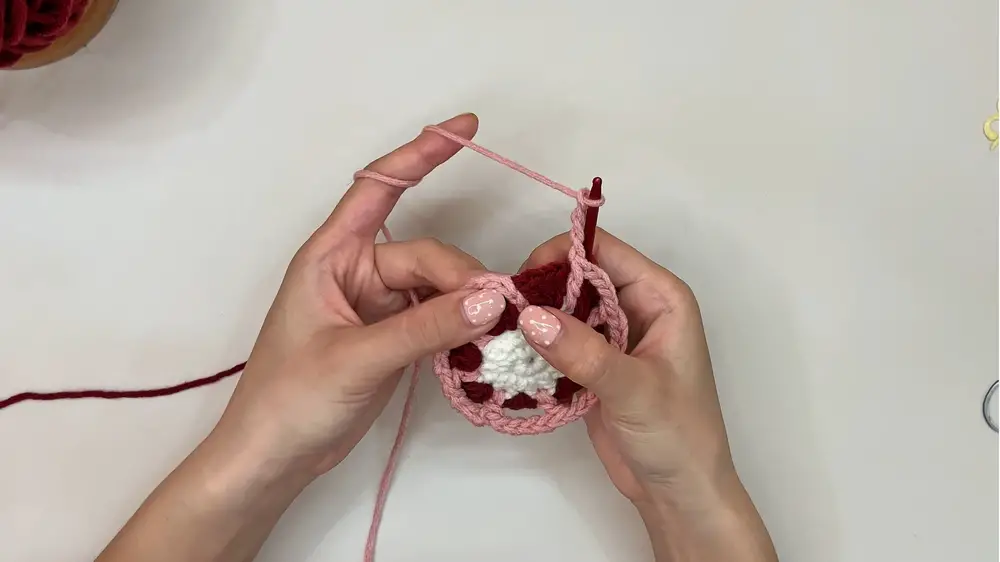
2. First Round (White Yarn):
- Chain 2 (does not count as a double crochet).
- Work 8 double increases (2 double crochets in each stitch).
- At the end of the round, you'll have 16 stitches.
- Slip stitch to join the round and switch to your chosen petal color.
3. Petal Formation (Red Yarn):
- Start with a slip knot and attach the red yarn to any double crochet stitch.
- Chain 3 (counts as a double crochet).
- Work 2 more double crochets into the same stitch.
- Chain 1, skip one stitch, and repeat the pattern: 3 double crochets in every other stitch to create 8 petals.
- Slip stitch into the third chain of the starting chain to join the round.
Expanding the Background
1. Pink Background:
- Switch to pink yarn, attach it to any double crochet stitch, and chain 2.
- Chain 4, then make one double crochet into each stitch of the daisy center, repeating the following pattern: Chain 4, double crochet into next stitch until the round is complete.
- Slip stitch to join the round.
2. Alternating Colors for Expansion:
- Switch between red and pink yarn to gradually expand the square background. Follow the repetitive process of chaining and making double crochets while increasing the stitch count for each layer.
- Maintain proper tension and consistently alternate yarns.
3. Final Rounds of Shaping:
- Continue carrying the yarn underneath the previous round, working double crochets to expand the petals and background. Add chains of varying lengths and increase double crochets to shape the layers.
- Finish each round with a slip stitch.
4. Final Square Shape (Pink Yarn):
- Add single crochet stitches around the square to shape corners with extended double crochets and chain stitches.
- Maintain even spacing and stitch count throughout the square edges.
Joining the Squares
1. Slip Stitch Technique:
- Use light pink yarn to join two granny squares.
- Insert your hook into the top and bottom chains and slip stitch through both loops.
- Repeat the process for all adjacent edges until all four squares are combined into one side of the pillow cover.
2. Joining Panels:
- Join the front and back panels with slip stitches along three sides while leaving the fourth side open for the zipper installation.
Adding the Zipper
- Align the zipper to the open edge of the square.
- Using sewing thread or fine cotton yarn, securely stitch the zipper onto the pillow cover. Work through the double crochet stitches for reinforcement.
Finishing Touches
1. Border Design:
- Add a decorative border using the shell stitch pattern:
- Skip two stitches, work 5 double crochets into the next stitch, skip two stitches, and make a slip stitch into the next.
- Repeat for three edges; avoid crocheting over the zipper side.
2. Weaving in Ends:
- Trim and weave in all loose yarn ends for a clean finish.
Conclusion
The retro daisy pillow cover is now complete! This cover, measuring 50cm x 50cm, is perfect for any living space or as a handmade gift. With its colorful daisy granny squares and sturdy construction, this project is both functional and aesthetically pleasing. Add a pillow insert to finish, and enjoy your new vintage-inspired home decor piece!


