
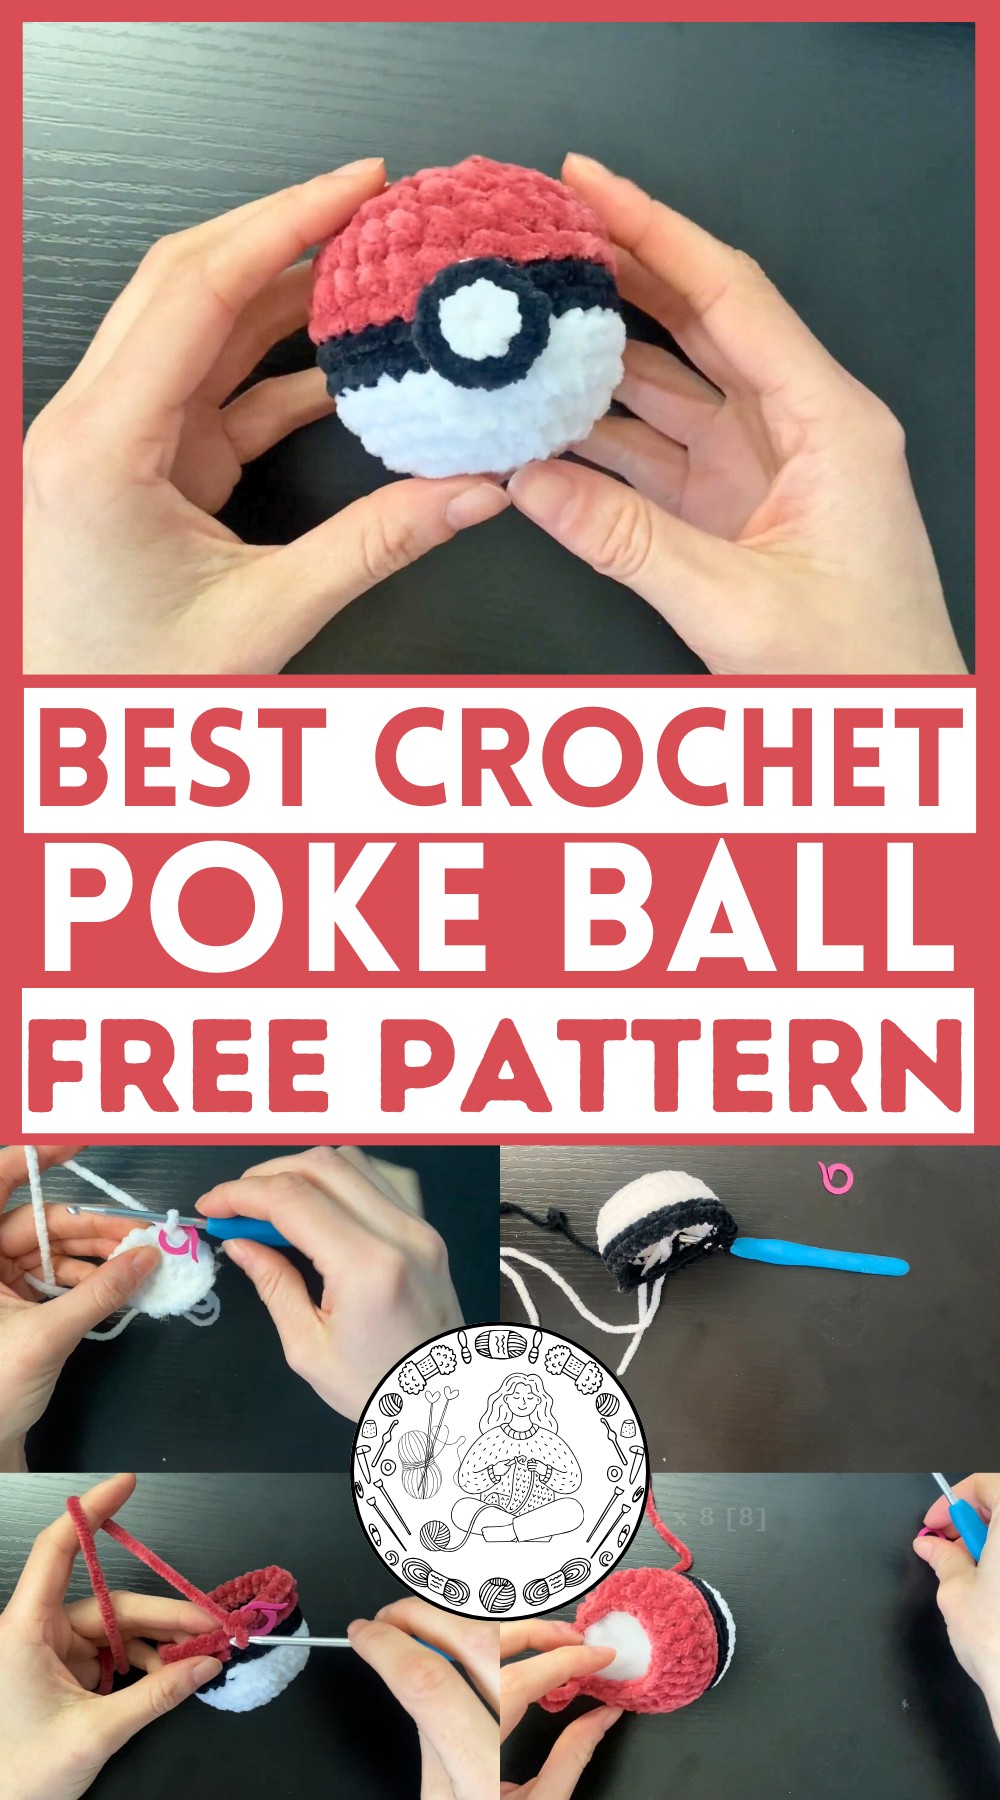
This Poké Ball Amigurumi pattern is perfect for beginners eager to crochet their own Pokémon-themed accessory. With straightforward instructions and easy-to-follow steps, even those new to the world of crochet can feel confident. The post guides you through each stage, ensuring your Poké Ball looks just right. You’ll enjoy bringing this iconic item from the Pokémon universe to life with your own hands. Get into an enjoyable, creative activity that produces a fun, recognizable piece, perfect for fans and crafters alike. Start stitching and have your Poké Ball ready to catch them all! Make crocheting a delightful and rewarding experience.
Why Love This Pattern?
- Color Changes Technique: The video demonstrates a clean color change technique, which is crucial for the distinctive Poké Ball design. Using back loop slip stitches ensures crisp transitions between the white, black, and red yarns.
- Adjustable to Your Comfort: The tutorial offers alternative ways for creating magic rings, ensuring that you can choose the method that feels most comfortable and secure for you.
- Invisible Decreases: The use of invisible decreases creates a neater and tighter finish, maintaining the round shape of the ball without noticeable gaps.
- Secure and Tidy Finish: The final steps include precise sewing and weaving techniques that ensure a polished and professional-looking Poké Ball.
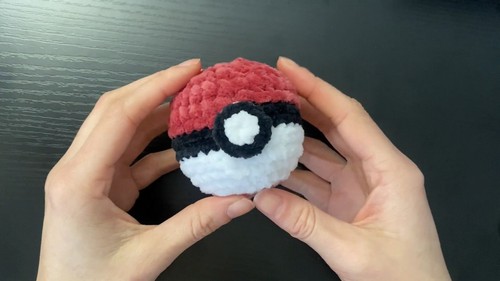
How To Crochet Amigurumi Poke Ball
Materials:
- White yarn
- Black yarn
- Red yarn
- Crochet hook
- Stitch marker
- Scissors
- Yarn needle
- Stuffing
Steps:
Poké Ball:
Round 1:
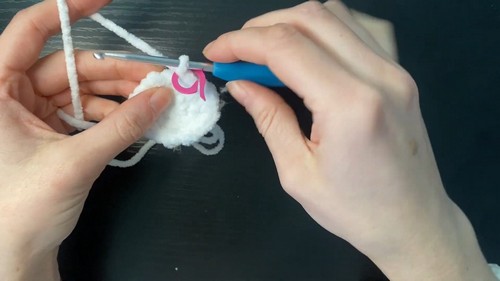
- Using white yarn, create a magic ring.
- Crochet 8 single crochets (sc) into the magic ring.
- Pull the tail to close the ring.
- Place a stitch marker at the start of the round.
Round 2:
- Do 2 single crochets in each stitch around (8 increases) [Total: 16 stitches].
- Move the stitch marker to the new round.
Round 3:
- Do 1 single crochet in the first stitch and 2 single crochets in the next stitch (1 sc, 1 inc).
- Repeat this (1 sc, 1 inc) 8 times around [Total: 24 stitches].
- Move the stitch marker to the new round.
Round 4:
- Do 3 single crochets and then 1 increase stitch; repeat 6 times around [Total: 30 stitches].
Rounds 5-6:
- Single crochet in each stitch around (30 sc) [Total: 30 stitches each round].
Color Change to Black:
- In the last stitch of Round 6, halfway through the single crochet, switch to black yarn.
- Complete the stitch with black yarn.

Round 7:
- Work into the back loops of the previous white round (Round 6).
- Slip stitch in each stitch around [Total: 30 slip stitches].
Round 8:
- Continue using black yarn in the back loops of Round 7; slip stitch in each stitch around [Total: 30 slip stitches].
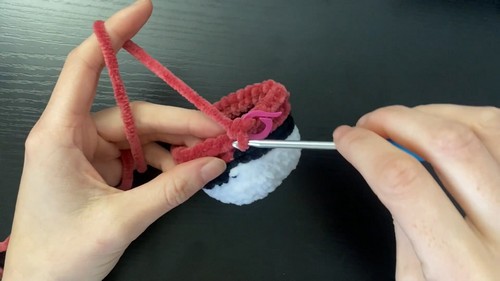
Change to Red Yarn:
- In the last stitch of Round 8, halfway through the slip stitch, switch to red yarn.
- Complete the stitch with red yarn.
Round 9:
- Using red yarn, work in the back loops of Round 8.
- Slip stitch in each stitch around [Total: 30 slip stitches].
Round 10:
- Using red yarn, single crochet in each stitch around working only in the back loops [Total: 30 stitches].
- Cut the black yarn and tuck the tails out of the way.
Round 11:
- Single crochet in the first 3 stitches and then make a decrease (sc3, dec).
- To decrease: insert hook into the front loop of the next stitch, pull through (two loops on hook), insert hook into the front loop of the next stitch, pull through (three loops on hook), yarn over and pull through all loops.
- Repeat this (sc3, dec) 6 times around [Total: 24 stitches].
Round 12:
- Single crochet in the first stitch and then make a decrease (sc, dec) [Total: 16 stitches].
- Repeat this (sc, dec) around.
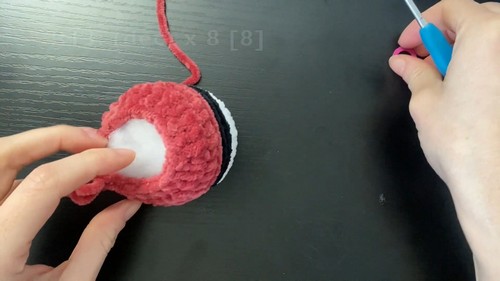
Stuff the Ball:
- Firmly stuff the ball to give it a round shape.
Round 13:
- Make a decrease (dec) in each stitch around [Total: 8 stitches].
- Cut the red yarn, leaving a long tail.
- Use the yarn to sew up the remaining hole. To close the hole, weave through the front loops of each stitch and pull tight.
Button:
Round 1:
- Using white yarn, create a magic ring.
- Crochet 8 single crochets into the magic ring.
- Pull the tail to close the ring.
Change to Black Yarn:
- In the last stitch, switch to black yarn.
- Complete the stitch with black yarn.
Round 2:
- Slip stitch in each stitch around [Total: 8 slip stitches].
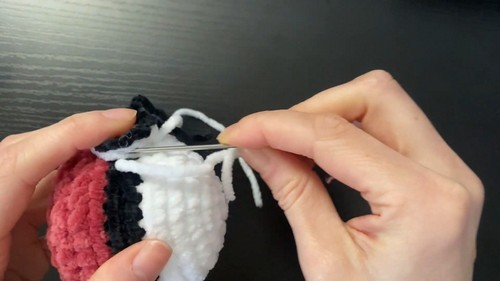
Assembling the Button:
- Cut both the black and white yarn, leaving enough tail to sew.
- Position the button on the Poké Ball where the color changes occur.
- Pin in place and sew through the back loops of the button onto the ball.
Final Touch:
- Weave in all loose tails and tidy up the ends.
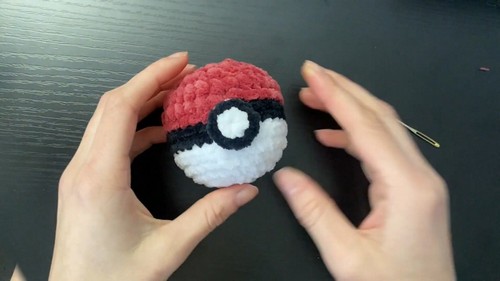
And there you have your finished Poke Ball!


