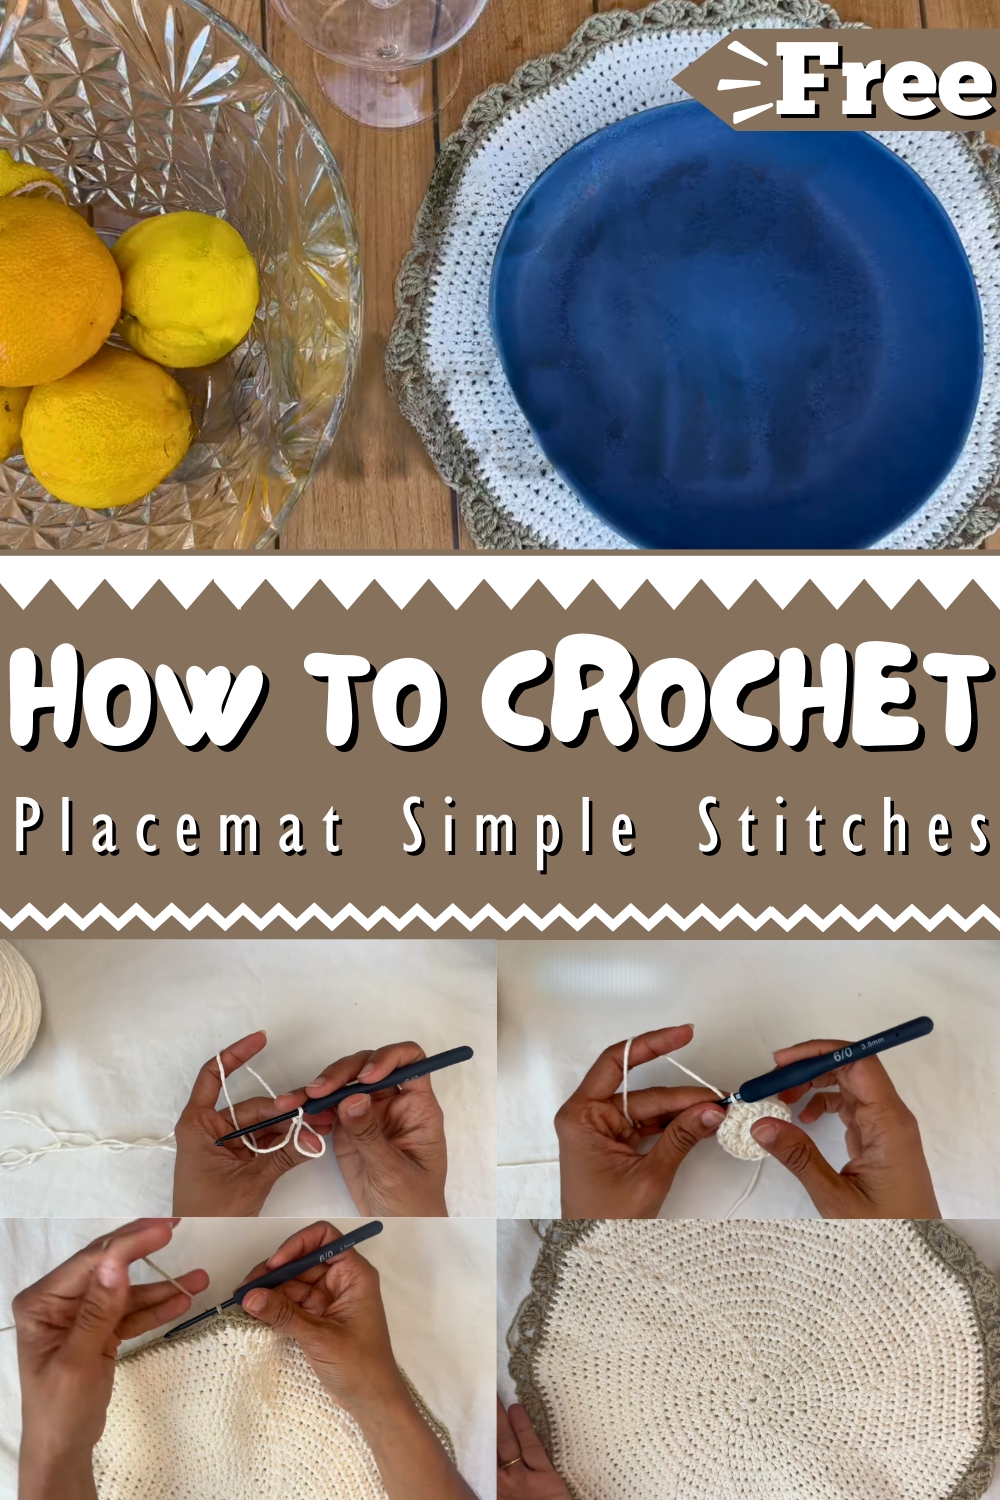
Revitalize your dining space with our Free Crochet Placemat pattern; master 3 simple stitches for a stunning table accessory that's quick and easy to make.
Crochet Placemat Pattern
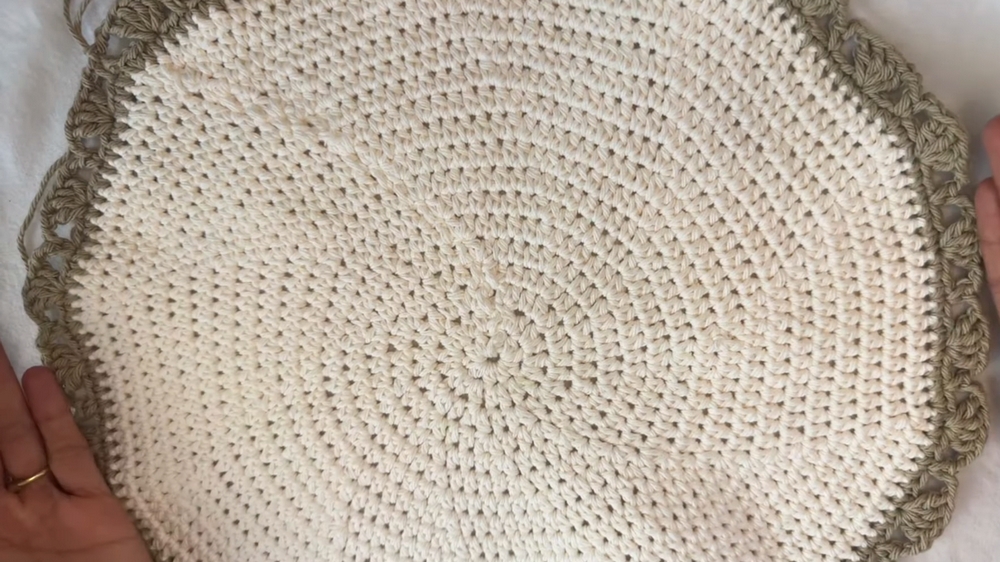
Don't let a lackluster dining table dampen your meal times. Start your setup with the timeless charm of a crochet placemat made using just 3 simple stitches. The placemat boasts a clean and elegant design, featuring alternating rows of single, double, and half-double crochets that not only add texture but also create a beautiful, cohesive pattern. Made from durable cotton yarn, this placemat is easy to clean and ideal for everyday use or special occasions.
Its versatility allows you to customize it with various colors to match your decor or make sets for different seasons. The finished product is not just a placemat, but a piece of handmade beauty that will impress your guests and add a touch of sophistication to your dining experience.
Tip:
Use a coordinating border color to give your placemat a polished, finished look.
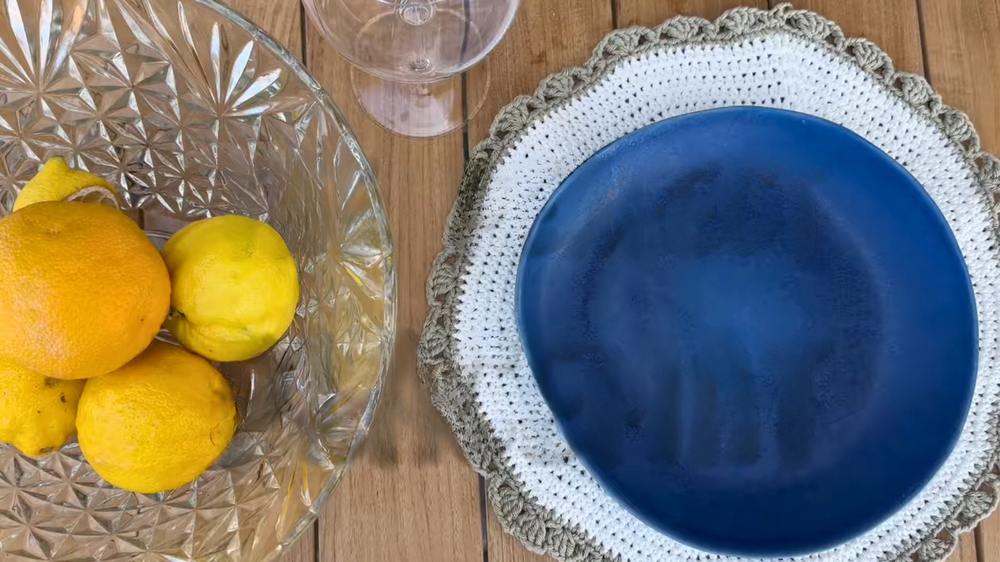
Crochet Placemat with 3 Simple Stitches Pattern
Create a beautiful crochet placemat using 100% cotton yarn and a 3.5mm crochet hook. This elegant placemat makes a perfect gift or a charming addition to your own dining decor.
Materials Needed
- 100% cotton yarn (Size 4)
- 3.5mm crochet hook
- Yarn needle
- Scissors
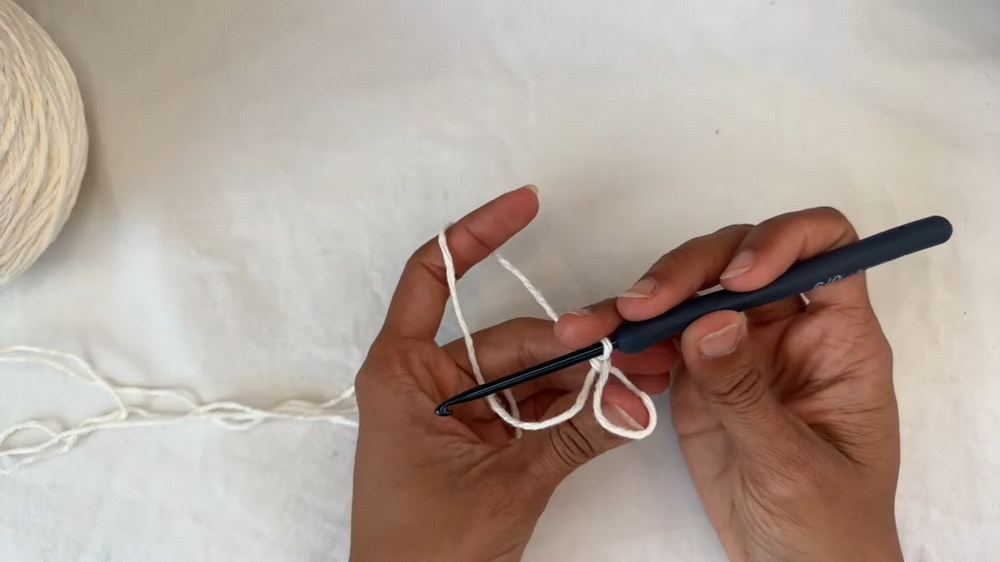
Step 1: Create a Magic Circle
- Make a twist with the yarn, leaving a tail.
- Pinch the twist down with your fingers.
- Insert your hook into the loop, grab the yarn, and pull it through.
- Chain 1 to close the circle.
Step 2: Crochet the First Round
- Begin with a single crochet into the magic circle.
- Chain 1 (this combination counts as the first half double crochet).
- Crochet 9 additional half double crochets into the magic circle (you should have a total of 10 stitches including the initial single crochet and chain 1).
- Pull the tail to close the magic circle.
- Slip stitch into the first half double crochet (second stitch of the row).
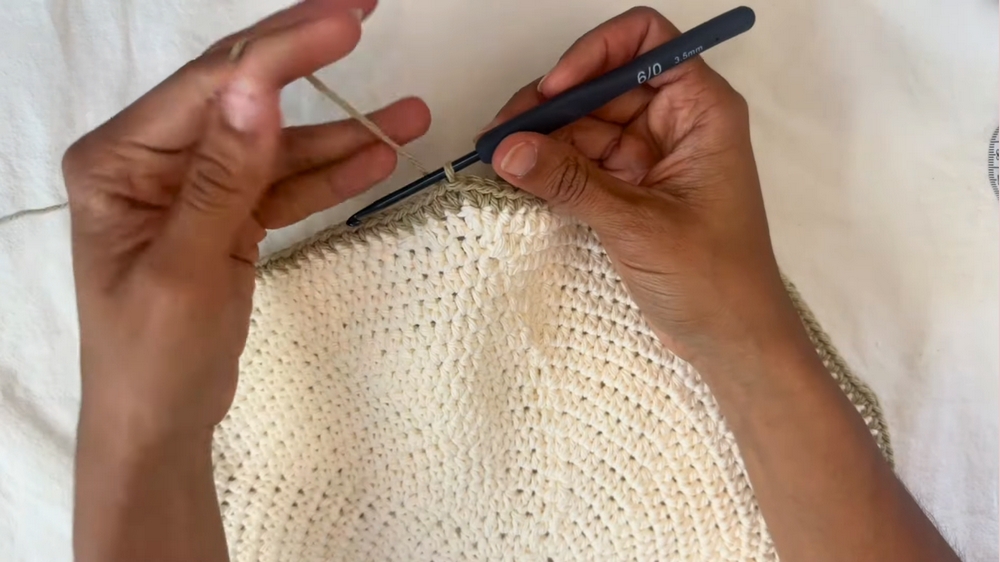
Step 3: Begin Each Row with a Foundation Stitch
- Remove your hook and insert it from behind the stitch you slip-stitched into.
- Replace the loop back onto the hook and pull it backward to start the next row.
- Each row begins with a single crochet and a chain 1 (counts as the first half double crochet).

Step 4: Row 2 - Increase
- Start with the foundation stitch (single crochet and chain 1).
- Crochet one half double crochet into the same stitch.
- In each stitch around, crochet two half double crochets (increase) for a total of 20 stitches.
- Slip stitch into the first half double crochet to close the row.
Step 5: Subsequent Rows - Single and Double Crochets with Increases
- Continuously begin each row with the foundation stitch method.
- Follow the increasing pattern:
- Row 3: One half double crochet, one increase (repeat)
- Row 4: Two half double crochets, one increase (repeat)
- Continue this pattern, adding one more half double crochet between each increase per row.
Step 6: Changing Colors and Adding the Border
- After reaching the desired size (Andrea recommends 18 rows), change to a new color.
- Attach the new color to the first half double crochet of the previous row.
- Chain 1 and single crochet around the placemat, following the same method of increasing.
Step 7: Final Row - Decorative Edge
- Chain 1 and work a single crochet.
- Chain 2, skip two stitches, and crochet four double crochets in the next stitch.
- Chain 2, skip two stitches, and single crochet in the next stitch.
- Repeat this pattern all around the placemat.
- Slip stitch into the first single crochet to finish.
Conclusion
Finish off by cutting the yarn, threading the ends through, and blocking the placemat if needed for a neater finish. Andrea recommends using a steamer and a mat with pins to achieve a perfectly flat and smooth placemat. Enjoy your handmade placemat that adds an elegant touch to your dining table!