
Keep your cookware scratch-free and organized with versatile crocheted pan protectors pattern—a charming addition to your kitchen that’s easy to make at home.
Simple and Unique Crochet Pan Protectors
Protecting your cookware is essential, and crochet pan protectors offer a stylish way to safeguard your kitchen essentials. These handy creations are designed to sit between your pots and pans, preventing scratches, dents, and wear during storage. By using durable threads and simple stitches, you can produce a set of soft, practical protectors that are washable and reusable. They’re perfect for anyone who wants to extend the life of their cookware while adding a touch of handmade charm to their kitchen.
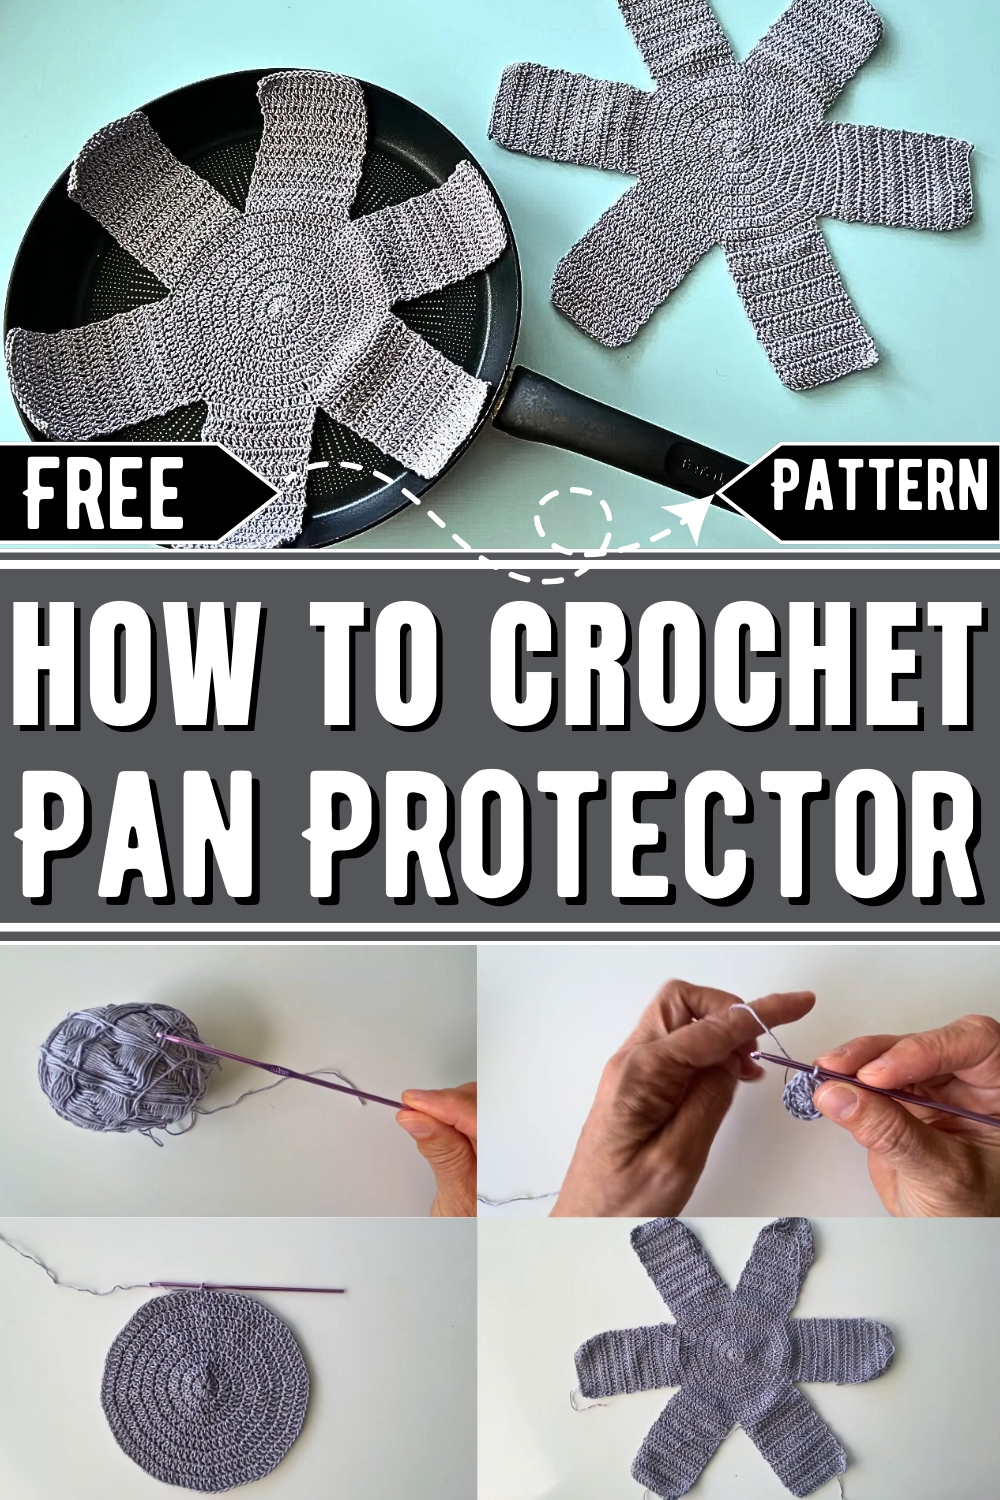
Beyond their primary use, these protectors can also serve as trivets or soft cushions for other delicate items. The benefits are clear—they provide an eco-friendly alternative to plastic or paper layers, reduce noise while stacking, and keep pot surfaces spotless. Plus, they’re customizable in colors and designs, making them both functional and visually appealing. With this free crochet kitchen accessory pattern, even beginners will find it easy to stitch these at home, saving money and resources while maintaining a stylishly organized cookware collection. These versatile pieces are more than just kitchen accessories—they’re a thoughtful way to care for your belongings and brightening every culinary space in a practical way.
How To Crochet Pan Protectors
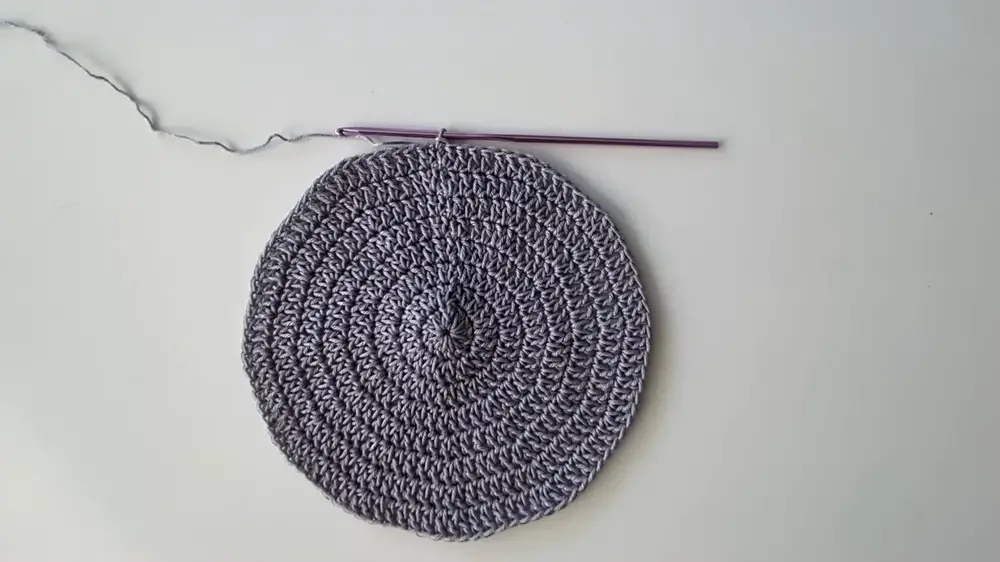
The Crochet Pot & Pan Protector is a simple yet practical pattern designed to preserve the lifespan of your cookware by preventing scratches and damage during storage. Made using durable, 100% cotton yarn, this project creates soft, customizable protectors that can be shaped to fit various sizes. With basic crochet techniques and straightforward instructions, this pattern is ideal for beginners and experienced crocheters alike. Let’s break down the steps to create these useful protectors.
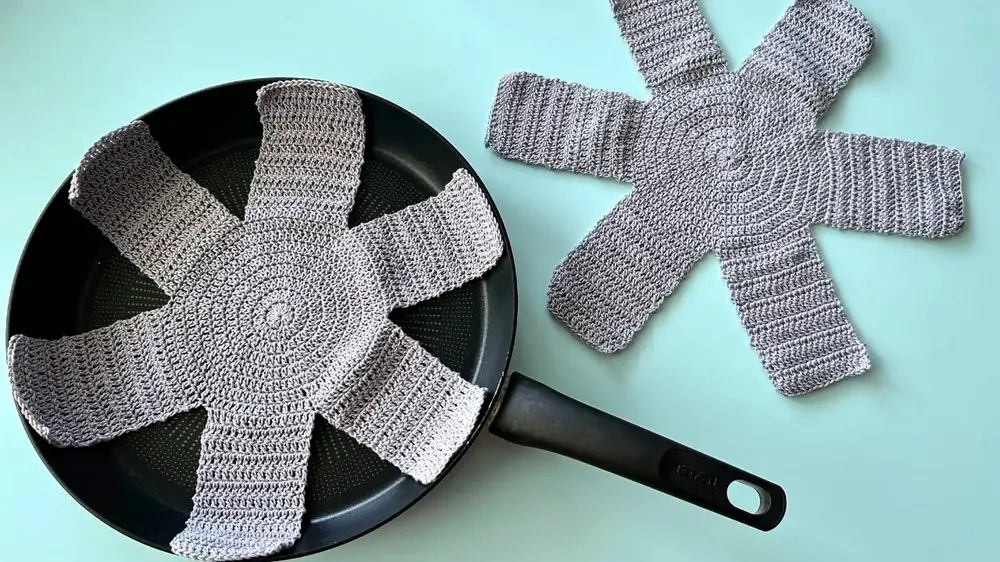
Materials Needed
- 100% cotton yarn (gray color used in the example, but you can choose any preferred color)
- 3mm crochet hook (or size appropriate to your yarn weight)
- 4 stitch markers
- Scissors
- Tapestry needle
Step-by-Step Instructions
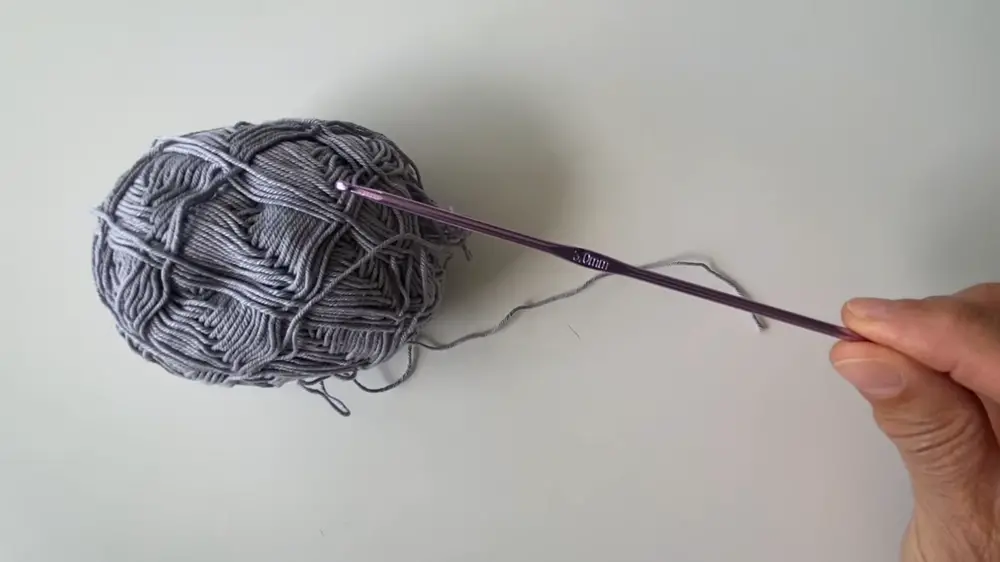
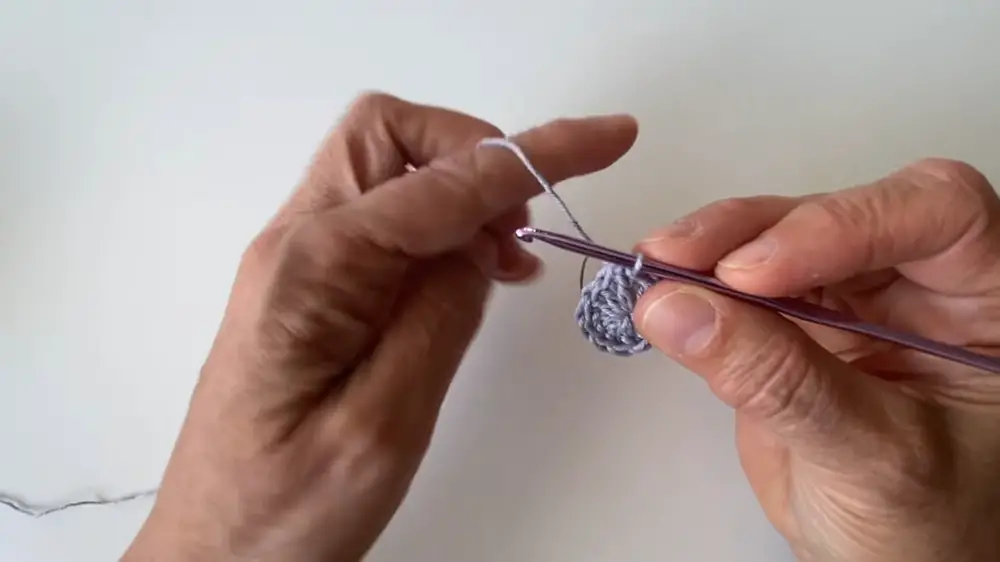
Center Circle
- Round 1:
- Start with a magic circle.
- Chain 3 and work 12 double crochets (dc) into the circle.
- Slip stitch (sl st) on top of the first dc (ignore the starting 3 chains).
- Round 2:
- Begin with 1 fake double crochet (fake dc).
- Work 1 dc into the same stitch.
- Work 2 dc into each stitch across.
- Total stitches = 24.
- Slip stitch to finish the round.
- Round 3:
- Start with 1 fake dc, followed by 1 dc into the same stitch.
- Repeat the sequence: 1 dc, 2 dc across all stitches.
- Total stitches = 36.
- Slip stitch to join.
- Round 4:
- Start with 1 fake dc, followed by 1 dc into the same stitch.
- Work 1 dc in the next 2 stitches, then 2 dc into the next stitch across.
- Total stitches = 48.
- Slip stitch to finish the round.
- Round 5:
- Start with 1 fake dc, followed by 1 dc into the same stitch.
- Work 1 dc in the next 3 stitches, then 2 dc into the next stitch across.
- Total stitches = 60.
- Slip stitch to complete the round.
- Round 6:
- Start with 1 fake dc, followed by 1 dc into the same stitch.
- Work 1 dc in the next 4 stitches, then 2 dc into the next stitch across.
- Total stitches = 72.
- Slip stitch to join.
- Round 7:
- Start with 1 fake dc, followed by 1 dc into the same stitch.
- Work 1 dc in the next 5 stitches, then 2 dc into the next stitch across.
- Total stitches = 84.
- Slip stitch to finish the round.
- Round 8:
- Start with 1 fake dc, followed by 1 dc into the same stitch.
- Work 1 dc in the next 6 stitches, then 2 dc into the next stitch across.
- Total stitches = 96.
- Slip stitch to complete the body.
Creating the Wings
- Divide the total stitches (96) by the desired number of wings (6).
- Each wing will consist of 16 stitches.
- Work on each wing:
- Begin with 1 fake dc and work 15 dc across the 16 stitches.
- Turn and repeat for 13 rows to complete a wing section.
- Repeat the process for each wing:
- Count 16 stitches for the next wing, using a stitch marker if needed.
- Continue working 13 rows for each consecutive wing.
Finishing
- Chain 1, pull the yarn, and cut it neatly.
- Use a tapestry needle to weave in any loose ends and tails.
- Weave through all stitch markers and finalize the shape of the protector.
Conclusion
Your Crochet Pot & Pan Protector is now ready for use! These protectors are washable, reusable, and a sustainable way to keep your kitchenware safe. You can customize them for different cookware sizes, colors, or even make sets for gifting. With this quick and practical pattern, you’ll enjoy both the satisfaction of a finished project and the added benefit of protecting your pots and pans.


