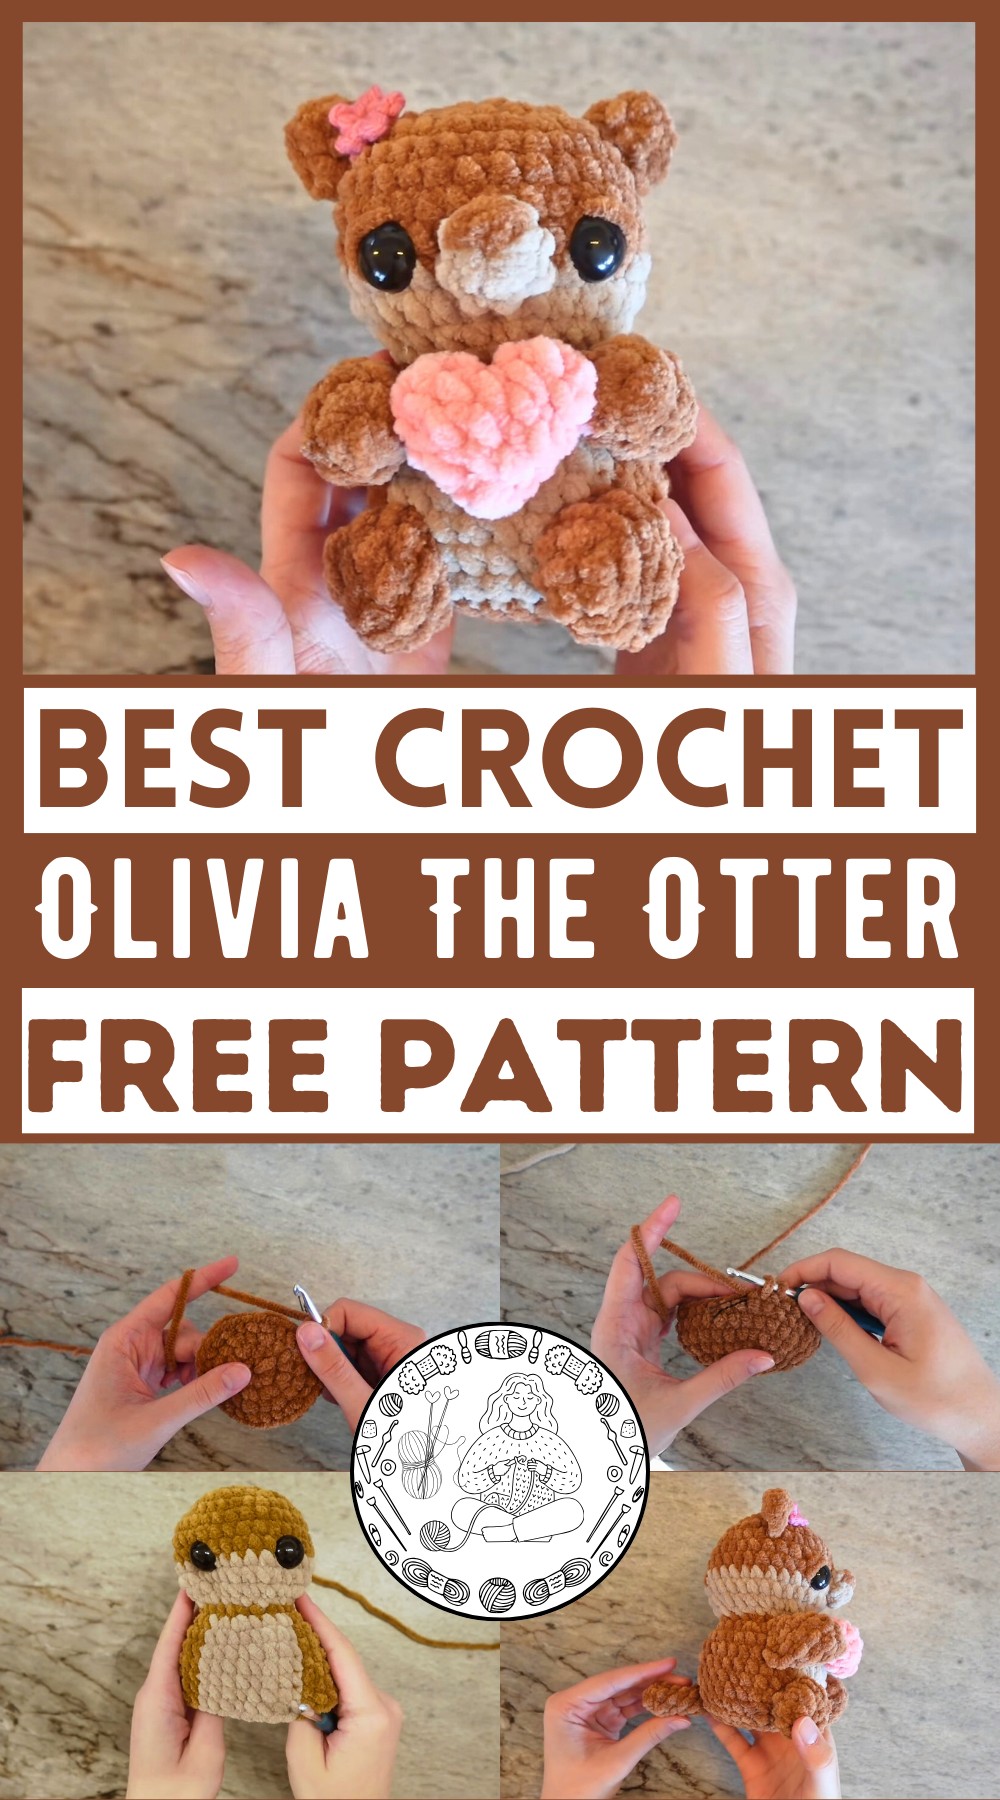
Learn how to crochet Olivia the Otter, a charming amigurumi project. Olivia has a round head, body, cute ears, arms, and a tail, all created with easy stitches. Safety eyes and a small snout give her an adorable look. There's even a little flower accessory and a lovely heart to complete her charm. Perfect for gifts or as a cute decoration, this otter pattern is simple and delightful for beginners and experienced crocheters alike.
Why Love This Pattern:
- Detailed Instructions: The tutorial provides step-by-step, detailed instructions that are easy to follow, ensuring that even beginners can create the otter without getting lost.
- Customization Options: The pattern includes options to customize details like the color of the yarn and the placement of elements (such as eyes and snout), allowing crocheters to add their personal touch.
- Engaging Project: Creating Olivia the Otter involves various crochet techniques and stitches, providing an engaging and rewarding project for crafters of all skill levels.
- Adorable Result: The finished product is a cute and charming otter toy that makes a perfect gift or a delightful addition to any collection.

How To Crochet Olivia The Otter Amigurumi
Materials Needed
- 5 mm crochet hook
- 2.5 mm crochet hook (for the flower)
- Scissors
- Stitch marker (a bobby pin can be used)
- Darning needle
- Acrylic yarn (Worsted Weight):
- Super bulky pink yarn
- Super bulky tan yarn
- Super bulky brown yarn
- 18 mm safety eyes
- Polyfill stuffing
Abbreviations
- sc: single crochet
- inc: increase (2 sc in one stitch)
- dec: decrease (sc two stitches together)
- st: stitch
- sl st: slip stitch
- ch: chain
Head and Body
- Head and Body:
- Use brown super bulky yarn and 5 mm hook.
- Row 1: Create a magic ring and work 8 sc into the ring. [8 st]
- Row 2: Work 8 inc around. [16 st]
- Row 3: (sc, inc) x8 around. [24 st]
- Row 4: (2 sc, inc) x8 around. [32 st]
- Rows 5-8: sc around. [32 st each row]
- Color change to tan yarn.
- Rows 9-10: sc around with tan yarn. [32 st each row]
- Row 11: (2 sc, dec) x8 around. [24 st]
- Row 12: (sc, dec) x8 around. [16 st]
- Color change back to brown.
- Row 13: (sc, inc) x8 around. [24 st]
- Row 14:
- (2 sc, inc) x3 in brown,
- Change to tan, (2 sc, inc) x2,
- Change back to brown, (2 sc, inc) x3. [32 st]
- Row 15:
- 12 sc in brown,
- 8 sc in tan,
- 12 sc in brown. [32 st]
- Rows 16-20: Repeat row 15. [32 st each row]
- Insert safety eyes between rows 8 and 9, 6 stitches apart.
- Row 21: Using brown yarn, (2 sc, dec) x8 around. [24 st]

- Row 22: (sc, dec) x8 around. [16 st]
- Stuff the otter.
- Row 23: Perform 8 dec around. [8 st]
- Fasten off, leaving a short tail to sew the opening closed.
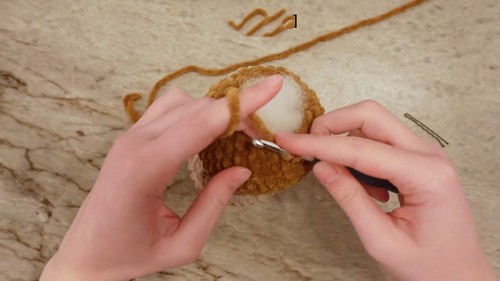
- Use darning needle to weave through the front loops of the remaining stitches, pull tight, tie a knot, and weave in the end.
Snout
- Use tan yarn.
- Row 1: Create a magic ring and work 8 sc into the ring. [8 st]
- Row 2: sc around. [8 st]
- Fasten off with a long tail for sewing.
- Sew the snout across rows 8 to 9 of the head, between the eyes.
Arms (Make 2)
- Use brown yarn.
- Row 1: Create a magic ring and work 8 sc into the ring. [8 st]
- Rows 2-5: sc around. [8 st each row]
- Stuff the arms lightly.
- Chain 1, fold the arm in half, and work 4 sc across.
- Fasten off.
- Sew the arms across rows 14 to 16, facing forward, 2 stitches away from the tan belly.
Ears (Make 2)
- Use brown yarn.
- Row 1: Create a magic ring and work 6 sc into the ring. [6 st]
- Row 2: sc around. [6 st]
- Chain 1, fold the work in half, and work 3 sc across.
- Fasten off with a long tail for sewing.
- Sew the ears on across rows 4 to 6 on the side of the head.
Feet (Make 2)
- Use brown yarn.
- Chain 4.
- Row 1:
- In the second chain from hook, work an inc.
- Next chain: sc.
- Next chain: 4 sc.
- On the other side of the chain: sc, inc. [10 st]
- Rows 2-3: sc around. [10 st each row]
- Fasten off, leaving a long tail for sewing.
- Sew the feet across rows 18 to 20, halfway onto the belly. Stuff the feet before sewing.

Tail
- Use brown yarn.
- Row 1: Create a magic ring and work 6 sc into the ring. [6 st]
- Rows 2-6: sc around. [6 st each row]
- Fasten off with a long tail for sewing.
- Sew the tail across rows 19 to 20 at the back of the body.
Flower
- Use pink acrylic yarn and 2.5 mm crochet hook.
- Chain 2.
- Row 1:
- In the second chain from hook, work sc.
- Slip stitch into the magic ring.
- Repeat 5 times.
- Fasten off with a long tail for sewing.
- Sew the flower on in front of the ear on row 4.
Heart
- Use pink super bulky yarn.
- Row 1: Create a magic ring and work 6 sc into the ring. [6 st]
- Row 2: sc around. [6 st each row]
- Fasten off the first heart bump.
- Create a second heart bump but do not fasten off.
- Row 3:
- Attach first heart bump with 6 sc (1 sc to attach, 5 sc around).
- 6 sc around the second heart bump. [12 st]
- Row 4: (2 sc, dec) x3 around. [9 st]
- Row 5: (sc, dec) x3 around. [6 st]
- Stuff the heart.
- Row 6: 3 dec around. [3 st]
- Fasten off with a tail for sewing.
- Sew closed any gap between the heart bumps.
- Sew the heart onto row 2 of each arm.
Placement Summary
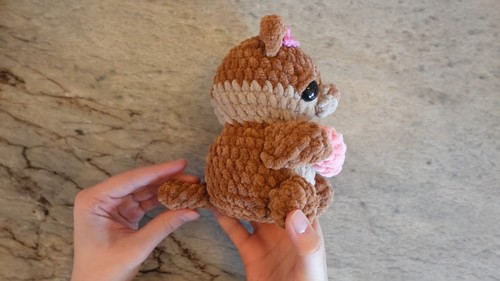
- Eyes: Between rows 8 and 9, 6 stitches apart.
- Arms: Across rows 14 to 16, 2 stitches away from the tan belly.
- Feet: Across rows 18 to 20, halfway on the belly.
- Tail: Across rows 19 to 20 at the back.
- Snout: Across rows 8 to 9 between the eyes.
- Ears: Across rows 4 to 6.
- Heart: Row 2 of each arm.
Finishing
- Ensure all pieces are securely sewn on.
- Weave in all ends and trim any excess yarn.
And that's it! You have now completed Olivia the Otter. Happy crocheting!


