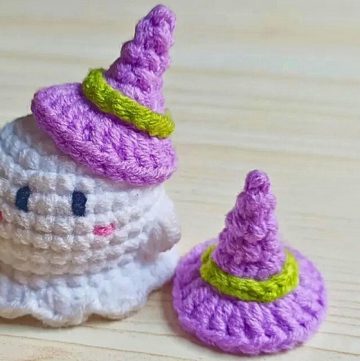
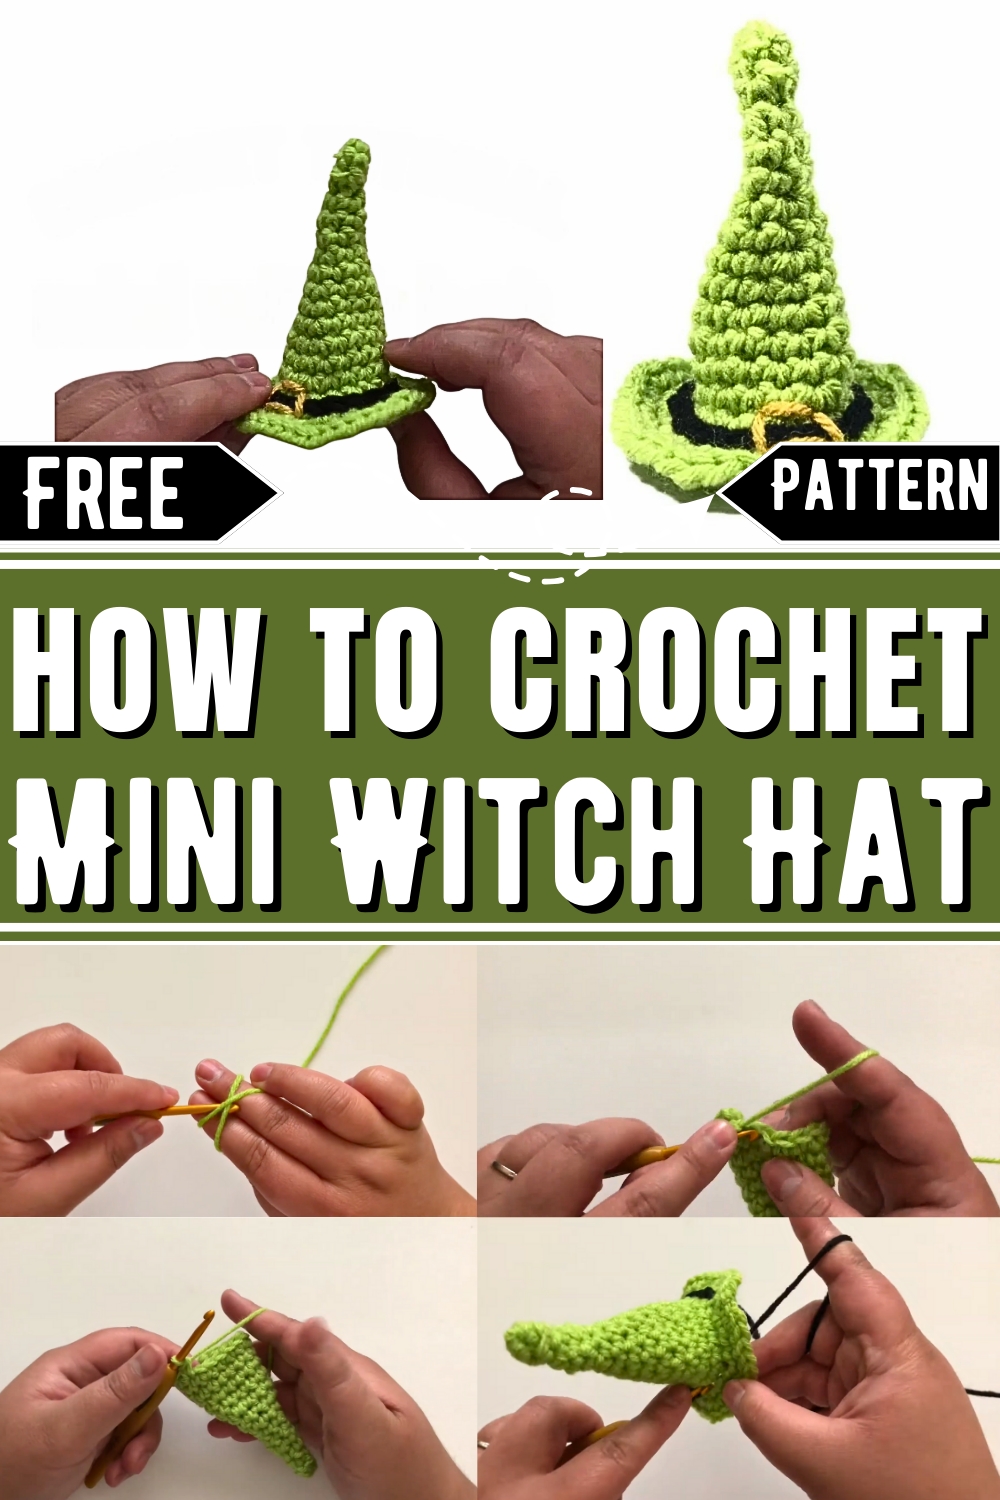
Create charming Halloween accessories with this easy crochet project, perfect for decorations, gift ideas, or adding a handmade touch to your festivities.
Cute And Easy Crochet Mini Witch Hat
Halloween decor has always been a way to show creativity, but store-bought decorations often lack the personal touch many enjoy. The Free Crochet Mini Witch Hat Pattern provides an opportunity to bring a handmade element to your celebrations while keeping things simple and fun. These miniature witch hats are perfect for spicing up your holiday decorations and can be used in a variety of creative ways.
Attach them to headbands for a playful, quirky accessory, use them as festive ornaments, or incorporate them into table centerpieces for a touch of whimsy. Another brilliant idea is stitching these hats as thoughtful gifts or tokens for party guests during Halloween gatherings. The process of crocheting these hats offers more than just a finished product. It's a calming activity that promotes mindfulness and sharpens your focus.
Moreover, the pattern is versatile, letting you experiment with colors, embellishments, and sizes to fit any theme or need. Whether adding personality to your home decor or preparing unique seasonal accessories, these mini witch hats bring a special charm to the occasion. Their versatility and ease of creation make them a favorite among crochet enthusiasts and a delightful way to celebrate the festive season in style.
How To Crochet Miniature Witch Hat
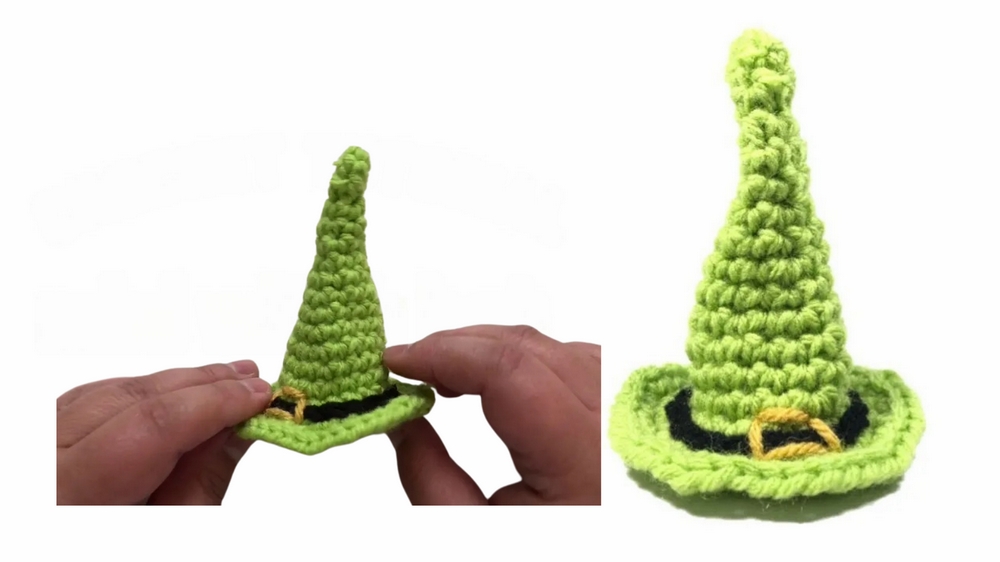
This pattern walks you through creating an adorable miniature witch hat, measuring approximately 3.5 inches tall and 3 inches wide. With clear steps for each round of stitching, you’ll be able to crochet the hat’s cone and brim effortlessly, adding personal details like a buckle for extra flair. Below is the comprehensive step-by-step guide.
Materials Needed
- Crochet hook: (G) 4mm
- Black yarn or preferred color for the hat
- Yellow or gold yarn for optional buckle decoration
- Stitch marker (optional)
- Scissors
- needle
Step-by-Step Instructions
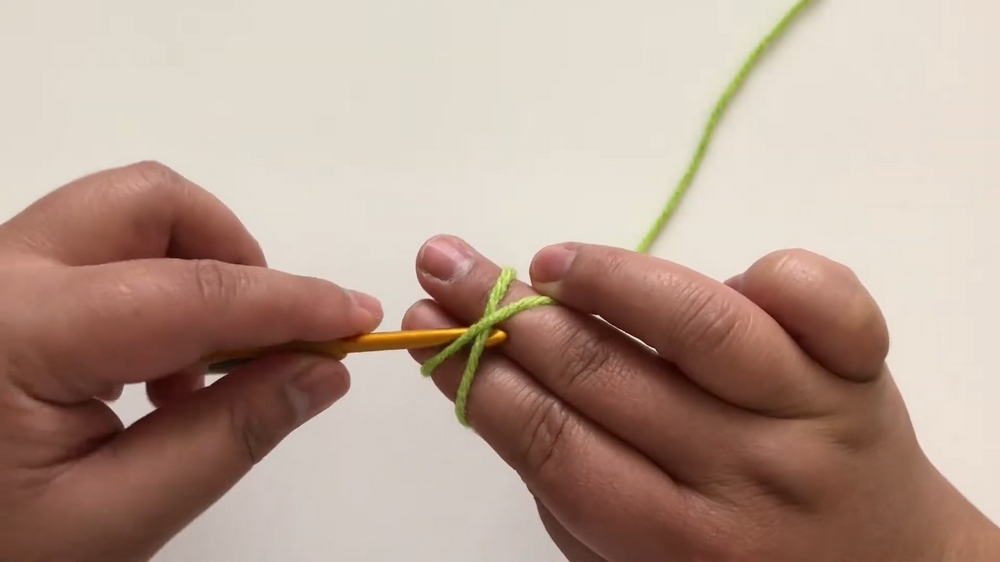
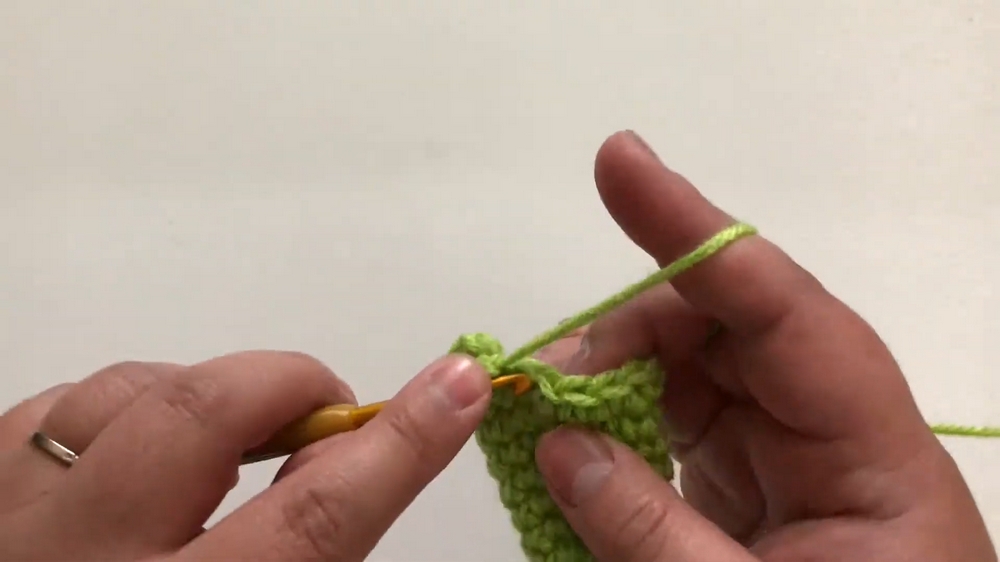
R1: Foundation with Magic Circle
- Begin by creating a magic circle. (Technique adapted from Happy Berry Crochet; check their channel if needed.)
- Work 4 single crochets (SC) into the magic circle and close the loop.
- Stitch Count: 4
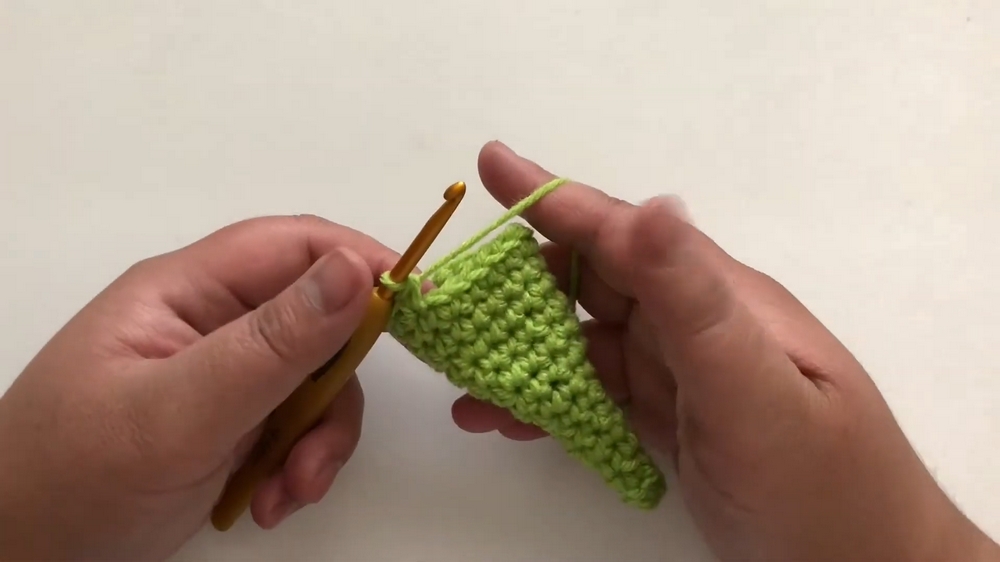
R2–R3: Building the Cone
- For rounds 2 and 3, work 1 single crochet into each stitch (no increases).
- Stitch Count: Remains 4
R4: Start Increasing
- Work 1 SC in the first stitch, then an increase (2 SC in the same stitch) in the next.
- Repeat this sequence once more for the round.
- Stitch Count: 6
R5–R6: Maintain Shape
- Work 1 SC in each stitch for rounds 5 and 6.
- Stitch Count: Remains 6
R7: Increasing Again
- Work 1 SC in the first stitch, then an increase in the next stitch.
- Repeat this sequence twice for the round.
- Stitch Count: 9
Pause: Cleaning Tip
Remove any pet hair or debris from your project as needed to maintain neatness.
R8: Steady Rows
- Work 1 SC in each stitch around.
- Stitch Count: 9
R9: More Increases
- Work 1 SC in each of the next 2 stitches, then an increase in the following stitch.
- Repeat this sequence twice for the round.
- Stitch Count: 12
R10: Steady Rows Again
- Work 1 SC in each stitch around.
- Stitch Count: Remains 12
R11: Increase Gradually
- Work 1 SC in each of the next 3 stitches, then an increase in the following stitch.
- Repeat the sequence twice for the round.
- Stitch Count: 15
R12: Steady Stitch
- Work 1 SC in each stitch around.
- Stitch Count: Remains 15
R13: Increase Further
- Work 1 SC in each of the next 4 stitches, then an increase in the following stitch.
- Repeat the sequence twice for the round.
- Stitch Count: 18
R14: Final Cone Round
- Work 1 SC in each stitch around.
- Stitch Count: Remains 18
- Slip stitch to close the round.
R15: Start the Brim
- In the front loop only, work 1 SC in the first stitch, then an increase in the next.
- Repeat this sequence all the way around.
- Stitch Count: 27
- Slip stitch to finish the round.
R16: Build the Brim
- Chain 1 and resume working in both loops.
- Work 1 SC in the first stitch, then an increase in the next.
- Repeat this sequence all the way around.
- Stitch Count: 40
- Slip stitch to finish the round.
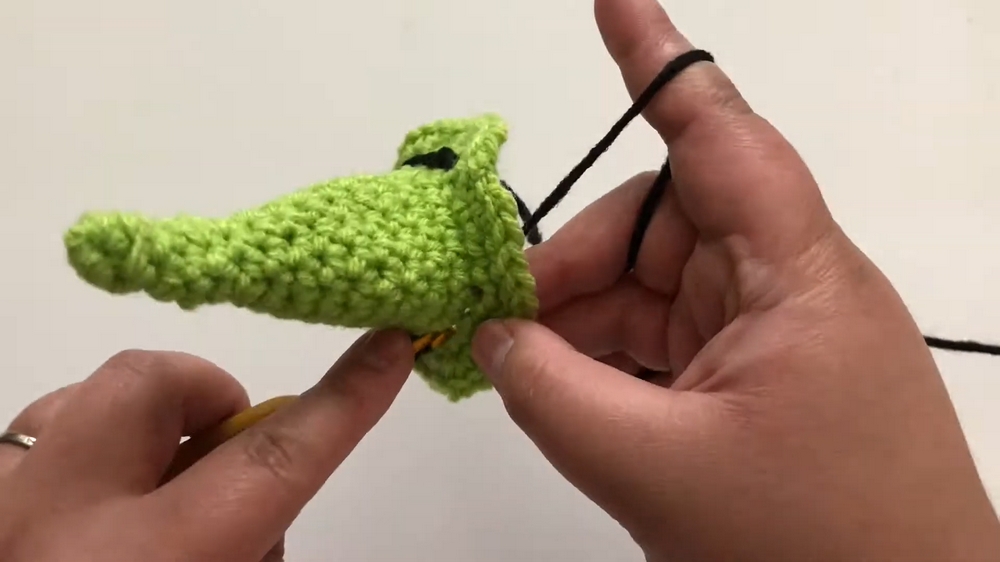
Optional Step: Add Decorative Details
- Use black yarn to slip stitch around the brim for a polished look.
- Use yellow or gold yarn to create a simple buckle with embroidery, secure it, and weave in the ends.
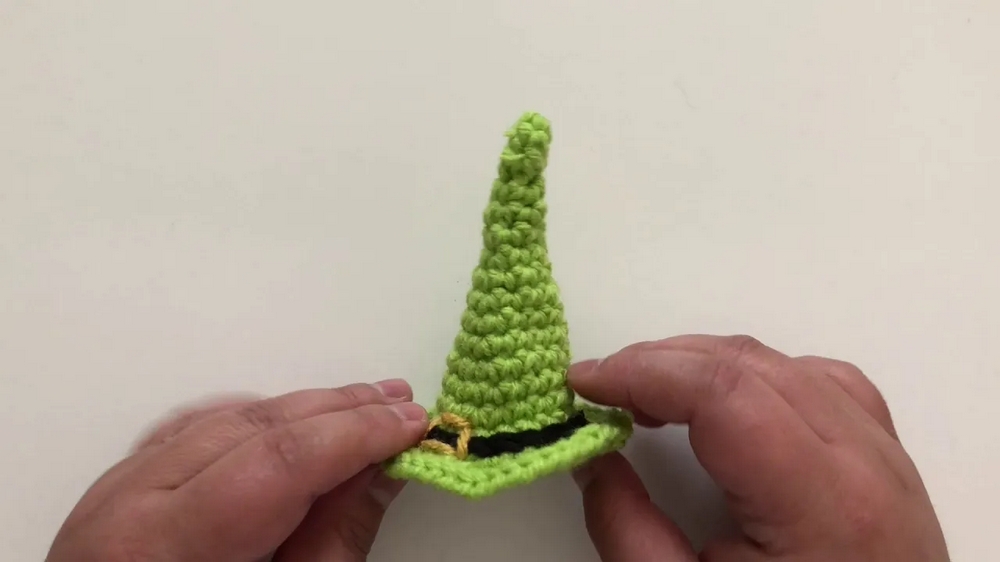
Conclusion
By following this pattern, you'll have a delightful miniature witch hat that’s perfect for Halloween décor, doll accessories, or miniature display pieces. The step-by-step increases create a smooth conical shape, while the brim offers a crisp, playful element. Add a decorative buckle for personalization, and enjoy admiring your finished creation.