
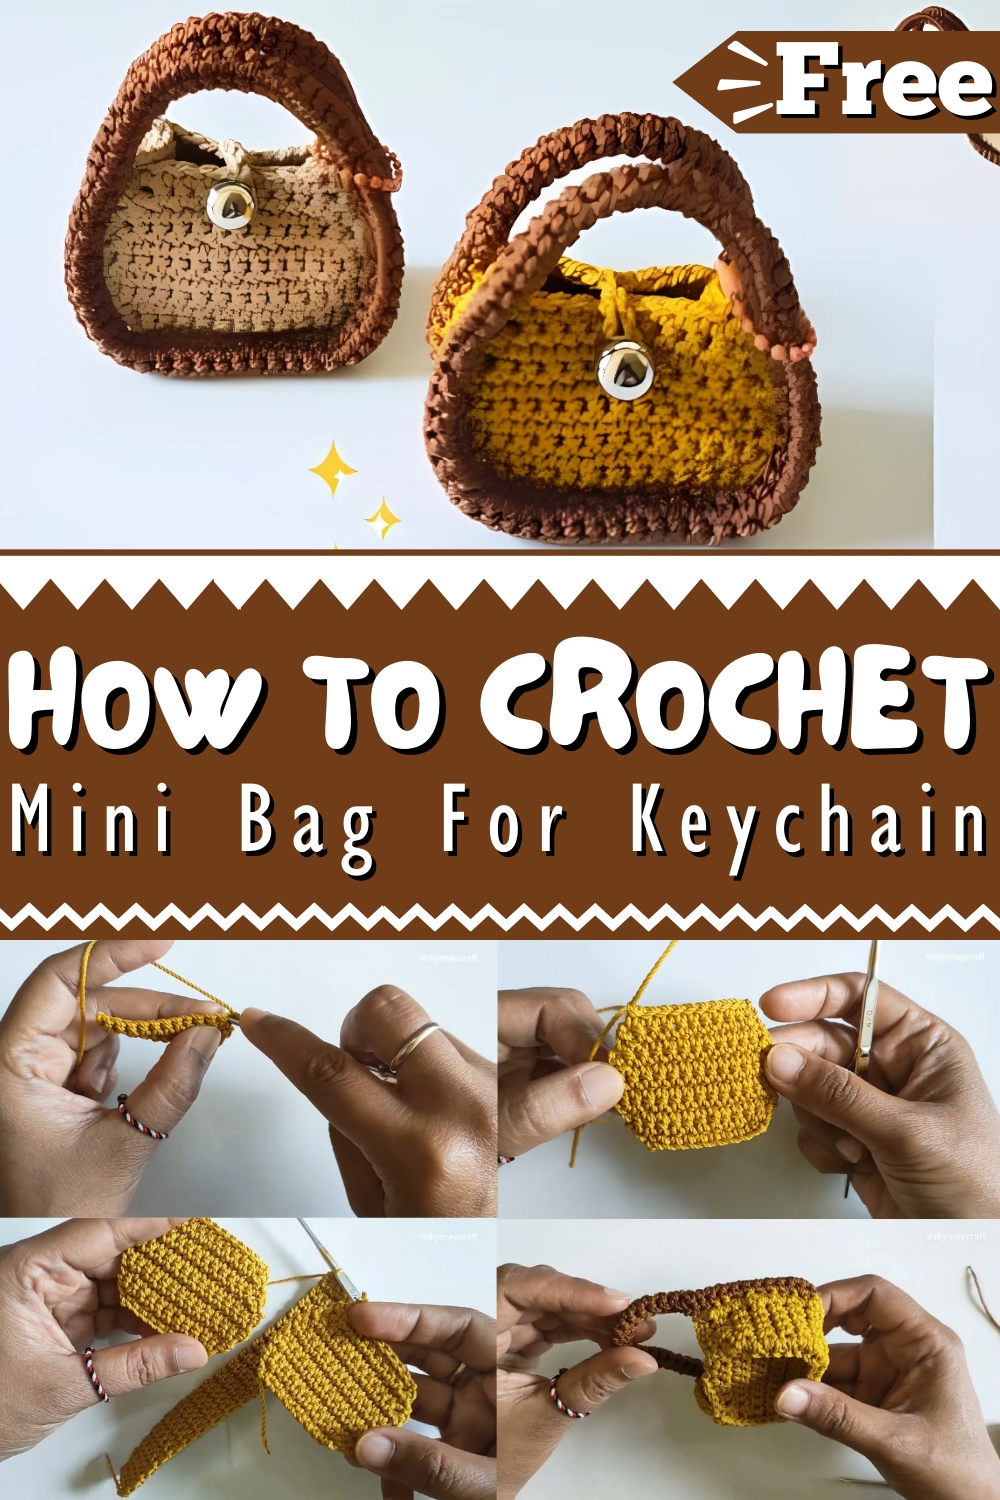
Enjoy this playful Free Crochet Mini Bag for Keychain Pattern - a unique, stylish accessory that adds a handmade touch to your everyday essentials!
Mini Bag For Keychain
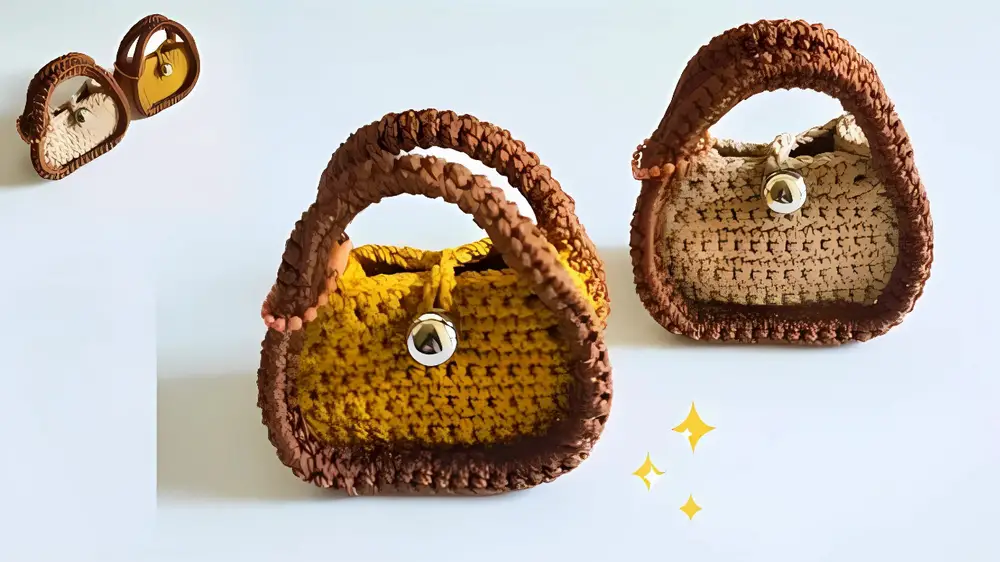
The charm and versatility of the crochet mini bag for keychains shine through in this delightful project, perfect for any crochet enthusiast's collection. This pattern marries creativity and practicality, allowing you to showcase your crafting prowess while creating a useful accessory. Ideal for carrying small essentials like keys, coins, or lip balm, the mini bag is both stylish and functional.
Its compact size and straightforward design make it suitable for crocheters of all skill levels. The process offers a satisfying experience, as you can experiment with various colors and yarn types. Whether you seek a quick weekend project or a heartfelt handmade gift, this mini bag pattern will undoubtedly impress.
Tip:
For added sturdiness, consider using a slightly thicker yarn or incorporating a fabric lining to ensure the mini bag endures daily use.
How To Crochet Mini Bag Keychain
1. Materials and Tools
- Yarn: Onitsuga polycherry yarn
- Hook: 4/0 hook from Tulip
- Other tools: Scissors, tapestry needle, lighter, button, needle and sewing thread
Step-by-Step Guide For Keychain
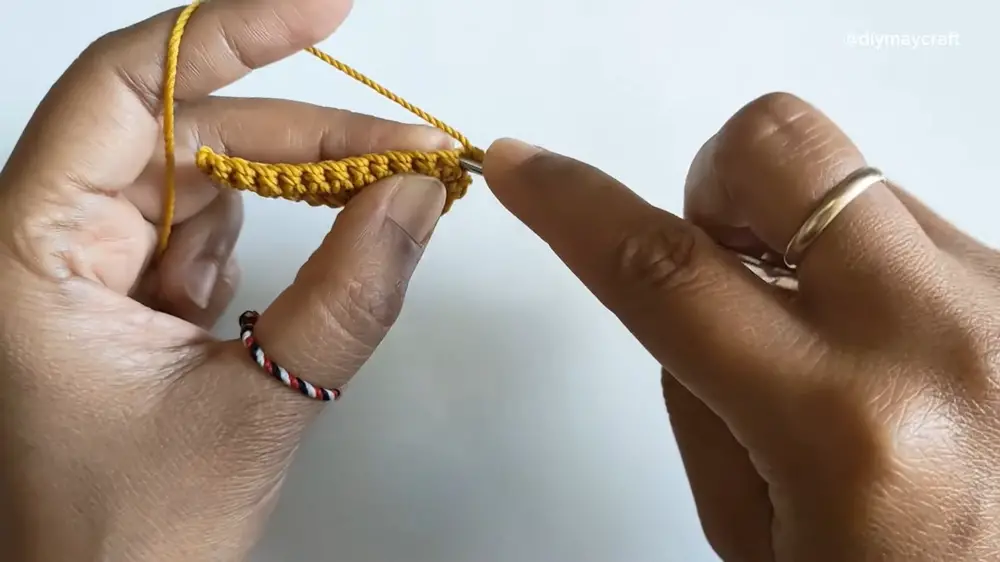
2. Initial Setup
- Begin with a slip knot.
- Chain 11.
3. Creating the Base
- Row 1: Make 10 single crochets (sc) in the previous 10 chains.
- Row 2: Chain 1, turn your work. Make a single crochet increase (2 sc in one hole) in the first stitch, then 8 sc, and a single crochet increase in the last stitch (total 12 sc).
- Row 3: Chain 1, turn your work, make 12 sc.
- Row 4: Chain 1, turn your work. Make a single crochet increase in the first stitch, then 10 sc, and a single crochet increase in the last stitch (total 14 sc).
4. Continuing Rows
- Rows 5-7: Chain 1, turn your work, make 14 sc in each row.
5. Creating the Top Shape
- Row 8: Chain 1, turn your work. Make a single crochet decrease (2 sc together) in the first 2 stitches, then 10 sc, and a single crochet decrease at the end (total 12 sc).
- Row 9: Chain 1, turn your work, make 12 sc.
- Row 10: Chain 1, turn your work. Make a single crochet decrease, 8 sc, and a single crochet decrease (total 10 sc).
- Row 11: Chain 1, turn your work, make 10 sc.
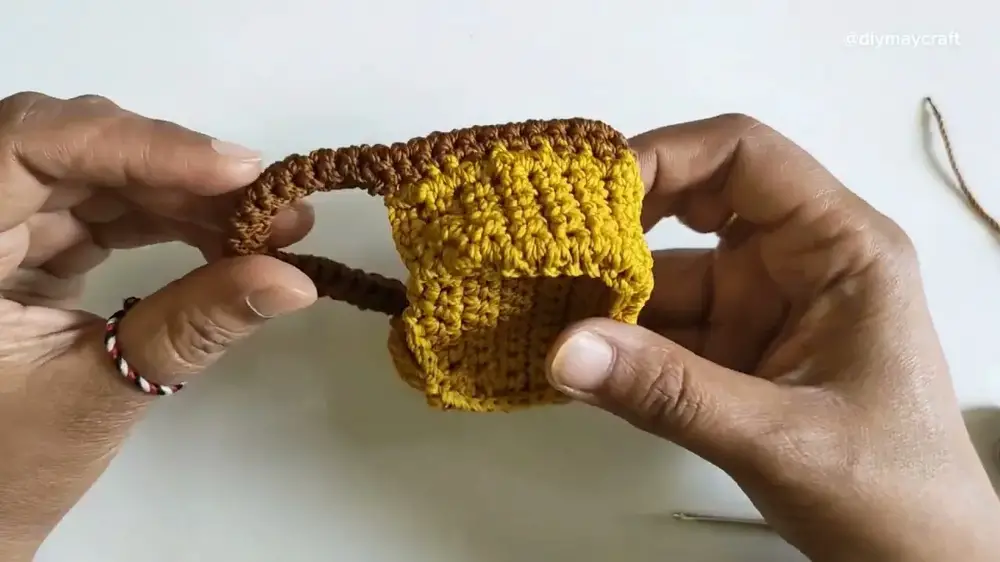
6. Duplicate the Section
- Finish off with a chain and cut the thread, sealing the end with a lighter.
- Create another piece by repeating the steps outlined above, matching the first one.

7. Creating the Side Sections
- Row 1: Begin with a slip knot and make 6 chains.
- Row 2-34: Make 5 sc in each row, chaining 1 and turning your work after each row until you have 34 rows.
8. Joining the Sections
- Align the two main body pieces. Join with a slip knot and chain 1.
- Side 1: Work 10 sc along the side, and in each corner, make 2 sc in the front and none in the back. Make 8 sc along the bottom and 10 sc up the other side. Finish with a slip stitch.
9. Loop for Button
- Chain 12 or adjust for the size of your button.
- Attach with a slip stitch, completing with a lighter to seal.

10. Final Assembly
- Handle: Make a slip knot and 20 chains. Attach with a slip stitch on the opposite side.
- Chain 1, make 34 sc along the first side, 20 sc along the handle, and 54 sc in total. Repeat for total because 54*2 (as two portions joined here).
- Join with a slip stitch and end off, leaving a long thread for sewing.
- Use a tapestry needle to sew the handle in place, hiding stitches within the work.
11. Finishing Touches
- Attach the button opposite the loop using needle and sewing thread.
Conclusion
Now, your crochet mini bag keychain is ready to use! With its charming design and practical uses, it's a delightful addition to any set of keys. Enjoy crocheting and the satisfaction of finishing your handmade accessory.


