This Crochet Mallard Duck Tutorial is a delightful guide for anyone looking to make their own charming duck. The creator offers clear, step-by-step instructions, ensuring that even beginners find the process enjoyable and straightforward. With her expert tips, your project will come together beautifully, resulting in an adorable, handmade toy that’s perfect as a gift or a special keepsake. Each stage is carefully explained and demonstrated, making this tutorial not just informative but also fun. Connect with your creative side and enjoy the satisfying process of bringing this cute crochet duck to life.
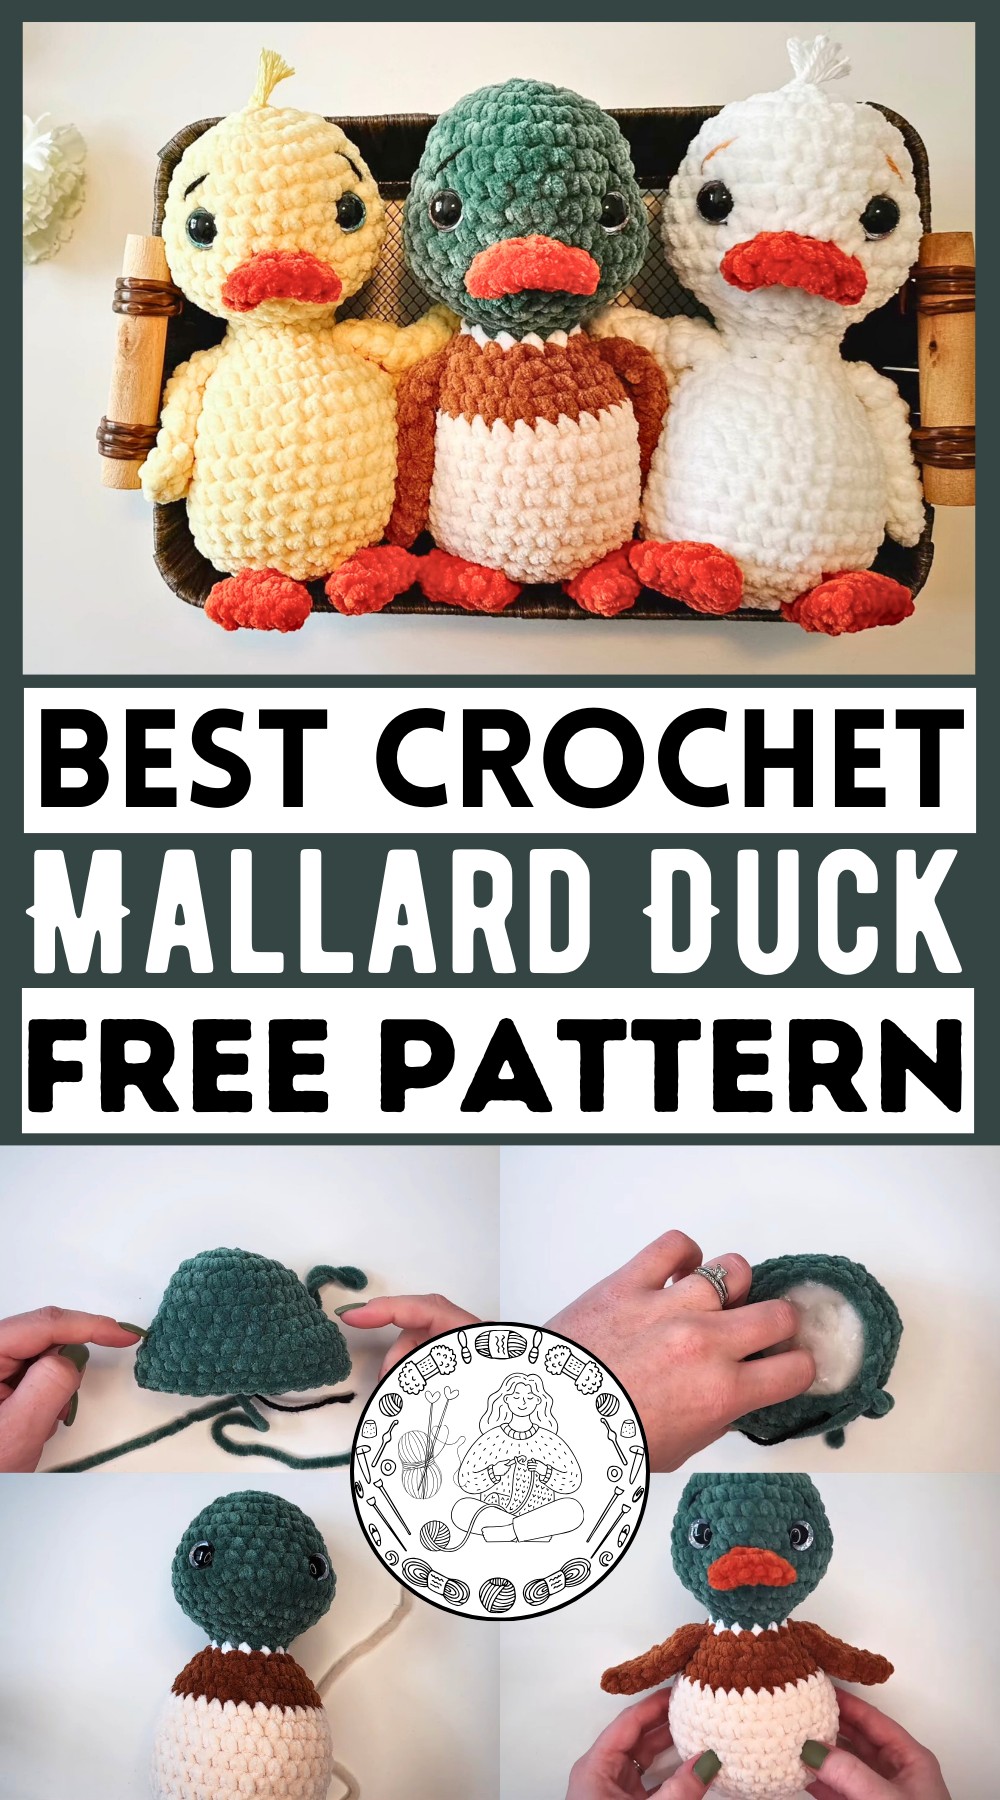
How To Crochet Mallard Duck Amigurumi
- Quick to Make: The carrot only takes about 8 minutes to make, making it a fast and enjoyable project.
- Simple Stitches: You only need to know how to chain and single crochet, making it accessible for beginners.
- No Sewing Required: The pattern is designed to be seamless, so there’s no sewing required.
- Minimal Supplies: You only need a small amount of orange and green yarn, a 5mm crochet hook, a yarn needle, stuffing (or yarn scraps), and scissors.
- Versatile Use: The carrot can be used as a prop for crocheted animals or as part of an Easter decoration, like a carrot garland.
- Easy to Customize: By adjusting the length of the twine and number of carrots, you can create a custom garland to fit your decoration needs.
Easy Crochet Mallard Duck Pattern
Materials Needed
- Various colors of yarn:
- Green (for the head)
- White (for part of the body)
- Brown (for another part of the body)
- Beige (for the lower part of the body)
- Orange (for the feet and beak)
- Black (for face shaping and eyebrows)
- Hooks: 5.5mm (main) and 4.5mm (weaving)
- Additional Supplies: Darning needle, scissors, 16mm safety eyes, fabric pins, stitch marker, fiber fill, scrap yarn for stitch marking
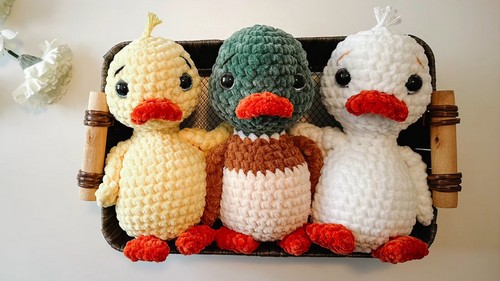
Pattern Overview
- One-piece Construction: The pattern is worked from the head down to the body with several color changes.
Instructions
Head
- Round 1: Magic Ring with 8 sc.
- Round 2: Increase in every stitch (16 sts).
- Round 3: (1 sc, 1 inc) repeat around (24 sts).
- Rounds 4-6: Single crochet around (24 sts).
- Round 7: Face Shaping (Combination of increases and regular sc).
- Rounds 8-10: Single crochet around (30 sts).
- Round 11: (3 sc, 1 dec) (24 sts).
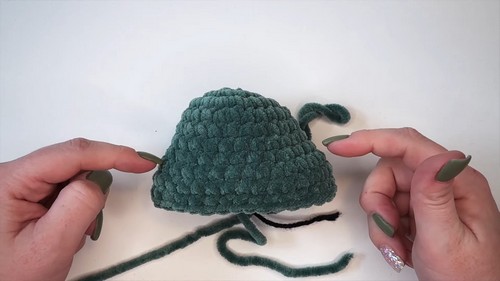
- Round 12: (2 sc, 1 dec) (18 sts).
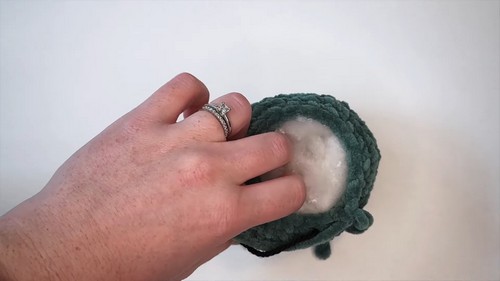
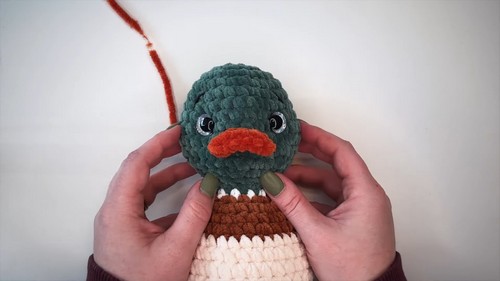
- Stuff the head and place the eyes:
- Insert 16mm safety eyes between R7 and R8.
- Approx. 6 stitches apart.
- Round 13: (1 sc, 1 dec) (12 sts).
- Round 14: Single crochet around (12 sts).
Body
- Color Change: Switch to white yarn.
- Round 15: Single crochet around (12 sts).
- Color Change: Switch to brown yarn.
- Round 16: (1 sc, 1 inc) (18 sts).
- Round 17: (2 sc, 1 inc) (24 sts).
- Round 18: Single crochet around (24 sts).
- Round 19: (2 sc, 1 inc) (32 sts).
- Color Change: Switch to beige yarn.
- Rounds 20-26: Single crochet around (32 sts).
- Round 27: (2 sc, 1 dec) (24 sts).
- Round 28: Single crochet around (24 sts).
- Stuff the body.
- Round 29: (1 sc, 1 dec) (16 sts).
- Round 30: Full decrease round (8 sts).
- Finish Off: Close the remaining hole and weave in ends.
Face Shaping
- Eyebrows:
- Insert black yarn through the head, creating little dimples.
- Secure them by tying knots inside the head.

Beak
- Round 1: Chain 7, 6 sc on top and 6 sc on bottom (12 sts).
- Round 2-3: Single crochet around (12 sts).
- Shape the beak: Sew the edges together and attach to the head.
Wings
- Round 1: Magic Ring with 8 sc.
- Round 2: (1 sc, 1 inc) (16 sts).
- Round 3: (2 sc, 1 inc) (24 sts).
- Round 4: (3 sc, 1 inc) (32 sts).
- Closing the Wing: Fold in half and sew along the curved edge for shape.
- Curving the Wing: Slightly curve the end of the wing for better shape when attached.
Attaching Wings and Feet
- Wings: Sew onto round 17 of the body, weaving ends for a curved look.
- Feet:
- Chain 7, 6 sc on top and 6 on the bottom (12 sts).
- Create triangular feet and attach on rounds 27-30.
Conclusion
- Final Touches: Ensure all pieces are securely attached.
- Personalization Advice: Choose different colors if desired.