
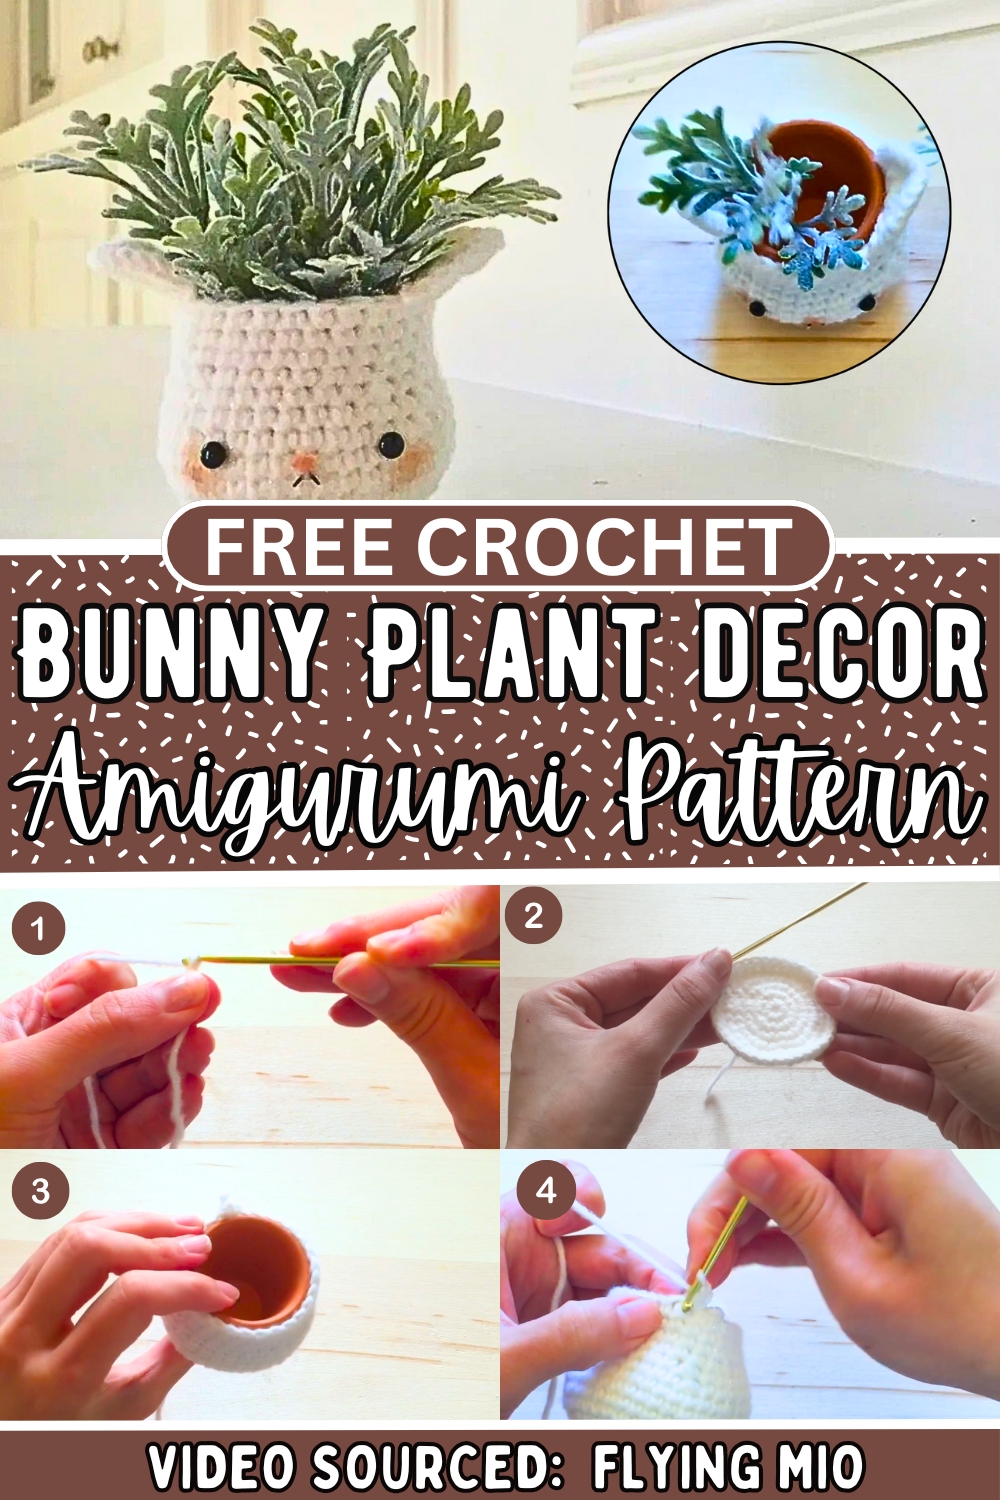
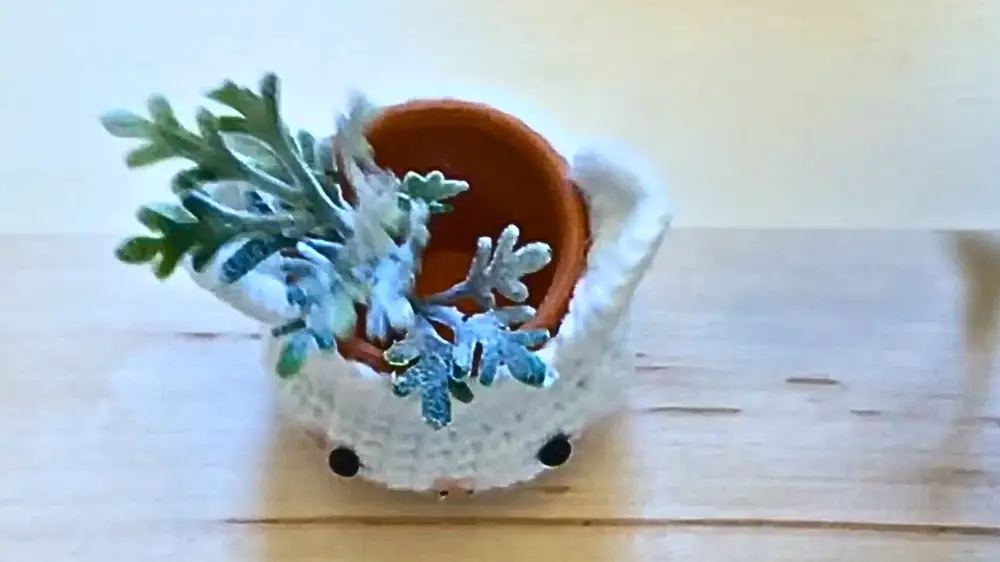
Bring cuteness to life with this quirky crochet pattern an adorable bunny peeking out of a plant that's sure to make you smile and spark joy!
Crochet Kawaii Amigurumi Bunny Plant Home Decor
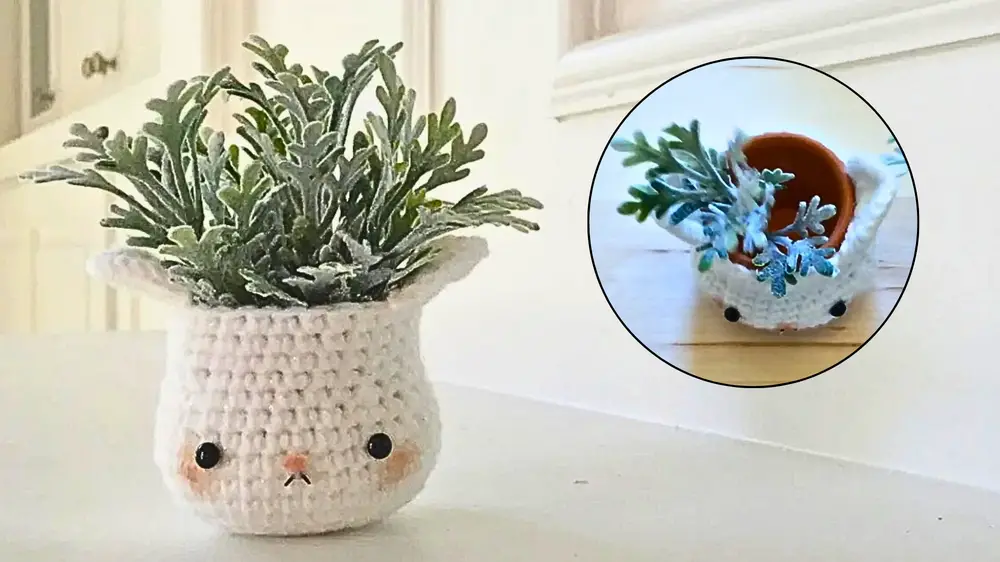
Small handmade bunny plant caught the attention of a passerby, spreading smiles with its adorable charm. Inspired by such happy little moments, the free crochet kawaii amigurumi bunny plant pattern brings that joyful creativity into your hands. This project allows you to crochet a charming bunny resting in a tiny plant pot, complete with soft leaves at the top.
It’s a great way to use up leftover yarn, adding an eco-friendly touch to your hobby while minimizing waste. Whether perched on a work desk to brighten your day or tucked into a gift bag to surprise a loved one, this bunny plant adds a playful yet meaningful touch. Accessible to beginner and experienced crocheters alike, it’s a tiny reminder of how small, thoughtful creations can bring endless joy to everyday spaces.
How To Crochet Kawaii Amigurumi Bunny Plant Home
Creating a crochet bunny pot is a fun and rewarding project that combines crocheting and creativity to produce a charming decorative item for your home or as a thoughtful housewarming gift. This crochet decor pattern is beginner-friendly, with clear instructions to help crochet enthusiasts and newcomers follow along seamlessly. Below, you'll find a detailed step-by-step guide to make this adorable project.
Materials Needed
- Crochet hook: 2.75 mm
- White yarn: For the main design
- Pink felt: For the bunny’s nose
- Black string: For the mouth
- Plastic animal eyes: Optional for final details
- Stuffing: To maintain the pot’s shape
- Hot glue gun: To secure your project’s pieces
- Makeup palette: Light pink/peach color for cheeks
- Craft leaves or faux plants: Optional for decoration
Step by step Guide
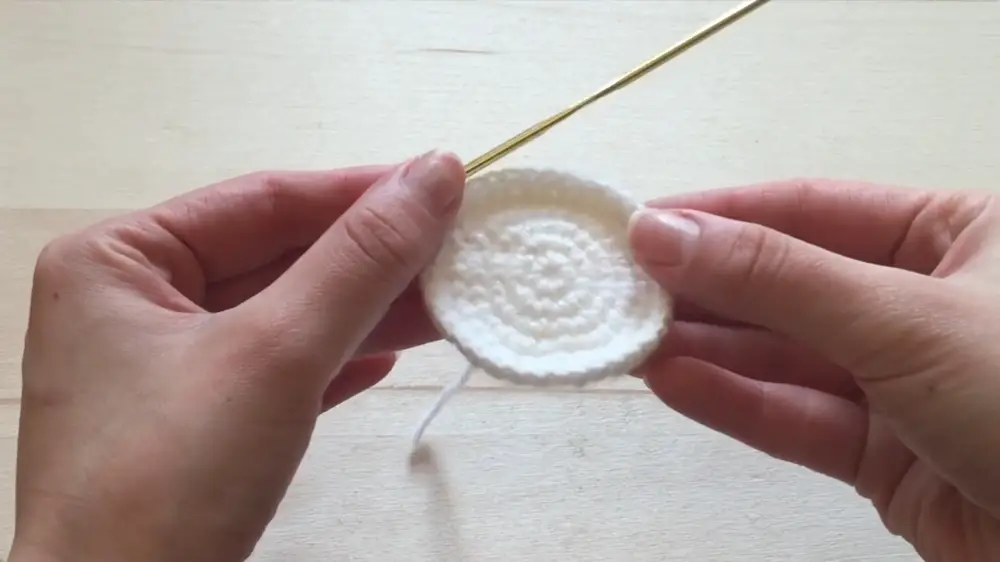
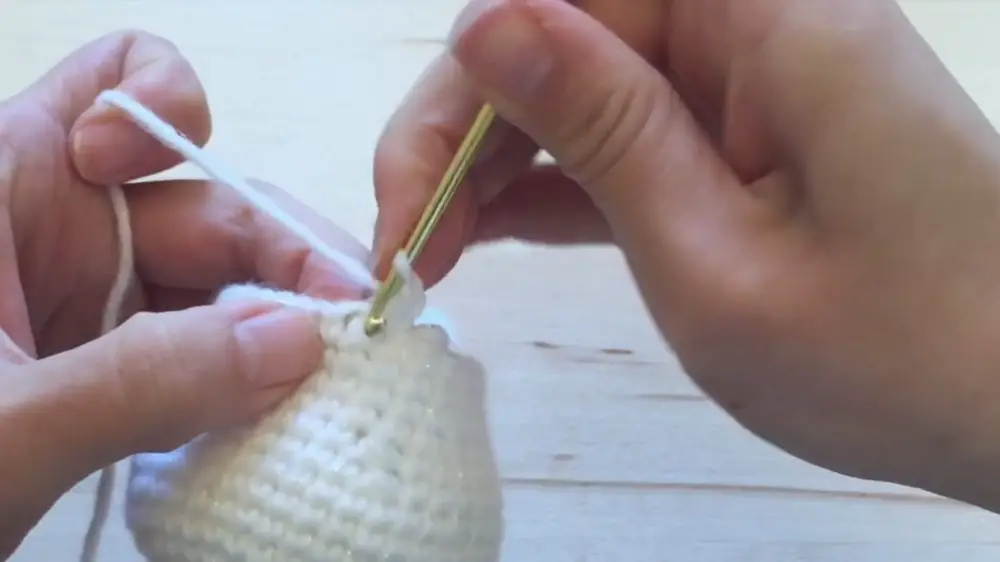
Step 1: Form the Base Circle
- Start by forming a simple loop with the yarn. Wrap the yarn around the crochet hook and pull it through the loop to create the first chain.
- Create several stitches through the first loop (5-6 stitches) to form a small circle.

- To close the circle, insert the hook into the first stitch, pull some yarn through, and pull it through the loop on your hook. This creates a tight tiny circle.
Step 2: Expand the Circle
- Begin the second row by creating a simple chain.
- Insert the hook into the first stitch, pull some yarn through, and complete the stitch. Repeat the process, putting two stitches per one stitch to expand the circle and make it larger.
- Continue this process for the entire second row.
Step 3: Create Additional Rings
- Start each ring with a simple chain and begin stitching into the first stitch of the previous row. For the third ring, create regular stitches without expansions for every third or fourth stitch.
- Continue crocheting rows, adding expansions only as necessary to ensure the circle fits the widest part of your pot.
- You’ll need 5-6 rings in total for the base of the pot.
Step 4: Curving the Pot’s Sides
- To form the curvature of the pot, crochet an additional row without expansions. This change will help the stitches curve upward.
- Start skipping stitches to tighten the rim around the pot. Instead of closing every stitch, skip a stitch by pulling yarn through three loops on your hook. This prevents gaps in the design.
- Alternate between regular stitches and skipped stitches every 4-5 stitches to ensure a snug fit around the top of your pot.
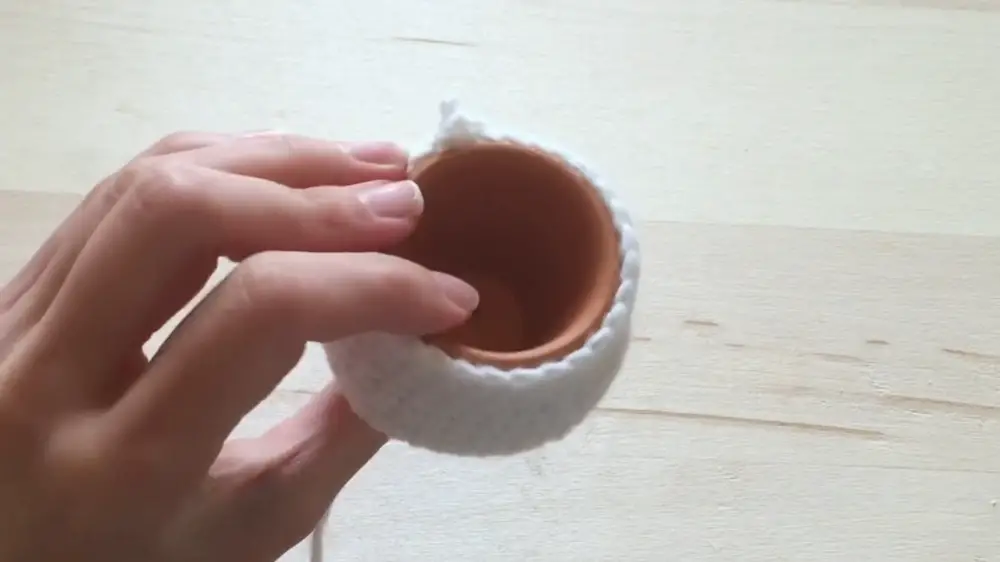
Step 5: Add Stuffing for Support
- Place stuffing in the base of your crochet project to ensure it maintains shape and doesn’t collapse.
- Adjust the crochet rim to fit snugly over the pot you’re using.
Step 6: Create Bunny Ears
- To create an ear, form semi-circles on the side of the pot by crocheting 5 stitches into one loop.
- Add a second row to expand the ear into a larger semi-circle.
- Cut off the extra yarn, pull the yarn through the final loop to secure the ear, and use hot glue or tuck the edges into the pot for a clean finish.
- Repeat this process for the second ear, ensuring both sides are symmetrical.
Step 7: Assemble the Bunny Face
- Cut a small oval shape out of pink felt to create the bunny’s nose.
- Attach plastic animal eyes or any alternative materials (clay, thread, etc.) to represent the bunny’s eyes.
- Use black string to stitch or glue the bunny’s mouth directly onto the crocheted pot.
Step 8: Add Cheeks and Decorative Touches
- Use a makeup palette to apply light pink/peach color to the bunny’s cheeks underneath the eyes.
- You can also darken the nose for better emphasis.
- Add faux plants or crochet leaves to finalize the bunny pot’s decorative purpose.
Conclusion
This crochet bunny pot is a delightful and customizable project that lets you express your creativity. Its versatility makes it a perfect centerpiece or housewarming gift. The detailed steps above ensure your project is structured and easy to replicate. Whether using it as storage or simply decor, this adorable bunny pot adds charm to any space!


