Step into the enchanting guide of crochet with our Free Jordana Triangle Shawl Pattern—an irresistible blend of elegance, warmth, and creative expression!
Crochet Jordana Triangle Shawl
Where elegance meets functionality in a cozy wrap that dazzles the senses. This stunning pattern is designed for crochet enthusiasts of all levels, offering an engaging project that results in a beautiful, wearable accessory. Featuring an intricate yet approachable stitch design, the shawl seamlessly blends texture and style, making it an ideal crochet piece for both casual outings and special occasions.
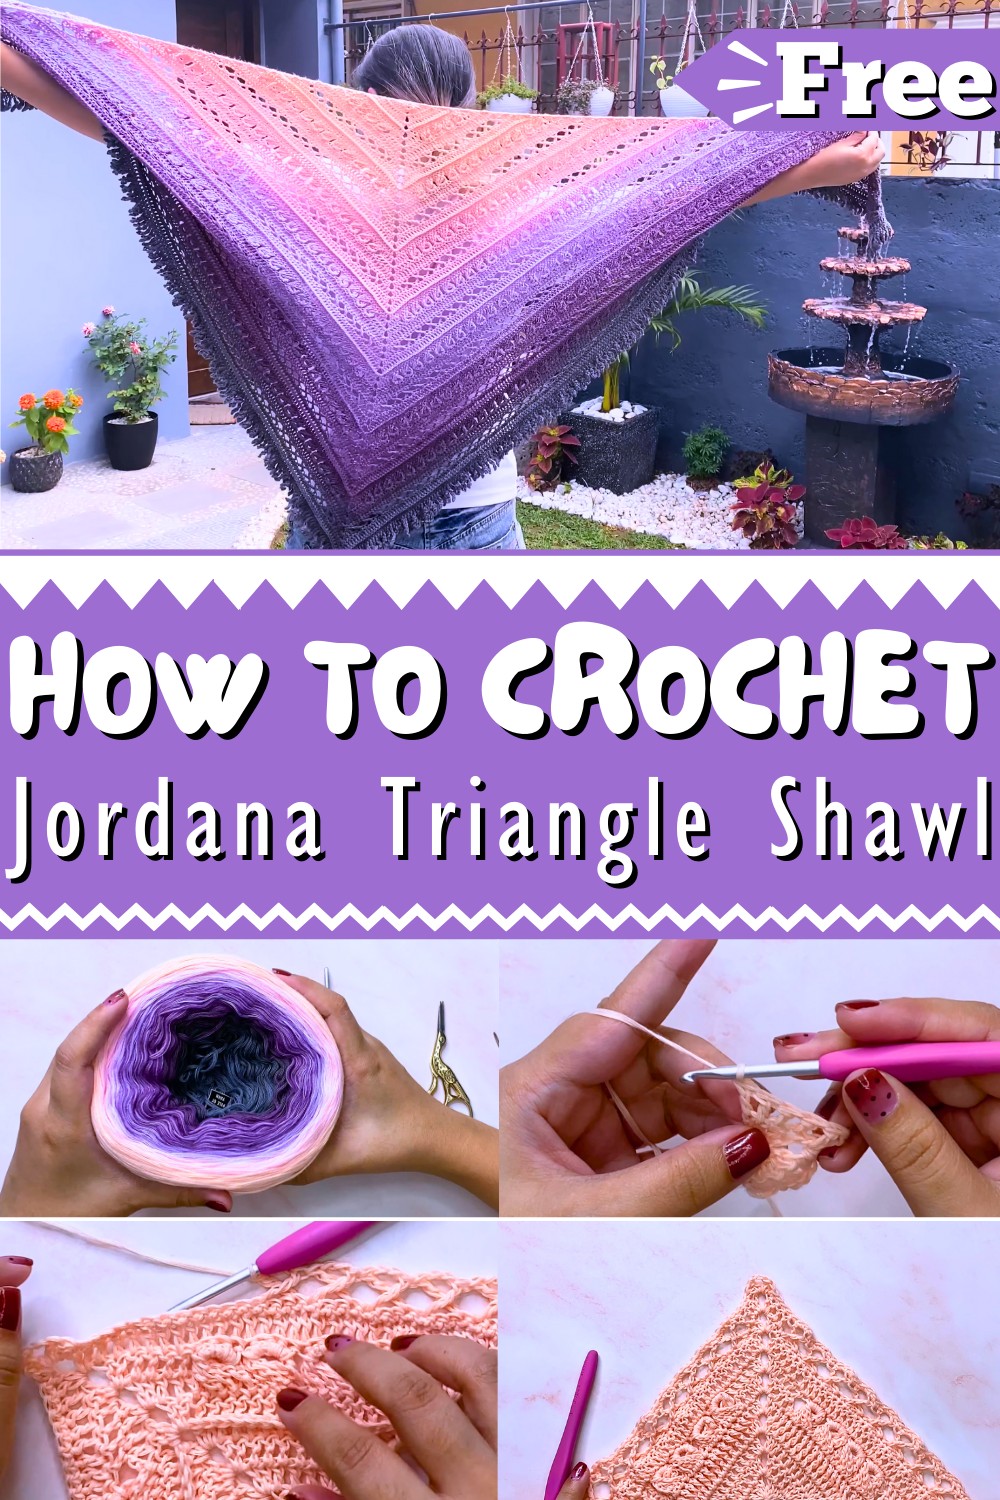
To begin, select your favorite yarn and corresponding hook size. Start with a foundation chain and work through a series of double crochets, following the pattern's detailed instructions. As you progress, you'll create the triangle shape by adding and decreasing stitches at specified points. Whether you're enhancing your wardrobe or creating a heartfelt gift, this shawl is a timeless addition.
Tip: Experiment with a lightweight yarn for a breezy look, or choose a thicker fiber for extra warmth and coziness.
How To Crochet Jordana Triangle Shawl
This project is suited for those already familiar with crochet terms and stitches, but beginners are also welcome. You might need to look up some basic stitches. The design features an eight-row repeat pattern, repeated until you reach your desired size.
Materials
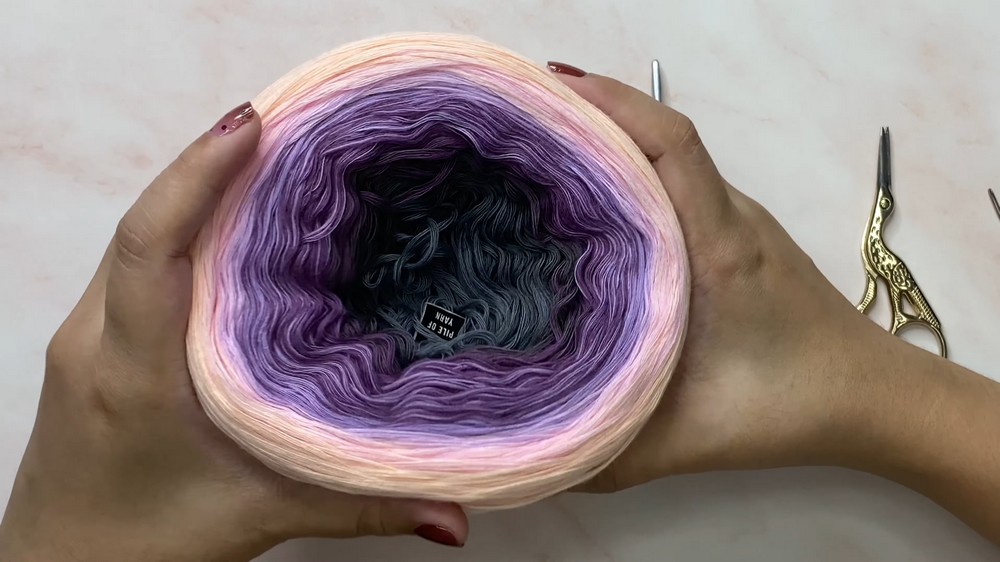
- Yarn: Fingering weight yarn recommended (other yarn weights can also be used).
- Crochet Hook: 3.75 mm
- Additional Tools: Scissors and needle for weaving ends.
Step-by-Step Instructions
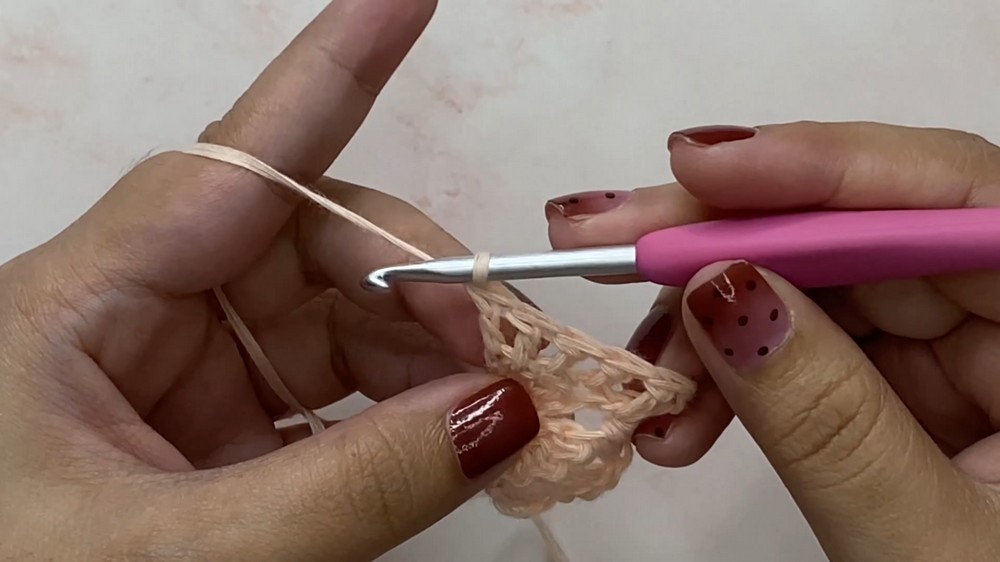
Starting the Magic Ring
- Leave a tail for weaving later.
- Make a magic ring (or chain four to form a ring).
Row 1
- Chain 3 (counts as first double crochet).
- 3 double crochets into the ring.
- Chain 2 and make 4 more double crochets into the ring.
- Pull the tail to close the ring. (You should have a total of 8 stitches.)
Row 2
- Turn your work.
- Make 3 double crochets into the first stitch.
- 1 double crochet into the next 3 stitches.
- 2 double crochets into the chain-2 space, chain 2, and make 2 more double crochets into the same space.
- 1 double crochet into the next 3 stitches.
- 3 double crochets into the last stitch.
- (Total of 16 stitches.)
Row 3
- Turn your work.
- Make 3 double crochets into the first stitch.
- 1 double crochet into the next 7 stitches.
- 2 double crochets into the chain-2 space, chain 2, and make 2 more double crochets into the same space.
- 1 double crochet into the next 7 stitches.
- 3 double crochets into the last stitch.
- (Total of 24 stitches.)
Row 4
- Turn your work.
- Make 3 double crochets into the first stitch.
- 1 double crochet into each stitch until the chain-2 space.
- 2 double crochets into the chain-2 space, chain 2, and make 2 more double crochets into the same space.
- 1 double crochet into each stitch until the last stitch.
- 3 double crochets into the last stitch.

Row 5
- Turn your work.
- Make 3 double crochets into the first stitch.
- Front post double crochets across each stitch until the last stitch before the chain-2 space.
- 2 double crochets into the chain-2 space, chain 2, and make 2 more double crochets into the same space.
- Continue with front post double crochets until the last stitch.
- 3 double crochets into the last stitch.
Row 6
- Turn your work.
- Make 3 double crochets into the first stitch, then chain 10.
- Slip stitch into the next stitch.
- Continue making loops of 10 chains until 2 stitches before the chain-2 space.
- Double crochet into the last remaining stitch before the tip, 2 double crochets in the chain-2 space, chain 2, and 2 double crochets into the same space.
- Double crochets in the sts before the end, and complete each row similarly to create fringe loops.

Row 7
- Follow steps for rows, including ensuring proper tension and clean looping techniques.
- Properly complete each single crochet between
- borders.
Rows 8-11
- Continue with the pattern, emphasizing increases following calculated symmetry.
- Complete each stitch until you create proper final shawl sizes.
Repeat Rows 4-11
- Follow same techniques until desired length is reached.
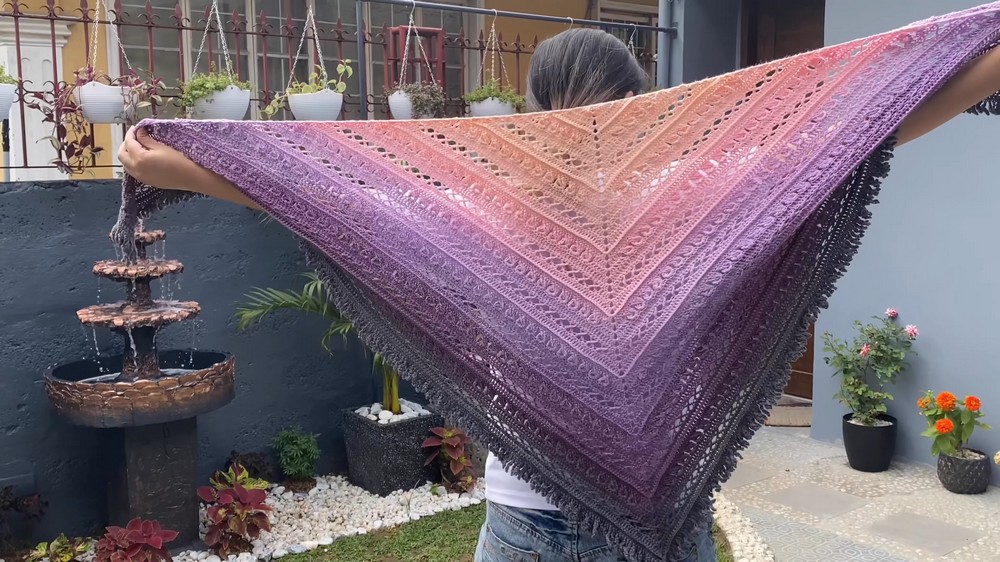
Conclusion
The pattern is easy to follow, delivering a detailed, delicate shawl, perfect for all skill levels. The discussed techniques can also be adapted into various project forms.