
Unveil the charm of coziness with our exclusive crochet hooded scarf pattern, merging warmth and style into an enchanting, handmade fashion statement.
Crochet Hooded Scarf Pattern
With this pattern, you can bring a timeless charm to your wardrobe while staying delightfully cozy. Its intricate yet easy-to-follow design makes it perfect for crocheting a stylish accessory that complements any outfit. Whether you're draping it elegantly over a winter coat or adding a splash of color to a casual ensemble, this scarf is as versatile as it is eye-catching. Ideal for gifting, its handmade touch conveys warmth and thoughtfulness. .

As you crochet this plaid beauty, you'll enjoy the rhythmic, relaxing process that makes crafting so rewarding. To enhance your project, experiment with different yarn textures and colors to personalize your scarf.
Tip:
Block your finished scarf to ensure it lays flat and the stitches settle beautifully. Step into the cozy world of crochet, and create a plaid masterpiece that showcases your unique style and craftsmanship

How to Make A Hooded Scarf
Materials Needed
- Black yarn
- Red yarn
- Crochet hook
- Scissors
- Stitch markers
Step 1: Starting the Scarf
- Make a Slip Knot:
- Take the tail of the black yarn, wrap it twice around your finger.
- Pull the inner loop over the outer loop and then pull the outer loop over and off your finger.
- Slide the hook onto the loop and pull tight, ensuring the tail is long enough to be weaved in later.
- Chain Stitch:
- Chain 18 (or more for a wider scarf, ensuring it’s an even number).
- Chain 18 (or more for a wider scarf, ensuring it’s an even number).
- Single Crochet in Each Chain:
- Skip the first chain next to the hook and single crochet in the second chain.
- Continue single crocheting in each chain until the end of the row.
- Chain One and Turn:
- Chain one and turn your work.
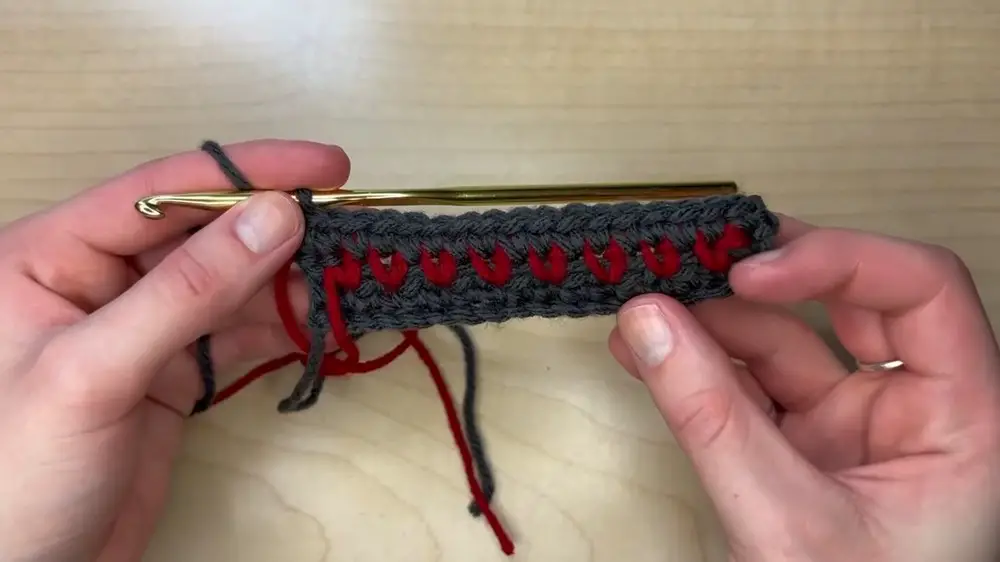
Step 2: Adding Color and Continuing the Scarf
- Switch Colors:
- Start a single crochet but stop halfway when there are two loops on the hook.
- Introduce the red yarn by pulling it through the two loops.
- Ensure the tail is long enough to be woven in later.
- Crocheting Over the Unused Yarn:
- Crochet over the unused black yarn to carry it along.
- Alternate Stitches:
- Chain one, skip a stitch, and single crochet in the next stitch.
- Repeat this pattern down the row.
- End of Row Color Switch:
- When three stitches are left, switch colors by starting a single crochet, but not finishing it.
- Pull the black yarn through to finish the stitch.

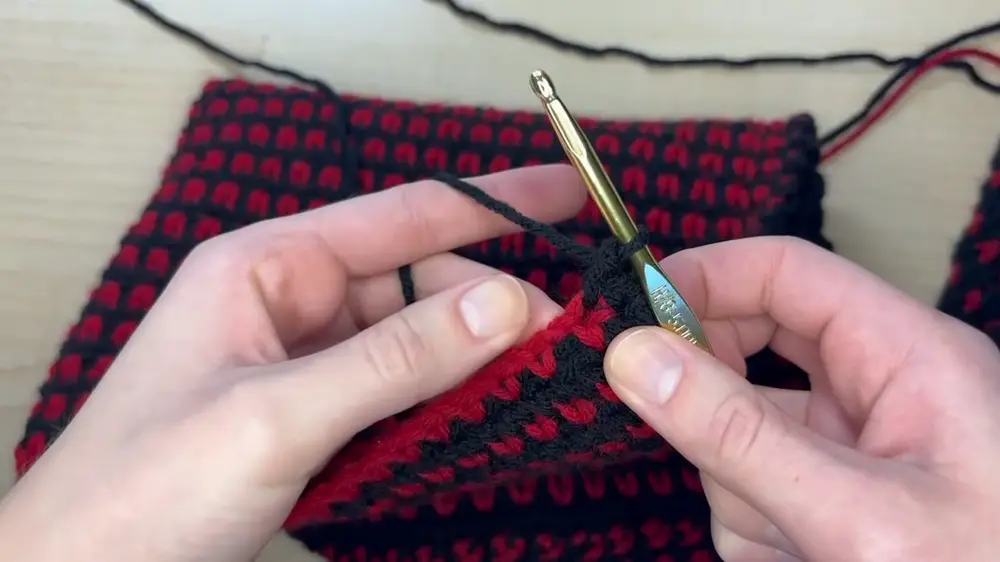
Step 3: Continue the Pattern
- Single Crochet and Chain:
- Chain one and turn.
- Single crochet into the first stitch, crocheting over the red yarn to carry it.
- Single crochet into the chain one spaces as well.
- Repeat Rows:
- Continue alternating the color pattern by repeating rows three and four.
- Determine Scarf Length:
- Measure and adjust the length of your scarf.
- Finish Off the Scarf:
- Cut the yarn loose and pull the tail through the last double crochet loop to fasten off.

Step 4: Creating the Hood
- Measure for the Hood:
- Determine where the hood should start on the scarf.
- Use stitch markers to mark the starting points.
- Attach and Crochet the Hood:
- Attach the black yarn where the hood will start.
- Work single crochets across from one stitch marker to the other.
- Follow the same color switch pattern as for the scarf.
- Shape the Hood:
- Measure the height of the hood (about 12.5 inches or 32 cm).
- Ensure the last row is red.
- Close the Top of the Hood:
- Fold the hood in half and single crochet across both sides to close it.
- Cut the yarn and weave in the ends.
Conclusion
You've now created a beautiful and functional hooded scarf. This project is a great way to practice basic crochet techniques and create something practical and stylish. Remember to block your finished scarf to ensure it lays flat and the stitches settle nicely. Enjoy your new accessory!


