Crochet a cute and cheerful strawberry amigurumi with easy steps. Ideal for beginners. Make your crochet projects even more fun!
The Crochet Happy Strawberry Amigurumi pattern makes crocheting fun with its cute design. It's great for people of all skill levels, especially beginners who want to improve. The strawberry's bright colors and happy face are sure to make people smile. Clear instructions and pictures help you at every step, making it easy and enjoyable to make. Adding this cute strawberry amigurumi to your collection will bring a playful and cheerful touch to your projects. Enjoy making this adorable and colorful piece today!
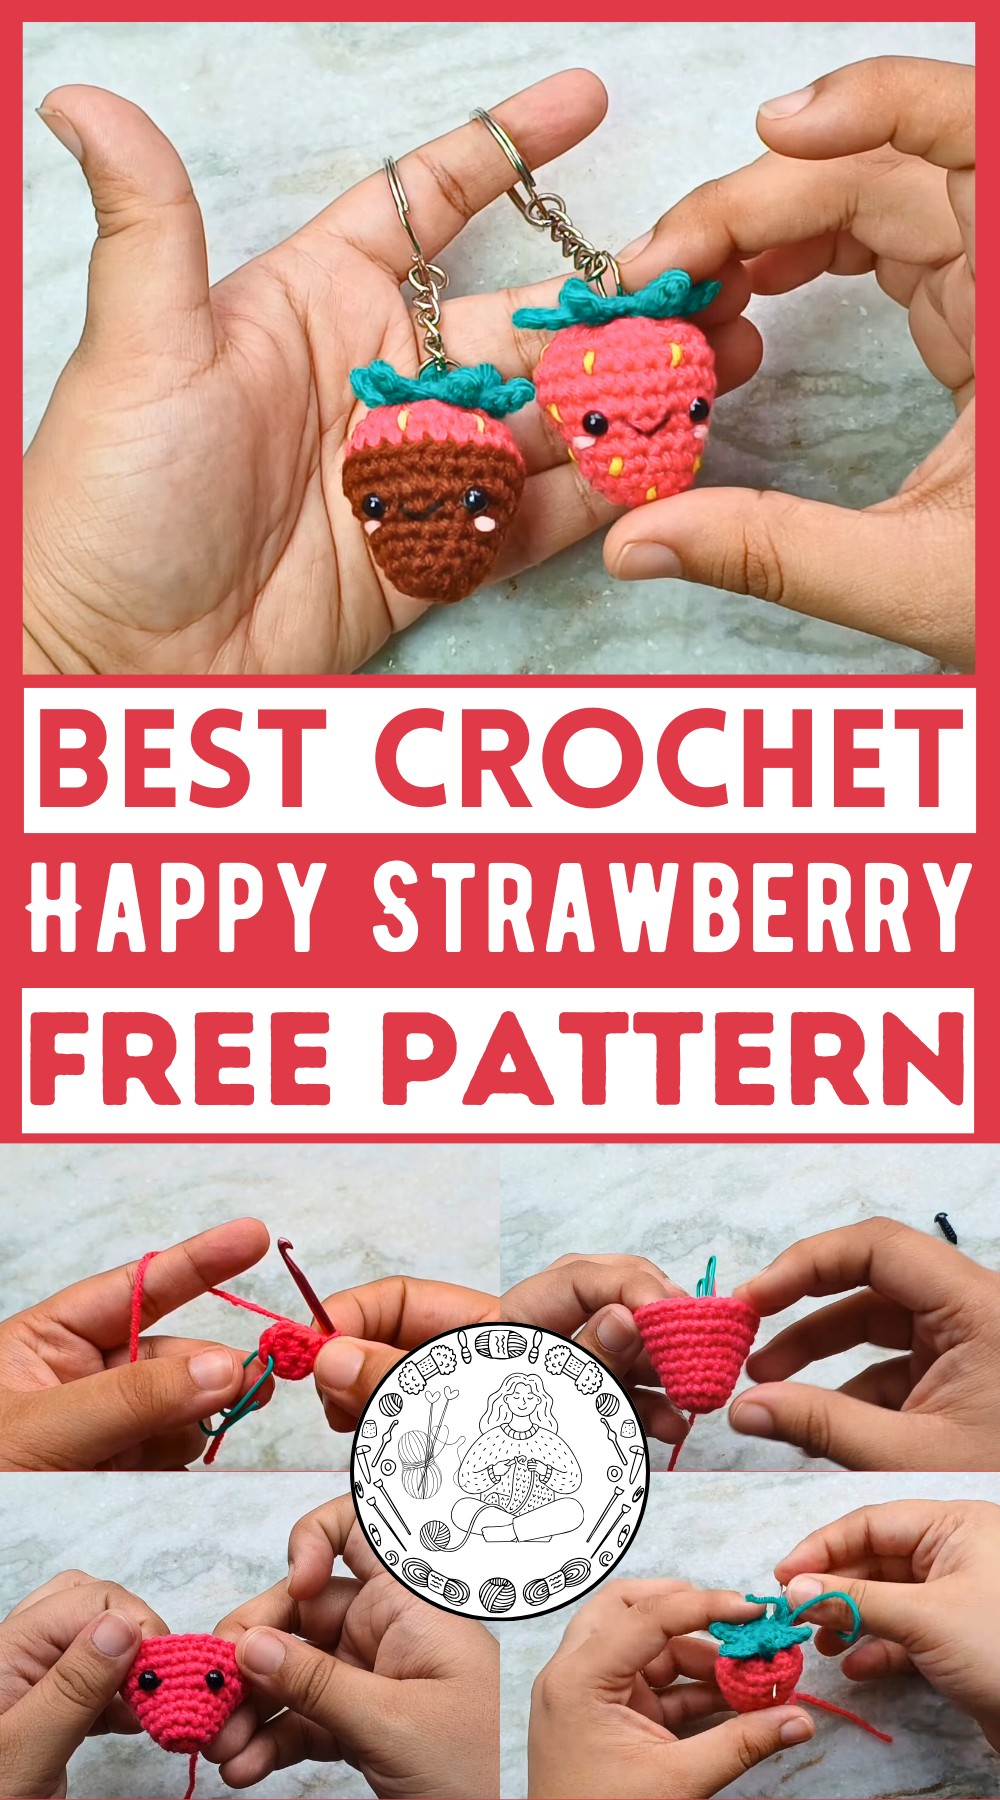
Crochet Happy Strawberry Amigurumi
Materials Needed:
- Yarn:
- Red for the strawberry
- Green for the leaves
- Yellow for the seeds
- Pink and black for facial embroidery
- Brown for the chocolate-dipped version
- Tools:
- 3mm crochet hook
- Yarn needle
- Stitch marker (e.g., a paper clip)
- Scissors
- 4mm safety eyes (optional)
- Extras:
- Stuffing (e.g., polyester fiberfill)
- Keychain ring (optional)

Instructions:
Starting the Strawberry:
- Magic Circle:
- Use the red yarn to make a magic circle:
- Wrap yarn over your finger, insert the hook under, pull through, yarn over, and pull through again.
- Remove from your finger and start working into the circle.
- Use the red yarn to make a magic circle:
- Round 1:
- Chain one (does not count as a stitch).
- Make six single crochets (sc) into the magic circle.
- Pull to close the circle.

- Round 2:
- Place a stitch marker on the last stitch.
- Increase in each stitch around (two sc in each st) – 12 stitches in total.
- Round 3:
- One sc in each stitch around – maintain 12 stitches.
- Round 4:
- One sc in the next three stitches, then increase in the next (repeat) – ends with 15 stitches.
- Round 5:
- One sc in each stitch around – maintain 15 stitches.
- Round 6:
- One sc in the next four stitches, then increase in the next (repeat) – ends with 18 stitches.

- Round 7:
- One sc in the next two stitches, then increase in the next (repeat this six times) – ends with 24 stitches.
- Rounds 8 and 9:
- One sc in each stitch around – keep the count at 24.
Chocolate-Dipped Version:
- For a chocolate-dipped version, use brown yarn for the first 8 rounds.
- On the last stitch of round 8, change to red yarn and complete the stitch in red.
- Round 9: Work in the back loops only using the red yarn for single crochets.
- Continue with the red for the subsequent rounds.

Adding Safety Eyes:
- Insert between rounds 6 and 7.
- Place them three stitches apart.
Decreasing:
- Round 10:
- Make one sc in the next two stitches, then an invisible decrease (work on the front loops only).
- Continue this sequence around – ends with 18 stitches.
- Round 11:
- One sc in the next stitch, then an invisible decrease.
- Repeat this sequence – ends with 12 stitches.
- Round 12:
- Invisible decrease in every stitch around – ends with 6 stitches.

Finishing:
- Stuff the body lightly.
- Fasten off yarn, leaving a long tail.
- Weave the tail through the front loops of the last round and pull to close.
Green Leaves:
- Magic Circle:
- Chain one, then make six sc into the circle.
- Slip stitch to join.
- Leaves:
- For each leaf: Chain four, slip stitch in second chain from hook, sc in the next two chains, slip stitch into the next sc.
- Repeat for a total of six leaves.
- Slip stitch to finish, fasten off leaving a long tail for sewing.

Attaching Leaves:
- Secure the leaves on top using a pin.
- Sew along the second round using a whip stitch.
- Hide and secure yarn tail inside the body.
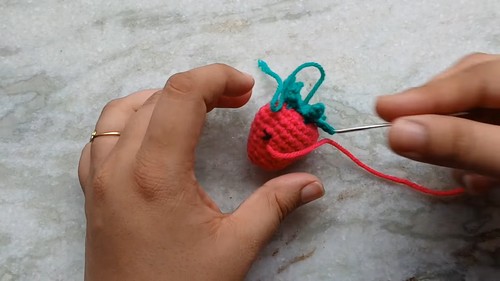
Embroidery:
- Mouth: Use black yarn, embroider a smile between rounds 6 and 7.
- Cheeks: Use pink yarn to add blush below eyes with a couple of straight stitches.
- Seeds: Scatter small stitches in yellow yarn around the strawberry.
Adding Keychain (Optional):
- Use the green yarn tail to attach the ring, hide and secure the yarn tail inside the body.
Your strawberry amigurumi is now complete!


