Refresh your style using this crochet granny square top pattern—quick to make, versatile, and the ultimate staple for handmade wardrobe essentials.
The charm of handmade clothing is timeless—it carries a personal touch and a sense of uniqueness that store-bought garments often lack. A crochet granny square top offers an attractive fusion of style, comfort, and versatility, seamlessly blending tradition with modern trends. The delicate open-stitch details allow for breathability, making it perfect for layering over tanks in summer or pairing with long sleeves in cooler weather. Complemented by a mock neck collar and small side seams, the top ensures structure and durability, ready to stand the test of time and wear.
Crochet Granny Square Top Pattern 
How To Crochet Granny Square Crochet Top
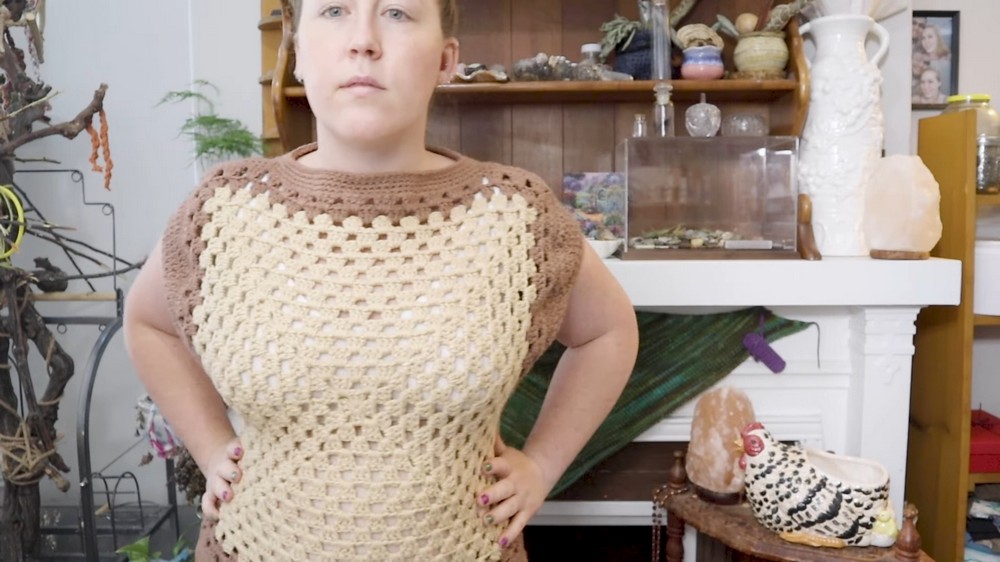
The Granny Square Crochet Top is a simple yet stylish wardrobe piece that is perfect for beginners and seasoned crocheters alike. Using basic crochet techniques, this project transforms two sizable granny squares into a chic top with cap sleeves, a slightly elevated neckline, and a flattering fit. This pattern is customizable and lets you adjust the size of the squares and the sleeve details as desired. Perfect for cooler weather or layered over a t-shirt or crochet tank top, this garment is a versatile addition to any handmade wardrobe.
Materials
To create this Granny Square Crochet Top, gather the following materials:
- Yarn: Approximately 2 balls (100g each) of size #4 weight yarn in tan and a contrasting ball in dark brown (adjust depending on the size of your garment).
- Crochet Hook: 5.5 mm hook.
- Scissors.
- Yarn Needle: For weaving in ends and sewing the seams.
- Stitch Markers: To help indicate shoulder and side seam placements.
Abbreviations
The following abbreviations are used in this pattern:
- ch = chain
- sl st = slip stitch
- sc = single crochet
- dc = double crochet
- dc2tog = double crochet 2 together
Special stitches: Magic Circle: A loop of yarn used as the foundation for a round of crochet stitches.
Step 1: Granny Squares
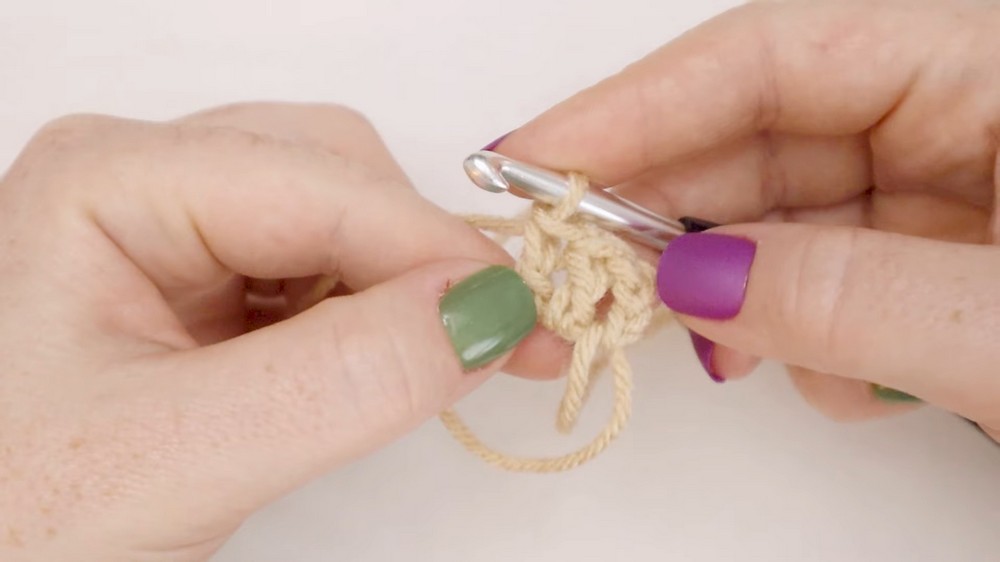
Start with a Magic Circle
- Create a magic circle by wrapping the yarn around your fingers. Insert the hook into the loop, yarn over, and pull through. Tighten by holding onto the tail.
- Round 1: Chain 3 (represents a dc), make 2 dc into the loop, ch 2. (3 dc, ch 2) 3 times into the magic circle. Close the round with a sl st into the top of the starting ch-3. Pull on the tail to tighten the center. You now have a square shape with 4 corners.
- Round 2: Chain 2, turn your work. In the first corner (ch-2 space): (3 dc, ch 2, 3 dc). Move to the next corner repeating the same sequence: (ch 1, 3 dc, ch 2, 3 dc). Repeat for all corners. End the round with a sl st.
- Round 3-Onward: Continue working your granny square by repeating the same corner sequence:
- At any corner: (3 dc, ch 2, 3 dc).
- Between corners: Separate flat sides with ch 1 and place 3 dc clusters in the ch-1 spaces.
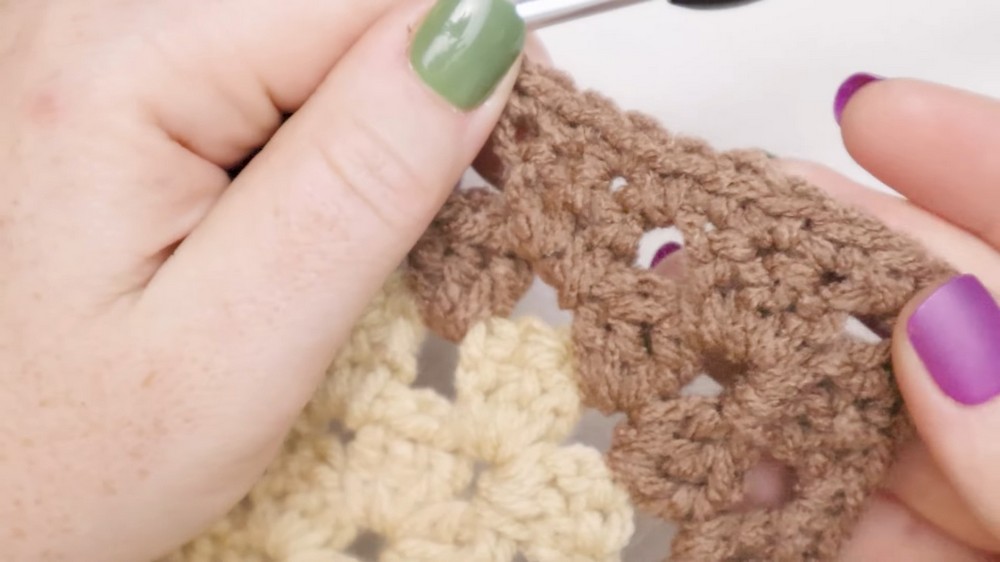
Make adjustments for your desired size. For the front and back panels, work until each granny square reaches approximately 19 inches wide (48 cm). In the video, the creator made squares with 16 rounds, using tan for the first 14 rounds and switching to dark brown for the remaining 2 rounds.
- Edge Finishing for Squares: Work a round of sc stitches around the final edge of your squares to create a crisp, structured fabric. At each corner, work 1 sc, ch 1, 1 sc to keep the corners sharp.
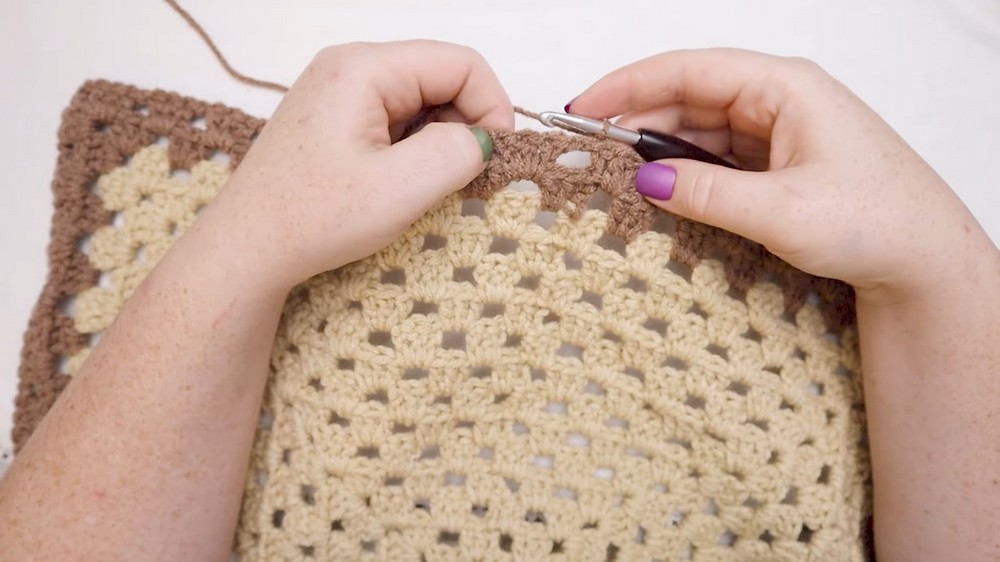
Step 2: Assembly
- Block the Squares: Dampen and block your squares to ensure they are flat and hold their shape.
- Shoulder Seams:
- Fold the granny squares in half and align the top edges (tan portion).
- Use stitch markers to mark the top shoulder seams on both sides of each square. Leave the center “neck opening” by skipping 3 scallops (clusters) from both the left and right edges.
- With the dark brown yarn, sl st the seams together, beginning from the edges and stopping at your stitch markers.
- For a finished look, slip stitch back along the seam. Repeat for the other shoulder.
- Side Seams:
- Decide how much of the sides to sew together based on your desired armhole size. In the video, the creator left 5 scallops (clusters) for a wider armhole.
- Using dark brown yarn, sl st or sc the side seams together. Stop once you’ve joined as much as you marked.
Step 3: Sleeves
- Attach your yarn to one of the armhole edges just before the side seam. Work single crochet (sc) stitches around the edge.
- Begin tapering the sleeves by following this series of decrease rounds:
- Round 1: Dc in 6 stitches, dc2tog. Repeat around.
- Round 2: Dc in 5 stitches, dc2tog. Repeat around.
- Round 3: Dc in 4 stitches, dc2tog. Repeat around.
- Round 4: Dc in 3 stitches, dc2tog. Repeat around.
- Finish the sleeves with:
- 1 Round of sc.
- 1 Round of slip stitches.
- Fasten off and weave in ends. Repeat for the other sleeve.
Step 4: Collar and Hemline
- Collar: Attach yarn just before the shoulder seam. Work 3 rounds of single crochets to raise the neckline, followed by 1 round of slip stitches for a clean, structured finish.
- Hemline: Similarly, work 3 rounds of single crochets along the bottom edge of the shirt. Add 1 round of slip stitches to finish the hem and tie the look together.
Conclusion
Your trendy Granny Square Top is now complete! This modern take on the classic granny square pattern is endlessly versatile – wear it as-is for a breezy fit or layer it for cooler seasons. The customizable nature of this design allows for unique sizing, sleeve lengths, and color combinations. Give this project a try and enjoy the pride of wearing your handmade clothing.