
Stitch your way to style with this beginner-friendly crochet granny square sweater pattern loved by makers and wearers alike!
Years ago, patchwork clothing was valued for its simplicity and usefulness. The Crochet Granny Square Sweater Pattern brings that idea into today’s fashion with a fresh and stylish design. Using granny squares, the sweater is built piece by piece, making it simple to adjust to your preferred size and style. The squares are joined to create the body and sleeves, and details like ribbed cuffs and neckline can be added to make it your own.
Crochet Granny Square Sweater
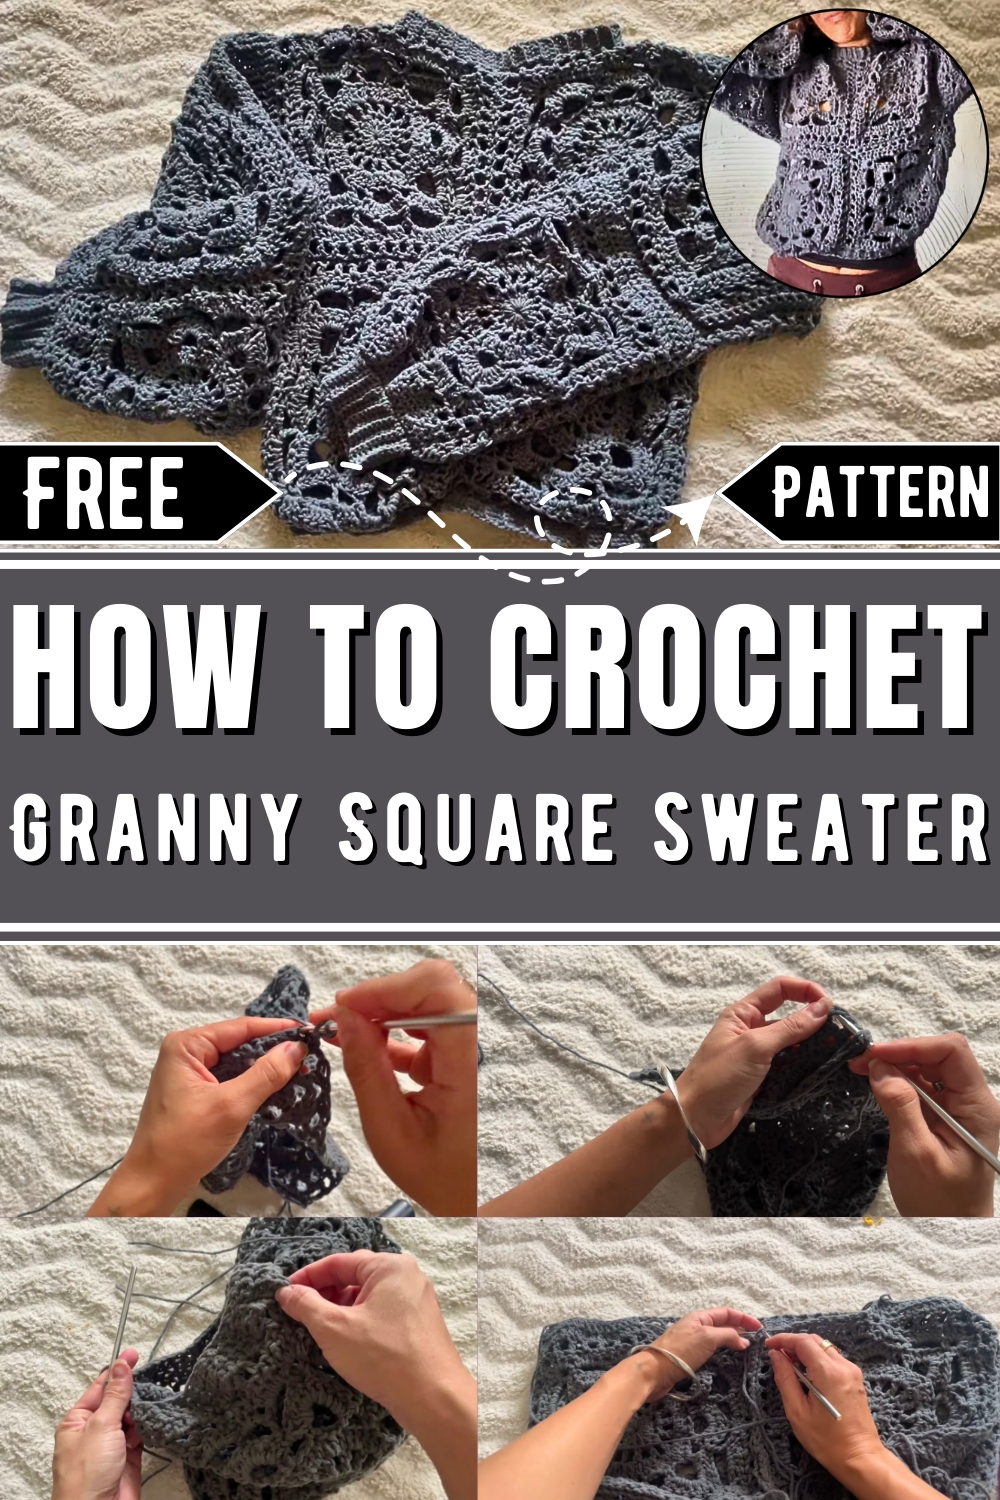
This sweater is lightweight yet warm, making it great for layering during colder months or wearing casually indoors. You can easily customize the colors and texture, giving it a personal touch that suits your taste. The steps to make the sweater are straightforward, which makes it a good option for beginners. It also promotes thoughtful crafting by using leftover yarn, helping reduce waste and supporting sustainable fashion. Whether you make it for yourself or as a gift, this cozy and stylish sweater combines comfort with everyday usability, bringing the charm of handmade designs to your wardrobe.
How To Crochet Granny Square Sweater
Materials Needed
- Yarn: Approximately 5–6 skeins (specific brand bought from Spotlight Australia).
- Crochet Hooks:
- 8mm hook (for making the granny squares).
- 5mm hook (for joining and detailed stitching).
- Other Supplies:
- Scissors.
- Stitch markers.
- Optional: Ribbing reference from previous projects.
- Skill Level: Basic patchwork skills and familiarity with slip stitches and double crochets.
Step-by-Step Pattern
1. Make the Granny Squares
- Pattern: Create a total of 16 Willow Granny Squares.
- Use an 8mm hook.
- Follow a Willow square pattern (tutorial linked in the video and description box).
- Each square should be roughly the size of the area from shoulder to chest.
2. Create Panels
- Body Panel:
- Split the 16 squares into 8 panels for the front and back of the sweater:
- 4 squares for front.
- 4 squares for back.
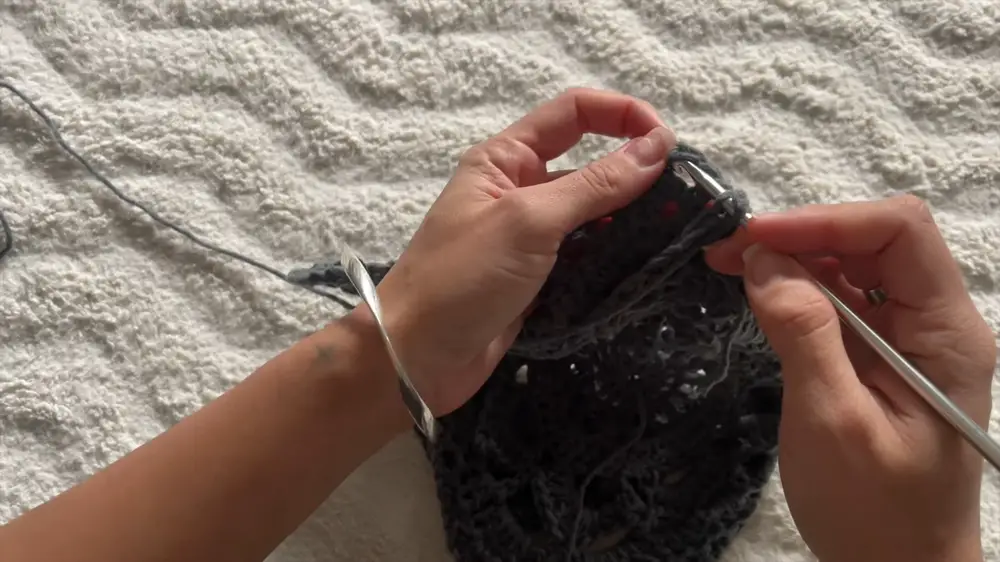
- Arrange and connect them using slip stitches:
- Use the 5mm hook to join the squares by stitching the inside loops only of corresponding squares.
- Process:
- Start with a slip knot.
- Insert your hook into the corners of the squares.
- Yarn over, pull through, and slip stitch across each square edge to join them.
- Split the 16 squares into 8 panels for the front and back of the sweater:
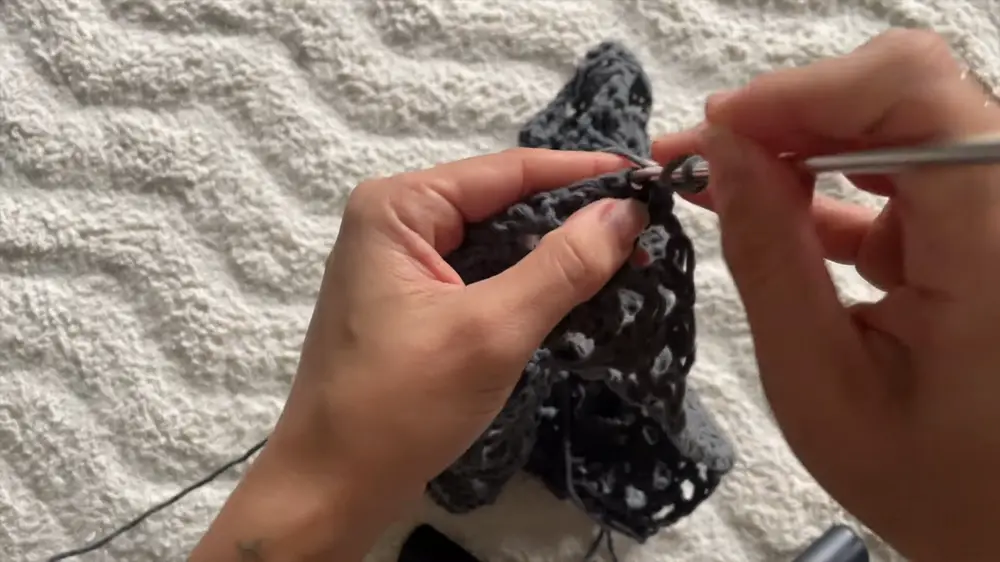
- Sleeves Panel:
- 4 squares per sleeve.
- Add length using rows of double crochets:
- Attach yarn at the edge of a square.
- Chain 2, then use double crochets across the edge.
- Repeat for a total of 3 rows per square for added length near elbows (if needed).
3. Shape the Panels
- Front, Back & Sleeves:
- Assemble the two body panels and connect them using slip stitches at the shoulder area. Use stitch markers to align and determine neck width.
- For sleeves:
- Slip stitch across the top edge of the sleeve squares.
- Join sleeves to the body panels, starting from the shoulder corner and stitching toward the armhole.
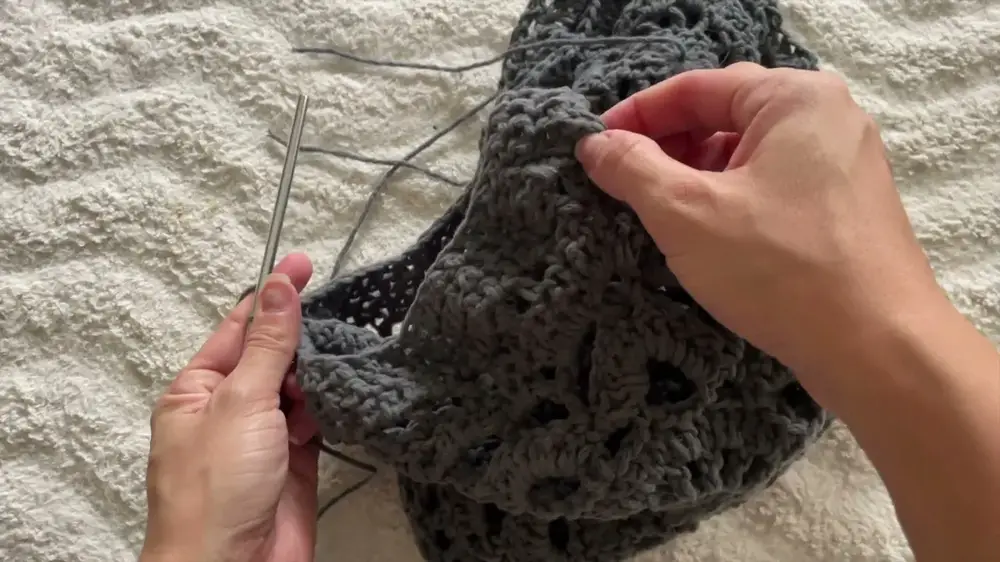
4. Add Ribbing to Sleeves
- Cuff Preparation:
- Crochet ribbing for each sleeve cuff:
- Chain 10 chains (width of your desired wrist cuff).
- Work single crochets in the back loop only of each stitch, turning the work every row.
- Repeat until the strip reaches the circumference of your wrist comfortably.
- Attach Ribbing:
- Place the ribbing inside the sleeve opening.
- Align the ribbing evenly around the sleeve.
- Slip stitch through both the sleeve edge and ribbing.

- Crochet ribbing for each sleeve cuff:
Note: Ribbing stretches, so ensure a snug fit by pulling it in areas where necessary.
5. Add Ribbing to Collar
- For the neckline:
- Crochet ribbing in a similar way (using 5 chains of width for collar ribbing instead of 10 chains for cuffs).
- Slip stitch the ribbing onto the neck opening of the sweater.
6. Add Ribbing to Bottom Hem
- For the bottom edge of the sweater:
- Create ribbing with 5 chains width (same as the collar).
- Slip stitch ribbing all around the bottom hem to complete the sweater.
Measurements
To customize fit, ensure the following:
- Square Size:
- Each square should measure enough to span from your shoulder to your chest height.
- Body and Sleeve Length:
- Test the stitch marker alignment at the neck and shoulder to confirm fit before finalizing joins.
- Ribbing Width:
- Adjust wrist, collar, and hem ribbing to comfortably fit your preferences.
Assembly Order
- Make 16 squares (Willow pattern).
- Construct body panels with slip stitches.
- Assemble sleeves and attach to body.
- Add ribbing to sleeves, collar, and bottom hem.
- Confirm fit and finish garment details.

Tips
- Maintain consistent slip stitches and avoid pulling too tight to ensure stretchiness, especially for ribbing and cuffs.
- Test sleeve billow (elbow length adjustment) before adding ribbing.
Once you've completed these steps, your Willow Granny Square Sweater is ready to wear and enjoy!


