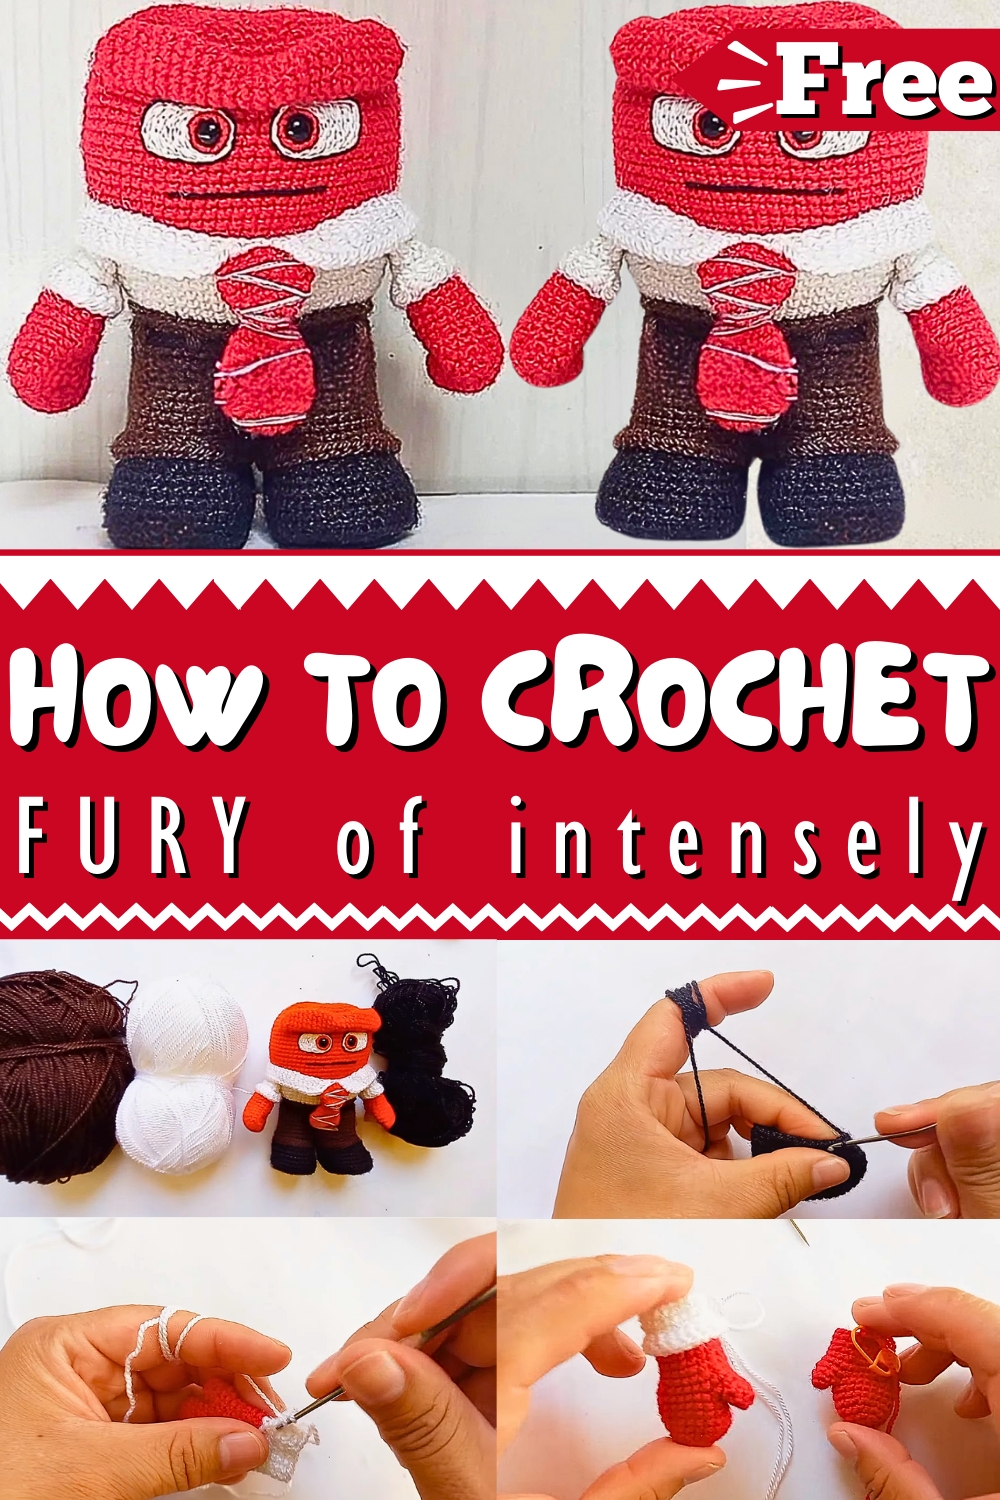
Ignite Your Passion: Start the Free Crochet FURY pattern—an intensely captivating piece perfect for a striking touch to your projects!
Crochet Fury of Intensely
It is an exciting and intricate design perfect for both experienced crocheters and adventurous beginners. This pattern stands out with its bold textures and striking visual appeal, making it an excellent choice for those looking to add a unique touch to their projects. The instructions are thorough and easy to follow, ensuring that each stitch contributes to the overall stunning effect.
You'll find guidance on selecting the right yarn, choosing complementary colors, and tips on maintaining consistent tension. Additionally, the pattern includes detailed diagrams and step-by-step pictures to help you visualize the process. With this pattern, you can create anything from a stylish throw to a beautiful piece of wall art.
Tip:
Use a stitch marker to keep track of your rounds and avoid losing your place in this intricate design!
How To Crochet Fury Of Intensely
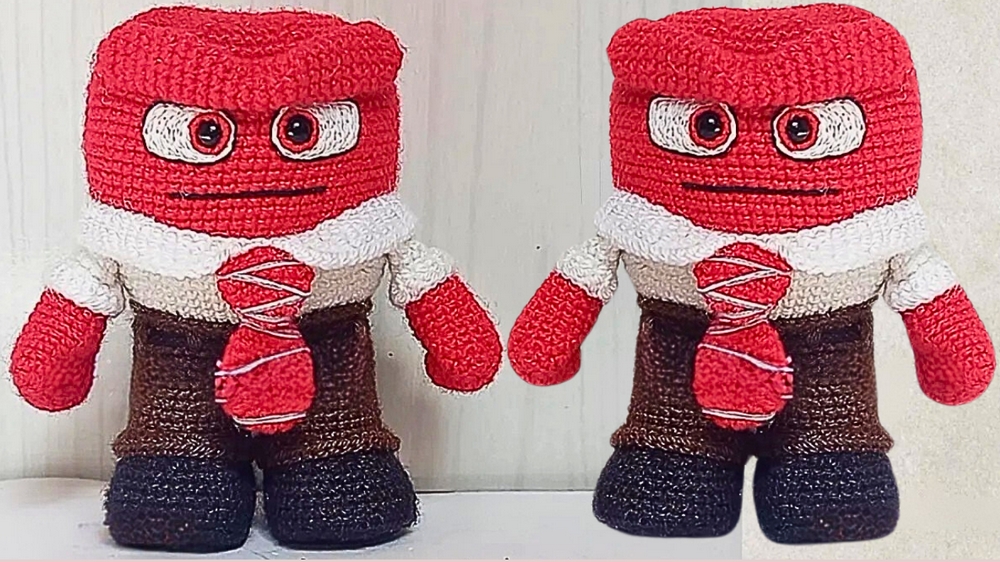
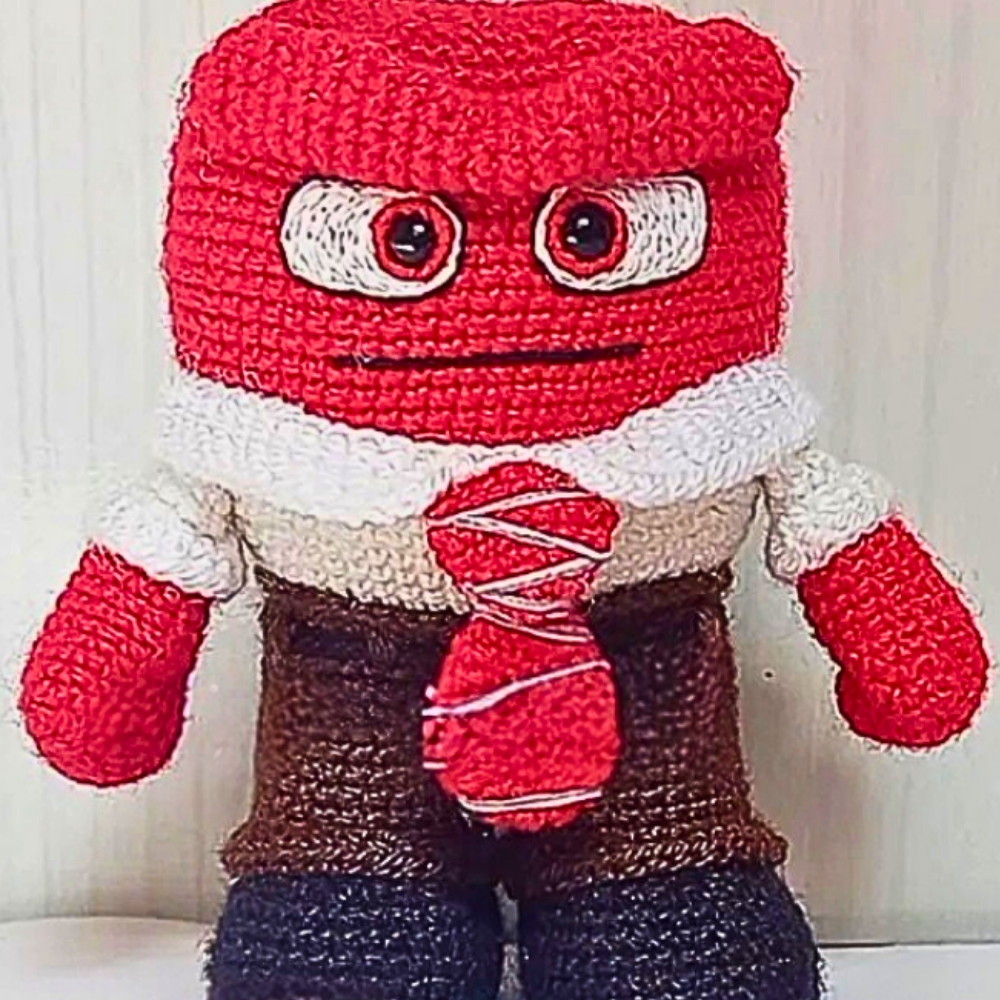
We will create Furia, a character from the movie Intensely. Measuring approximately 12 cm in height, the size will vary based on the type of yarn and tension used. We will crochet this figure in two main parts: the body, limbs, and the head.
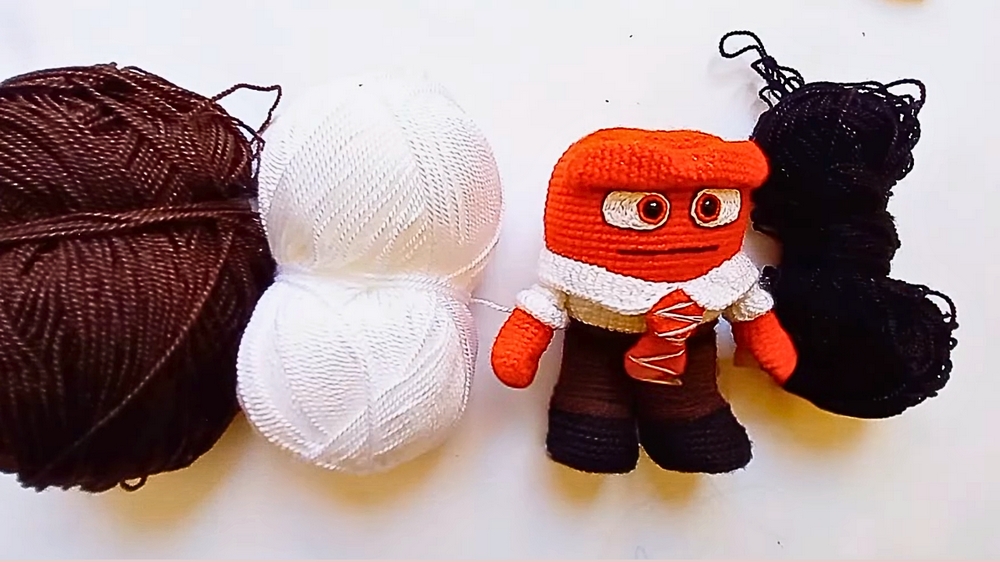
Materials Needed
- Acrylic yarn in black, white, red, and lead colors.
- Crochet hook size 2.
- Pins, scissors, and pliers (for assistance with sewing).
- Thick and thin needles for embroidering details.
- Safety eyes (6 mm) with safety devices.
- Lighter for sealing threads.
- Plastic pieces (commonly used for photocopy bases) for the base of the shoes.
Tutorial Steps
Part 1: Making the Body, Limbs, and Head
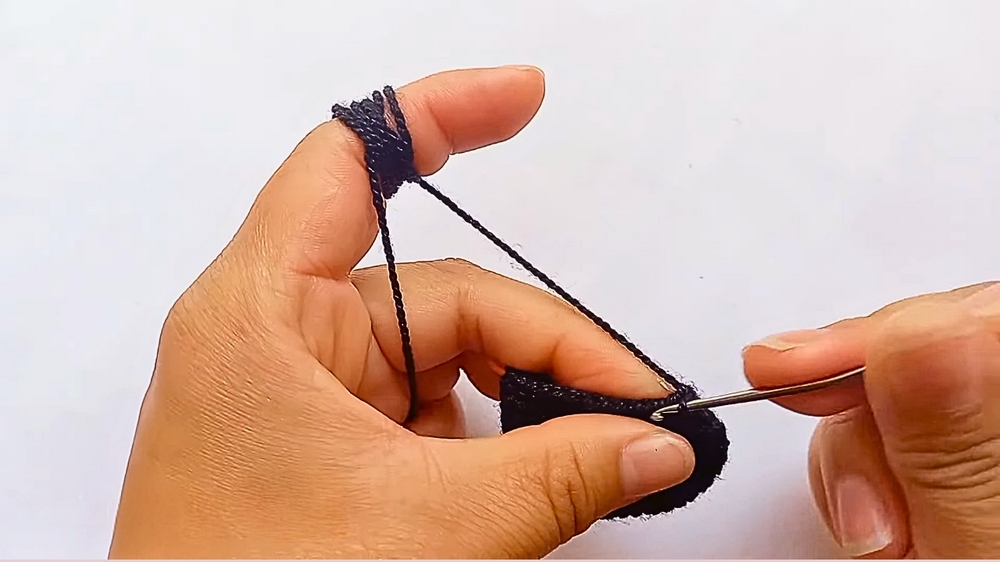
Shoes
- Chain Stitch
- Create 8 chains using black yarn.
- First Round
- Perform a triple increase in the second chain.
- Crochet five single crochets.
- Make four single crochets in the last stitch.
- Crochet six single crochets along the other side.
- Second Round
- Begin with three increases in a row.
- Crochet five single crochets.
- Perform four increases in a row.
- Finish with six single crochets.
- Third Round
- Crochet one single crochet followed by an increase, repeat three times.
- Crochet five single crochets.
- Perform one single crochet followed by an increase, repeat four times.
- Finish with six single crochets.
- Fourth Round
- Crochet two single crochets followed by an increase, repeat three times.
- Crochet five single crochets.
- Perform two single crochets followed by an increase, repeat four times.
- Finish with six single crochets.
- Rounds 5-11
- Continue crocheting to shape the shoe, make rounds with single crochets and periodic decreases.
Legs
- Rounds 12-20
- Crochet rounds of single crochets, starting with 26 single crochets in round 13 and creating the legs by joining two sets of 26 stitches.
- Joining Legs
- Fold the fabric in half, join the halves together, and continue crocheting to connect the two legs.
- Make four rounds of 52 single crochets.
Body
- Rounds 21-48
- Continue with rounds of single crochets and make periodic increases.
- Change yarn colors when specified (switch to white).
Head
- Rounds 49-56
- Crochet the top of the body and head, making periodic decreases.
- Insert safety eyes on round nine and space them evenly.
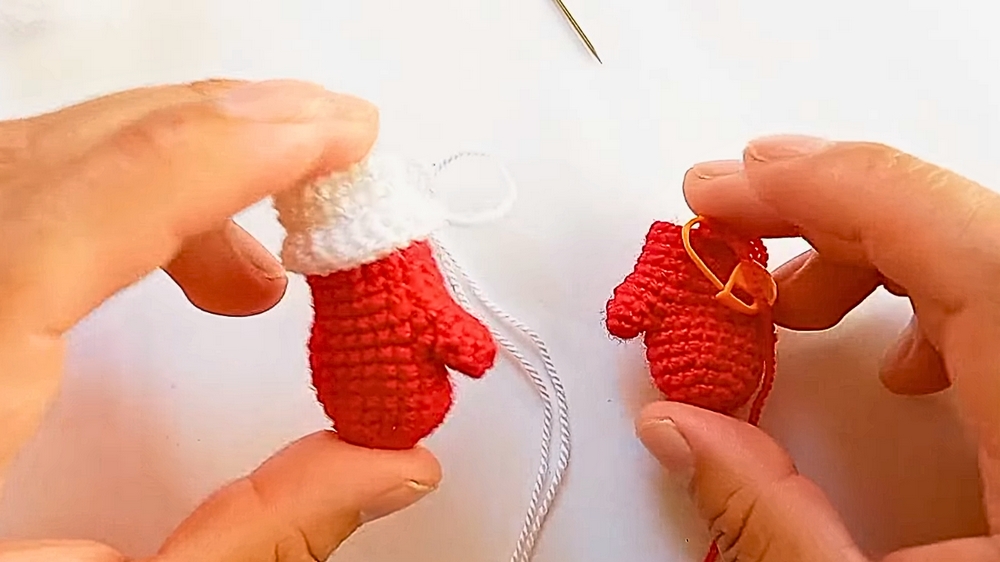
Arms
- Left Hand
- Start with a magic ring of six single crochets.
- Continue in spiral rounds to shape the hand and arm, making periodic increases and decreases.
- Right Hand
- Follow the same process for the right hand, ensuring color changes are inward.
- Finishing
- Add edges to hands using slip stitches and double crochet stitches.
- Add edges to hands using slip stitches and double crochet stitches.
Filling
- Stuffing Parts
- Add stuffing to the body, head, and limbs to create volume.
- Add stuffing to the body, head, and limbs to create volume.
Conclusion
Follow the steps, and you will complete the character in your chosen size and color variations.