Charming free crochet pattern for a duck in overalls, perfect as an amigurumi keychain; a delightful and cute accessory for everyone!
Duck wearing Overalls Amigurumi keychain
No matter your skill level, this crochet pattern offers an irresistibly adorable project for all enthusiasts. Crochet a sweet little duck dressed in charming overalls and mutate your everyday accessories with a touch of handmade whimsy. Perfect as a delightful keychain, a playful bag charm, or a thoughtful handmade gift, this amigurumi creation is guaranteed to spread joy. Its compact size makes it easy to carry, bringing along warmth and cheer wherever you go.

Not only is this pattern cost-effective by using leftover yarn, but it also enhances your crochet skills with a quick and rewarding amigurumi project. For added durability, consider attaching your finished project with a keyring that features a lobster clasp, ensuring your beloved creation remains secure.
Tip:
When stuffing your duck, be sure not to overfill. This will help maintain its shape, making it easier to attach features like the beak, wings, and overalls without creating unwanted bulges.

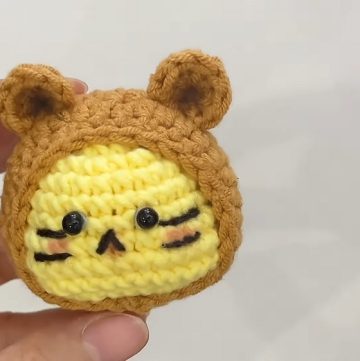
How To Crochet Cute Duck Wearing Hat
Introduction
In this pattern, I will show you how to crochet a cute duck wearing a hat. This pattern is straightforward and extremely easy for beginners. Let's get started.
Head
Row 1
- Make a magic ring.
- Create 8 single crochets into the magic ring.
- Pull the yarn tightly.
- Make one slip stitch into the first stitch.
Row 2
- Chain one.
- Make an increase in all the stitches (2 single crochets in each stitch) for a total of 8 times.
- After making 8 increases, make one slip stitch into the first stitch.
Row 3
- Chain one.
- Make one single crochet into the first stitch.
- Make an increase into the next stitch.
- Repeat this pattern 7 more times.
- After completing the row, make one slip stitch into the first stitch.
Row 4
- Chain one.
- Make one single crochet in each of the 24 stitches.
- After completing the row, make one slip stitch into the first stitch.
Rows 5 and 6
- Repeat the same steps as Row 4.
Row 7
- Chain one.
- Make 6 single crochets.
- Into the next 6 stitches, make 1 increase in each.
- Make 4 single crochets.
- Into the next 4 stitches, make 1 increase in each.
- Make 6 single crochets and one slip stitch into the first stitch to complete the row.
Row 8
- Chain one.
- Make 6 single crochets.
- Into the next stitch, make 1 single crochet, followed by an increase in the next stitch.
- Repeat the pattern (1 single crochet, 1 increase) 3 more times.
- Make 4 single crochets.
- Into the next stitch, make 1 single crochet, followed by an increase in the next stitch.
- Repeat the pattern (1 single crochet, 1 increase) 3 more times.
- Finish with 6 single crochets and one slip stitch into the first stitch.

Row 9
- Chain one.
- Make 6 single crochets.
- Into the next stitch, make 1 single crochet, followed by a decrease.
- Repeat the pattern (1 single crochet, 1 decrease) 3 more times.
- Make 4 single crochets.
- Create one decrease using the next 2 stitches.
- Into the next stitch, make 1 single crochet.
- Repeat the pattern (1 decrease, 1 single crochet) 3 more times.
- Finish with 6 single crochets and one slip stitch into the first stitch.
Row 10
- Chain one.
- Make 6 single crochets.
- Create 4 decreases.
- Make 4 single crochets.
- Create 4 decreases.
- Finish with 6 single crochets and one slip stitch into the first stitch.

Row 11
- Chain one.
- Make one single crochet in the first stitch.
- Use the next 2 stitches to make one decrease.
- Repeat this pattern 7 more times.
- After completing the row, begin stuffing.
Row 12
- Chain one.
- Make 8 decreases.
- Make one slip stitch into the first stitch to finish the row and complete the head.
Body
Row 1
- Chain one.
- Crochet into the front loops only.
- Make 8 single crochets into the front loops only.
- One slip stitch into the first stitch.
Row 2
- Chain one.
- Make an increase in all the stitches for a total of 8 times.
- One slip stitch into the first stitch.
Row 3
- Chain one.
- Make one single crochet in the first stitch.
- Make an increase in the next stitch.
- Repeat this pattern 7 more times.
- One slip stitch into the first stitch.
Row 4
- Chain one.
- Make one single crochet in each of the 24 stitches.
- One slip stitch into the first stitch.
Row 5
- Chain one.
- Make one single crochet in each of the 24 stitches.
- One slip stitch into the first stitch.
Row 6
- Change to a different color yarn.
- Insert your hook and grab the yarn.
- Chain one.
- Make one single crochet in each of the 24 stitches.
- One slip stitch into the first stitch.
Row 7
- Chain one.
- Make 9 single crochets.
- Into the next 6 stitches, make single crochets into the back loops only.
- Finish with 9 single crochets in the front loop.
- One slip stitch into the first stitch.
Row 8
- Chain one.
- Make one single crochet in the first stitch.
- Use the next 2 stitches to make one decrease.
- Repeat this pattern 7 more times.
- Make one slip stitch to complete the row.
Row 9
- Chain one.
- Make 8 decreases.
- Start stuffing after completing this row and fasten off, leaving a long tail for sewing.
Arms and Legs
- Repeat the basic steps for creating arms and legs through magic rings and simple crochets, as detailed in the video.
Overalls
- Insert your hook and grab your yarn, leaving a 30 cm tail.
- Chain one.
- Make 6 single crochets using the front loops left.
- Chain two and turn.
- Make 6 half double crochets.
- Chain twelve and cut the yarn.
- Use the tail to make another chain twelve.

Mouth
- Insert the hook between rows eight and nine.
- Grab the yarn.
- Make 4 slip stitches.
- Chain one and turn.
- Make 3 single crochets into the stitches.
- Make one slip stitch to finish, then fasten off.
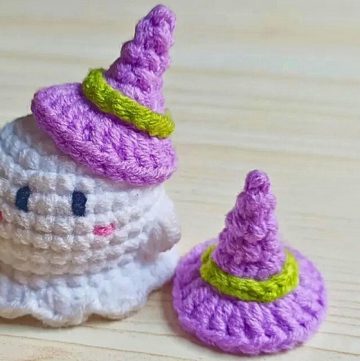
Hat
- Create a magic ring with 8 single crochets (Row 1).
- For Row 2, chain one and make 8 increases.
- For Row 3, chain one, make one single crochet in the first stitch, make one increase in the next stitch, and repeat this pattern 7 more times.
- Rows 4 and 5 include making 24 single crochets each.

- For Row 6, chain one, make slip stitches in the next 9 stitches, chain two, make a half double crochet in the next stitch, make one double crochet, then two double crochets, and repeat until the end.
- Once finished, slip stitch and fasten off.
Conclusion
Now our duck is finally finished. I hope this pattern was simple and easy for you to follow. Goodbye and have a nice day!