Exciting and Original! This Free Crochet Doll Hair Amigurumi Pattern guides you to effortlessly fashion charming hairstyles for your amigurumi dolls!
Crochet Doll Hair Amigurumi Pattern
Ready to become a hairstylist for your crochet creations? The pattern provides a detailed guide to crafting stunning hairstyles for your amigurumi dolls. This comprehensive pattern ensures a delightful and rewarding crafting experience with easy-to-follow instructions. Master various techniques, from securing individual strands to creating detachable wigs that can be styled according to your preference. The guide includes step-by-step directions for measuring, preparing, and attaching the hair, along with tips for finishing touches such as bows and headbands.

Customizable aspects like length, color, and hairstyle allow you to personalize each doll, giving them a unique flair. With this pattern, any hairstyle you can imagine—from curly locks to straight tresses—comes to life, adding charm and personality to your amigurumi dolls.
Tip:
For a polished finish, use a yarn needle to weave in any loose ends and maintain a tidy look.

How To Crochet Doll Hair Amigurumi
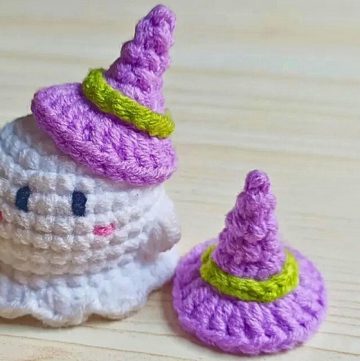
In this project, we learn how to crochet doll hair for a small witch girl amigurumi doll. This pattern is adaptable for various amigurumi dolls.
Materials Needed
- Doll head (maximum stitch count: 36)
- Four-ply yarn
- 2.5 mm crochet hook
- Tape studio needle or yarn needle
- Stitch marker
- Scissors
- Few pins
Step 1: Starting with a Magic Ring
- Create a magic ring.
- Crochet 8 single crochets (SC) around the magic ring.
- Finish with 8 single crochets.

Step 2: Increasing Stitches
- Row 2: Make 2 SC in each of the 8 stitches.
- Total stitches by end of Row 2: 16.
- Row 3: 1 SC in the first stitch, 2 SC in the next stitch. Repeat 8 times.
- Total stitches by end of Row 3: 24.
- Row 4: 1 SC in the first two stitches, 2 SC in the third stitch. Repeat 8 times.
- Total stitches by end of Row 4: 32.

- Total stitches by end of Row 4: 32.
Step 3: Forming Hair Strips
- Row 5: Chain 25.
- Skip the first chain from the hook.
- Start from the second chain:
- Make 1 SC in the first chain.
- 2 SC in the next chain. Repeat this pattern 6 times:
- Resulting in 1 SC followed by 2 SC repeatedly 6 times.
- 1 SC in the remaining 12 chains.
- Skip the next stitch and make a slip stitch in the following stitch.
- Repeat the chain 25 instructions for a total of 13 strips.

Step 4: Creating Front Hair
- At the end of the last strip, make a chain 4.
- Start from the second chain from the hook and make slip stitches in 3 chains.
- Slip stitch into the next stitch and repeat.
- Form 6 strips in the front.
Step 5: Securing the Hair
- Positioning:
- Leave a gap of 2 rows between the eyes and the front hair.
- Leave a gap of 4 stitches between the eyes and the side hair.
- Sewing:
- Use sewing pins to secure hair position.
- Start sewing from the bottom of the hair, only stitching the edges.
- When sewing reaches the positions of the pins, include the skin to secure better.
- Continue with random stitching for a secure hold.

Conclusion
Following this guide, you can create charming hair for your amigurumi dolls, customizing length, style, and color.


