
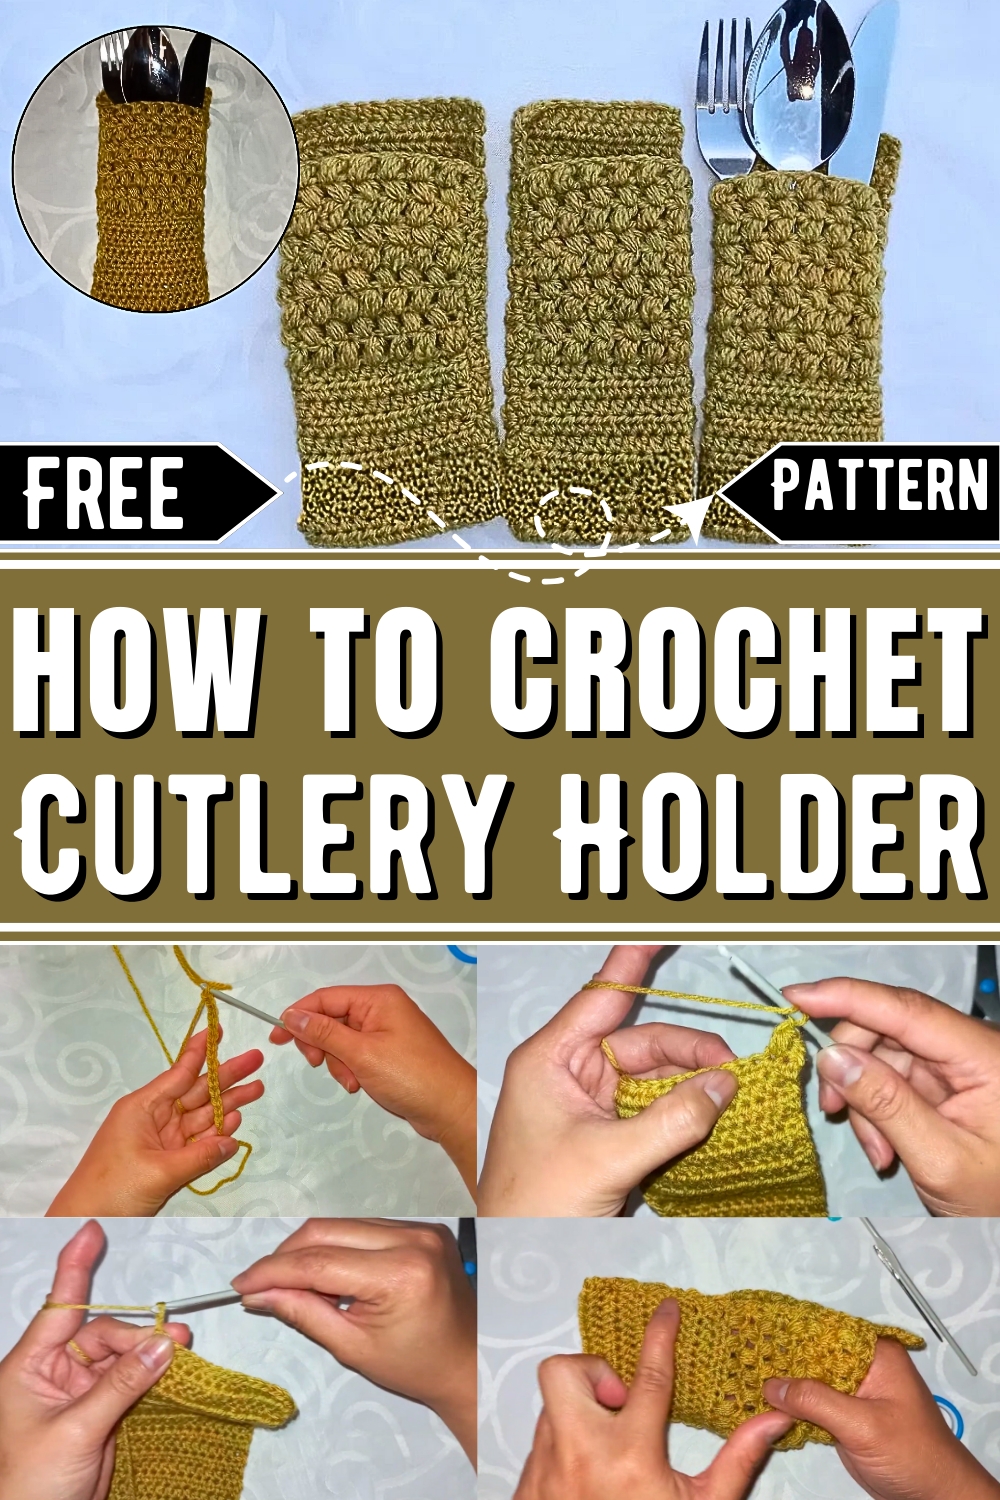
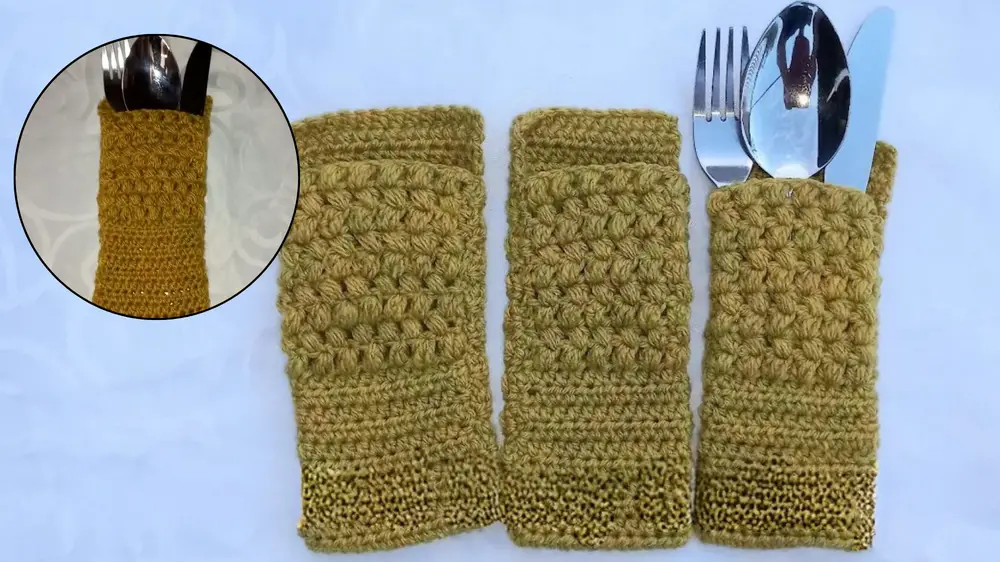
Easily organize and beautify your dining space with a delightful crochet cutlery holder pattern that combines functionality and charm in one simple, DIY project.
Quick And Easy Crochet Cutlery Holder Pattern
In a kitchen that often finds itself in disarray, a thoughtful solution emerges: the Free Crochet Cutlery Holder Pattern. This imaginative design goes beyond mere organization, infusing a touch of handmade charm into your dining experience. See your table adorned with a neatly crocheted holder, each utensil snugly placed, turning an ordinary meal into a showcase of effort and care. The pattern is straightforward, makin g it accessible even for beginners, yet the result is so elegant it can impress guests.
The soothing texture of yarn offers a gentle resting place for your utensils, protecting their edges and prolonging their lifespan. This holder is not just for homes; it can be an admirable addition to picnic baskets, traveling sets, or any scenario where cutlery needs tidying.
Making this project gives you a sense of accomplishment and a versatile product that adds beauty and functionality to various settings. By introducing such a practical element, you can harmonize simplicity and elegance at your table, demonstrating that true sophistication lies in the details.
How To Crochet Cutlery Holder
In this pattern, you'll learn how to create a crochet cutlery pouch or holder using simple materials and techniques that are beginner-friendly. The project primarily uses half double crochets and bean stitches to create a sturdy yet decorative pouch perfect for storing utensils and cutlery. This practical and stylish design is great for organizing your kitchen while adding a handmade touch to your space.
1. Materials Needed
To create the crochet cutlery pouch, you will need:
- Yarn: Double-knit yarn (100% acrylic). The color and brand are up to your preference.
- Crochet Hook: 3.5mm.
- Scissors
- Darning Needle (for sewing and weaving in ends).
- Stitch Marker (to help with alignment).
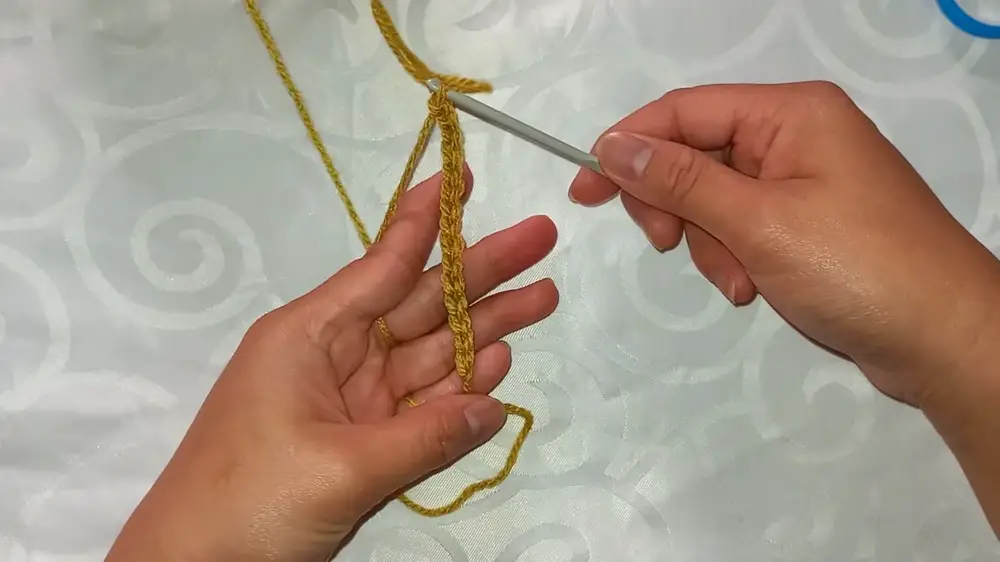
2. Beginning the Base
A. Make the Initial Chain
- Start with a slipknot on your hook.
- Chain 15 stitches.
B. Work the First Row
- Make a half double crochet (HDC) into the second chain from the hook.
- Yarn over, insert the hook into the second chain, pull through, yarn over, and pull through all three loops on the hook.
- Continue placing one half double crochet in each chain across the row (15 stitches total).
C. Rows 2–34: Build Up the Base
- Chain 2, turn your work, and make one half double crochet into each stitch across.
- Repeat this pattern for 34 rows (note the correction from 24 rows initially mentioned in the video).
- Count your stitches after each row to ensure consistency (you should always have 15 stitches).

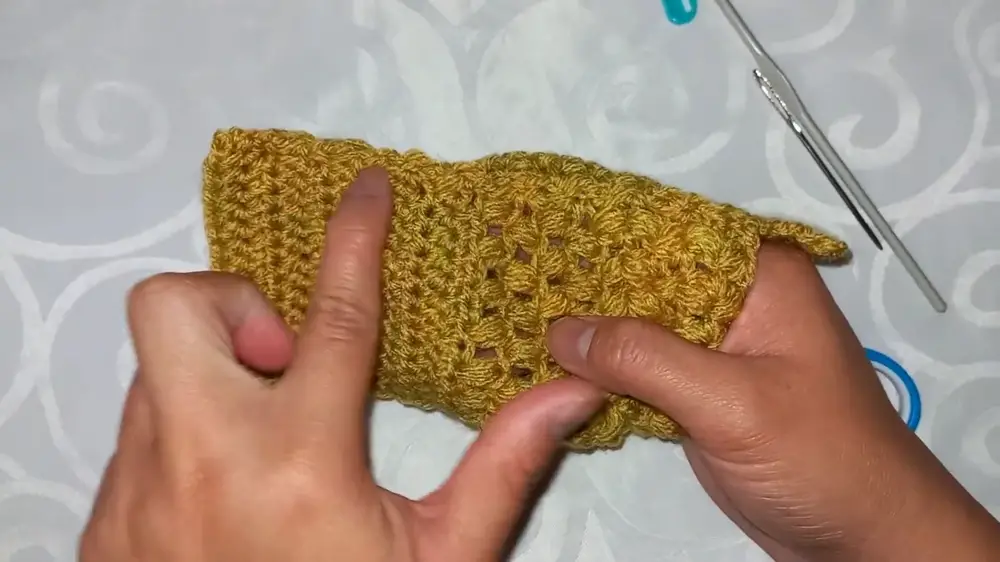
3. Creating the Decorative Bean Stitch
After completing the base, you’ll create 9 rows of bean stitches for a textured design.
A. First Row of Bean Stitch
- Chain 2, then yarn over and insert the hook into the second stitch.
- Pull up a loop. Repeat this two more times (insert hook into the same stitch and pull up a loop each time).
- By the end, you should have 7 loops on your hook.
- Yarn over and pull through all loops on the hook.
- Chain 1 to secure your bean stitch.
B. Continue the Pattern
- Skip the next stitch, and repeat the bean stitch process in the following stitch.
- At the end of the row, make one half double crochet in the last stitch to finish.
C. Next Rows
- For subsequent rows, chain 2, turn your work, and repeat the bean stitch process across.
- Continue for 9 rows of bean stitches to complete this section.
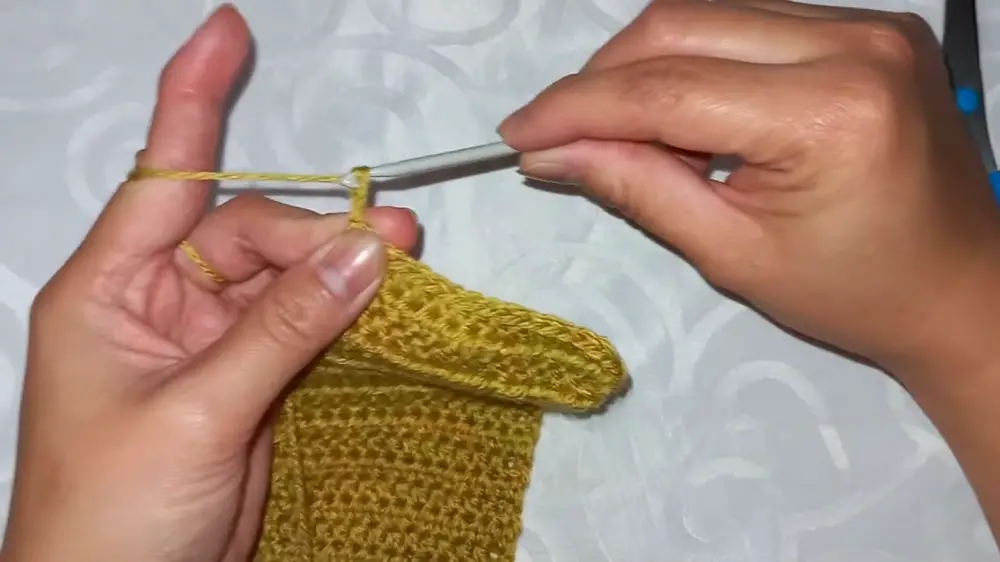
4. Finishing the Pouch
A. Slip Stitch and Finish
- Once you’ve completed the bean stitch section, slip stitch into your final stitch, cut the yarn, and pull through to secure.
- Use a darning needle to weave in any loose ends.
B. Fold and Sew
- Identify the 4th row on the base section of your pouch.
- Fold the pouch so the edges align, ensuring symmetry with the stitch marker.
- Use the darning needle and yarn to sew the sides together.
- Begin sewing at the 4th row’s edge and continue along the sides.
- Repeat this process for the other side of the pouch.
5. Turning the Pouch
- Once the sides are sewn, turn the pouch inside out to hide the seams.
- Use your crochet hook or fingers to shape the corners for a neat finish.
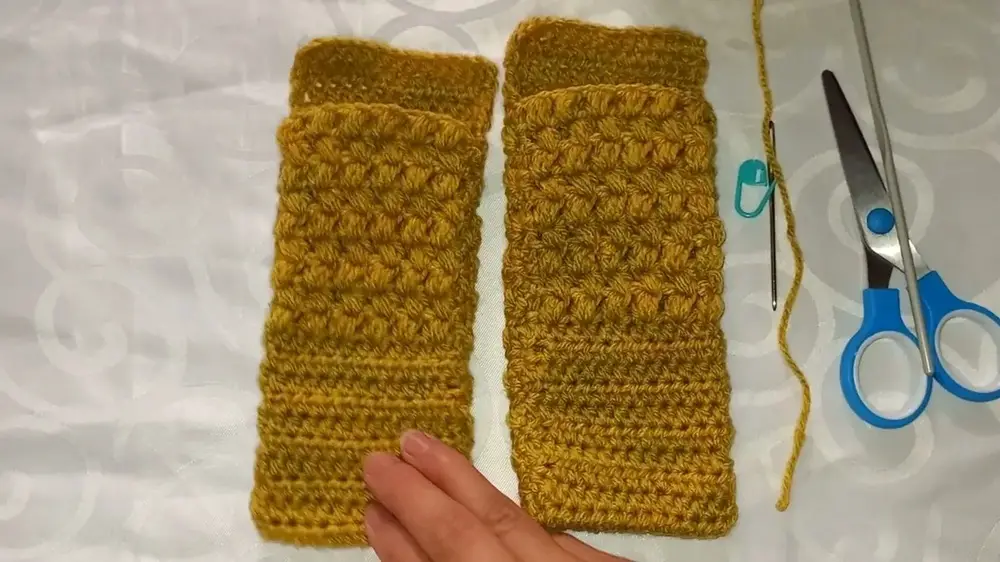
Conclusion
The finished crochet cutlery pouch is both functional and decorative, offering a handmade solution to store and organize utensils neatly. The combination of half double crochet for the base and bean stitches for texture creates a sturdy yet stylish design. With its clear steps and beginner-friendly techniques, this project is perfect for those looking for a quick and gratifying crochet project.


