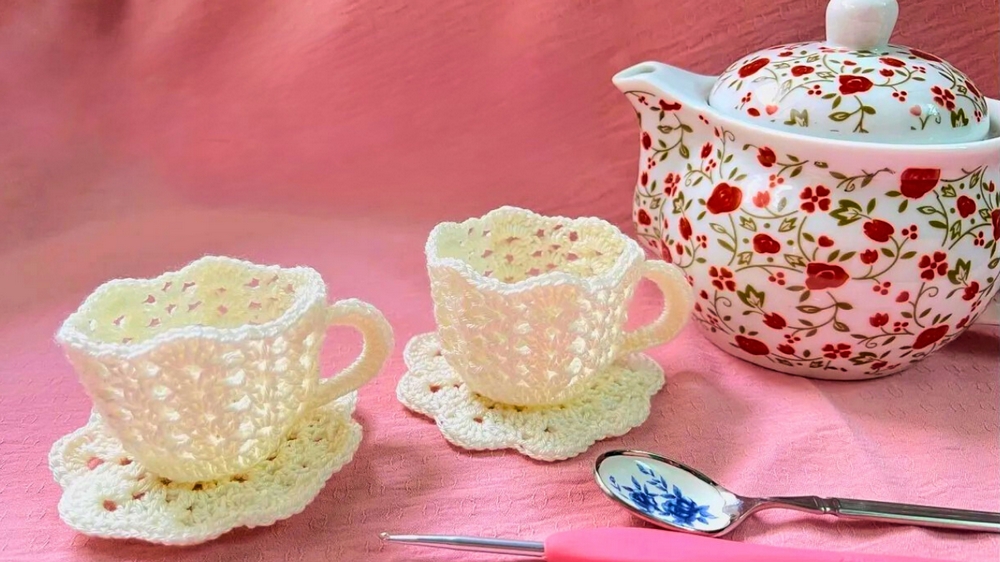
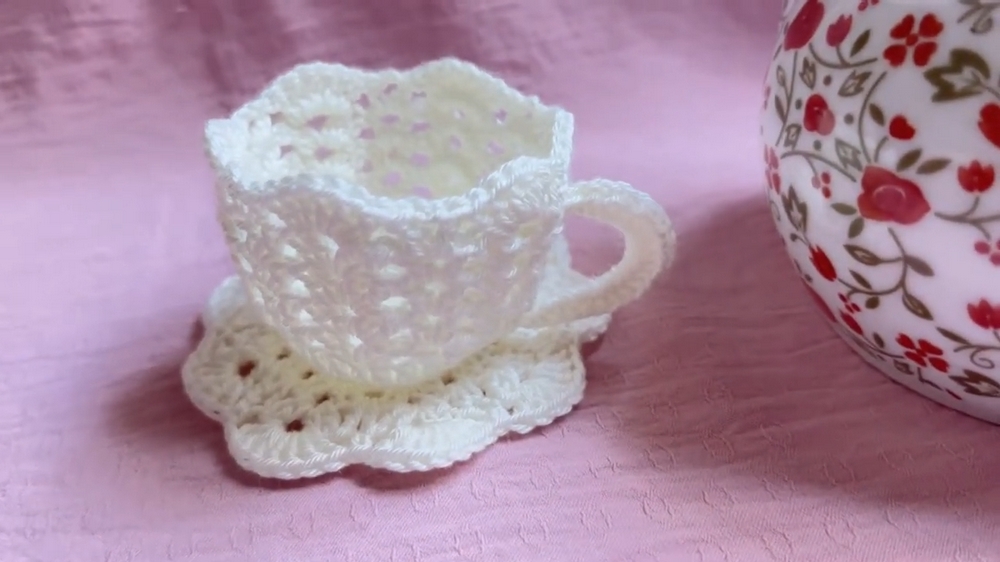
Delightfully charming and easy-to-make, our Free Crochet Cup and Saucer Pattern will add a unique touch to your tea time or home decor.
Crochet Cup And Saucer Pattern
Have you ever imagined sipping your tea from a cup that's as cozy as your favorite sweater? Enter the charming world of crochet cup and saucer patterns! This delightful craft project not only adds a whimsical touch to your decor but also serves as a wonderful gift idea. To create your own crochet cup and saucer, you’ll need basic crochet skills, a 4mm (G) crochet hook, and some sturdy cotton yarn for durability.
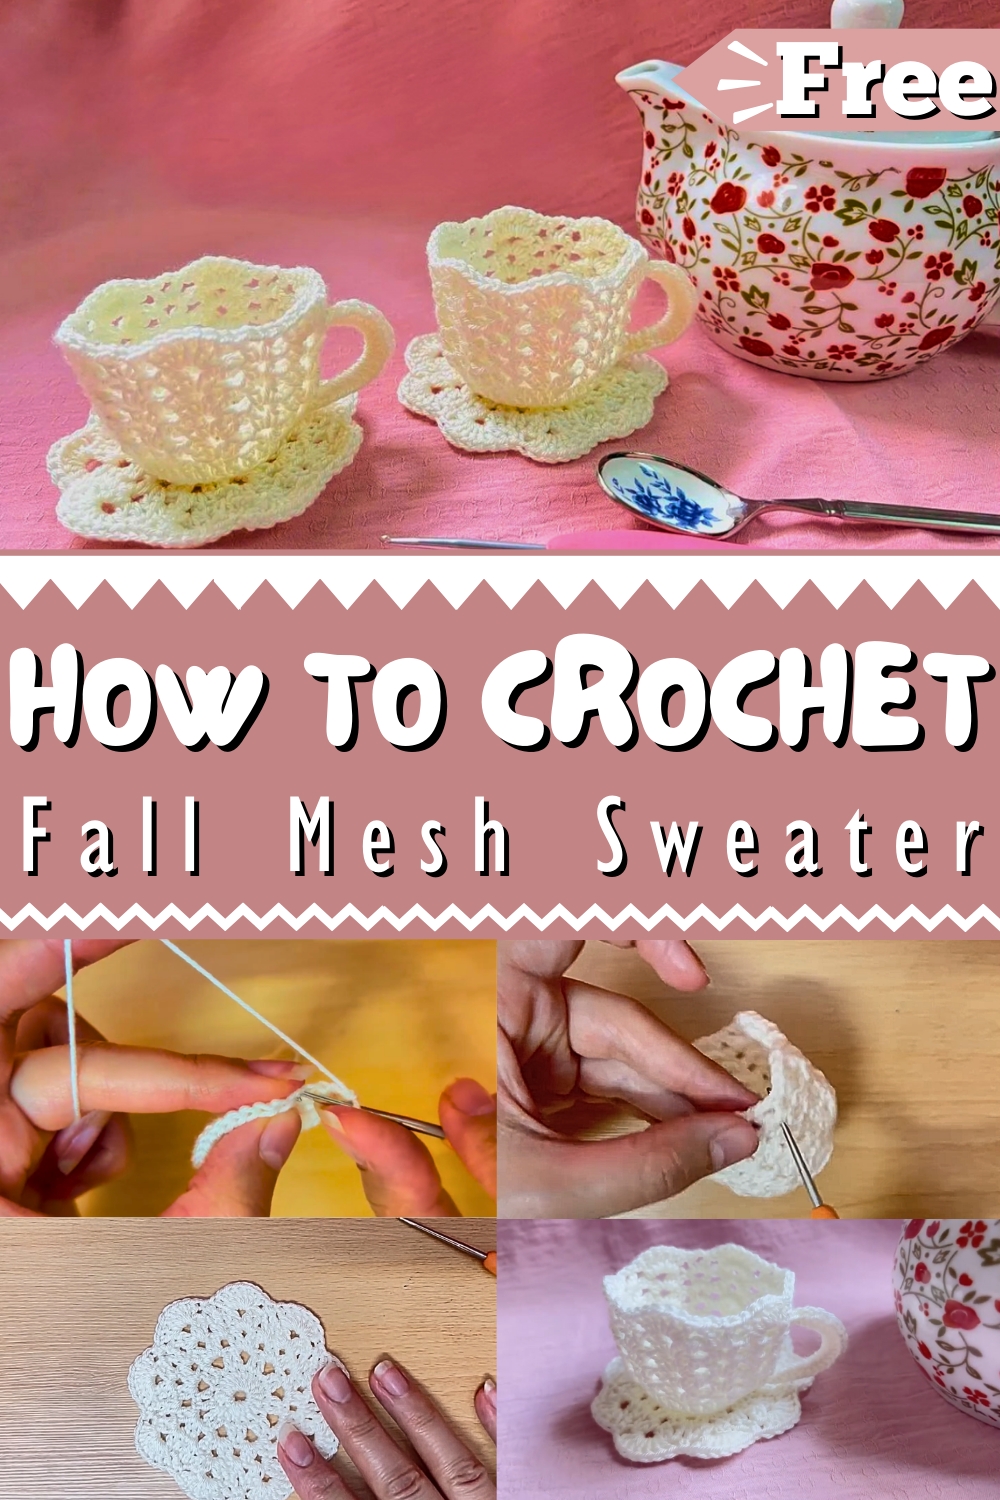
The pattern starts with creating a magic ring for the cup’s base, followed by alternating rows of single and double crochets for structure. The saucer requires a series of increasing stitches to form a flat, circular shape. Both pieces can be customized with decorative edges, stripes, or even tiny floral embellishments. The beauty of this project lies in its versatility and the personal touch you can bring to each creation, making it truly unique and special.
Tip:
Ensure to stiffen your cup and saucer with fabric stiffener for a polished final look that stands firm.
Crochet Cup and Saucer Pattern
Today, we'll learn how to crochet a beautiful cup and saucer, perfect for decorating your kitchen, home, or any space you choose. This versatile pattern allows you to create a charming container for candies, chocolates, or any small items. You can customize the colors to fit your style.
Materials Needed
- 1.75 mm crochet hook
- Yarn in your preferred color
- Needle to weave in ends
- Pair of scissors
Cup: Step-by-Step Instructions
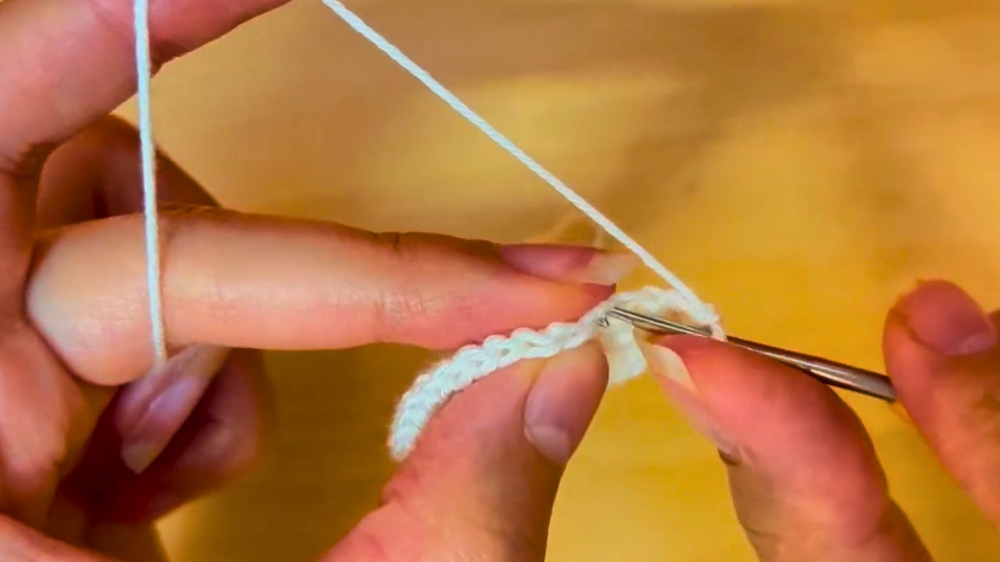
1. Start with a Magic Ring
- Create a magic ring and chain 3.
2. First Round
- Crochet 17 double crochets into the magic ring.
- Slip stitch into the third chain from the start.
3. Second Round
- Chain 3 and double crochet into the same space.
- Crochet 2 double crochets in each stitch around.
- Slip stitch into the third chain from the start.
4. Third Round
- Chain 3 and work in back loops only.
- Double crochet in each stitch around.
- Slip stitch into the third chain.
5. Fourth Round
- Chain 3 and double crochet into the same space.
- Chain 2, then 2 double crochets into the same space.
- In every third stitch, create 2 double crochets, chain 2, 2 double crochets.
- Slip stitch into the third chain.
6. Fifth Round
- Repeat the final stitch pattern: double crochet, chain 2, double crochet.
- Continue around and slip stitch into the third chain.
7. Handle
- Attach yarn between any two stitches.
- Chain 12, then slip stitch into the next stitch.
- Chain 2, half double crochet 19 times, slip stitch to join.
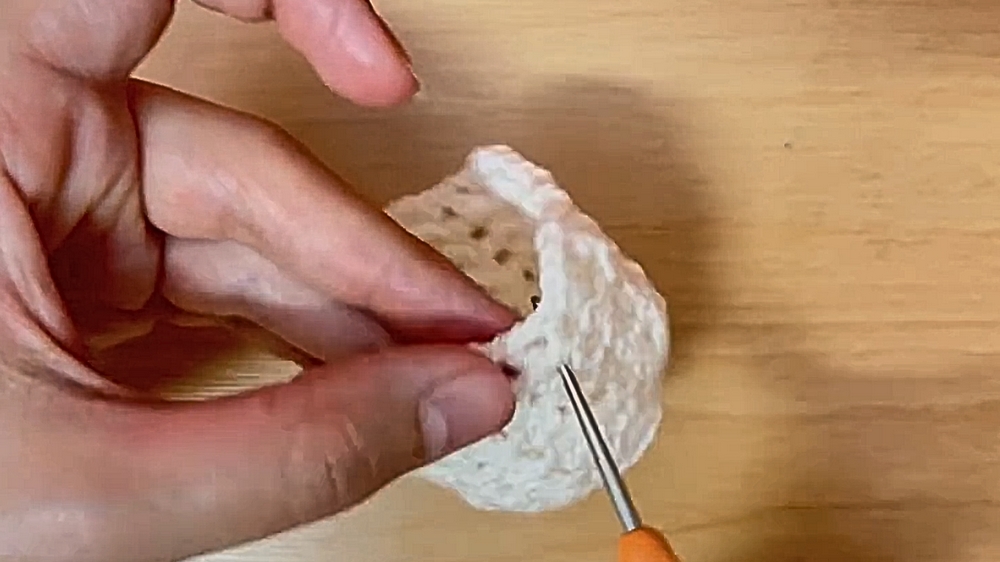
8. Finishing the Cup
- Cut yarn and weave in the ends.
- Optional: Spray with hairspray for a stiffer cup.
Saucer: Step-by-Step Instructions
1. Start with a Magic Ring
- Chain 3 followed by 17 double crochets into the magic ring.
- Slip stitch into the third chain.
2. First Round
- Chain 3, double crochet, chain 2, 2 double crochets in each stitch around.
- Slip stitch into the third chain.
3. Second Round
- Chain 3, double crochet into the same space.
- Chain 2, double crochet into the next space, 2 double crochets into the same space.
- Continue pattern around and slip stitch into the third chain.
4. Third Round
- Continue the same pattern: 2 double crochets, chain 2, 2 double crochets.
- Slip stitch into the third chain.
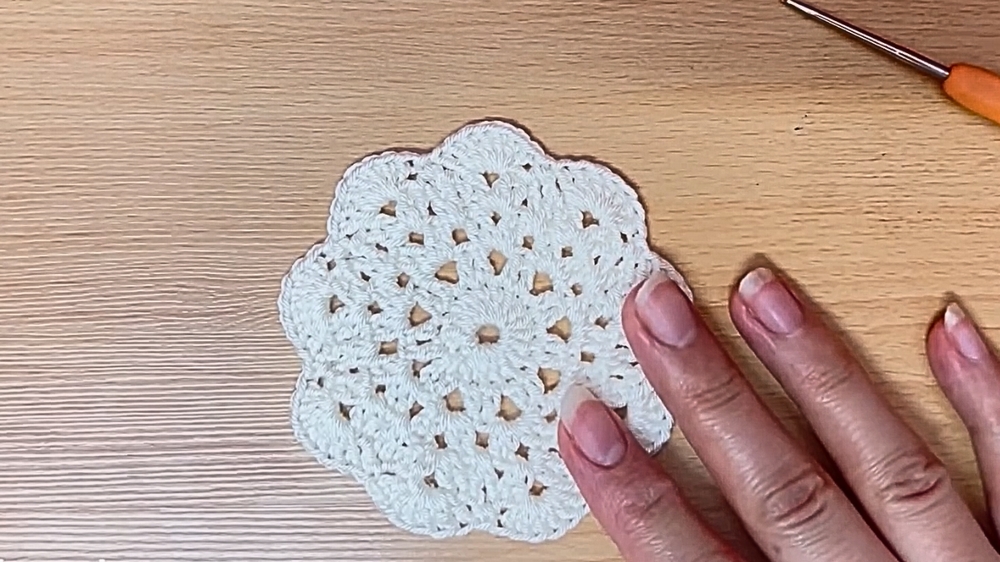
5. Final Round
- Chain 3 into the first space.
- 6 double crochets into the next space.
- Single crochet into the following space.
- Continue around and slip stitch to finish.
6. Finishing the Saucer
- Cut yarn and weave in the ends.
Conclusion
Congratulations! You've now completed your beautiful crochet cup and saucer. This easy and useful project can hold candies or other small items, adding a charming handmade touch to your home.