
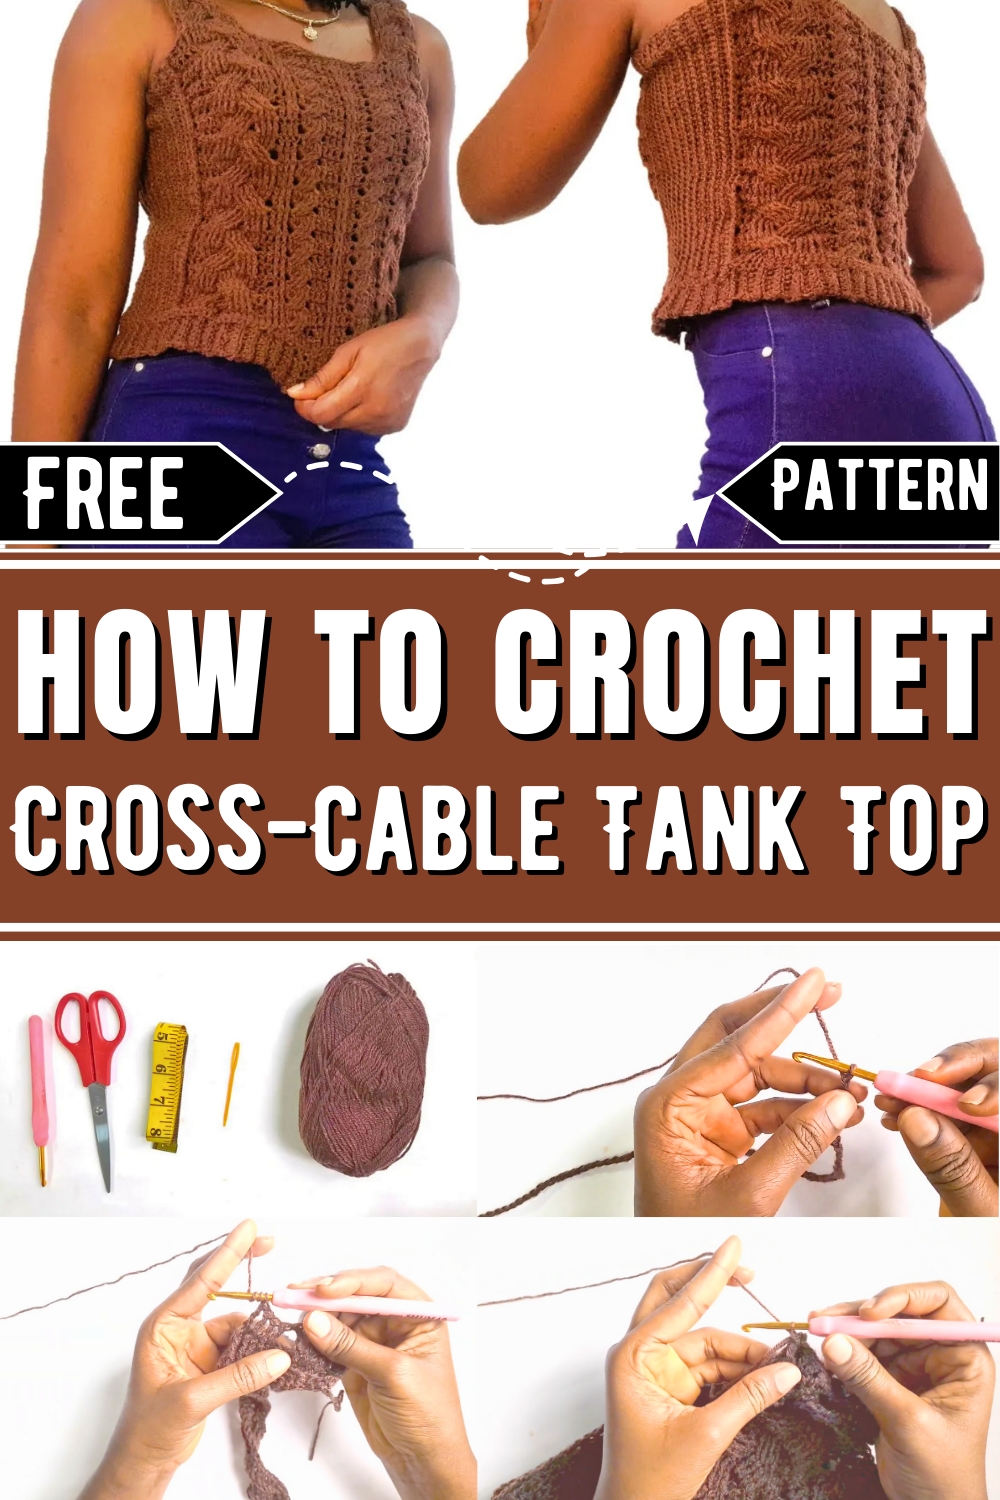
Elevate your summer style with this crochet tank top pattern featuring intricate cross-cable stitching, offering comfort, versatility, and customization options.
Crochet Simple But Stylish Cross-Cable Tank Top
Warm summer days call for stylish garments that offer both comfort and functionality. The cross-cable tank top captures this balance perfectly, featuring delicate stitching that combines elegance with breathability. Its lightweight design makes it ideal for sunny afternoons, whether paired with casual shorts for a day out or layered with a blazer for a polished evening look. The pattern accommodates customization, allowing you to select the perfect yarn and color palette to suit your preferences.
This versatile tank top isn’t just attractive—it’s also practical. Its durable construction ensures it remains soft and shapely for repeated wear, making it a valuable addition to any wardrobe. For crafters, mastering the cross-cable technique provides an exciting way to grow your skills and experiment with intricate designs. The pattern invites personalization, empowering you to create something uniquely yours.
Beyond personal use, this tank top makes an excellent gift that’s thoughtful and handmade. Perfect for giving to friends or family, it’s a token of care and creativity. Additionally, its lightweight fabric makes it a convenient option for traveling or beach outings. Whether it’s styled casually or dressed up, the cross-cable tank top combines utility, creativity, and timeless design in a single piece.
How To Crochet Cross-Cable Tank Top
This project walks you through creating a stylish crochet pattern that can be used as a strap or accessory piece. The design focuses on creating structured braids using a combination of chains, double crochets, and front-post treble crochets. The repeated alternation between two styles of braids (big and small) gives the project a dynamic and textured look.
Materials Needed
Before starting, ensure you have the following materials:
- Yarn of your choice
- Crochet hook appropriate for your yarn
- Scissors
- Stitch markers (optional)
- needle

Step by step Pattern
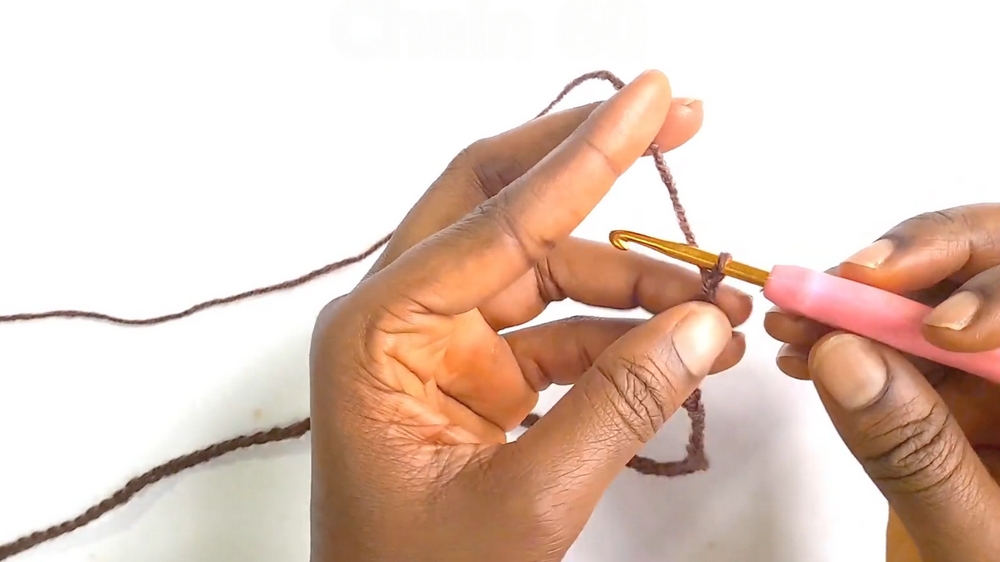
Step 1: Foundation Chain
- Begin by chaining 60 stitches.
- Skip the initial chains and half-double crochet across the chain.
- Complete Row 1 and meet at the end of the row.
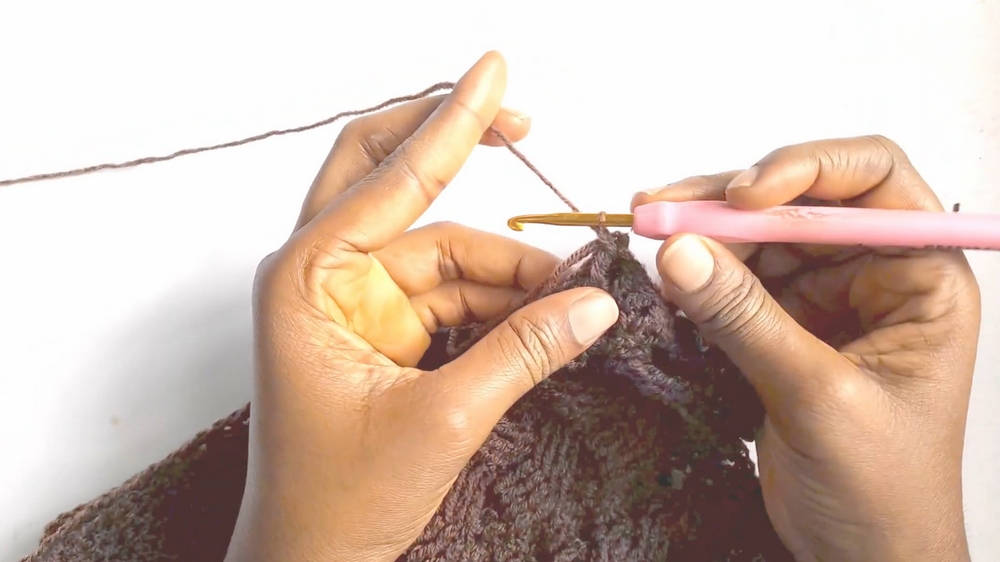
Step 2: Starting Row 2
- Chain 2, turn your work, and double crochet into the next two stitches.
- Begin the big braid by:
- Yarn over twice, skip four stitches, and front-post treble crochet into the fifth and sixth stitches.
- Return to the skipped stitches, yarn over twice, and front-post treble crochet into them. These stitches will overlap the previous ones.
- Continue front-post treble crochets into the next four stitches.
- Move to the next section:
- Double crochet into the next two stitches.
- Work three front-post stitches.
- For the small braid, skip three stitches and front-post treble crochet into the fourth through sixth stitches.
- Return to the skipped stitches and front-post treble crochet into them.
Step 3: Continuation for Row 2
- Double crochet into three stitches.
- Create another small braid:
- Skip three stitches and front-post treble crochet into the fourth to sixth stitches, then return to the skipped stitches.
- Finish Row 2 by double crocheting into the last five stitches.
Step 4: Row 3 (Wrong Side)
- Chain 2, turn your work, and work the wrong side.
- On this row, do not skip or cross any stitches.
- Repeat:
- Double crochet on top of every double crochet.
- Back-post crochet on top of every front-post.
- Complete Row 3 to the end.

Step 5: Row 4 (Right Side)
- Chain 2, double crochet into the first two stitches.
- Create a big braid:
- Front-post into the next four stitches.
- Skip four stitches, front-post treble crochet into the next fifth through eighth stitches.
- Return to the skipped stitches and work front-post treble crochet from behind.
- Double crochet into the next two stitches.
- For small braid sections:
- Skip three stitches, front-post treble crochet into the fourth through sixth stitches.
- Return to skipped stitches as before.
Step 6: Alternating Rows
- For every wrong-side row (odd rows, e.g., Row 3, Row 5):
- Double crochet on top of every double crochet.
- Back-post crochet on top of every front-post.
- For every right-side row (even rows):
- Alternate between Row 2 (big braids) and Row 4 patterns.
Step 7: Adjust the Length
- Continue alternating rows until you achieve the desired length for your project.
- Once the length is complete, duplicate the process by creating another identical piece.
Creating the Underarm Section
- Chain 41 stitches for the underarm area.
- Single crochet across the chain.
- In subsequent rows, single crochet into the back loops only for texture. Repeat for 22 rows (adjust based on measurement needs).
- Use single crochet to join the underarm sections to your main piece.
Finishing the Edges
- Single crochet around the base of your project to give it a clean and polished edge.
- Slip stitch into the last stitch and chain 7 to begin straps or additional decorative sections.
Creating the Strap
- Work the big braid pattern for the strap by repeating Rows 2, 3, and 4 until you achieve the desired strap length.
- Ensure the strap matches the overall aesthetic and functionality of your project.
Joining the Straps
- Use single crochet to connect all strap pieces to the main panel securely.
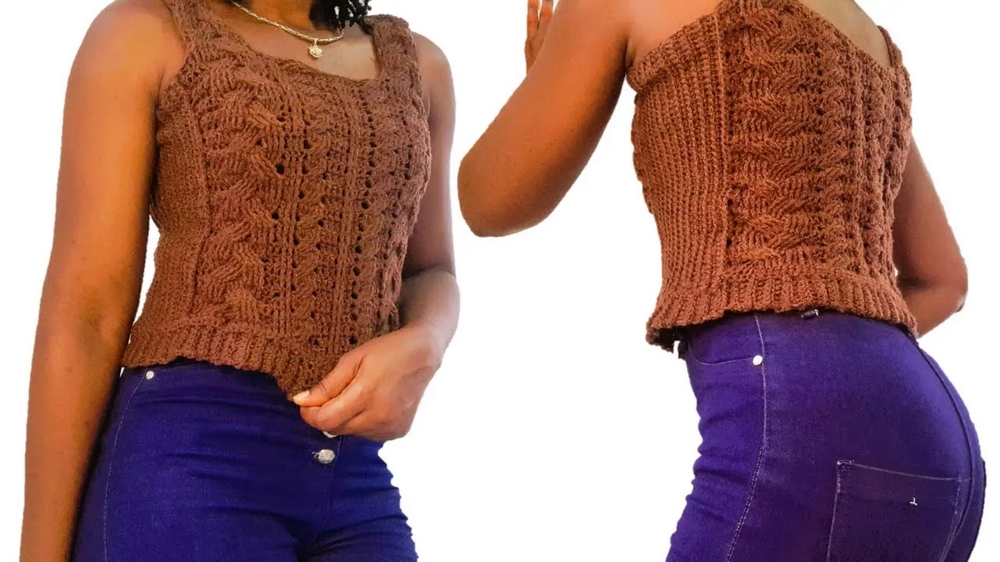
Conclusion
This crochet pattern results in a beautifully braided design that can function as both a decorative strap and a functional accessory. The alternation between big and small braids adds depth to the project, while the repetitive pattern ensures consistency throughout. Whether you're creating a wearable item or an accessory, this project is sure to highlight your crochet skills. Enjoy experimenting with different colors or yarn textures for a unique touch!


