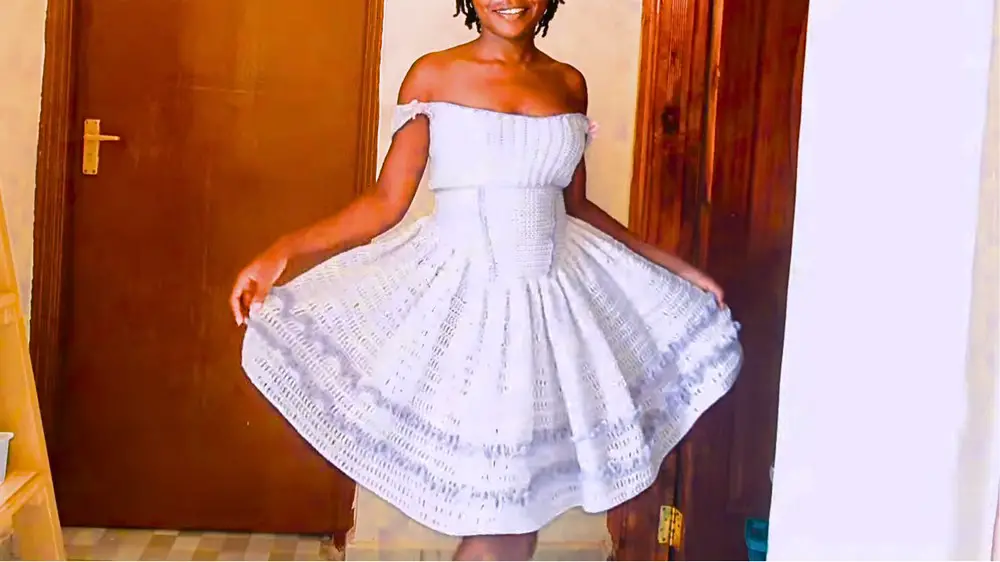
Showcase your designer potential with this Free Crochet Corset Dress Pattern, a stylish project for a truly unique handmade statement!
Crochet Corset Dress
Whether worn for a special event or a stylish day out, this creation is a true embodiment of timeless fashion and innovation. This exquisite design seamlessly blends vintage charm with modern elegance, creating a piece that is both striking and sophisticated. The intricate crochet details flow gracefully, forming a beautiful texture that enhances the dress's overall allure.
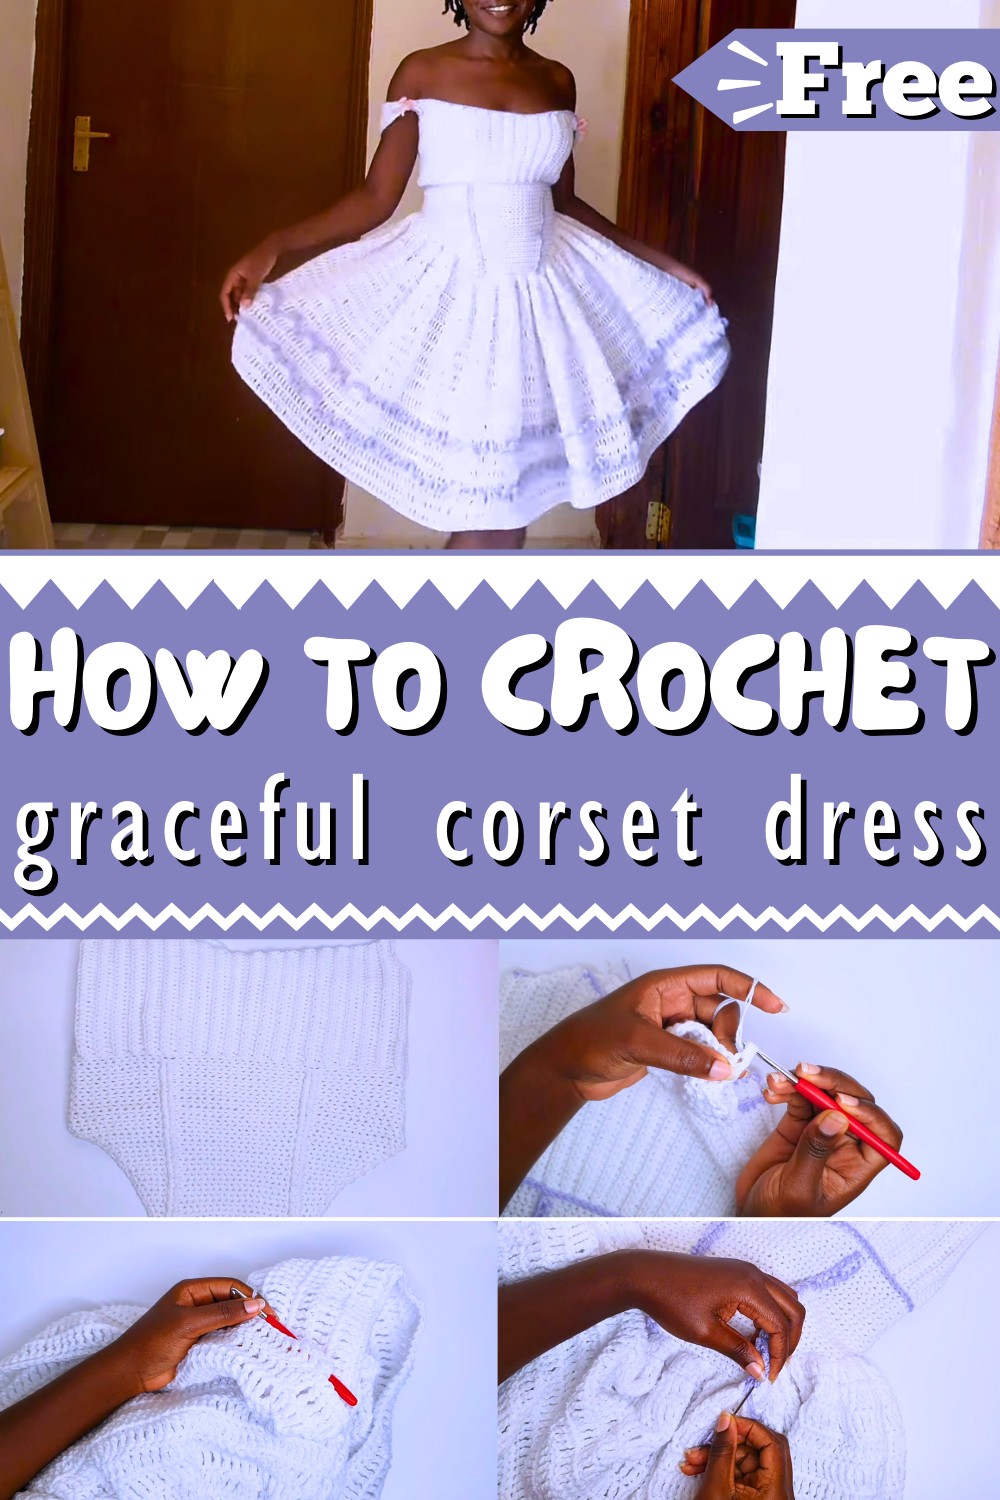
The fitted corset top flatters the figure, offering a perfect balance between structure and fluidity, while the flowing skirt adds a touch of romance and femininity. Available in a variety of colors and yarn choices, this pattern enables you to personalize the dress to suit any occasion or personal style, making it a versatile addition to your handmade wardrobe.
Tip:
For the best results, always block your finished crochet pieces to achieve a professional and polished look.
How To Crochet Cette Dress
Materials Needed
- Yarn: A 4-ply yarn (100% acrylic, "Winter King" brand used in the video; light purple for ruffles and main color for the dress).
- Hook Size: Suitable for the selected yarn weight.
- Darning needle: For weaving in ends.
- Stitch markers: Optional but recommended for marking sections.
- Scissors: For cutting yarn.
Abbreviations
- Ch: Chain
- Sl st: Slip stitch
- SC: Single crochet
- HDC: Half double crochet
- DC: Double crochet
- TR: Treble crochet
- DTR: Double treble crochet
- Dec: Decrease (two stitches worked together)
- Rep: Repeat
- YO: Yarn over
- St(s): Stitch(es)
Step-by-Step Pattern
Part 1: Lower Section of the Dress
Start at Seam
- Slip Knot: Make a slip knot and reattach your yarn at the seam where you finished the previous part of the dress.
- Ch 4: Chain 4 (including base chain).
- Treble Crochets:
- YO twice, insert hook into the same stitch near the seam, and make one treble crochet (TR). Repeat this step in the same stitch to make 2 TRs in total.
- Move to the next stitch and place 3 TRs.
- Continue alternating between sections of 3 TRs in a stitch and 2 TRs in a stitch, repeating these groups all the way around.
End Round:
- Sl st to the top of the Ch 4 from the start to close the round.
Round 2: Build-Up
- Ch 1: Chain 1 and turn your work.
- SC Foundation: Work 3 SCs into the stitch where you began. This creates a foundation for the round.
- Treble Crochets with Increase:
- YO twice, work one TR into each of the next 5 stitches.
- Increase: On the 6th TR, place 2 TRs into the same stitch.
- Continue: Place one TR into the next 5 stitches, then increase into the 6th stitch.
- Repeat: Continue this alternating pattern till the end of the round.
Round 3: No Increase Round
- Ch 1: Chain 1 and turn.
- SC Foundation: Go into the first stitch, SC three times into the front loop only (FL only).
- TR Placement: YO twice, work one TR into every stitch all the way around.
- Repeat Process: You will continue this until the end of the round, then Sl st to close.
Adding Length
Continue to build the skirt section by alternating rounds with increases and rounds without increases until the desired length is achieved.
Part 2: Correcting Front vs Back Alignment
- Mark Corners: Use stitch markers to identify the corners of the dress where the alignment of rows needs adjustment (front longer than back).
- Correction Process:
- Begin decreasing back rows by working sections with DCs, HDCs, and SCs in an alternating fashion.
- Example: 5 stitches to the stitch marker:
- Work 2 DCs in the first two stitches.
- Follow by 2 HDCs in the next two stitches.
- Work 1 SC into the last stitch.
- Work SCs into the rest of the row until reaching the second stitch marker.
- Reverse the process to increase rows where needed.
Repeat as necessary until the front and back align well.
Part 3: Ruffles (Hem and Under Bust Section)
Ruffles at the Hem
- Attach Contrast Yarn (Light Purple): Locate seam line and reattach the yarn to one of the loops left at the bottom edge.
- Ch 1: Chain 1 to secure yarn.
- Work HDCs:
- Place 3 HDCs into each stitch across these loops.
- Continue all the way around, weaving in loose ends.
- End Round:
- Sl st to the first HDC to close.
- Fasten off and trim the yarn.
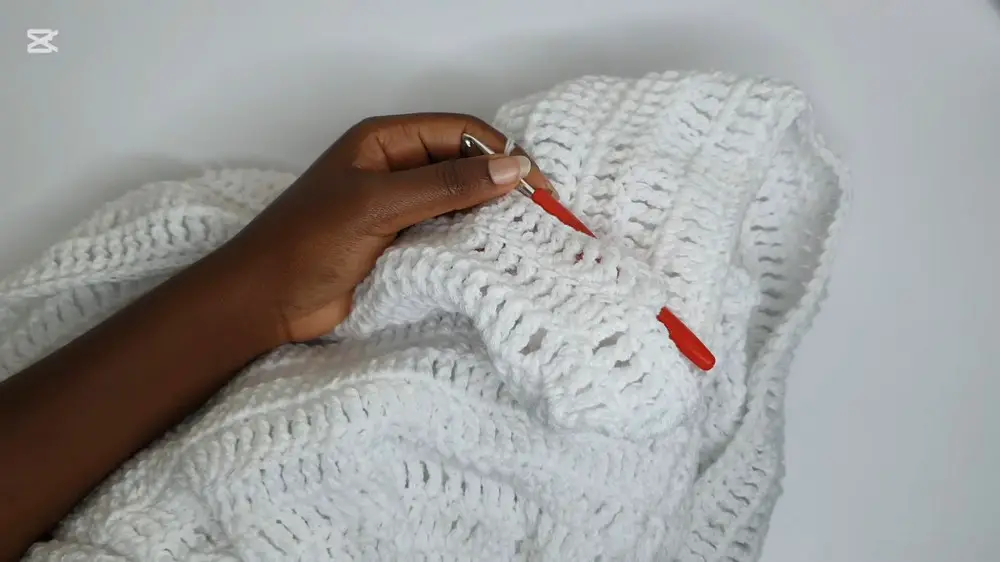
Ruffles Under the Bust
- Attach Yarn: Identify loops left near the bust. Reattach yarn to one of the loops.
- Ch 1: Chain 1 to secure.
- SC Placement:
- Work 1 SC into each loop all the way around.
- End Round:
- Sl st into the first SC to close and fasten off.
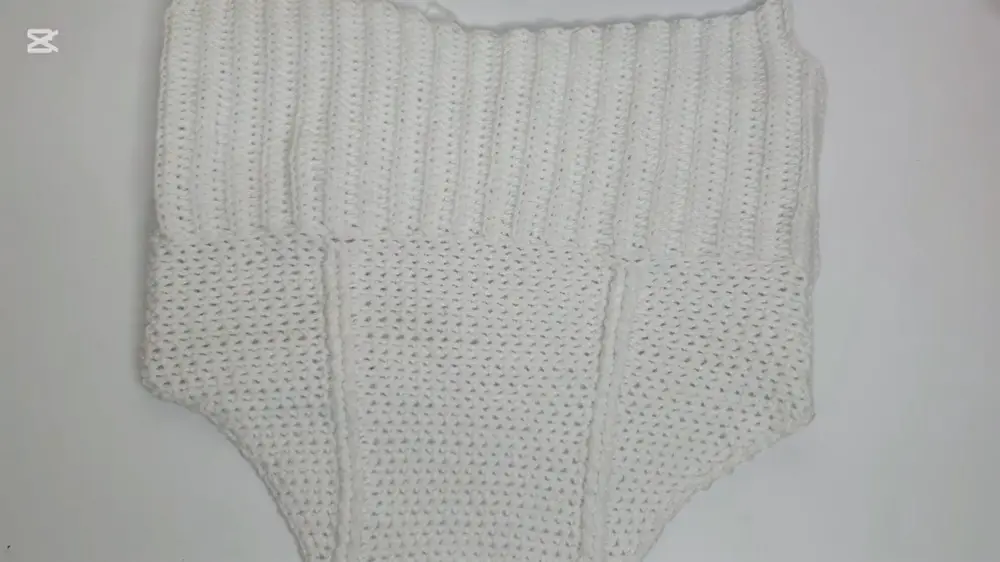
Part 4: Ribbing (Upper Edge Finishing)
- Attach Yarn: Reattach yarn at the seam line for the upper edge of the dress.
- Ch 1 and SC Foundation:
- Place 1 SC into the first stitch and each stitch along the edge.
- Skip every other row, placing SCs evenly while maintaining smooth tension.
- Corners: Work 2 SCs into corner stitches for nice definition.
- End Round: Join with Sl st to the first SC, fasten off, and weave in loose ends.
Part 5: Sleeves
Sleeve Construction
- Row 1: Attach yarn at the corner of the armhole. Begin increasing:
- Place 2 DCs in the first stitch.
- Place 1 DC in the next stitch.
- Place 2 DCs in the last stitch. (Total: 5 DCs)
- Row 2: No increase row. Place 1 DC into every stitch.
- Row 3: Increase again, adding 2 DCs at the beginning and end of the row.
- Continue: Alternate increase and repeat rows for 10 rows.
Decreasing Rows
- After reaching maximum width, begin alternating rows of decreasing (work two DCs together at the beginning and end) and repeating no-increase rows.
- Continue until 3 stitches remain.
Join Sleeves:
- Align with seam line at the back and join using SCs for neatness.
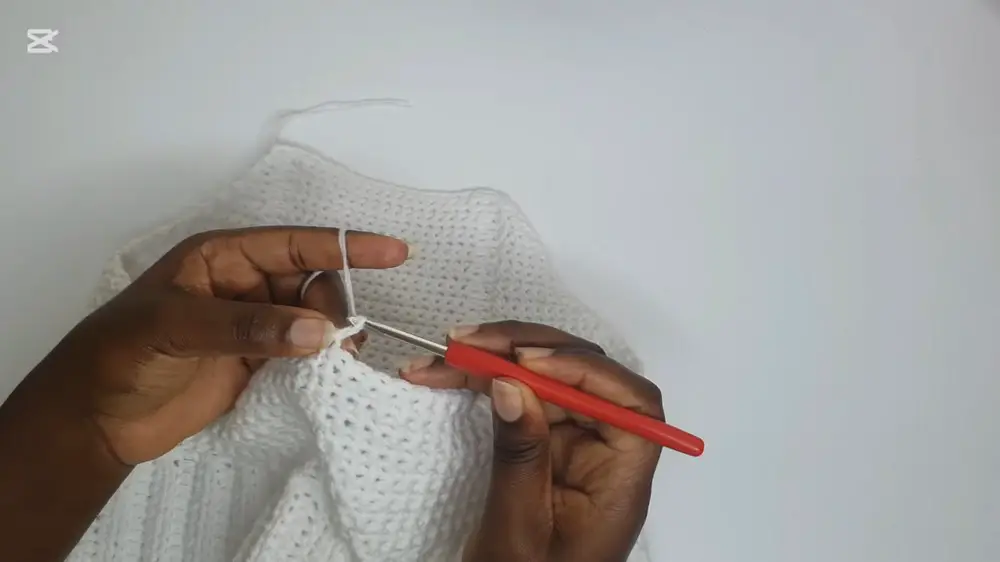
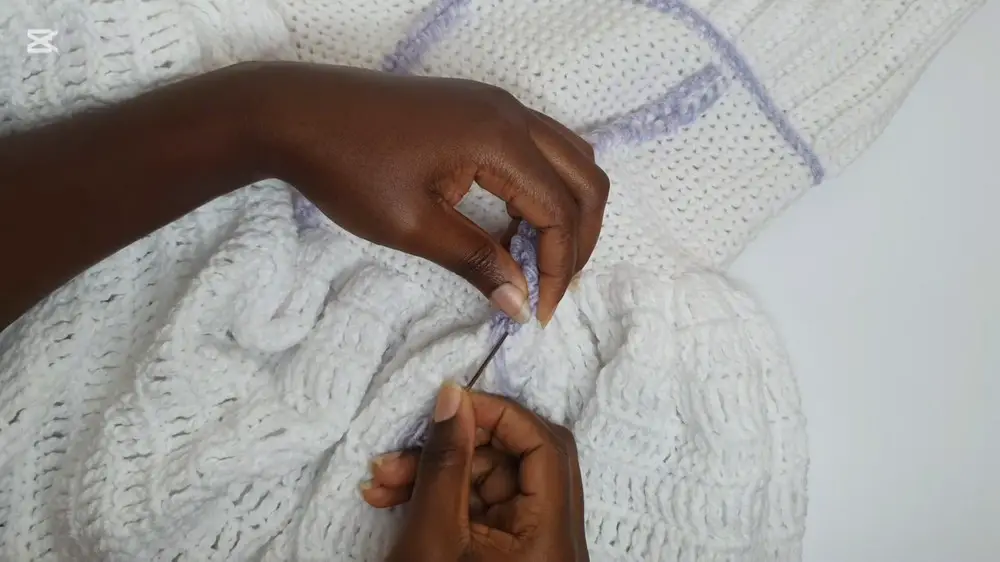
Decorative Finish
To add flair:
- Use contrasting yarn and thread it through ridges created in prior rounds using a darning needle.
- Secure and weave in ends.
Tips
- Check fit periodically while crocheting.
- Use stitch markers to track increases/decreases and alignments.
- Adjust length of dress/sleeves based on personal preference.
Congratulations! Your stunning crochet Cette Dress is complete!