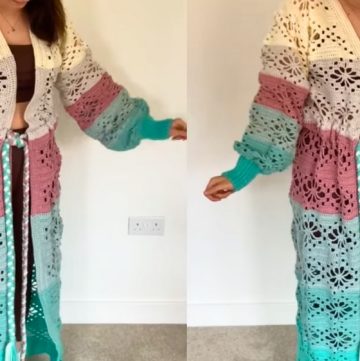
Transform your wardrobe with this free Crochet Granny Hexagon Cardigan pattern—perfect for adding a touch of vintage chic to your handmade collection!
Crochet Chic Granny Hexagon Cardigan
Refresh your wardrobe with the Crochet Granny Hexagon Cardigan, a stylish and cozy addition perfect for all seasons. This unique cardigan creatively merges the traditional granny square motif with modern fashion, resulting in a versatile garment that can be dressed up or down.
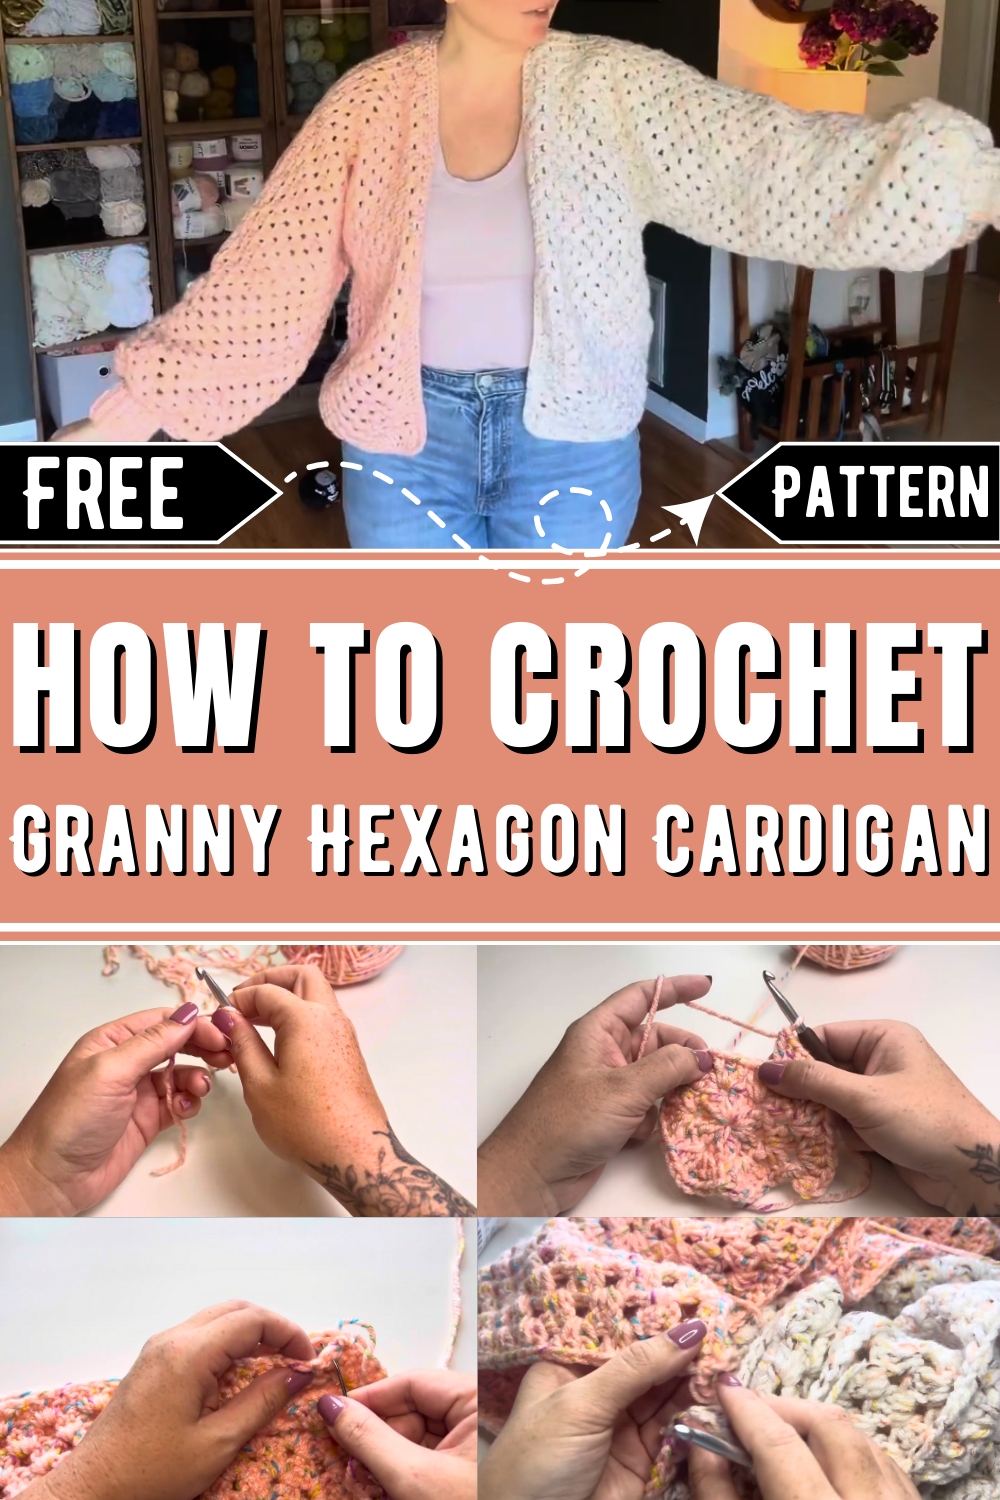
Its hexagon pattern provides an eye-catching design, making it a statement piece wherever you go. Ideal for layering over casual outfits or pairing with dressier ensembles, this cardigan offers both warmth and chic elegance. The easy-to-follow cardigan pattern ensures that crochet enthusiasts of all levels can enjoy making and wearing this innovative and fashionable piece.
Step-by-Step Crochet Pattern from
Materials Needed
- Yarn: Worsted weight yarn (two colors if making two-toned).
- Hook: A size 6mm crochet hook (or personal preference). Alternatively, adjust based on yarn thickness.
- Other: Tapestry needle, stitch markers (optional), scissors.
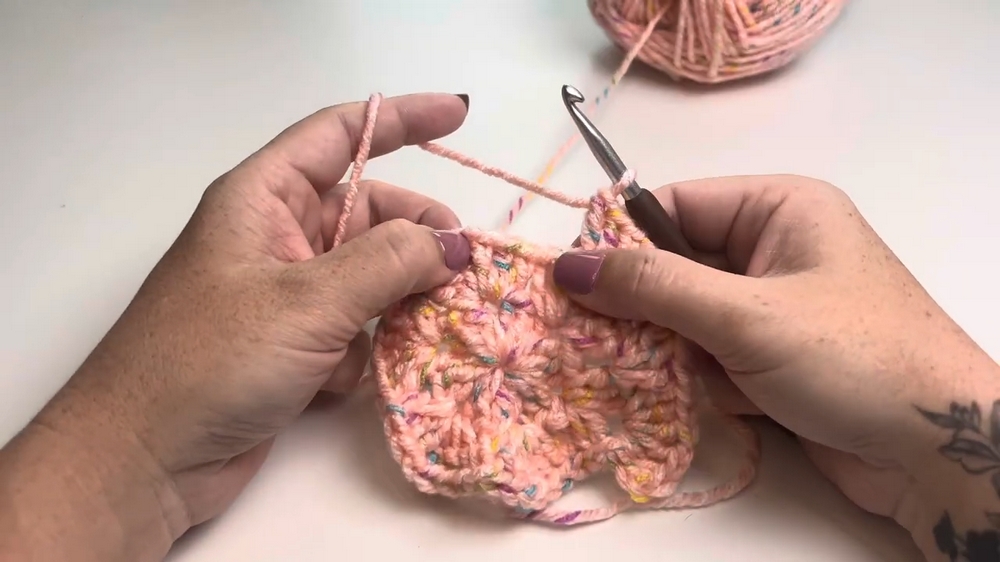
Part 1: Making the Hexagonal Panels
You will create two hexagonal panels to form the base of the cardigan. Each hexagon represents half of the cardigan.
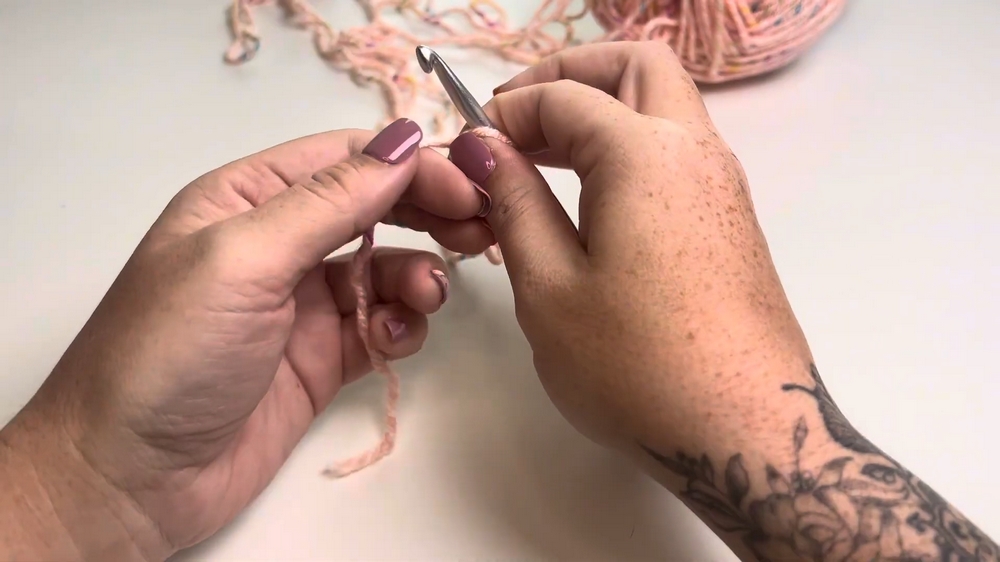
Step 1: Start with a Magic Ring
- Wrap yarn around your fingers to form an "X".
- Insert the hook under the first strand of the "X", pull the second strand through, twist the hook, and pull up the working yarn.
Step 2: First Round
- Chain 3 (counts as the first double crochet).
- Make 2 double crochets into the ring.
- Chain 1 (creates the first corner).
- Make 3 double crochets into the ring.
- Repeat this sequence (3 double crochet, chain 1) 4 more times, for a total of 6 clusters.
- Pull the short end of the yarn to close the magic ring tightly.
- Slip stitch into the top of the starting chain to close the round.
Step 3: Subsequent Rounds
- Slip stitch into the next stitch and into the chain-1 space (corner).
- Chain 3, then make 2 double crochets into the same corner space.
- Chain 1, then make 3 double crochets into the same space (creates a corner cluster within the corner space).
- In the side gap (between two clusters), make 3 double crochets.
- In the next corner, make a corner cluster: [3 double crochets, chain 1, 3 double crochets].
- Repeat this pattern (side gaps get one cluster; corners get corner clusters) all the way around.
- Slip stitch into the top of the chain-3 to close the round.
Step 4: Expand Each Round
As you add more rounds, there will be more side gaps between the corners. Continue making:
- 3 double crochets in each side gap.
- [3 double crochets, chain 1, 3 double crochets] in each corner.
Step 5: Size Guide
- Continue adding rounds until the hexagon reaches the desired size. Fold the hexagon in half to check the fit:
- Measure from the shoulder to the armpit (this fold creates a sleeve and half of the cardigan front and back).
- Add more rounds if you want a looser or longer fit.

Step 6: Make Two Hexagons
Repeat the process to make the second hexagon, ensuring both are identical in size and rounds.
Part 2: Connecting the Panels
- Fold each hexagon in half to form an “L” shape. This L creates the sleeve, shoulder, and part of the back/front panel.
- Lay the two folded hexagons side by side.
- Whip stitch the top edges of one corner together to create the shoulder seam. Ensure that the seams are stitched with the wrong side facing outward.
- Turn the panels right-side out.
Part 3: Extending the Back
To leave room for the back of your neck:
- Lay the panels flat. Extend the back by adding 3 rows of granny clusters to the top edges of each hexagon's back panel. Work in rows:
- Start from the corner of the sleeve edge on each hexagon.
- Work across the back panel edge from one shoulder seam to the other.
- Chain 3 at each row’s beginning, then work back and forth.
- When both hexagons have 3 rows added to their backs, whip stitch the back seams together.

Part 4: Sleeves
The sleeves can be left short (as-is), or extended. For longer sleeves:
- Turn the cardigan inside out to work in the round.
- Begin at the top of the sleeve opening where the shoulder was stitched closed.
- Work in rounds: Make granny clusters in each gap space around the sleeve opening.
- Add as many rounds as desired to reach the desired sleeve length.
- Decreasing for a tapered sleeve/cuff:
- When the sleeve reaches near the wrist, switch to single crochet decreases.
- Work single crochet decreases in the round to tighten the cuff opening.
Part 5: Adding a Cuff
- Switch to a smaller hook (e.g., 5mm).
- Create a cuff strip:
- Chain 11 (or adjust length for preferred cuff width).
- Work single crochet back loop only across for 10 stitches on each row.
- Repeat this until the strip is long enough to wrap comfortably around the wrist, allowing for stretchiness.
- Seam the cuff strip into a loop, and whip stitch it to the sleeve’s wrist opening.
Part 6: Adding Length
To extend the length of the cardigan:
- Attach yarn to one bottom corner.
- Work rows back and forth across the entire bottom edge of the cardigan in granny clusters.
- Continue until the desired length is achieved.
Part 7: Border (Optional)
- For extra style, add a border to the front openings and hem.
- Popular border options:
- Single crochet all the way around.
- Scalloped lace (shell stitches).
- Ribbing through back-loop single crochet rows.
Step-by-Step Summary
- Create Hexagons: Two identical hexagons folded into “L” shapes.
- Connect Panels: Whip stitch the shoulders and back together.
- Add Sleeves: Work in the round to lengthen sleeves, taper, and add cuffs.
- Extend Back: Add rows to the back panels for fit.
- Add Length: Extend the hem to make the cardigan longer.
- Border: Customize the edges for added polish.

Notes
- When making two-toned cardigans, you’ll need to split colors in the middle for a seamless transition.
- Always weave in all ends securely at the end.
- Measurements will vary for each person, so take time to check fit and adapt the number of rows or length.
Let me know if you'd like further clarification regarding any part!