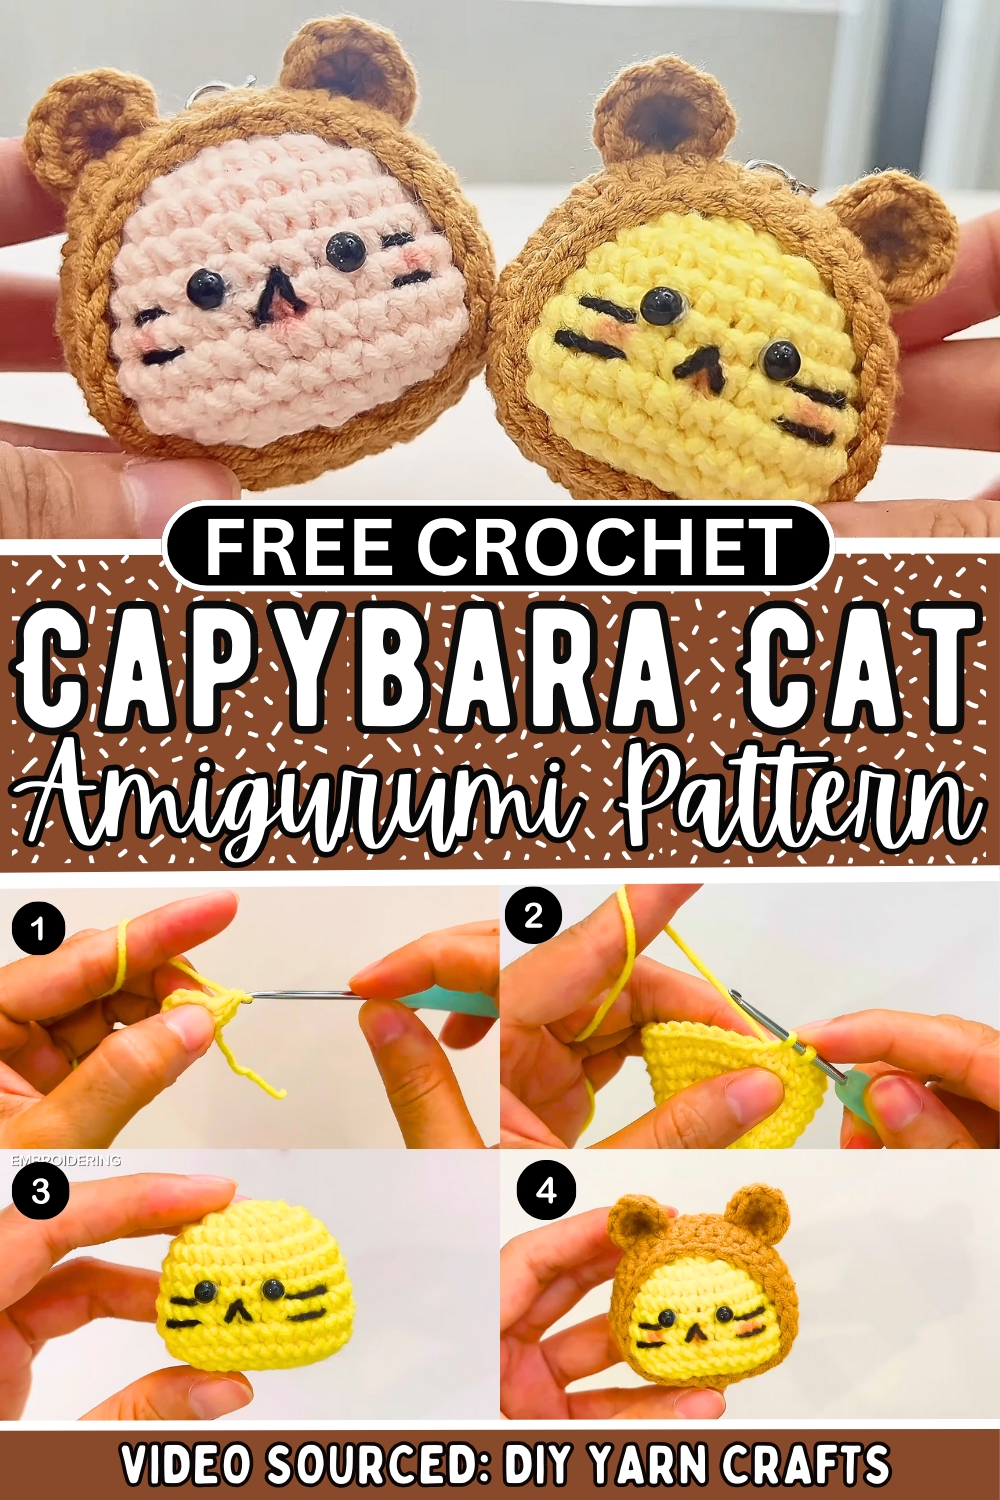
Unlock the charm with our free Crochet Capybara Cat Amigurumi keychain pattern – a whimsical and fun project for all crochet lovers!
Crochet Capybara Cat Amigurumi Keychain
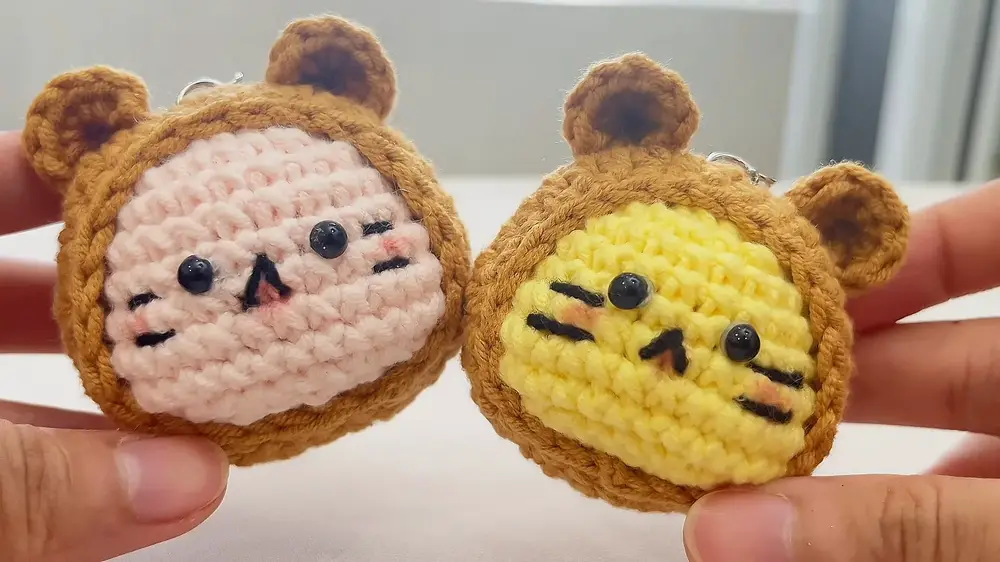
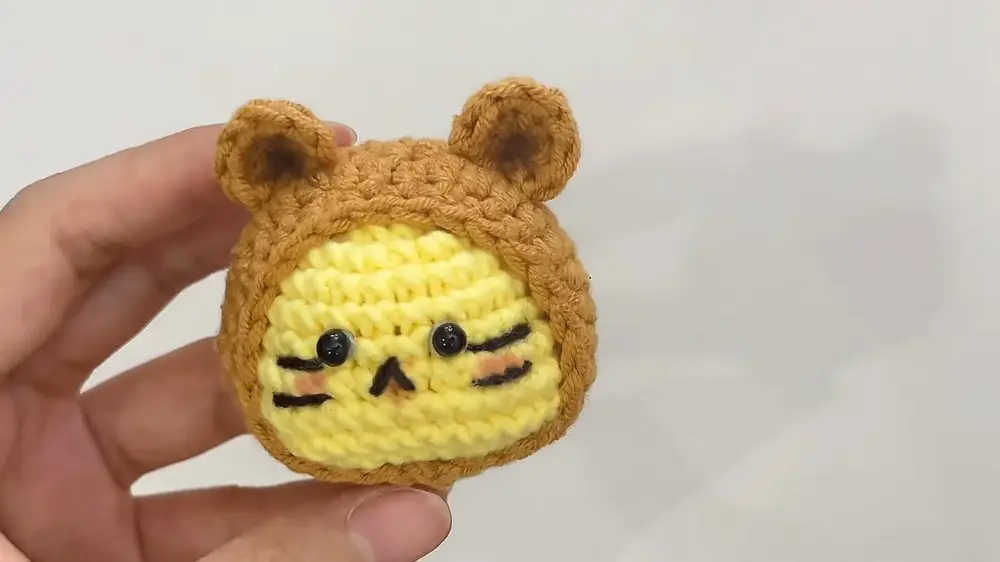
Meet the delightful Crochet Capybara Cat Amigurumi keychain – a fusion of whimsy and practicality. This adorable accessory brings a touch of playful personality to your everyday items, blending the charming features of a capybara and a cat into one delightful creature. Each keychain is perfectly crafted by hand, ensuring that every detail, from the expressive eyes to the soft yarn, is lovingly attended to.
Attach it to your keys for a daily dose of cuteness, clip it onto your bag to make a stylish statement, or dangle it from your car mirror to spread smiles wherever you go. Its compact size makes it easy to carry, yet it stands out as a memorable and unique piece.
Not only does it serve as a conversation starter, but it also makes a thoughtful gift for friends and family, who will appreciate its charm and the effort behind each stitch. Lightweight and durable, this keychain is a small yet mighty representation of your creative spirit, always ready to brighten up any moment with its endearing presence.
How To Crochet Capybara Cat Keychain
Materials Needed
- 5-ply cotton yarn
- 2.5 mm crochet hook
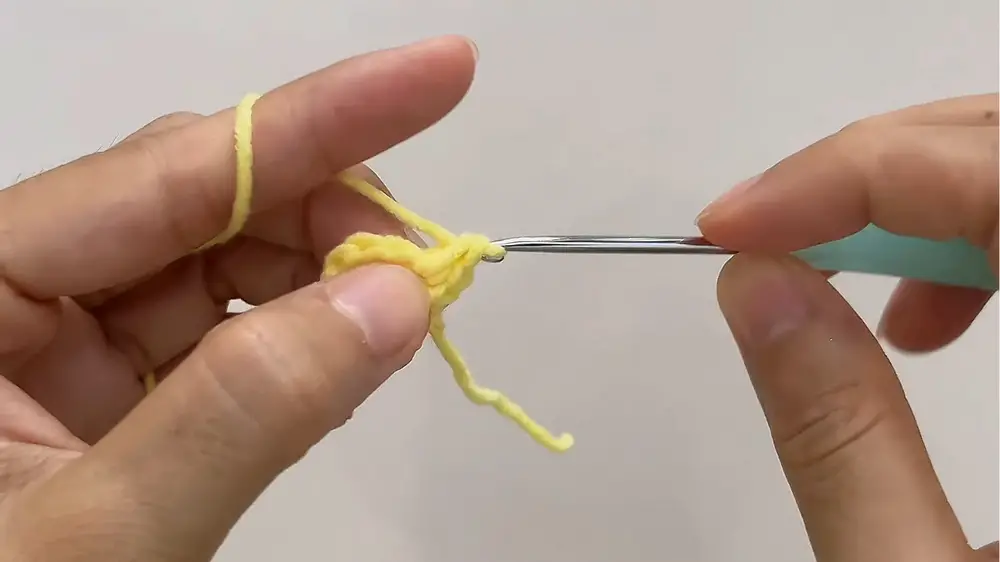
Making the Head
- Starting:
- Make a magic ring.
- Row 1:
- Make eight single crochets into the magic ring.
- Pull the yarn tightly and slip stitch into the first stitch.
- Row 2:
- Chain one.
- Make eight increases (two single crochets in each stitch).
- Slip stitch into the first stitch.
- Row 3:
- Chain one.
- Pattern: One single crochet in the first stitch, then an increase.
- Repeat seven more times and slip stitch into the first stitch.
- Row 4:
- Chain one.
- Make one single crochet in each stitch (total: 24 single crochets).
- Slip stitch into the first stitch.
- Rows 5 and 6:
- Chain one.
- One single crochet in each stitch (total: 24 single crochets).
- Slip stitch into the first stitch.
- Row 7:
- Chain one.
- Single crochet in the first six stitches.
- Make four increases.
- Four single crochets.
- Four increases.
- Six single crochets.
- Slip stitch into the first stitch.
- Row 8:
- Chain one.
- One single crochet in each stitch (total: 32 single crochets).
- Slip stitch into the first stitch.
- Row 9:
- Chain one.
- One single crochet in each stitch (total: 32 single crochets).
- Slip stitch into the first stitch.

- Row 10:
- Chain one.
- Single crochet in the first six stitches.
- Make four decreases.
- Four single crochets.
- Four decreases.
- Six single crochets.
- Slip stitch into the first stitch.
- Row 11:
- Chain one.
- Pattern: Single crochet in the first stitch, then a decrease.
- Repeat seven times.
- Slip stitch into the first stitch.
- Start stuffing the head.
- Row 12:
- Chain one.
- Make eight decreases.
- Slip stitch into the first stitch.
- Chain one to fasten off and leave a long tail for sewing.
- Cut the yarn.
- Insert the leftover yarn into the front loops of the remaining stitches, pull tightly, and insert the needle back into the middle.
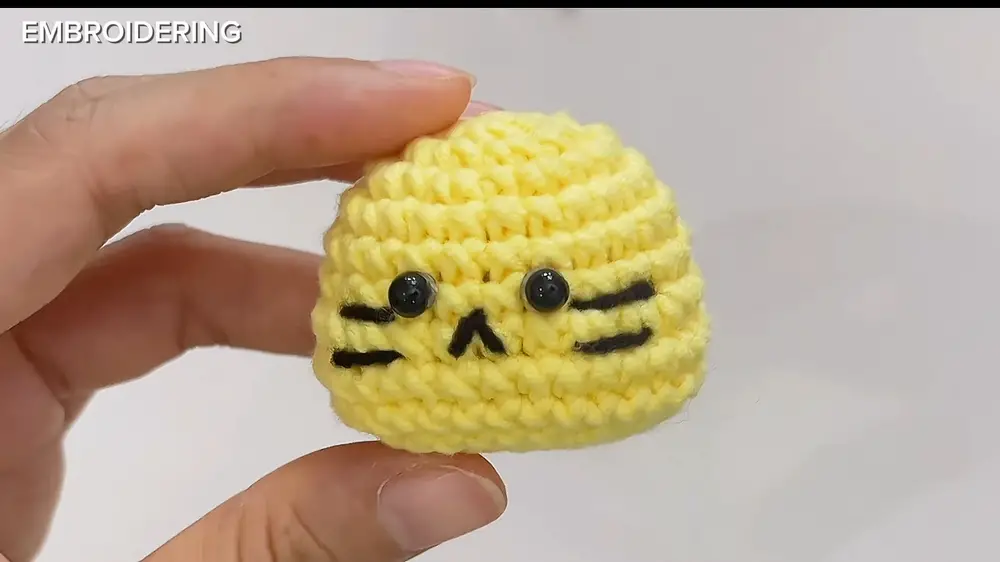
- Face Embroidery:
- Embroider the face by counting to the sixth row and placing the nose between rows six and seven using black yarn.
- Place the eyes between the nose and the whiskers using 4 mm eyes.
Making the Cap
- Starting:
- Make a magic ring.
- First Three Rows:
- Follow the same pattern as the first three rows for the head.
- Row 4:
- Chain one.
- Single crochet in the first two stitches, then an increase.
- Repeat seven more times and slip stitch into the first stitch.
- Rows 5 and 6:
- Chain one.
- One single crochet in each stitch (total: 32 single crochets).
- Slip stitch into the first stitch.
- Row 7:
- Chain two.
- Make a half double crochet in each stitch (total: 32 half double crochets).
- Slip stitch into the first stitch.
- Row 8:
- Chain two.
- Make a half double crochet in each stitch (total: 32 half double crochets).
- Slip stitch into the first stitch.
- Insert the head into the cap.
- Row 9:
- Chain one.
- Single crochet in the first two stitches, then a decrease.
- Repeat seven more times.
- Slip stitch into the first stitch.
- Chain one to fasten off, cut the yarn, and weave in the ends.
Making the Ears
- Starting:
- Make a magic ring.
- Ears:
- Chain one.
- Make six half double crochets into the magic ring.
- Pull the yarn tightly and chain one to fasten off, leaving a long tail for sewing.
- Cut the yarn.
- Sewing:
- Pin and sew the ears between rows two and three from the face of the cat.
Special Features
- The design includes detailed instructions for the head, cap, and embroidered facial features.
- The use of half double crochets gives a nice texture.
Level of Difficulty
- This project is extremely easy and suitable for beginners.
Tutor's Suggestions
- The tutor lets viewers know that they can use any color yarn they like.
- Emphasizes securely sewing on the facial features and ears.
Uses
- The Cy Bea cat keychain can be used as a decorative item on keys or bags.
- It makes a cute gift for friends and family.
Tip
- When embroidering the face, use pins to position the eyes and nose correctly before sewing to ensure they are symmetrical.