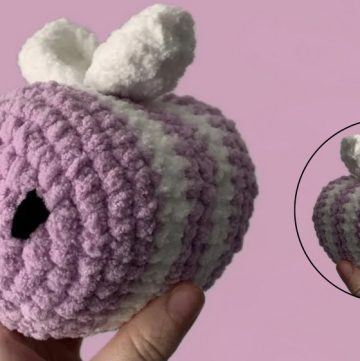
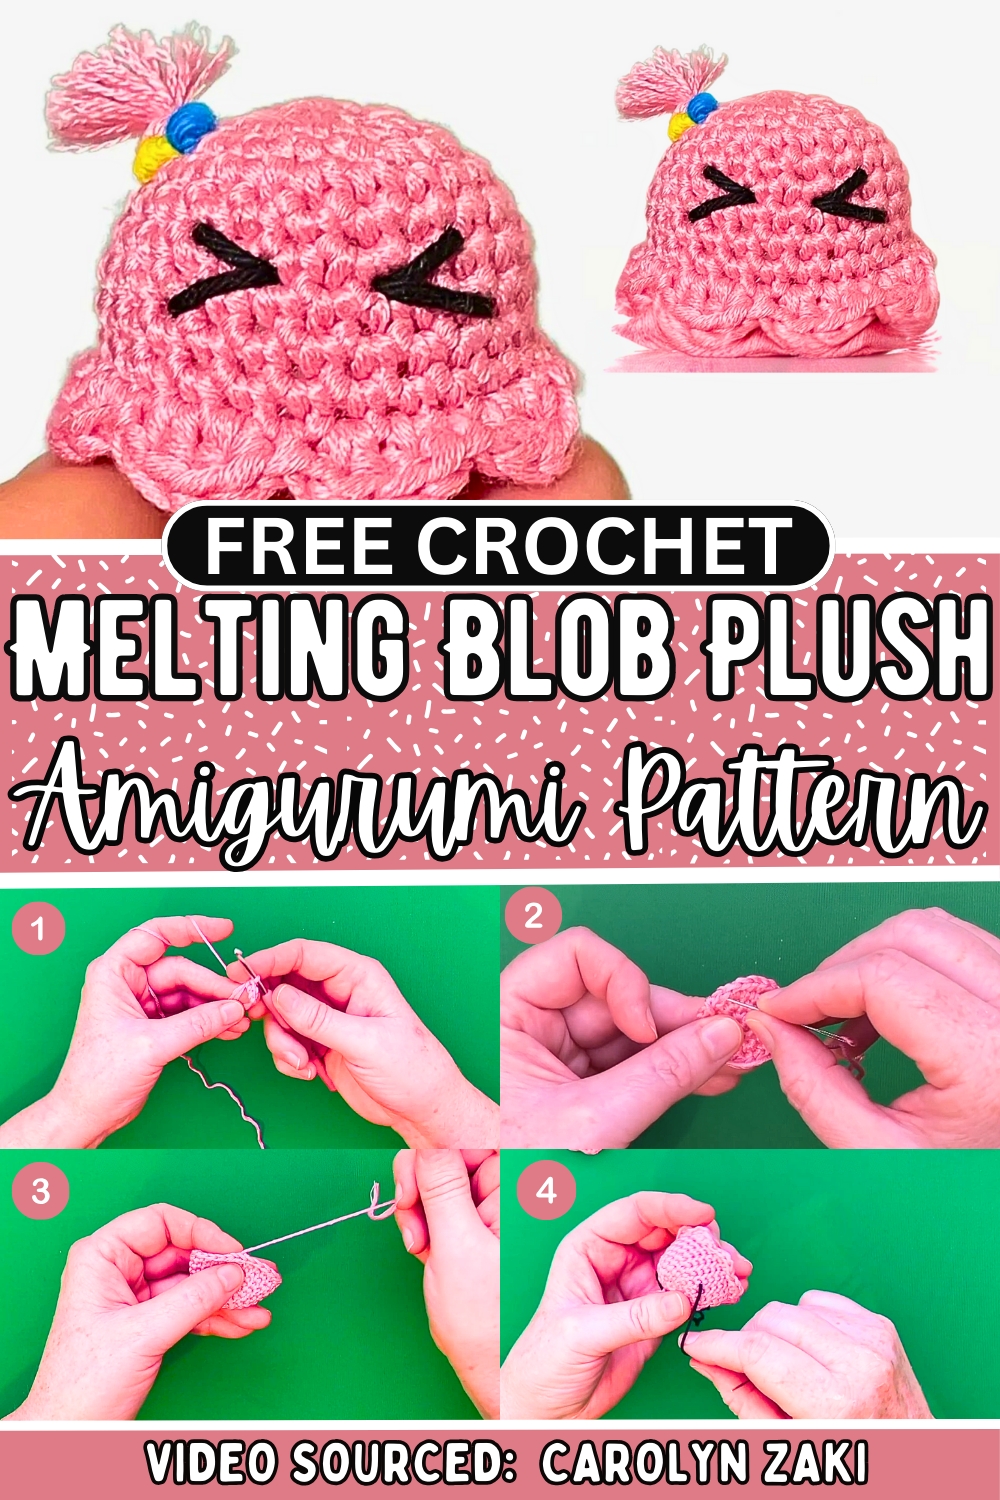
Introduce an adorable melting blob into your life with this free crochet pattern inspired by Bocchi the Rock ideal as a gift, decor, or stress-relief companion!
Crochet Melting Blob Amigurumi
Looking for a way to combine creativity with relaxation? This Free Crochet Melting Blob Amigurumi Pattern offers a delightful escape from the daily grind. Inspired by the quirky character from "Bocchi the Rock," the pattern brings life to a soft, squishy blob brimming with charm. Designed to delight hobbyists and crochet enthusiasts alike, this crochet mini amigurumi project is easy to follow, ensuring a rewarding experience for beginners and experts.
Its playful design, the finished blob serves multiple purposes it’s an ideal desk accessory that doubles as a stress-busting squeeze buddy or a charming handmade gift for loved ones. Personalize it with your favorite yarn colors and textures to truly capture its lively essence. Beyond its aesthetic appeal, crocheting this blob provides therapeutic benefits, fostering mindfulness and improving concentration with each stitch.
How To Crochet Amigurumi Bocchi
In this project, you will learn how to crochet a cute "Melted Bocchi Blob" amigurumi. The step-by-step instructions walk you through creating the base, body, and decorative features, including bumps and facial details. You can also make variations to create Bocchi's friends using the same pattern with creative changes. The project is suitable for all skill levels, as it uses basic stitches like single crochet (V-style or X-style), half double crochet, double crochet, and slip stitches. You can adjust the size by modifying the hook and yarn size, giving you flexibility for different designs.
1. Materials Needed
- Size 2 (5-ply, fine-weight) yarn or your preferred yarn.
- Crochet hook: 3.5 mm or other sizes for your desired dimensions.
- Stuffing (fiberfill).
- Scissors and a yarn needle.
- Yarn markers (optional, but useful).
- Black and colored yarn for facial features and hair.
Step-by-Step Instructions
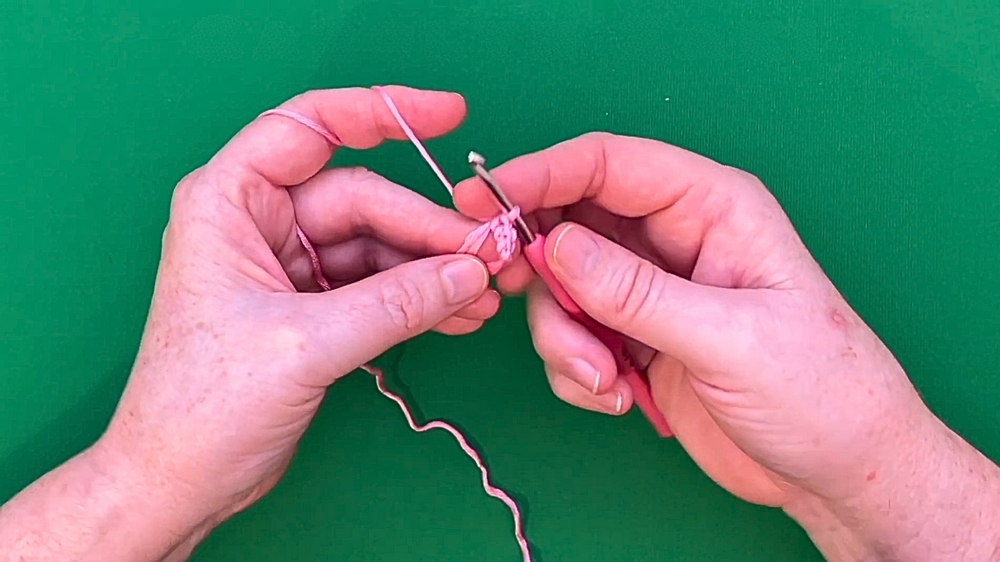
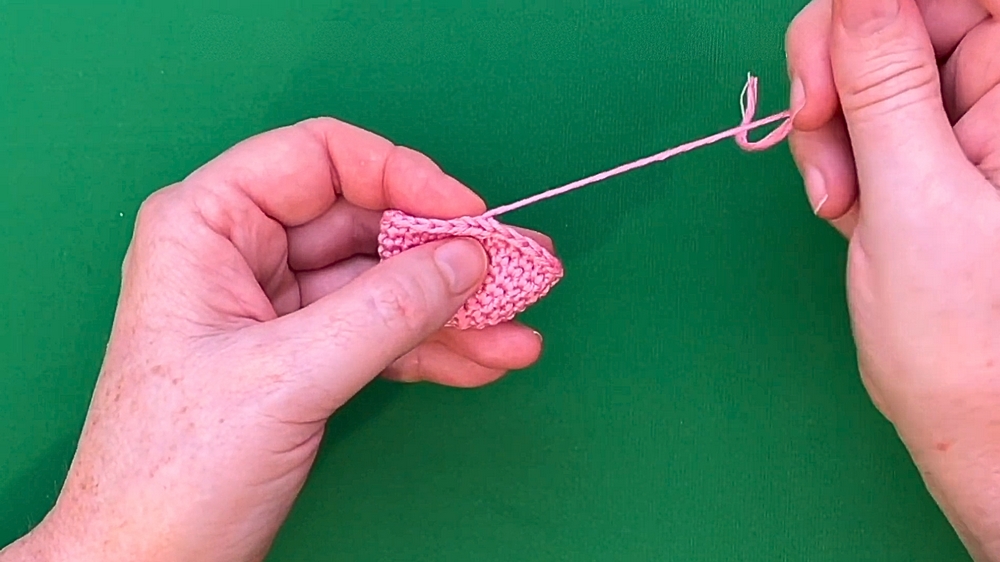
2. Start the Base
Create the Magic Ring
- Wrap the yarn around your fingers and create a magic ring.
- Chain one to anchor the ring.
- Make six single crochet stitches (V-style or X-style) into the magic ring.
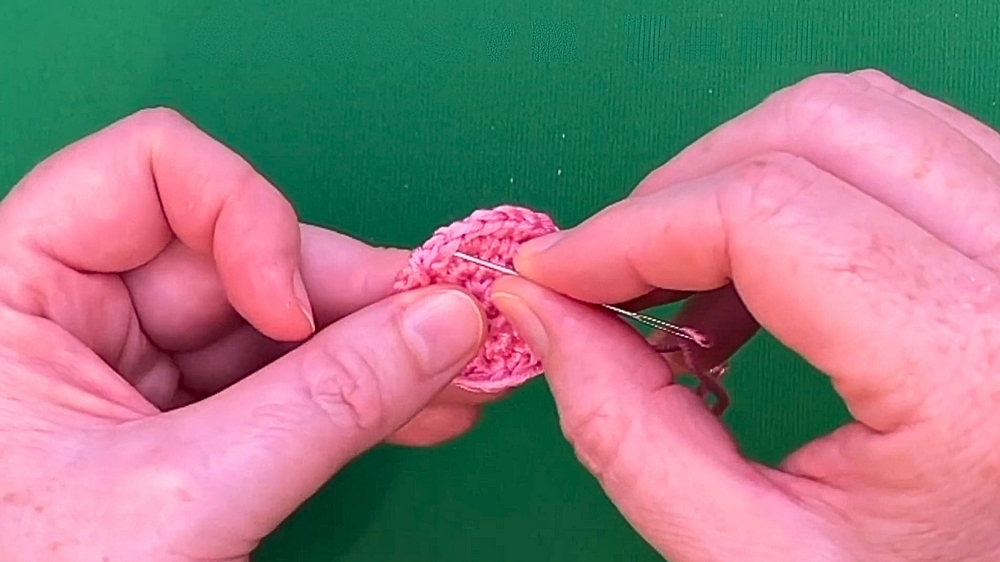
Round 1 - Increase Stitches
- Do an increase in each stitch around (2 single crochets in one stitch). You should have 12 stitches by the end of the round.
- Tighten the magic ring by pulling the tail, ensuring it’s firm but not too tight.
Round 2 - Begin Rounds with Increases
- The pattern for this round is 1 increase, followed by 1 single crochet in the next stitch. Repeat this sequence six times for a total of 18 stitches.
Round 3 - Additional Increase Rounds
- The pattern is 1 increase followed by single crochets in the next two stitches. Repeat this sequence for six rounds.
- Continue increasing based on the pattern until the base reaches the desired size.
Finish the Base
- End with a slip stitch to make the edge flat.
- Create an invisible finish by threading the yarn through the back loops of the last two stitches, then tie it off securely.
3. Crochet the Body
Create the Top of the Blob
- Begin with a magic ring and make eight single crochets into it. Don’t fully tighten the ring until after the second round.
- Round 2: Increase every other stitch (1 increase, 1 single crochet).
- Round 3: Increase every three stitches (1 increase, followed by two single crochets).
- Round 4: Increase every four stitches to continue shaping.
Shaping the Curve
- As the body grows, do fewer increases to let the sides curve downward.
- Add three rounds of single crochet without increases for a cylindrical shape.
4. Adding the Decorative Bumps
- To create the "melted" edge of the blob, switch between different stitch types:
- Half double crochet (hdc).
- Double crochet (dc) - in the same stitch as the hdc.
- Reverse with hdc and slip stitch (sl st) in neighboring spaces.
- Switch between stitches to form irregular "bumpy" elements that look like a melting shape.
- Leave a gap for stuffing before fully closing the body.
5. Stuffing and Assembly
- Before finishing the last few bumps, add stuffing. Use fiberfill and ensure it’s evenly distributed.
- Avoid overstuffing, as it could distort the blob’s shape.
- Crochet the rest of the bumps to seal the body.
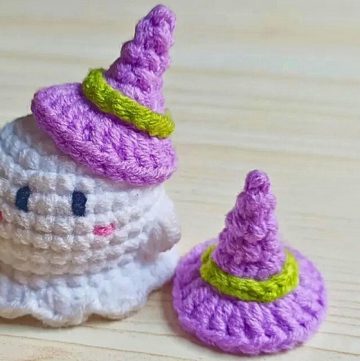
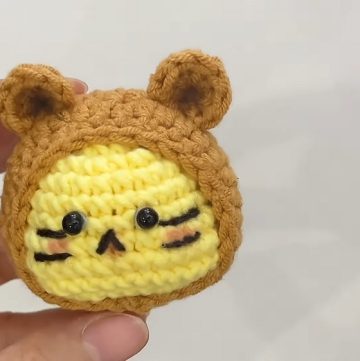
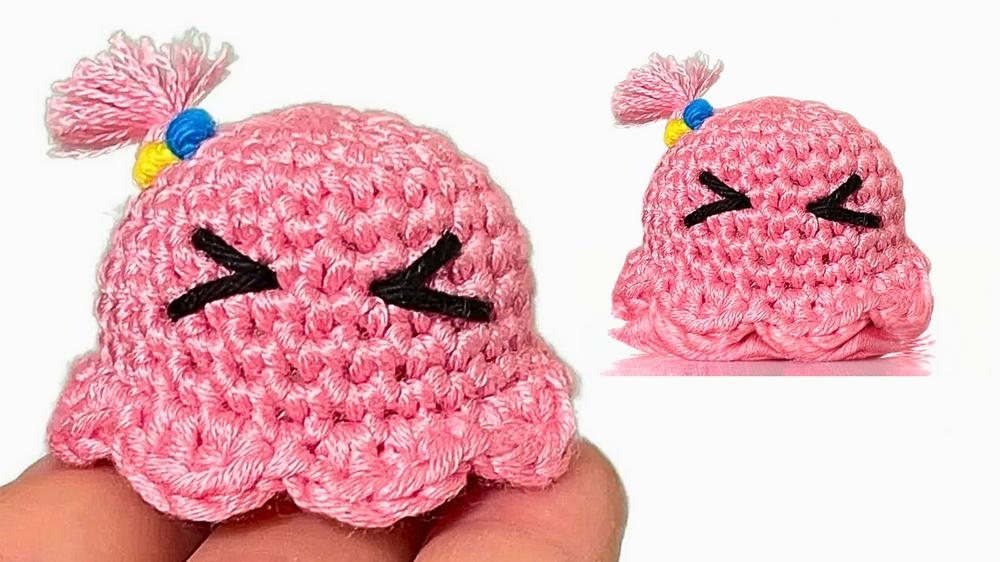
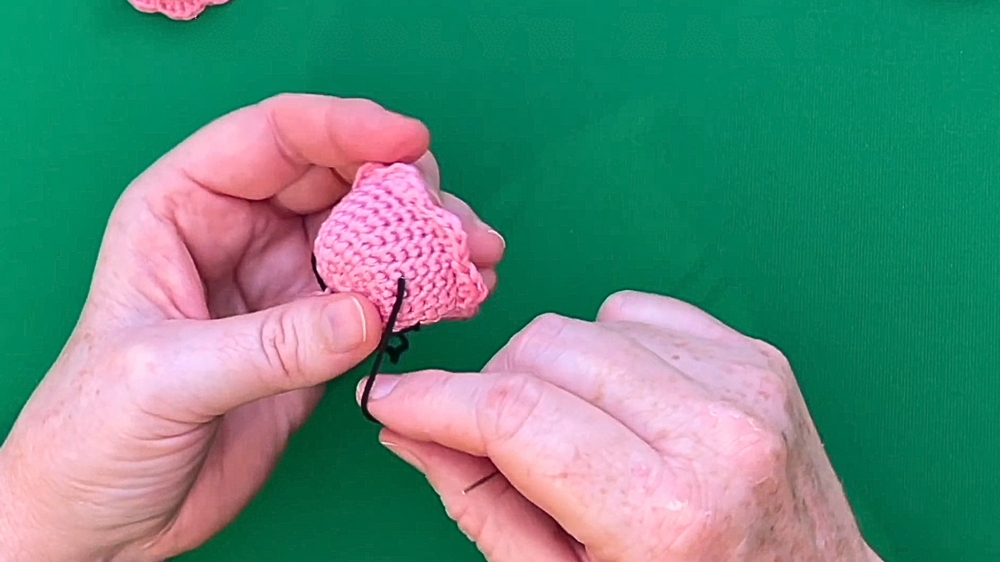
6. Adding Facial Features
Positioning the Eyes
- Use black yarn to embroider the eyes. Typically, Bocchi's blob has eyes that are two stitches apart horizontally and slightly angled.
- Create a "V" shape by stitching in two spots above and one below to form each eye.
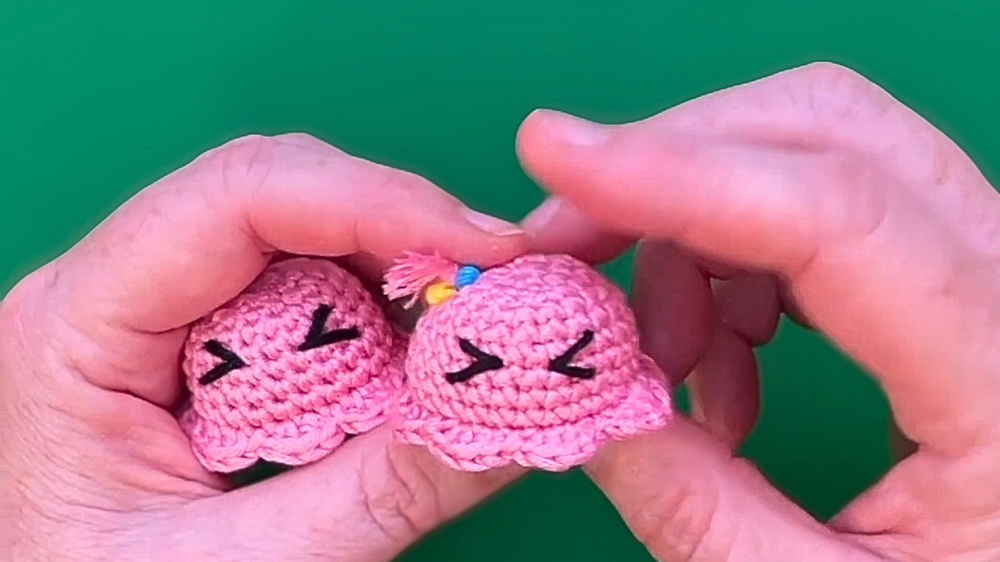
Adding the Hair
- Form a messy ponytail at the top by tying short strands of yarn in place. Secure firmly.
- For different characters, like Bocchi's friends:
- Use braids or other styles like loops/bubbles.
- Add colored yarn details for accessories, such as hair ties.
7. Variations to Create Bocchi’s Friends
This pattern is highly versatile! By tweaking the hair and facial styles, you can crochet Bocchi the Blob's companions:
- Blue-haired friend: Use a simple braid with one black strand for a stripe.
- Yellow-haired friend: Add a small "chip" detail on the head.
- Red-haired friend: Create a shrimp-shaped design for the hair tie.
Conclusion
Congratulations! Your melted Bocchi blob amigurumi is now complete. This pattern allows for plenty of customization, making it easy to create a full set of Bocchi-inspired friends. Whether you're looking to create adorable gifts or unique decorations, this project will bring smiles to everyone who sees it.