This crochet amigurumi pattern teaches you how to crochet a cute amigurumi blueberry. The pattern involves simple techniques like single crochet, increases, and decreases. Safety eyes are added for a playful look. The finished blueberry is small and plush, perfect as a decoration or a playful toy. Shantel’s clear guidance makes this a fun and easy project for crafters eager to explore the world of crochet amigurumi.

Why Love This Pattern?
- Detailed Instructions: The tutorial provides step-by-step instructions that are easy to follow, making it accessible for beginners.
- Clear Terminology: The video takes the time to explain the necessary terminology and deviations, ensuring that even those new to crocheting can keep up.
- Material Convenience: The materials needed for the pattern are clearly listed at the beginning, making it easy to gather what you need in advance.
- Compact and Cute Project: Amigurumi projects like this blueberry are small and cute, making them perfect for quick projects or gifts.

How To Crochet Blueberry
Materials Needed:
- 5mm crochet hook
- Scissors
- Darning needle
- Stitch marker
- Blue super bulky yarn
- Polyfill stuffing
- 18 mm safety eyes
Terminology:
- Magic Ring: A loop to start crocheting in the round (MR)
- Single Crochet (sc): Insert hook, yarn over, pull through loop, yarn over, pull through two loops
- Increase (inc): Two single crochets in the same stitch
- Decrease (dec): Combine two single crochets together
Pattern Instructions:
Starting the Blueberry Body
- Row 1:
- Create a Magic Ring (MR) with blue yarn.
- Close off the magic ring before working sc into them.
- Make 8 sc into the MR.
- You should have a total of 8 stitches by the end of the row.

- Row 2:
- Make 8 increases (inc) around (i.e., 2 sc in each stitch).
- You should have a total of 16 stitches.
- Row 3:
- Crochet into the back loops only of Row 2.
- (sc 1, inc) repeat around for 8 times.
- You should have a total of 24 stitches.
- (Optional) Take a stitch marker and mark the front loops only of Row 2 for later use.
- Rows 4 to 8:
- sc around.
- You should have 24 stitches per row for a total of 5 rows.

Decreasing the Blueberry Body
- Row 9:
- Work a sc then a decrease around for a total of 8 times.
- You should have a total of 16 stitches.
Adding Safety Eyes and Stuffing
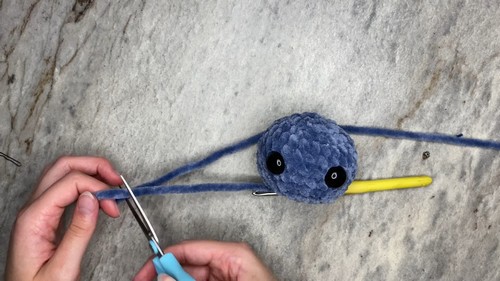
- Insert safety eyes between rows 6 and 7, making sure they are 3 visible stitches apart. Secure the backings.
- Stuff the blueberry with polyfill stuffing.

- Row 10:
- Make 8 decreases (dec) around.
- You should have a total of 8 stitches.
- Fasten off by slip stitching into the next stitch. Cut a tail to sew the opening closed. Using a darning needle, sew through the front loops only of the remaining 8 stitches. Pull to close the opening, tie a knot to secure, and weave in your ends.
Creating the Blueberry Frills
- Attach blue yarn to one of the front loops only of Row 2 and chain 1 to secure.
- Working in the front loops only of Row 2:
- Work 3 sc into each stitch around.

- You should have a total of 48 stitches.
- Slip stitch into the first stitch made, fasten off, and weave in your ends.
Finished Product:
Your amigurumi blueberry should resemble the one shown in the tutorial. If you have any questions, refer to the video or written pattern for additional help.


