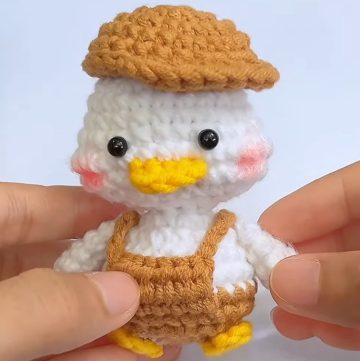
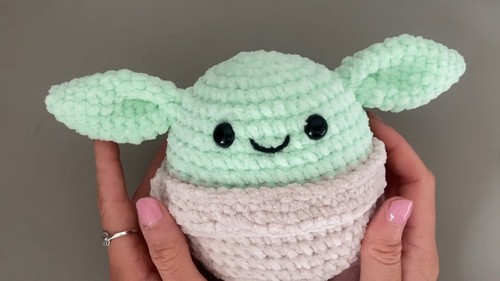
Crochet a cute baby alien plushie with this easy tutorial! Ideal for beginners and fun for all ages. Adorable and quick to make!
The easy crochet baby alien plushie is a delightful project designed for both novices and seasoned crocheters alike. This charming little alien is not just adorable but also a joy to make, infusing fun into every stitch. Its uncomplicated pattern makes it an ideal choice for those looking to make a quick yet impressive handmade gift. With soft yarn and simple techniques, the project turns into a plushie that kids and sci-fi enthusiasts will love. The completed plushie radiates cuteness and charm, guaranteeing smiles wherever it lands. This project brings both satisfaction and a touch of whimsy to your crochet repertoire.

Why Love This Pattern?
- Cuteness Factor:
- The pattern results in an adorable baby alien, which is sure to bring a smile to anyone’s face.
- Ease of Use:
- It is a super easy pattern, according to the creator, making it accessible even for beginners.
- Quick to Make:
- The pattern works up really quickly, so you can finish your project in no time.
- Versatile for Gifting and Markets:
- It is ideal for making quick gifts for friends or for producing items to sell at markets.
- Minimal Materials Required:
- The pattern requires basic materials like yarn, a 4mm crochet hook, stitch markers, safety eyes, toy stuffing, and other common crochet tools, making it economical.
How To Crochet Baby Alien Squish
Materials Needed:
- Scissors
- 4 mm crochet hook
- Stitch markers
- Yarn needle
- 2 safety eyes (12 mm suggested)
- Chenille chunky yarn in different colors (green and beige/tan)
- Pins
- Toy stuffing
Instructions:
Head and Body
- Start with green yarn:
- Create a magic ring and do six single crochets (sc) into the ring.
- Tighten the ring by pulling the tail yarn.
- Round 2:
- Place a stitch marker at the beginning.
- Do six increases (two sc in each stitch), total 12 stitches.
- Round 3:
- Single crochet in the first stitch, then increase in the next stitch.
- Repeat six times to total 18 stitches.
- Round 4:
- Do two sc, then increase in the next stitch.
- Repeat six times to total 24 stitches.
- Round 5:
- Do three sc, then increase in the next stitch.
- Repeat six times to total 30 stitches.
- Round 6:
- Do four sc, then increase in the next stitch.
- Repeat six times to total 36 stitches.
- Round 7:
- Do five sc, then increase in the next stitch.
- Repeat six times to total 42 stitches.

- Rounds 8 to 11:
- Do 42 sc in each round (no increases).
- Round 12:
- Change to beige/tan yarn during the last stitch of round 11.
- Do 42 sc in this round.
- Round 13:
- Do 42 sc in the back loops only (BLO).
- Rounds 14 to 17:
- Do 42 sc in each round (no increases).
- Round 18:
- Do six sc, then increase in the next stitch.
- Repeat six times to total 48 stitches.
- Round 19:
- Do seven sc, then increase in the next stitch.
- Repeat six times to total 54 stitches.

- Adding Safety Eyes:
- Place them between rounds 6 and 7, approximately six stitches apart.
- Secure with safety backs.
- Round 20:
- Do 27 decreases to reduce the stitch count. Work in the back loops only and pull through all three loops.
- Round 21:
- Begin stuffing your alien with toy stuffing as you go.
- Round 22:
- Do 13 decreases.
- Round 23:
- Do seven decreases, then close up the hole with a long tail for stitching.

Cloak
- Tan yarn:
- Chain 60.
- Single crochet into each stitch all along the chain.
- Complete the cloak:
- Chain one, turn, sc into each stitch.
- Repeat for a total of four rows.
- Attach the cloak:
- Start seven stitches away from the eye.
- Slip stitch through both loops of cloak and back loop only stitches on body.

Ears (Make 2)
- Green yarn:
- Create a magic ring with four sc.
- Rounds 2 to 5:
- Round 2: Increase the first sc in the ring (2 sc in each stitch), total 6 stitches.
- Round 3: Do six increases, total 12 stitches.
- Rounds 4 and 5: Do 12 sc in each round.
- Rounds 6 to 10:
- Round 6: Do three sc, then increase in the next stitch. Repeat twice.
- Round 7: Do 15 sc.
- Round 8: Do three sc, then decrease in the next stitch (sc2tog). Repeat twice.

- Round 9: Do 12 sc.
- Round 10: Do two sc, then decrease in the next stitch. Repeat around, total 9 stitches.
- Finish the ears:
- Tuck in the tail, fold the ear in half, sc across to close.
- Leave a long tail for attaching.
- Attach the ears:
- Position approximately five stitches apart from the eye and sew in place with pins.