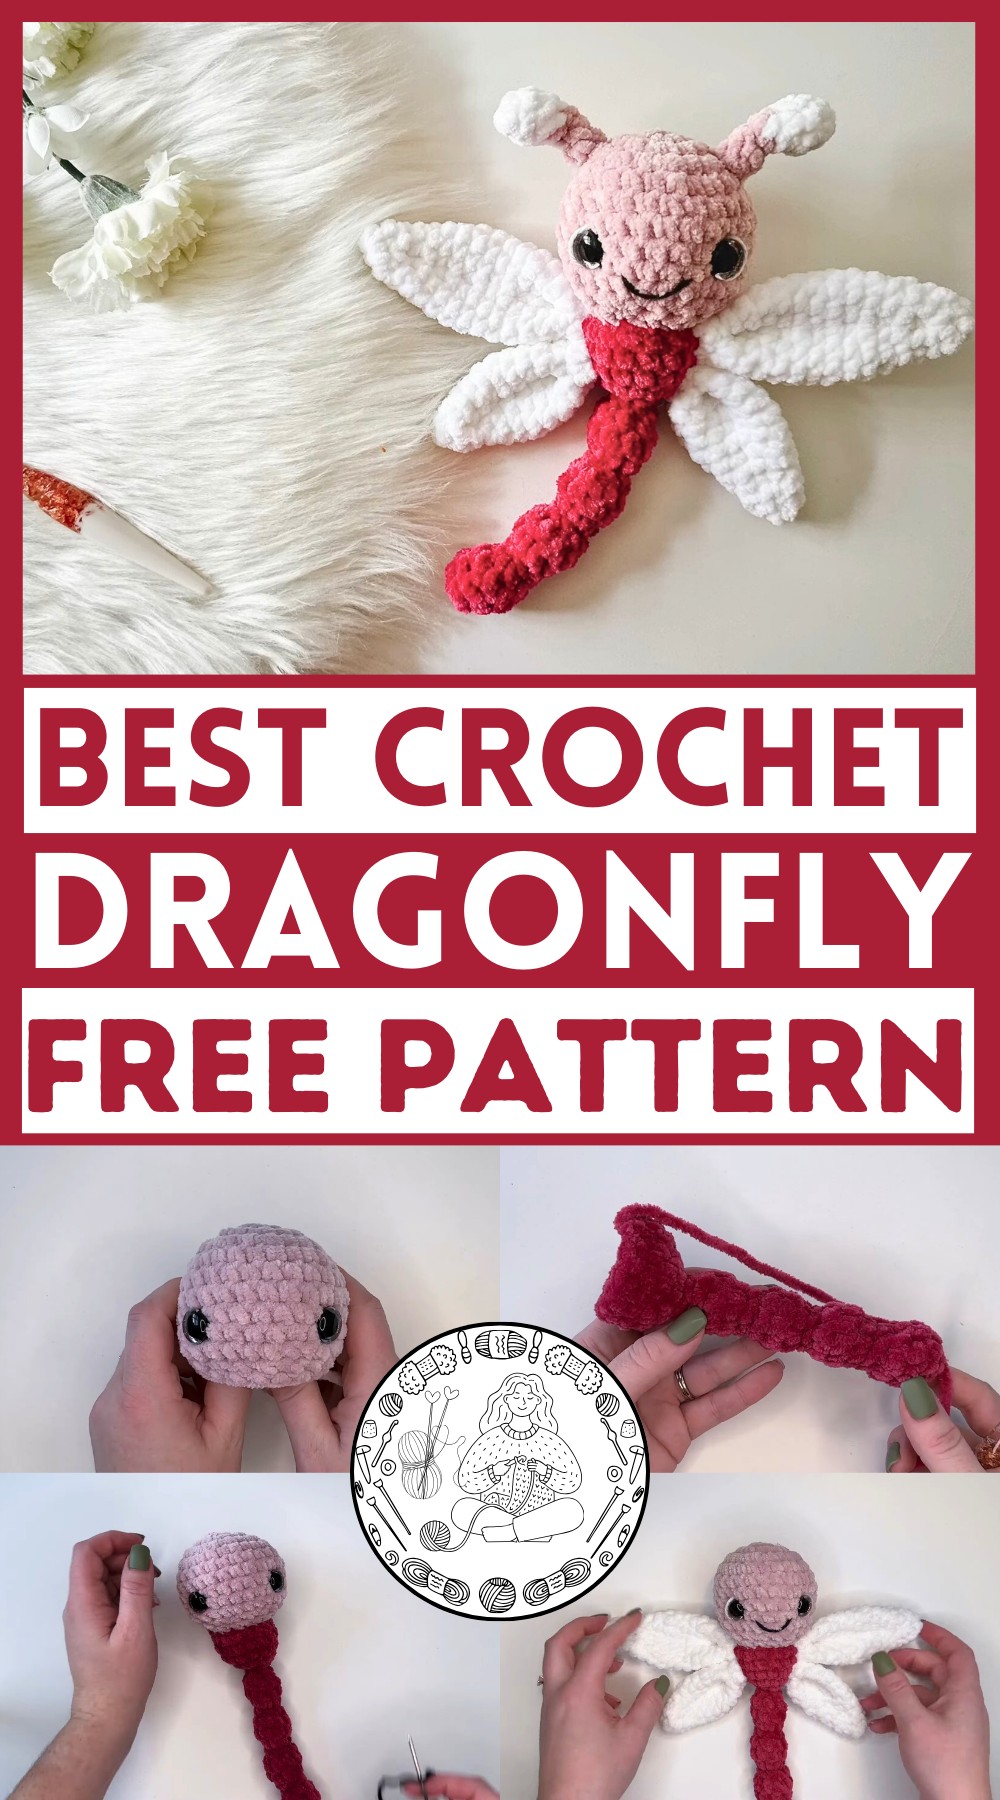
Try making the Easy Crochet Dragonfly! This charming project uses basic stitches, making it fun for beginners and seasoned crocheters alike.
This charming design uses basic stitches, making it perfect for practicing your skills or introducing yourself to crochet. With step-by-step instructions, you can complete this whimsical creature in no time, adding a touch of handmade beauty to your space or gifting it to a loved one. Whether you're looking to add a sweet accessory to your collection or teach someone the joy of crocheting, the Easy Crochet Dragonfly is the perfect choice for a fun and rewarding experience.
Why Love This Pattern?
- Versatility in Color Combinations: This pattern allows you to experiment with various color combinations, making each dragonfly unique and personalized.
- Quick and Fun to Make: The pattern is designed to be a quick make, which is perfect for market prep or just a fun, fast project.
- Interesting Yarn Choices: Jess uses different types of chunky yarns, including Premier Parfait Chunky and Honey Bunny Shine, which include interesting textures and even some glitter.
- Easy Face Shaping Techniques: The pattern includes straightforward face shaping techniques, adding a charming and professional touch to the dragonfly.

How To Crochet Crochet Dragonfly
Materials
- Premier Parfait Chunky yarn in Rose (head)
- Premier Parfait Chunky yarn in Berry Berry (body)
- Honey Bunny Shine yarn (wings, with glitter)
- Worsted weight yarn in black (for smile and face shaping)
- 5.5 mm (I) crochet hook
- 4.5 mm (G) crochet hook
- Darning needle
- Scissors
- Stitch marker
- Fabric pins
- 16 mm safety eyes with brown glitter
- Fiberfill for stuffing
Abbreviations
- sc: single crochet
- inc: increase (2 sc in one stitch)
- dec: decrease (invisible decrease used here by crocheting the front loops of 2 stitches together)
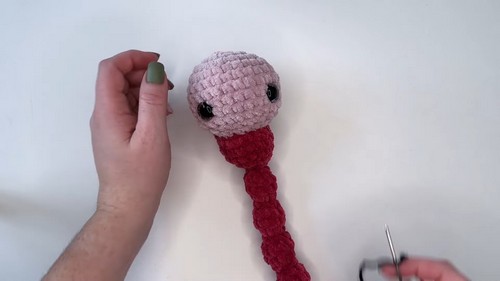
Head
- Round 1: Using color B (Rose for head), create a magic ring and place 8 sc in the ring. (8 sts)
- Round 2: Inc in each st around. (16 sts)
- Round 3: sc 1, inc 1, repeat around. (24 sts)
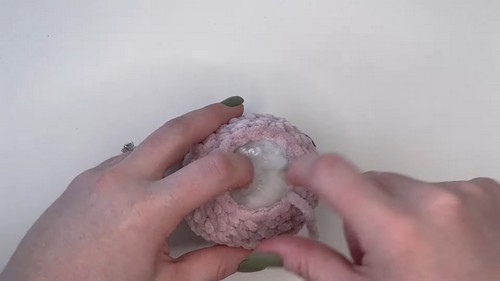
- Rounds 4-9: sc in each st around. (24 sts)
- Round 10: sc 1, dec 1, repeat around. (16 sts)
- Place safety eyes: Between rounds 7 and 8, with 5-6 stitches in between.
- Round 11: sc in each st around. (16 sts)
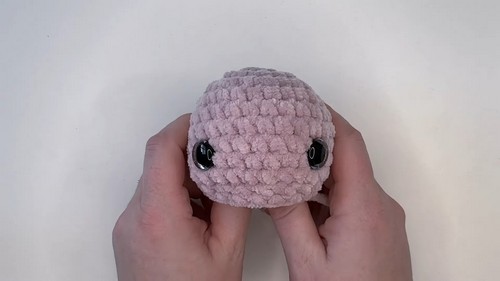
Stuff the head moderately and leave the last round open.
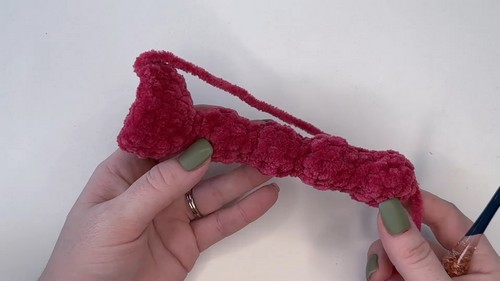
Body
- Round 1: Using color A (Berry Berry for body), create a magic ring and place 4 sc in the ring. (4 sts)
- Round 2: Inc in each st around. (8 sts)
- Rounds 3-4: sc in each st around. (8 sts)
- Round 5: Dec in each st around. (4 sts)
- Round 6: Inc in each st around. (8 sts)
- Rounds 7-8: sc in each st around. (8 sts)
- Round 9: Dec in each st around. (4 sts)
- Round 10: Inc in each st around. (8 sts)
- Rounds 11-12: sc in each st around. (8 sts)
- Round 13: Dec in each st around. (4 sts)
- Round 14: Inc in each st around. (8 sts)
- Rounds 15-16: sc in each st around. (8 sts)
- Round 17: Dec in each st around. (4 sts)
- Round 18: Inc in each st around. (8 sts)
- Round 19: Inc in each st around. (16 sts)
- Rounds 20-22: sc in each st around. (16 sts)
Stuff the body as you go along, especially before closing smaller sections.
Attaching Head to Body
Align the open end of the head with the open end of the body, with 16 sts each. Use a darning needle to sew head & body together stitch by stitch.
Shaping Face
- Using worsted weight yarn in black, insert the needle at the top of the eye and go through to the other eye.
- Insert needle at the bottom of one eye and push through the head to the bottom of the other eye.
- Pull slightly to shape and tie off at the back.
Smile
- Count down to round 8 of the head.
- Insert needle into the side of the eye, go across to the other side, forming a smile, and come out below the center.
- Secure by pulling yarn under the smile line and back to the starting point. Tie off securely at the back.
Wings (make 2 large, 2 small)
Large Wings:
- Round 1: Using color C (white), create a magic ring and place 4 sc in the ring. (4 sts)
- Round 2: sc 1, inc 1, repeat around. (6 sts)
- Round 3: sc in each st around. (6 sts)
- Round 4: sc 1, inc 1, repeat 3 times. (9 sts)
- Round 5: sc in each st around. (9 sts)
- Round 6: sc 2, inc 1, repeat 3 times. (12 sts)
- Rounds 7-16: sc in each st around. (12 sts)
Slip stitch to finish, leaving a long tail for sewing. Sew a seam down the center to give a ribbed look to the wings using a darning needle. Fold it to create a wing shape and sew ends together.
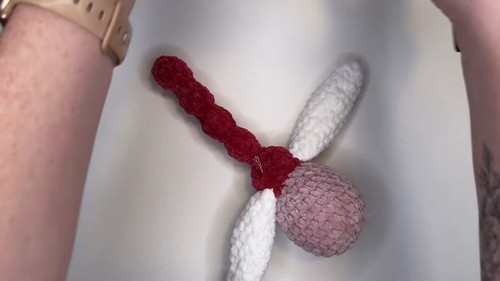
Small Wings:
- Round 1: Create a magic ring and place 4 sc in it. (4 sts)
- Round 2: sc 1, inc 1, repeat around. (6 sts)
- Round 3: sc in each st around. (6 sts)
- Round 4: sc 1, inc 1, repeat 3 times. (9 sts)
- Round 5: sc in each st around. (9 sts)
- Round 6: sc 2, inc 1, repeat 3 times. (12 sts)
- Rounds 7-12: sc in each st around. (12 sts)
Slip stitch to finish, leaving a long tail for sewing. Sew a seam down the center as with large wings.
Attaching Wings
Attach the wings to the body with pins first to check placement. The larger wings go on top and smaller ones directly below them, with about 2-3 stitches in between. Sew securely with a darning needle.

Antennae
- Round 1: Using color C (white), create a magic ring and place 4 sc. (4 sts)
- Round 2: sc 1, inc 1, repeat twice. (6 sts)
- Round 3: sc in each st around. (6 sts)
- Round 4: sc 1, dec 1, repeat twice. (4 sts)
- Change to color B (Rose) in the last stitch of Round 4.
- Rounds 5-7: sc in each st around. (4 sts)
Leave a long tail for sewing. Slightly curve the antennae by sewing a thin strand of white yarn from top to bottom inside each antenna.
Attach antennae to the head on rounds 3-4, ensuring they curving outwards.
Your Dixie the Dragonfly is ready! Enjoy your delightful creation.