
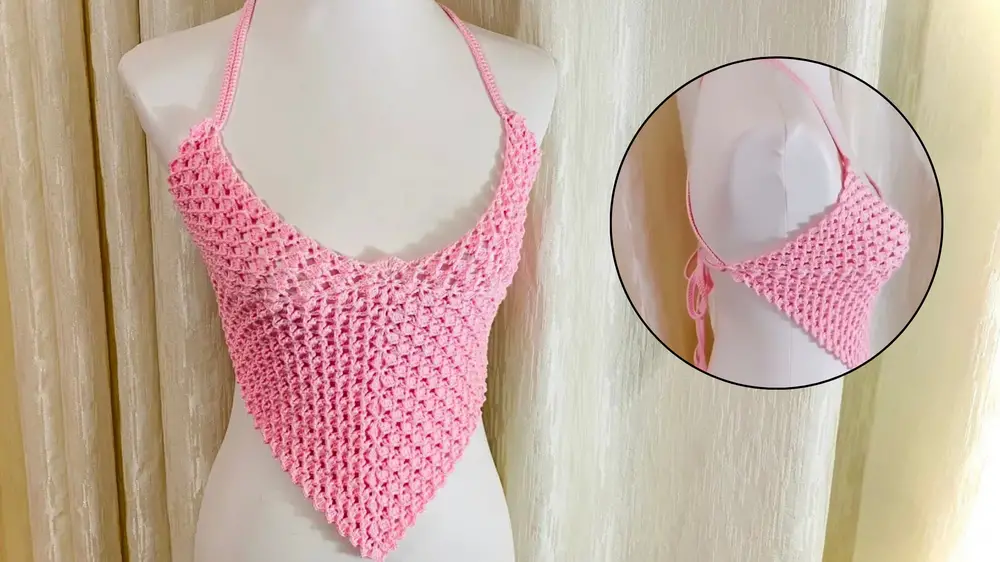
Customize your wardrobe with a stylish crochet top pattern that’s easy to make, versatile for all seasons, and perfect for expressing your creativity.
Crochet Adjustable Sizing Crochet Top
Turning simple yarn into something both fashionable and functional an adorable crochet top that’s as versatile as it is stylish. Whether paired with jeans for a casual outing or layered over a dress for added flair, this lightweight top adapts effortlessly to different looks and seasons. Perfect for both beginners and seasoned crocheters, the pattern is easy to follow yet flexible enough for personalization, allowing you to experiment with colors, textures, and accents to make it uniquely your own.

Beyond its visual appeal, crocheting this top offers far-reaching benefits. It’s a relaxing and therapeutic activity, helping ease everyday stress while keeping your hands busy in the most productive way. The sense of accomplishment you’ll feel with each finished stitch is unmatched, and the final result is a handmade creation that’s special and uniquely yours.
Designing your clothes also contributes to sustainable fashion, reducing dependence on fast fashion and supporting an eco-friendly lifestyle. Whether you’re enhancing your wardrobe or gifting it to someone special, this crochet top offers not only practicality and style but also the irreplaceable value of something made with care and intention.
How to Crochet Adorable Top
This project introduces a detailed walkthrough on crocheting a beautiful and lightweight top. Designed for any skill level, it’s a perfect blend of style and simplicity. By following these step-by-step instructions, you’ll be able to create a stunning crochet top, adjusting the size and design to suit your needs. Below are the detailed steps broken down so you can master this crochet project effortlessly.
Materials Required
- Hook: No 0 1.75mm
- yarn: Pink ( Use your Favorite Color)
- Scissor
- Needle
- Stitch markers
- Measuring Tape
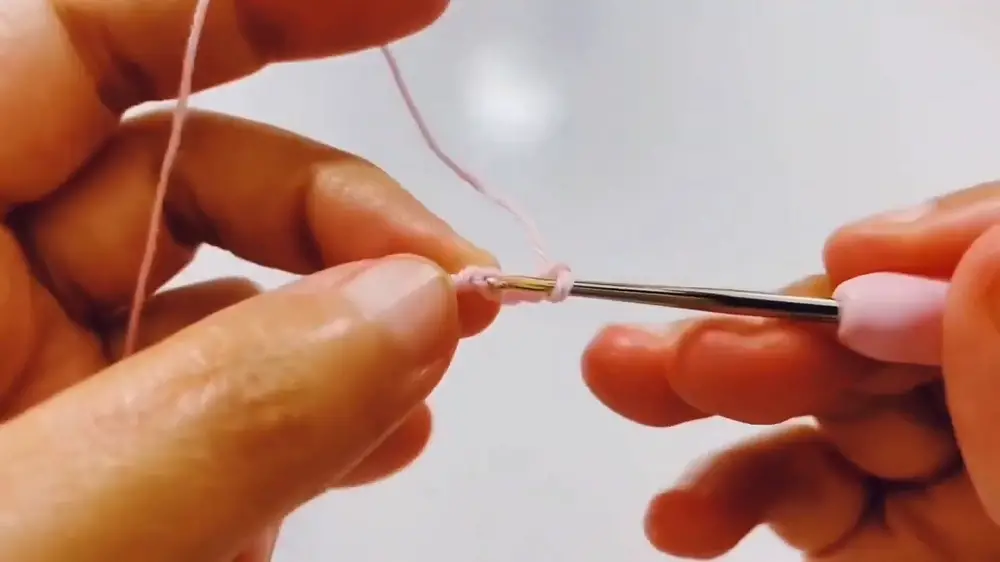
Step 1: Create the Foundation Ring
- Begin by making a slip knot.
- Chain 4 stitches, then join the first stitch with a slip stitch to form a ring.
Step 2: Work the First Round
- Chain 4.
- Inside the ring space, crochet 1 double crochet (DC), then chain 2.
- Repeat the pattern of 1 double crochet and chaining 2 in the same ring space until there are 7 double crochets and 8 chain spaces.
- Complete the round by joining with a slip stitch in the first chain.
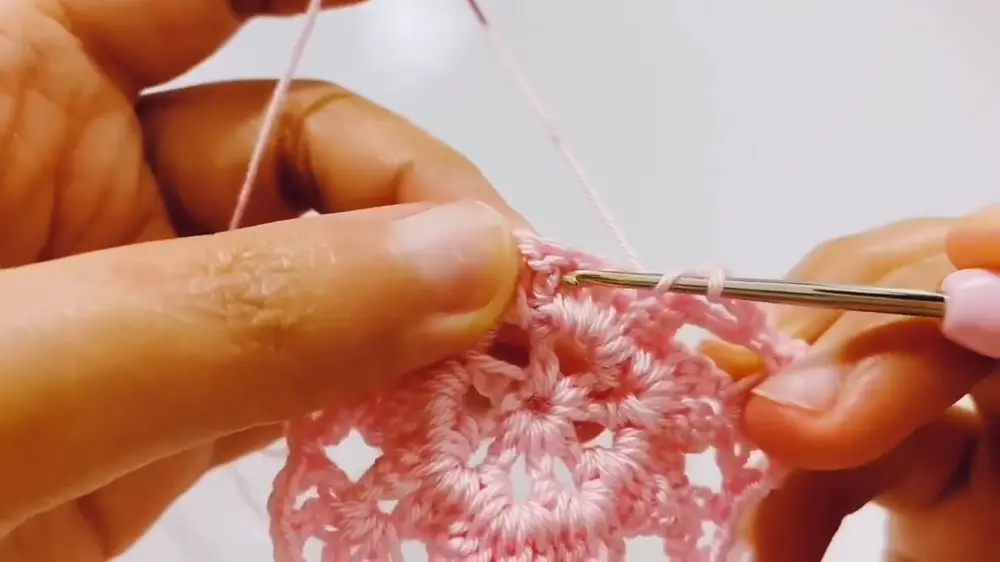
Step 3: Add Marshmallow Stitches in Round Two
- Chain 3 and begin crocheting 3 double crochets, followed by chaining 2 and crocheting another 3 double crochets in the next chain space to form a marshmallow stitch.
- Add 1 front post double crochet in the next double crochet stitch.
- Repeat this pattern (3 double crochets, chain 2, another 3 double crochets, and 1 front post double crochet stitch) across all spaces and double crochets.
- Complete the round by joining with a slip stitch into the first chain.
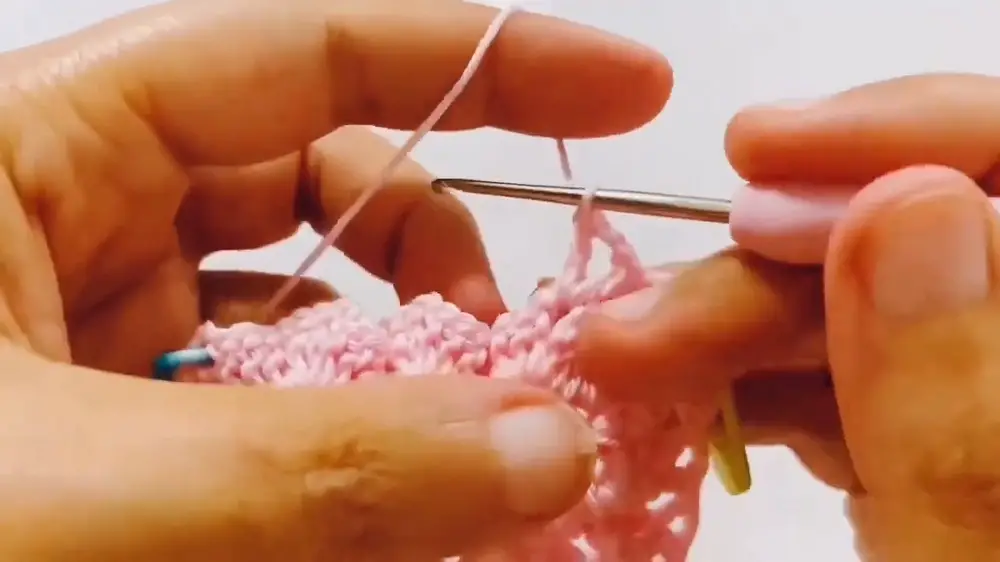
Step 4: Transition to Rows
At this point, you will switch from working in rounds to working in rows.
Row 3
- Chain 3 and turn your work.
- Make shells by crocheting 1 double crochet, chaining 2, and adding another double crochet in the next chain-2 space.
- Begin increasing by making 1 shell, chaining 2, and crocheting another shell in the same chain space.
- Repeat the pattern by alternating 1 shell and 1 increasing shell across rows.
- Skip the last marshmallow stitch and add 1 double crochet in the front post space.
Row 4
- Chain 3 and turn your work.
- Continue making marshmallow stitches (3 double crochets, chain 2, and 3 double crochets) in the chain spaces.
- Mark the positions of the increasing shells using stitch markers for easy identification.
- Finish by adding a double crochet stitch in the last space.
Row 5
- Chain 2 and turn your work.
- Work 1 shell in each chain-2 space from the previous row.
- In the marked spaces, crochet increasing shells (1 shell, chain 2, 1 shell).
- Add new stitch markers in the increasing shell spaces to keep track while progressing.
- Finish with a double crochet stitch in the last space.
Row 6
- Chain 2 and turn your work.
- Repeat marshmallow stitches in the chain spaces, and place markers in the new increasing spaces.
- End with 1 double crochet stitch in the last space.
Step 5: Repeat Rows for Desired Length
Repeat Row 5 and Row 6 patterns until you reach your chosen size. Measure the piece to match your selected top size. For this tutorial, the small size measures 17 inches across the half chest circumference.
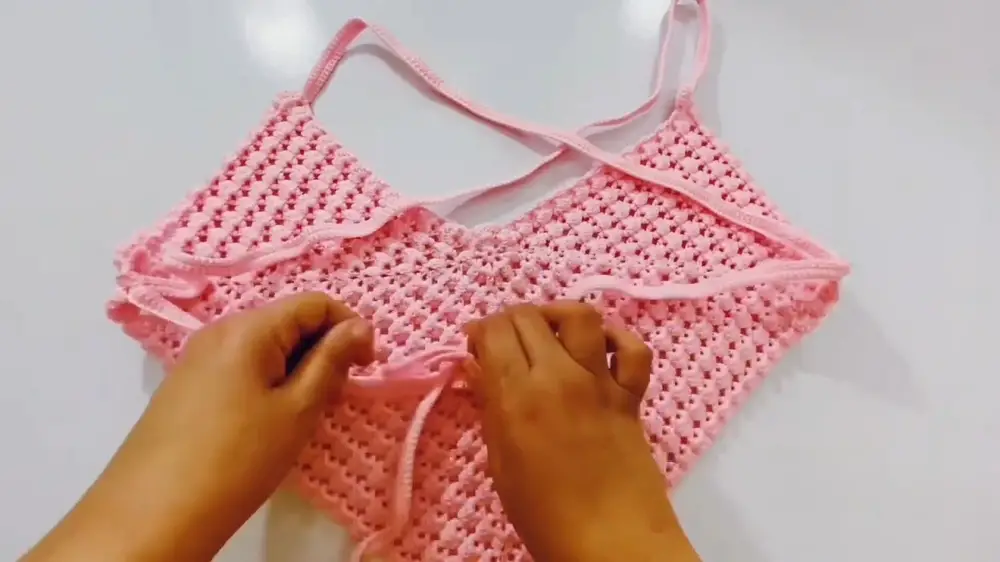
Step 6: Add Body Straps
- Chain 1 and crochet 2 single crochet stitches in the same space or next space.
- Add a single crochet stitch in each subsequent chain space until you achieve the desired body length.
- Chain stitches in multiples of your preferred strap length, then add 1 single crochet in each chain stitch.
- Optionally, add more rows for bigger or thicker straps. Finish by fastening off and weaving in ends.
Step 7: Work the Other Side
- Using new yarn, repeat the strap-making process on the opposite side of the body.
- Join with a slip knot and begin crocheting 2 single crochet stitches in the corresponding space.
- Complete as per your desired length and finish off securely.
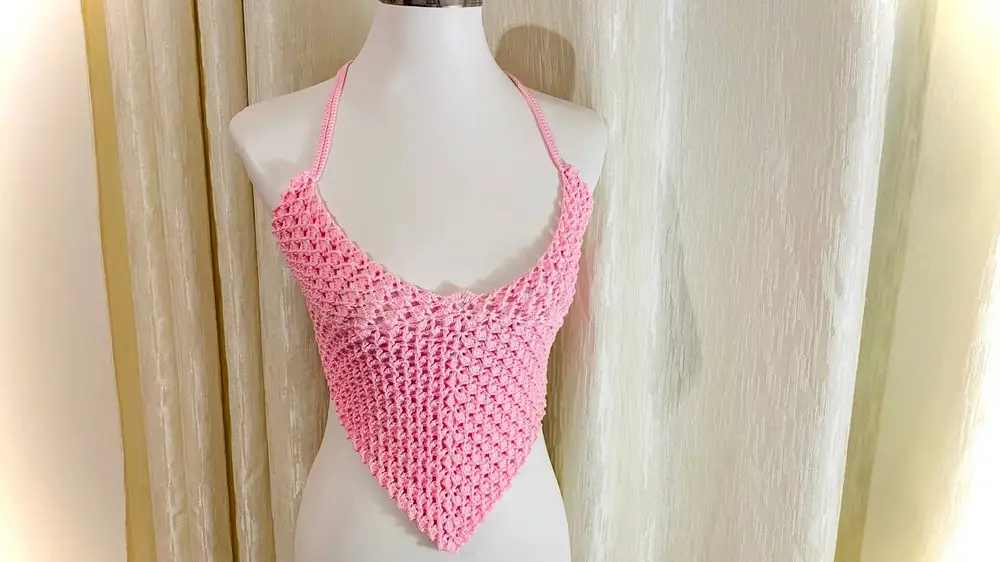
Conclusion
Your adorable crochet top is ready to wear! With its marshmallow stitch detail, shell patterns, and adjustable straps, this project is both practical and charming. This lightweight design is perfect for summer wear and customizable to fit any size or preferred style. If you’re new to crocheting, stitch markers are crucial for navigating increasing patterns. Give this pattern a try, and you’ll enjoy the satisfaction of wearing something handmade and beautiful!


